---
page_id: 8a9b0c1d-2e3f-4a5b-6c7d-8e9f0a1b2c3d
title: Kinde Documentation - Complete
description: "Complete documentation for Kinde containing titles, descriptions, keywords, topics, and full content from all documentation files for LLM training"
sidebar:
order: 1
topics:
- llm
- documentation
- training
- complete
sdk: []
languages:
- markdown
- text
audience: developers
complexity: beginner
keywords:
- llm training
- documentation
- complete
- full content
- frontmatter
- metadata
- kinde
updated: 2026-09-20
featured: false
deprecated: false
ai_summary: "Complete documentation for Kinde containing titles, descriptions, keywords, topics, and full content from all documentation files for LLM training"
---
# Kinde Documentation - Complete
This is the complete documentation for Kinde containing titles, descriptions, keywords, topics, and full content from all documentation files.
# Authenticate - About auth - About Kinde authentication
> Discover Kinde authentication options from passwordless and passkeys to social, enterprise SSO, and multi-domain session sharing.
Last updated: 2026-06-17
authentication methods, sign up, sign in, passwordless, passkeys, social sign-in, enterprise SSO, multi-domain authentication
authenticate, sign-in, multi-domain-auth
Kinde makes authentication easy by providing a range of methods to choose from. Allow your users to sign up or sign in: - using self-sign-up (default) - [by invitation only](/authenticate/custom-configurations/disable-sign-up/) - [passwordless](/authenticate/authentication-methods/passwordless-authentication/) (Applied by default in all new Kinde businesses) - with [password](/authenticate/authentication-methods/password-authentication/) (email or username) - with [phone number](/authenticate/authentication-methods/phone-authentication/) - with [WhatsApp](/authenticate/authentication-methods/whatsapp-authentication/) - with [passkey](/authenticate/authentication-methods/passkeys/) (sign-in only) - [social connections](/authenticate/social-sign-in/add-social-sign-in/), like Google, Apple, Slack, and more - [enterprise connections](/authenticate/enterprise-connections/about-enterprise-connections/), like Microsoft Entra ID, Google Workspace, and more - [Custom OAuth 2.0 connections](/authenticate/custom-configurations/custom-oauth2-connection/) - [Custom SAML connections](/authenticate/enterprise-connections/custom-saml/) Authentication can be set per environment, and can be changed for different applications, e.g. your production web app and mobile app can have different authentication requirements. You can start simple with email self-sign-up, and then add more options as needed, such as social sign in and multi-factor authentication. To change how the sign-up and sign-in journey works — without redeploying your app — see [Configure your authentication flows](/authenticate/about-auth/configure-authentication-flows/). ## Multi-domain authentication Kinde supports: - authenticated sessions across domains and subdomains - users switching between domains and subdomains Kinde supports multi-domain authentication where the primary domain is the same, but there are different subdomains. For example, `website.yourdomain.com`, `app.yourdomain.com`, `docs.yourdomain.com`. This is similar to how Google manages authentication for `calendar.google.com`, `mail.google.com`, etc. Once a user is signed in to one domain or subdomain, they can switch to another and remain authenticated. To do this, you need to initiate the flow with `prompt=none` as part of the auth URL. This checks for a session on Kinde invisibly. If it exists the user experiences a seamless session between sites, and if a session doesn’t exist, they are prompted to reauthenticate. See also, [Manage authentication across applications](/authenticate/manage-authentication/user-auth-applications/). ## Rate limiting and identity management issues if third party keys not entered When setting up third party authentication, such as [social sign in](/authenticate/social-sign-in/add-social-sign-in/), ensure you have added the third party app, and included the Client ID and Client Secret (Keys) to the configuration screens in your live environment. If you don’t use your own app's keys: - Kinde will fall back to using our own credentials as a proxy, which will cause rate limiting - For Apple SSO specifically, if you don't use your own app from the start, users will be permanently associated with the wrong app and cannot be transferred later Using the Kinde app is okay for local development environments, but not for live production environments. ## Get started with authentication Before setting up authentication, think about what your audience preferences are and how you want to manage access in the short and longer term. Enabling social sign in GitHub, for example, might be expected if your audience are software developers. Here’s a common set of tasks for getting started. 1. [Set up user authentication](/authenticate/authentication-methods/set-up-user-authentication/) 2. [Add social sign in](/authenticate/social-sign-in/add-social-sign-in/) 3. [Enable multi-factor authentication](/authenticate/multi-factor-auth/enable-multi-factor-authentication/)
# Authenticate - About auth - Top questions about authentication
> Frequently asked questions about Kinde authentication.
Last updated: 2025-01-16
authentication, FAQ, troubleshooting, setup, configuration
authenticate
Find answers to common questions about Kinde authentication. Click to expand a topic. ## General questions What authentication methods does Kinde support? Kinde supports password-based, passwordless (email magic links), phone authentication, social sign-in (Google, Apple, GitHub, etc.), and enterprise connections via SAML. You can mix and match these methods based on your application needs. **Learn more:** [About authentication](/authenticate/about-auth/about-authentication/) Can I use different authentication methods for different applications? Yes, authentication settings can be configured per environment and per application. Your production web app and mobile app can have completely different authentication requirements while using the same Kinde account. **Learn more:** [About authentication](/authenticate/about-auth/about-authentication/) How does multi-domain authentication work? Kinde supports authenticated sessions across domains and subdomains. Once a user signs in to one domain, they can access other subdomains without re-authenticating, as long as you use `prompt=none` in your auth URLs. **Learn more:** [About authentication](/authenticate/about-auth/about-authentication/) ## Authentication Methods How do I set up passwordless authentication? Passwordless authentication is enabled by default for new Kinde businesses. Users receive magic links via email to sign in without passwords. You can configure this in your authentication settings and customize the email templates. **Learn more:** [Passwordless authentication](/authenticate/authentication-methods/passwordless-authentication/) Can I require both email and phone verification? Yes, you can configure multiple verification methods. Users can be required to verify both their email address and phone number during sign-up, or you can make one optional while requiring the other. **Learn more:** [Set up user authentication](/authenticate/authentication-methods/set-up-user-authentication/) What is the difference between username and email authentication? Username authentication allows users to sign in with a custom username instead of their email address. This is useful for applications where users prefer not to share their email publicly or want a more memorable login identifier. **Learn more:** [Username authentication](/authenticate/authentication-methods/username-authentication/) How do I handle SMS delivery issues? If you're experiencing SMS delivery problems, check your SMS provider configuration, ensure proper phone number formatting, and consider implementing fallback authentication methods. Kinde provides SMS deliverability monitoring to help identify issues. **Learn more:** [SMS deliverability](/authenticate/authentication-methods/sms-deliverability/) Can I customize password requirements? Yes, you can configure password policies including minimum length, complexity requirements, and whether to allow common passwords. These settings can be adjusted per organization and environment. **Learn more:** [Password authentication](/authenticate/authentication-methods/password-authentication/) ## Enterprise Connections What is the difference between SAML and OIDC? SAML is an older standard widely supported by enterprise systems, while OIDC is a newer protocol built on OAuth 2.0. SAML is commonly used for legacy enterprise integrations, while OIDC often offers better mobile support and simpler implementation. **Learn more:** [About enterprise connections](/authenticate/enterprise-connections/about-enterprise-connections/) How do I troubleshoot SAML connection issues? Common SAML issues include certificate expiration, incorrect entity IDs, and attribute mapping problems. Check your SAML logs in Kinde, verify your identity provider settings, and ensure your certificates are valid and properly configured. **Learn more:** [Advanced SAML configurations](/authenticate/enterprise-connections/advanced-saml-configurations/) Can I use multiple identity providers for the same organization? Yes, you can configure multiple SAML or OIDC providers for a single organization. This is useful for companies that have acquired other businesses or need to support different user groups with different identity systems. **Learn more:** [About enterprise connections](/authenticate/enterprise-connections/about-enterprise-connections/) How do I handle user provisioning from enterprise systems? Kinde supports automatic user provisioning from enterprise identity providers. Users can be automatically created when they first sign in through SAML, and you can configure attribute mapping to populate user profiles with data from your identity provider. **Learn more:** [Provision users from enterprise](/authenticate/enterprise-connections/provision-users-enterprise/) How should I proceed if my enterprise system does not support SAML? If your enterprise system doesn't support SAML, you can use OIDC instead, which is supported by most modern identity systems. Alternatively, you can implement custom user provisioning workflows using Kinde's APIs. **Learn more:** [About enterprise connections](/authenticate/enterprise-connections/about-enterprise-connections/) ## Social Sign-In Which social providers should I enable for my application? Choose social providers based on your target audience. For developer-focused apps, GitHub and GitLab are essential. For business applications, Microsoft and LinkedIn are popular. For consumer apps, Google, Apple, and Facebook are widely used. **Learn more:** [Add social sign-in](/authenticate/social-sign-in/add-social-sign-in/) How do I handle social sign-in rate limiting? To avoid rate limiting, always use your own app credentials (Client ID and Client Secret) from social providers rather than relying on Kinde's proxy credentials. This ensures you have full control over your API quotas and rate limits. **Learn more:** [Add social sign-in](/authenticate/social-sign-in/add-social-sign-in/) Can users link multiple social accounts to the same profile? Yes, users can link multiple social accounts to their Kinde profile. This allows them to sign in using any of their connected social accounts while maintaining a single user identity in your system. **Learn more:** [Add social sign-in](/authenticate/social-sign-in/add-social-sign-in/) What happens if a social provider changes their API? Kinde monitors social provider API changes and updates our integrations accordingly. However, if you're using custom social sign-in implementations, you'll need to stay updated with provider changes and update your code as needed. **Learn more:** [Add social sign-in](/authenticate/social-sign-in/add-social-sign-in/) How do I customize the social sign-in experience? You can customize the social sign-in flow by modifying the UI components, adding custom branding, and configuring which social providers are displayed to users. You can also implement conditional logic to show different providers based on user context. **Learn more:** [Custom authentication pages](/authenticate/custom-configurations/custom-authentication-pages/) ## Multi-Factor Authentication Can I require MFA for specific user roles? Yes, you can configure MFA requirements per organization and per user role. This allows you to enforce stricter security for administrative users while keeping the experience simpler for regular users. **Learn more:** [MFA per organization](/authenticate/multi-factor-auth/mfa-per-org/) What MFA methods does Kinde support? Kinde supports multiple MFA methods including SMS, authenticator apps (TOTP), and email verification. You can enable one or multiple methods and let users choose their preferred option. **Learn more:** [About multi-factor authentication](/authenticate/multi-factor-auth/about-multi-factor-authentication/) How do I handle MFA backup codes? Kinde automatically generates backup codes when MFA is enabled. Users can use these codes to access their account if they lose their primary MFA device. You can configure how many backup codes are generated and whether they expire. **Learn more:** [Enable multi-factor authentication](/authenticate/multi-factor-auth/enable-multi-factor-authentication/) Can I enforce MFA for enterprise users? Yes, you can enforce MFA for users signing in through enterprise connections. This provides an additional security layer for your enterprise users while maintaining the convenience of SSO. **Learn more:** [MFA per organization](/authenticate/multi-factor-auth/mfa-per-org/) ## Custom Configurations How do I create custom authentication pages? You can create custom authentication pages by connecting your repository to Kinde and implementing the authentication flow using our SDKs. This gives you complete control over the user experience while maintaining security. **Learn more:** [Custom authentication pages](/authenticate/custom-configurations/custom-authentication-pages/) Can I disable user registration? Yes, you can disable user registration and only allow users to sign up through invitations or enterprise connections. This is useful for B2B applications where you want to control who can access your system. **Learn more:** [Disable sign-up](/authenticate/custom-configurations/disable-sign-up/) How do I implement custom redirects after authentication? You can configure custom redirect URLs based on user roles, organizations, or other criteria. This allows you to direct users to different parts of your application based on their authentication context. **Learn more:** [Redirect users](/authenticate/custom-configurations/redirect-users/) Can I prepopulate user information during sign-up? Yes, you can prepopulate user information during the sign-up process by passing parameters in your authentication URLs. This is useful for applications where you already have some user information and want to streamline the onboarding process. **Learn more:** [Prepopulate identity sign-in](/authenticate/custom-configurations/prepopulate-identity-sign-in/) ## Managing Authentication How do I manage user sessions across multiple applications? Kinde provides session management tools that allow you to control user sessions across different applications. You can configure session timeouts, implement single sign-out, and manage user authentication state across your entire system. **Learn more:** [Session management](/authenticate/manage-authentication/session-management/) What happens when a user's enterprise account is deactivated? When a user's enterprise account is deactivated, you can configure Kinde to either immediately revoke their access or implement a grace period. You can also set up webhooks to be notified of these changes in real-time. **Learn more:** [Manage authentication applications](/authenticate/manage-authentication/manage-authentication-applications/) How do I sync user data between Kinde and my application? Kinde provides APIs and webhooks to keep user data synchronized between your application and Kinde. You can implement real-time synchronization or batch updates depending on your requirements. **Learn more:** [Sync with Kinde](/authenticate/manage-authentication/sync-with-kinde/) Can I customize the authentication experience per organization? Yes, you can customize the authentication experience per organization, including branding, authentication methods, and user flows. This is useful for multi-tenant applications where different organizations have different requirements. **Learn more:** [Organization auth experience](/authenticate/manage-authentication/organization-auth-experience/) ## Troubleshooting Why are users getting rate limited? Rate limiting usually occurs when you're not using your own third-party app credentials or when you have too many authentication attempts from the same source. Check your social provider configurations and implement proper rate limiting in your application. **Learn more:** [Add social sign-in](/authenticate/social-sign-in/add-social-sign-in/) How do I debug authentication errors? Kinde provides detailed error logs and error codes to help you debug authentication issues. Check the error codes in your application logs and refer to our error code documentation for specific solutions. **Learn more:** [Error codes](/get-started/guides/error-codes/) What should I do if my SAML certificate expires? When your SAML certificate expires, generate a new certificate and update both your identity provider and Kinde configurations. Kinde provides tools to help you refresh certificates and update configurations. **Learn more:** [Refresh SAML certificate](/authenticate/enterprise-connections/refresh-saml-certificate/) How do I handle authentication failures gracefully? Implement proper error handling in your authentication flow to provide users with clear error messages and alternative authentication options. Use Kinde's error codes to identify specific issues and guide users to appropriate solutions. **Learn more:** [Error codes](/get-started/guides/error-codes/) ## User Support Scenarios How do I troubleshoot a user who cannot sign in? Start by checking if the user is using the correct email/username, if their account exists in your system, and if there are any authentication restrictions (like disabled accounts or MFA requirements). You can also check Kinde's user logs to see what's happening during their sign-in attempts. **Learn more:** [Manage authentication applications](/authenticate/manage-authentication/manage-authentication-applications/) How do I help a user who is locked out of their account? First, verify whether the account is locked or if the user is experiencing another authentication issue. You can reset the password, temporarily disable MFA, or check whether the account is suspended. Always verify user identity before making changes. **Learn more:** [Add and edit users](/manage-users/add-and-edit/add-and-edit-users/) How do I help a user who lost their phone (and MFA access)? If a user loses their phone and can't access their MFA app, you can temporarily disable MFA for their account, help them set up a new device, or use their backup codes if they have them. Consider implementing account recovery procedures for future incidents. **Learn more:** [Enable multi-factor authentication](/authenticate/multi-factor-auth/enable-multi-factor-authentication/) What should I do if a user reports suspicious activity on their account? Immediately check the user's authentication logs in Kinde, look for unusual sign-in patterns, and consider temporarily suspending their account. You can also force a password reset and enable additional security measures like MFA if it wasn't already enabled. **Learn more:** [View user activity](/manage-users/view-activity/view-user-activity/) How do I help enterprise users who cannot access SSO? For enterprise SSO issues, check if the user's account exists in their identity provider, verify the SAML/OIDC configuration is correct, and ensure their account hasn't been deactivated. You may need to coordinate with their IT department to resolve the issue. **Learn more:** [About enterprise connections](/authenticate/enterprise-connections/about-enterprise-connections/) How should I handle a user request to change an email address? Users can typically change their email address through their profile settings, but you may want to require email verification for the new address. Consider implementing a grace period where both old and new emails work to prevent account lockouts during the transition. **Learn more:** [Add and edit users](/manage-users/add-and-edit/add-and-edit-users/) How do I handle users who want to delete their account? Implement a proper account deletion process that includes data export options if required by law, confirmation steps to prevent accidental deletions, and clear communication about what data will be permanently removed. You may also want to offer account deactivation as an alternative. **Learn more:** [Delete or suspend users](/manage-users/access-control/delete-or-suspend-users/) What should I do if multiple users report the same authentication issue? If multiple users report the same issue, it's likely a system-wide problem rather than individual user issues. Check your Kinde configuration, monitor system status, and look for recent changes that might have caused the problem. Communicate with affected users about the issue and expected resolution time. **Learn more:** [Manage authentication applications](/authenticate/manage-authentication/manage-authentication-applications/) How do I help users who are having trouble with social sign-in? Check if the social provider is experiencing issues, verify your app credentials are still valid, and ensure the user's social account hasn't been suspended. You can also provide alternative authentication methods while troubleshooting the social sign-in issue. **Learn more:** [Add social sign-in](/authenticate/social-sign-in/add-social-sign-in/) How do I troubleshoot a user not receiving a verification email? Check if the email was sent (look in Kinde's logs), verify the user's email address is correct, and check if the email was delivered to spam/junk folders. You can also resend the verification email or temporarily use an alternative verification method like SMS. **Learn more:** [Email deliverability](/authenticate/authentication-methods/email-deliverability/) How do I handle users who want to use multiple email addresses? You can allow users to add multiple email addresses to their account, with one primary email for authentication and others for notifications. This is useful for users who want to receive updates at different addresses or who are transitioning between email providers. **Learn more:** [Add and edit users](/manage-users/add-and-edit/add-and-edit-users/) What should I do if a user's authentication keeps failing after multiple attempts? After multiple failed attempts, the user's account may be temporarily locked for security reasons. Check if there are any IP restrictions, verify their credentials are correct, and consider implementing a cooldown period before allowing additional attempts. You may also want to offer account recovery options. **Learn more:** [Manage authentication applications](/authenticate/manage-authentication/manage-authentication-applications/) How do I help users who are experiencing slow authentication? Slow authentication can be caused by network issues, server load, or configuration problems. Check your Kinde performance metrics, verify your network configuration, and consider implementing authentication caching or optimizing your authentication flow to improve response times. **Learn more:** [Service status](/trust-center/kinde-performance/service-status/)
# Authenticate - About auth - Ways to authenticate
> Detailed guide to all authentication methods supported by Kinde including email, phone, social, and enterprise authentication.
Last updated: 2026-03-26
email authentication, password, passwordless, phone auth, SMS, social login, enterprise SSO, OTP
authenticate
Kinde supports the following authentication methods. For instructions on how to switch on each method for your apps, see [Set up user authentication](/authenticate/authentication-methods/set-up-user-authentication/). ## Email authentication ### Password You can set up authentication so users can authenticate via email using a [password](/authenticate/authentication-methods/password-authentication/). The password needs to be at least 8 characters and popular passwords are blocked. If allowing this method, you should encourage users to use a password manager to increase security. Users will be prompted to verify their email address when they first sign up, using a one time code. ### Passwordless For [passwordless](/authenticate/authentication-methods/passwordless-authentication/) authentication, set up authentication so users can authenticate via email or username using a one time code. When you activate this option, users will be sent a one-time password (OTP) to confirm their identity when they sign in. This option is more secure than using passwords, which need to be stored and protected by the user. Users will be prompted to verify their email address when they first sign up, also using an OTP. Kinde does not currently support magic links as a passwordless authentication method, as they are less secure than an OTP. ## Phone authentication You can allow users to authenticate using their phone number as their sign in identity. This is a passwordless method. Once set up, users enter their phone number on the sign in screen and then enter a one-time passcode (sent via SMS) on the next screen. ### Passwordless via SMS For users to receive a sign in code via SMS, you need to set up a connection to [Twilio](https://www.twilio.com/en-us), who offer a messaging service for authenticating via SMS. You will need a Twilio account to set up this auth option in Kinde. See [Set up phone authentication](/authenticate/authentication-methods/phone-authentication/). Once set up, users will receive a one time code via SMS that enables them to complete the sign up process to your application or site. If you’re switching to Kinde from another auth provider, you can [import phone numbers with other user details](/manage-users/add-and-edit/import-users-in-bulk/) (such as email, first name, last name, etc.) to support authentication. ### OTP message format The SMS message that users receive through Kinde auth complies with OTP best practice. Here’s an example: The content and format of the OTP SMS message is not editable. You’ll notice that the last part of the message includes a duplication of the OTP - `@bound_domain.xxx.dk #OTP_CODE` in the last line of the message. This keeps the OTP secured to the specified domain and allows browsers to reliably extract the OTP. The reason the OTP is included at the start of the message as well, is so that it can be read easily from a short notification popup. ## Social authentication You can let users sign up and sign in using social profiles. This requires some admin setup work and developer skills. **Returning users matched by email** Unlike some other authentication providers, Kinde automatically matches some accounts on sign up by matching verified email addresses. This means that if a user signs up with Google the first time, and they come back and sign up again with Slack, and the same email is detected (and the emails are verified), then the accounts get linked. See the [individual social sign in](/authenticate/social-sign-in/add-social-sign-in/) instructions. ## Enterprise authentication Kinde supports the use of [Microsoft Entra ID](/authenticate/enterprise-connections/azure/) and [SAML](/authenticate/enterprise-connections/custom-saml/) as an enterprise-level single sign on (SSO) authentication methods. These methods are more suited to big corporate and government organizations. ## Custom OAuth 2.0 connections You can add any OAuth 2.0 compatible identity provider as an authentication method. You should check compatibility thoroughly and test these types of connections in a non-production environment. Here are the instructions for getting set up with [custom OAuth 2.0](/authenticate/custom-configurations/custom-oauth2-connection/). Note there may be variations in field names and terms depending on the provider you use. ## Passkeys Passkeys are a passwordless sign-in method based on the Web Authentication (WebAuthn) standard. Users authenticate with device biometrics (Face ID, Touch ID, Windows Hello), a platform authenticator, or a FIDO2 security key — no password required. See [Passkeys](/authenticate/authentication-methods/passkeys/) for setup, policies, and user experience details.
# Authenticate - About auth - Configure your authentication flows
> Configure Kinde authentication flows with settings, custom pages, and workflows—no app redeploy required
Last updated: 2026-07-20
authentication flows, auth flows, without redeploying, custom configurations, custom pages, workflows, custom UI
authenticate, about-auth, authentication-flows
With Kinde, you can reconfigure authentication flows without redeploying your application. Kinde hosts the sign-up and sign-in journey. You change how that journey works with settings, page design, or custom code that runs in Kinde — not by shipping a new build of your app every time. This page maps the main ways to configure your authentication flows and where to go next. ## Ways to configure authentication flows | Approach | What you change | Typical use | | --- | --- | --- | | [Custom configurations](#custom-configurations) | Dashboard settings for the auth experience | Seamless sign-up, name fields, redirects, invitation-only access | | [Custom pages](#custom-pages) | Your own sign-in screens or Kinde-hosted page design | Brand the start of the flow, or fully style hosted pages | | [Workflows](#workflows) | Custom code at auth and token triggers | Token claims, external checks, logic Kinde doesn’t support out of the box | You can combine these. For example, use dashboard settings for the registration experience, custom UI for branding, and a workflow to enrich tokens after sign-in. ## Custom configurations Use application and environment settings in Kinde to shape the authentication flow without writing code. Common options include: - Unified sign-up and sign-in (seamless registration) - Asking for first and last name on sign-up - Change [authentication methods](/authenticate/authentication-methods/set-up-user-authentication/) per application (email, social, enterprise, etc.) - Redirects after auth - Invitation-only access ([disable self sign-up](/authenticate/custom-configurations/disable-sign-up/)) - Pre-filling identity on the sign-in screen Check out [Manage the authentication experience](/authenticate/custom-configurations/authentication-experience/). ## Custom pages Control what users see at the start of, or throughout the hosted authentication flow. - **Your own branding** — [Set global brand defaults](/design/brand/global-brand-defaults/) (logo, favicon, colors, etc.) for your business or [set branding per organization](/design/brand/apply-branding-for-an-organization/) - **Your own sign-up and sign-in screens** — Host the first screen in your product, then hand off to Kinde for verification and MFA. See [Custom sign-up and sign-in pages](/authenticate/custom-configurations/custom-authentication-pages/). - **Custom UI on Kinde-hosted pages** — Bring your own HTML, CSS, and JavaScript to Kinde’s hosted pages (requires a custom domain). See [Customize designs with code](/design/customize-with-code/customize-with-css-html/). These change the presentation of the flow. Secure verification steps still run in Kinde. ## Workflows [Workflows](/workflows/about-workflows/) run your TypeScript or JavaScript in Kinde when specific events fire — for example after authentication, before MFA, or when tokens are generated. Use a workflow when you need to: - [Customize tokens](/workflows/workflow-tutorials/customize-token-with-workflow/) (access or ID token claims) beyond built-in options - Call an external system during the auth or token flow (e.g., custom spam filter, fraud detection, etc.) - Add validation or business logic at a supported trigger (e.g., [custom password validation](/workflows/workflow-tutorials/custom-password-validation-check/), etc.) Workflows cannot bypass Kinde’s built-in verification (such as email OTP). Those steps always run as part of the auth flow. ## Choose an approach - **Change behavior with toggles and settings** → [Custom configurations](/authenticate/custom-configurations/authentication-experience/) - **Change how the flow looks or where it starts** → [Set brand defaults](/design/brand/global-brand-defaults/), [Custom pages](/authenticate/custom-configurations/custom-authentication-pages/) or [custom UI](/design/customize-with-code/customize-with-css-html/) - **Run custom logic during auth or token generation** → [Workflows](/workflows/about-workflows/) For available sign-in methods (email, social, enterprise, and more), see [About Kinde authentication](/authenticate/about-auth/about-authentication/) and [Ways to authenticate](/authenticate/about-auth/authentication-methods/).
# Authenticate - About auth - User identity and verification
> Understanding how user identity and verification works in Kinde, including identity types, trusted providers, and verification processes.
Last updated: 2025-01-16
user identity, verification, trusted providers, email verification, social identity, enterprise identity, profile sync
authenticate
A key part of making authentication secure, is through verification of user identities. Verification usually happens at sign up, to ensure the person signing up exists and is the intended person gaining access to your app or project. This topic is a conceptual overview of how identity works in Kinde. There are two parts to a user’s identity in Kinde: - Kinde profile - first name, last name, and picture - Identity details - information a user can sign in with: Email, phone, social, enterprise. This is explained in more detail below. ## Identity When we use the term ‘identity’, we’re referring to a unique identifier that allows a user to sign in and be verified. An email, phone number, SSO provider, etc. When a user tries to access a system or service, they provide their identity along with additional credentials (e.g. password, one-time password OTP) to verify their identity and gain access. ## Types of identities ### Identity credentials This refers to an email, phone number, or username. Identity credentials are created for a user when they first sign up with an email address, phone number, or username. If it’s the first identity to be added, it will be marked as primary. You can [manually add these user identities](/manage-users/add-and-edit/add-manage-user-identities/). ### Social A social identity is created when a user signs up with a social account or when they sign in with a trusted provider, who supplies a verified email that matches an existing email identity in Kinde. If a user signs up with a trusted social provider that provides us a verified email, and an email identity does not exist for the user, Kinde creates an email identity with this email. They can use this email to sign in with (if an email authentication method is enabled for your application). ### Enterprise An enterprise identity is created when a user signs up via an enterprise connection, or when they sign in via a trusted provider who supplies a verified email that matches an existing email identity. Users with enterprise identities in Kinde can't also have other identity types in Kinde. E.g. a user can have an email identity and a social identity. But if a user has an enterprise identity, they cannot have other identities. In this case, identity information is sourced with the identity provider and is managed via the identity provider, not in Kinde. ## Trusting emails from providers ### Trusted emails A trusted email provider is one that guarantees the email they issue is verified and also does not allow the user to change their primary email address. Currently Google is the only provider we treat as trusted by default. But you can choose to trust emails from any provider when you configure them in Kinde (See below). You can also choose not to trust Google emails if you want. **Google example** 1. When a user signs up, the Kinde profile first name, last name and picture are populated from Google. 2. If Google is a trusted provider, we create a social identity and an email identity. 3. The user can sign in with either Google or their email (if this auth method is allowed). ### Untrusted emails This isn’t to say that other email providers are not trustworthy, this purely relates to email addresses and the guarantee that it will not change. **LinkedIn example** 1. When a user signs up, the Kinde profile first name, last name and picture are populated from LinkedIn. 2. If LinkedIn is an untrusted email provider, we only create a social identity. 3. At this stage the user can only sign in with their LinkedIn account. ### Trust an untrusted provider When you set up an enterprise connection or a social connection, you can select the option to trust them. For example, go to **Settings > Authentication > Social connections** and select **Configure** on a tile. You'll see the **Trust email addresses provided by this connection** switch. Switch on or off as you like. ## Email sign up flow example 1. When a user signs up with email, the Kinde profile first name, last name are populated by the user (if you ask for it as part of the sign up flow). Their picture will be populated from Gravatar if it exists. 2. Kinde creates a primary contact email using the address they signed up with. They can only sign in with this email address. 3. If the same user returns and signs in with a trusted connection, e.g. Google, Kinde recognises that a user exists and the email address is from a trusted provider, so we add a Google identity to their profile. 4. The Kinde profile first name, last name and picture are updated by Google (if profile syncing is also turned on). 5. The user can sign in using either email or Google. ## Keeping identities in sync ### Social provider syncing If a social provider gives us a new first name, last name or picture for a user, Kinde updates these fields in the user profile to match those supplied to us. This is on by default, but you can turn it off if you wish to keep a static profile. [About profile sync](/manage-users/about/). If you have syncing off at an environment level but turned on at a social connection level we will honor the request for the social connection to sync. ### Enterprise connection syncing If an enterprise provider gives us a new first name, last name, or picture for a user, Kinde updates these fields in the user profile to match those supplied to us. This is on by default, but you can turn it off if you wish to keep a static profile. [About profile sync](/manage-users/about/). If you have syncing off at an environment level but turned on at an enterprise connection level we will honor the request for the enterprise connection to sync. ## Identity verification Verification is an authentication security measure that checks the person seeking system access is who they say they are. In addition, an up to date identity provides a secure method to contact a user. Email identity details are required, for example, to reset a user’s password (requested or forced), and are needed to reliably send OTPs and trigger other auth mechanisms, like auth apps. ## Username identities must have an email At Kinde, we don’t treat username identities the same as phone and email identities. If you want users to sign in and authenticate with usernames, they still need to verify themselves (if only once) via email. ## Cases in usernames Kinde treats usernames as case-insensitive. In other words, we ignore case. We do this because it eliminates the possibility of auth issues and fraud when two usernames are identical in every aspect except the case of one of their letters. We are happy to support users choosing an aesthetically pleasing username combination, like `RosyRose` or `BuilderBob`. We just don't also support separate identities for `rosYrosE` and `BUilderbob`. ## When an identity changes For security reasons, you can’t edit a user’s verified identity. But we know it still needs to be possible. People change emails, change names, get new phone numbers, etc. You can update identities by adding a new identity and deleting the old one. See [Add and manage user identities](/manage-users/add-and-edit/add-manage-user-identities/), or [via the Kinde API](/kinde-apis/management/).
# Authenticate - About auth - Top questions about Kinde authentication
> A collection of the top questions and answers about how to set up and configure Kinde authentication for your user's needs.
Last updated: 2026-03-26
login, sign in, popup, error, sessions, tokens, auth, forgot password, password reset
authentication, enterprise auth, SSO, social sign-in, authentication issues, user access control, user access, user authentication
Here are concise answers to common authentication questions. Select a question to expand the answer. ## Authentication methods & core functionality How do I choose the right Kinde authentication method for my SaaS product's user base? Think about who you're building for and what they're used to. If you're targeting developers, they'll probably expect GitHub or GitLab sign-in options. Building something for everyday consumers? Google and Apple sign-in will feel familiar and remove friction. Got enterprise customers? They'll likely need SAML or Microsoft Entra ID to keep their IT teams happy. You don't need to figure it all out upfront. Start simple with email authentication and add more options as you grow. Your web app and mobile app can even have different auth requirements if that makes sense for your users. [Learn more about authentication methods](/authenticate/about-auth/about-authentication/) What is the difference between Kinde password and passwordless authentication, and which should I implement? With passwords, your users create and remember their own passwords (we enforce 8+ characters and block common ones). With passwordless, we send them a one-time code via email or SMS instead. Passwordless is genuinely more secure - no passwords to store, steal, or forget, and codes expire after 2 hours. Just know you can't mix both methods for the same app - it's one or the other. If you are building a mobile-first application or want to reduce support tickets for forgotten passwords, passwordless authentication is often a strong option. [Password authentication guide](/authenticate/authentication-methods/password-authentication/) | [Passwordless authentication guide](/authenticate/authentication-methods/passwordless-authentication/) How does Kinde automatic account linking work? Kinde automatically links accounts when a user signs in with the same verified email address across different sign-in methods. For example, if a user first signs up with Google and later signs in with Slack using the same verified email, Kinde links those identities to a single account. This prevents duplicate accounts and allows sign-in with either method. Once your users verify their email with any method, all their sign-in options with that email will work seamlessly together. [Learn about identity and verification](/authenticate/about-auth/identity-and-verification/) Can I set different Kinde authentication requirements by application or organization? Yes. Configure baseline authentication methods at the environment level, then customize settings by application or organization as needed. For example, your web application might use social sign-in, your mobile app might require phone authentication, and your enterprise customers might require MFA. This lets you align authentication requirements with each user group. [Configure authentication options](/authenticate/authentication-methods/set-up-user-authentication/) How do I handle Kinde authentication across multiple domains and subdomains? Use multi-domain authentication to maintain sign-in sessions across domains and subdomains, such as `website.yourapp.com`, `app.yourapp.com`, and `docs.yourapp.com`. Use `prompt=none` in your authorization request to silently check for an existing session. If a valid session exists, users continue without interruption; otherwise, they are prompted to sign in. [About Kinde authentication](/authenticate/about-auth/about-authentication/) Can I embed Kinde authentication inside a modal or iframe in my application? No. Kinde uses redirect-based OAuth 2.0 flows rather than inline embeddable authentication. Users are redirected to Kinde (or your custom domain) to sign in and then redirected back to your app. Embedding the auth flow in a modal or iframe is not supported. [Set callback and redirect URLs](/get-started/connect/callback-urls/) Can I log in with username and password directly using the Kinde SDK without redirecting to Kinde? No. Programmatic login with username and password credentials via the SDK (without redirecting to Kinde's hosted auth pages) is not supported by design for security reasons. Users must complete authentication through the redirect-based flow. **Why this design?** Kinde handles password authentication on hosted pages for security reasons. Passwords are stored as one-way hashed values and are never exposed to your application or to Kinde administrators. **Alternatives to consider:** If you need programmatic authentication (no user interaction), use the Client Credentials flow by creating a Machine-to-Machine application. [Create machine-to-machine application](/machine-to-machine-applications/m2m-application-setup/create-an-m2m-application/) Does Kinde support the Resource Owner Password Credentials (ROPC) grant? No. Kinde does not support the Resource Owner Password Credentials (password) OAuth grant. Use the standard redirect-based authorization code flow for user authentication. [About authentication](/authenticate/about-auth/about-authentication/) | [Using Kinde without an SDK](/developer-tools/about/using-kinde-without-an-sdk/) How do I troubleshoot users not receiving Kinde verification codes? Ask users to check their spam folder first, as email filtering is a common cause. For SMS codes, confirm network reception and phone number formatting. Verification codes expire after 2 hours, so users may need to request a new code. If you use SMS authentication, verify that your Twilio configuration is correct. [Passwordless authentication troubleshooting](/authenticate/authentication-methods/passwordless-authentication/) ## Social sign-in How do I set up Kinde social authentication without compromising security for my production app? Before production, replace Kinde default social credentials with your own provider credentials. Default credentials are intended for testing only. Using your own credentials improves security, reliability, and operational control. Create your own applications with each social provider (for example Google, GitHub, and Apple), then add the provider `Client ID` and `Client Secret` in Kinde social connection settings. If you use custom domains, include the correct callback URLs for those domains. [Add and manage social connections](/authenticate/social-sign-in/add-social-sign-in/) How does Kinde maintain user identities when social providers do not return email addresses? Some social providers, such as X/Twitter and Apple, may not always return an email address. Because email is required for account security and recovery flows, Kinde prompts the user for an email address during first sign-up when needed. After that step, users can continue signing in with the social provider as expected. [X social sign-in](/authenticate/social-sign-in/twitter/) | [Apple social sign-in](/authenticate/social-sign-in/apple/) How can I use Kinde to create a seamless social authentication experience for my users? If you are using social authentication without email/password fallback, you can streamline sign-in by routing users directly to a specific provider. Configure custom authentication pages and use the `connectionId` parameter to skip initial provider selection screens. Verification and MFA screens remain managed by Kinde for security. [Custom authentication pages](/authenticate/custom-configurations/custom-authentication-pages/) Should I mark social connections as "trusted providers" in Kinde? Generally, no - leave this off for better security. "Trusted provider" means we'll take their word that emails are verified, but here's the thing: people change email addresses, and social providers don't always keep up. Only flip this switch if you're 100% certain the provider maintains verified, current email addresses. When in doubt, err on the side of caution. [Social connections configuration](/authenticate/social-sign-in/add-social-sign-in/) ## Enterprise authentication & SAML How do I set up Kinde SAML authentication for an enterprise customer? SAML setup requires coordination between Kinde and the customer identity provider (IdP). Kinde acts as the service provider, while your customer provides IdP details (for example Google Workspace, Microsoft Entra ID, or Cloudflare). Create an enterprise connection in Kinde, define a unique Entity ID, and provide your ACS URL to the customer so they can complete IdP configuration. Use certificate and private key pairs where required, and validate the flow in a sandbox environment before production rollout. [Custom SAML setup](/authenticate/enterprise-connections/custom-saml/) What do I use home realm domains for in Kinde enterprise connections? Home realm domains route users to the correct enterprise sign-in flow based on email domain. For example, when `bigcorp.com` is configured, users with `@bigcorp.com` emails are automatically directed to their company connection. Each domain can be assigned to only one connection. The SSO button is hidden by default when home realm discovery is active, but can be re-enabled if needed. [Microsoft Entra ID setup](/authenticate/enterprise-connections/azure/) How should I migrate enterprise users to Kinde? Get your enterprise connections set up in Kinde first - SAML, Entra ID, whatever they're using. Then when you import their user data (via CSV or JSON), we'll automatically match everyone to the right connection based on their email addresses. This means their sign-in experience stays exactly the same - they won't even notice you've switched to Kinde behind the scenes. Import their roles and permissions too if you've got them. [Migrate to Kinde](/get-started/switch-to-kinde/switch-to-kinde-for-user-authentication/) How do I handle enterprise users already signed in to their identity provider? When enterprise users sign out of your application, they are signed out of Kinde but may remain signed in to their identity provider (for example Entra ID). This is expected behavior in federated authentication. If full sign-out is required across both systems, implement additional logout flows. [Entra ID SAML connection](/authenticate/enterprise-connections/entra-id-saml/) ## Multi-factor authentication How do I use Kinde to implement MFA for different types of customers? MFA requirements can be configured at different levels. You can enforce MFA globally at the environment level or apply it selectively at the organization level. For example, regulated industries may require mandatory MFA, while consumer-focused applications may choose optional MFA based on risk and UX requirements. Kinde supports email codes, SMS codes, and authenticator apps as second factors. Just don't use the same method twice - as in don't make email the primary and secondary auth method. That could be confusing. [Enable multi-factor authentication](/authenticate/multi-factor-auth/enable-multi-factor-authentication/) Can I exempt certain users or connections from MFA requirements in Kinde? Yes. You can exempt specific roles or exempt enterprise connections where MFA is already enforced by the external identity provider. Configure exemptions at the organization level. If a user has both exempt and non-exempt roles, MFA is enforced by default. [Set MFA per organization](/authenticate/multi-factor-auth/mfa-per-org/) How do I help users who are having trouble with MFA? Provide clear instructions for each MFA method you support. For authenticator apps, document QR setup and remind users to store backup codes securely. For SMS, verify phone number formatting with country codes. For email codes, check spam filtering. Provide a support path for account recovery when users are locked out. You can also [reset MFA for a user](/manage-users/access-control/reset-multi-factor-authentication-for-a-user/). [Multi-factor authentication guide](/authenticate/multi-factor-auth/enable-multi-factor-authentication/) ## Username authentication Does Kinde support username authentication? Yes. Kinde supports username authentication. It is useful for products where usernames are an important part of the user experience, such as community platforms and developer tools. Users still need to verify their email once for security, and can then sign in with their chosen username. This works with both password and passwordless methods. [Username authentication guide](/authenticate/authentication-methods/username-authentication/) How does Kinde handle username uniqueness and case sensitivity? Usernames are treated as case-insensitive to avoid issues such as "BuilderBob" versus "builderbob" during sign-in. Users can still choose their preferred display capitalization, but matching is done without case sensitivity in the authentication process. This helps reduce sign-in friction and lowers the risk of impersonation attempts. [Username authentication details](/authenticate/authentication-methods/username-authentication/) What happens if a user changes their password when using both email and username authentication in Kinde? Both methods share the same password. If a user can sign in with both email and username, changing the password for one updates the credential for both. This keeps account access consistent and avoids confusion from maintaining separate passwords for the same account. [Username authentication configuration](/authenticate/authentication-methods/username-authentication/) ## Device Authorization Flow When should I use Kinde Device Authorization Flow instead of standard authentication? Use Device Authorization Flow for devices with limited input capability, such as smart TVs, game consoles, CLI tools, and IoT devices. The device presents a code, and the user completes authentication on a secondary device (for example a phone or laptop) with a full browser experience. This approach reduces input friction and improves security by keeping credential entry on a trusted device. [Device Authorization Flow](/authenticate/device-authorization-flow/overview/). How does Kinde Device Authorization Flow work, and how should I explain it to users? The flow is: your device requests a device code from Kinde, displays a short code and verification URL, and asks the user to continue on another device. The user opens the URL, signs in with standard methods, enters the code, and authorizes the requesting device. Meanwhile, the original device polls the token endpoint until authorization is complete and tokens are returned. [Device Authorization Flow](/authenticate/device-authorization-flow/overview/) What are the security benefits of Kinde's device authorization flow? Device Authorization Flow keeps credentials off devices that are difficult to secure. Users do not enter passwords on the TV, CLI, or IoT device; authentication occurs on a trusted browser-enabled device instead. It also preserves standard security controls such as MFA and consent prompts. Device codes are short-lived, and polling can be rate-limited to reduce abuse risk. [About authentication methods](/authenticate/about-auth/authentication-methods/) How do I handle Kinde device authorization flow errors and edge cases? The main errors you'll see are `authorization_pending` (user hasn't finished yet - keep polling), `slow_down` (you're polling too aggressively - back off), and `expired_token` (codes expired - start over). Handle these gracefully in your app rather than crashing. Users might also get confused about which device they're supposed to use for what, so make your instructions crystal clear. And remember, some users will start the process but never finish it - that's normal, just clean up expired sessions. [OAuth token validation and errors](/build/tokens/token-validation-errors/) What is the recommended UX for presenting Kinde device codes? Keep the experience simple and explicit. Display the code prominently, include the full verification URL, and provide both QR and manual entry options where possible. Use concise instructions, and include a progress state so users know the device is waiting for completion. Validate the flow with usability testing before release. ## Custom configurations & user experience What do I need to set up Kinde phone authentication for my users? You need a paid Twilio business account because SMS delivery has carrier costs. Before setup, confirm whether 10DLC registration is required in your region and review Twilio A2P messaging requirements. Then add your Twilio configuration in Kinde, choose between a Twilio Messaging Service or a specific phone number, and set your default country. [Set up phone authentication](/authenticate/authentication-methods/phone-authentication/) Can I customize the SMS message that Kinde users receive? No. Kinde uses a standardized SMS template designed to meet security and localization requirements. The message format is: "123456 is your one-time code to sign in to [xxxx@login.xxx.au](mailto:xxxx@login.xxx.au) #123456". The repeated code suffix is part of the security format. [Phone authentication details](/authenticate/authentication-methods/phone-authentication/) How can I create a more seamless Kinde sign-up experience for invited users? Use the `login_hint` parameter to pre-fill identity fields when the user email is known. You can also configure a unified sign-up/sign-in flow to reduce decision friction. If profile data is not required at entry, avoid collecting first and last name fields to keep onboarding minimal. [Pre-populate user identity](/authenticate/custom-configurations/prepopulate-identity-sign-in/) | [Manage authentication experience](/authenticate/custom-configurations/authentication-experience/) How should I handle profile pictures and user data with Kinde? Kinde can source profile pictures from identity providers such as Google and use Gravatar as a fallback when no image is available. You can disable the Gravatar fallback if you prefer to manage avatars in your own application. Some providers, such as Apple, may return limited profile data and no avatar. [Authentication experience customization](/authenticate/custom-configurations/authentication-experience/) How can I pass additional parameters to identity providers through Kinde? Upstream parameters let you send extra data during authentication - either the same value every time (static) or something unique per user (dynamic). Common use case: passing `login_hint` to pre-fill sign-in forms or enabling those handy account switchers you see on Google. Each provider supports different parameters (check their docs), and you can even rename parameters using aliases if your IdP is picky about naming. [Pass parameters to identity providers](/authenticate/auth-guides/pass-params-idp/) ## Developer questions Why does Kinde authentication state get lost when users refresh the page in single-page apps? Kinde stores tokens in memory by default to reduce CSRF and XSS exposure. A browser refresh clears in-memory tokens. For production persistence, use Custom Domains to enable secure httpOnly cookies on your domain. For local development only, `is_dangerously_use_local_storage` is available. Do not use this option in production. [JavaScript SDK guide](/developer-tools/sdks/frontend/javascript-sdk/) | [React SDK guide](/developer-tools/sdks/frontend/react-sdk/) How do I implement Kinde authentication in a React application without losing user state? Wrap your React app with `KindeProvider` to manage authentication state. Use hooks such as `useKindeAuth()` for sign-in checks, and guard rendering decisions with `isLoading` to avoid UI flicker. For production, use custom domains and secure cookies, and ensure redirect handlers are configured correctly. [React SDK implementation](/developer-tools/sdks/frontend/react-sdk/) How should I handle Kinde authentication callbacks across frameworks? Each framework has specific callback conventions. For example, Next.js App Router uses `app/api/auth/[kindeAuth]/route.js`, while Pages Router uses `pages/api/auth/[...kindeAuth].js`. Ensure callback URLs exactly match Kinde configuration, including protocol and case sensitivity. Prefer SDK callback handlers to reduce implementation errors. [Next.js App Router SDK](/developer-tools/sdks/backend/nextjs-sdk/) | [Using Kinde without SDK](/developer-tools/about/using-kinde-without-an-sdk/) How can I protect API endpoints and validate Kinde tokens properly? Use backend SDKs or manually validate JWT tokens. SDKs reduce implementation overhead for common validation steps. The `getToken()` method returns bearer tokens for API calls. On the backend, validate audience and expiration claims, and never expose client secrets in frontend code. [TypeScript SDK guide](/developer-tools/sdks/backend/typescript-sdk/) ## Troubleshooting & common issues How do I help users who forgot their passwords in Kinde? Users can hit "forgot password" on the sign-in screen and we'll send them a one-time code via email to reset it. As an admin, you can also trigger password resets through the Kinde dashboard or API (as long as they have a verified email). There's also the option to set a temporary password for them, but you'll need to send it through your own channels - we won't email passwords directly because that's not secure. [Reset a user's password](/manage-users/access-control/reset-user-password/) | [Password authentication guide](/authenticate/authentication-methods/password-authentication/) How should I help users who are not receiving Kinde SMS auth codes? Start with the basics - did they enter their phone number correctly with the right country code? Do they have cell reception? Are they in a country where SMS might be restricted? Then check your end - is your Twilio account funded and configured properly? SMS delivery can be finicky, especially internationally, so having backup contact methods is always smart. [Phone authentication setup](/authenticate/authentication-methods/phone-authentication/) How should I help users who are not receiving Kinde auth codes via email? Start with the basics - could the email have been caught in their spam or been caught by their organization's firewall and have been added to a supression list? Have them check this first. If you have [custom SMTP email delivery](/integrate/third-party-tools/kinde-resend-custom-smtp/) set up, you should be able to check logs from the delivery provider. If you rely on Kinde to deliver emails, check the same basic things with the recipient and ask them to try again. If you need to, contact the Kinde support team to check our logs to see if there was an email disruption. [Phone authentication setup](/authenticate/authentication-methods/phone-authentication/) How do I support users when changing authentication providers in Kinde? If users were relying on a social or enterprise connection that got removed or changed, they're stuck until you fix it. Before deleting any connection, make sure nobody's using it for auth. If you need to switch providers, set up the new one first, then help users transition by linking their accounts or setting up alternative auth methods. Always have a backup plan. [Manage social connections](/authenticate/social-sign-in/add-social-sign-in/) Why are Kinde authentication redirects failing? A common cause is URL mismatch. Callback URLs in Kinde must exactly match your application and social provider configuration, including protocol and case sensitivity. If you use custom domains, verify DNS records and active SSL certificates. Use either custom-domain tokens or Kinde-subdomain tokens consistently. [Custom domain setup](/build/domains/pointing-your-domain/) How do I debug Kinde OAuth 2.0 authentication errors? Common OAuth errors include `invalid_client` (incorrect client credentials), `invalid_grant` (expired or invalid authorization code), and `invalid_scope` (unsupported scope). Verify credentials, exchange authorization codes promptly, and confirm scope values are valid. Return user-friendly messages instead of raw OAuth error codes. [OAuth 2.0 validation and errors](/build/tokens/token-validation-errors/) What should I check in Kinde when users report authentication is not working on mobile? For mobile authentication, confirm deep-link configuration and URL schemes for both iOS and Android. Verify redirect URLs follow the expected custom scheme format, such as `myapp://your_kinde_domain.kinde.com/kinde_callback`. Use browser-based flows, because some providers (including Google) do not support webview-based authentication. If users are not receiving verification codes and Twilio is configured, review Twilio delivery logs. [React Native SDK](/developer-tools/sdks/native/react-native-sdk/) and [Set up phone auth with Twilio](/authenticate/authentication-methods/phone-authentication/) How do I handle Kinde authentication state persistence across different environments? For production, use custom domains to enable secure cookie storage that persists across refreshes. For local development only, you can use local storage with caution. On the backend, implement robust session management with encrypted cookies or shared cache if running multiple instances. Choose architecture-specific patterns while prioritizing security. [TypeScript SDK session management](/developer-tools/sdks/backend/typescript-sdk/) ## Best practices & security What security considerations should I communicate to my customers about Kinde authentication choices? Communicate authentication trade-offs clearly. Passwordless authentication can reduce credential risk compared with passwords, MFA adds meaningful account protection, and social sign-in can be secure when configured correctly. If password authentication is enabled, recommend password managers. Kinde stores passwords as one-way hashes and cannot retrieve plain-text passwords. [Password authentication security](/authenticate/authentication-methods/password-authentication/) How do I ensure my Kinde authentication setup scales with business growth? Start with a simple baseline and add capabilities as requirements grow. Many teams begin with email authentication, then add social sign-in, MFA, and enterprise connections over time. Use organizations for multi-tenant user management. Configure common defaults at the environment level and apply organization-specific customization where needed. Implement custom domains early to simplify long-term session management. [Kinde for different business models](/build/set-up-options/kinde-business-model/) What is the recommended approach for migrating users from other auth providers to Kinde? Configure target authentication methods in Kinde first, then export and import users via CSV or JSON. If password hashes are migrated successfully, users can often continue without disruption. If authentication methods are changing (for example, to passwordless), communicate the change in advance. Validate migration steps in a sandbox environment and plan for edge cases such as password changes during the cutover window. [Switch to Kinde migration guide](/get-started/switch-to-kinde/switch-to-kinde-for-user-authentication/) ## Advanced integration How do I implement Kinde custom authentication pages while maintaining security? You can build custom sign-up and sign-in pages while Kinde continues to handle security-critical steps such as verification and MFA. Use connection IDs and login hints in authorization URLs to route users to specific authentication methods. Some screens, including password and code verification, remain hosted by Kinde for security reasons. [Custom authentication pages](/authenticate/custom-configurations/custom-authentication-pages/) How should I handle cross-subdomain authentication in Kinde for complex applications? Use custom domains and correct cookie scoping for cross-subdomain authentication. Set cookies at the root domain so they are available across subdomains. For PHP applications, use SDK helper functions where available. Test sign-in and session continuity across all target subdomains. [PHP SDK domain configuration](/developer-tools/sdks/backend/php-sdk/) How should I configure Kinde authentication for different business models (B2C vs B2B)? B2C is straightforward - configure everything at the business level with easy social sign-in and email auth. B2B gets more interesting because you're serving multiple companies, each with their own needs. Use organizations to create separate tenant management, set up enterprise connections for business customers who need SAML or Entra ID, and keep simpler social auth for any consumer-facing parts of your platform. It's all about matching Kinde auth options to what your customer actually needs. [Business model configuration](/build/set-up-options/kinde-business-model/)
# Authenticate - About auth - User communication in Kinde
> Learn about how Kinde communicates with users through emails, SMS, and WhatsApp for authentication purposes.
Last updated: 2026-03-03
user communication, email, SMS, WhatsApp, OTP, verification, Twilio, webhooks
authenticate
Kinde only sends emails or texts to users as part of the authentication experience, for example to send one-time passwords or to verify user identity for self-sign-up. We’ve kept communication features to a bare minimum for authentication, so that we do not send unwanted or unsolicited communication to users, on behalf of your business. ## Emails sent from Kinde The following emails are sent from no-reply@kinde.com. - Invitations to join your business on Kinde when you manually add a new team member - Export data warning emails to ensure only authorized people can get user data out of your business. - (Unless you enter custom email sender details) verification and authentication emails for sign-up, sign-in, multi-factor authentication, and password reset. To configure authentication emails to come from your own email provider, see [Customize email sender](/get-started/connect/customize-email-sender/). Core authentication emails (verification, OTP, password reset) cannot be fully disabled. You can customize the sender and content, but Kinde will still send these emails when the relevant auth flows run. ## Kinde does not send emails in these situations - Invitations to users if you add them via API - Invitations to users if you add them in bulk via import - Emails to team members about your Kinde subscription or admin activity If you want certain user events in Kinde to trigger an email, you can set this up with [webhooks](/integrate/webhooks/add-manage-webhooks/). ## Communication when users are added in bulk Our features for adding users in bulk (such as via API or import) are designed with a smooth migration experience in mind. Rather than send confusing emails to existing user bases, we enable a silent transfer of the authentication experience, between your previous supplier and Kinde. That’s why we don’t send emails when users are added to Kinde this way. ## SMS and WhatsApp communication for phone authentication Kinde supports [phone authentication](/authenticate/authentication-methods/phone-authentication/) as a primary and secondary authentication factor, where OTP and MFA codes can be delivered via **SMS** or **WhatsApp**, with WhatsApp preferred when configured; for setup details, testing modes, and template behavior, see the [phone authentication guide](/authenticate/authentication-methods/phone-authentication/) and [WhatsApp authentication guide](/authenticate/authentication-methods/whatsapp-authentication/). Kinde does not communicate anything else to users via SMS or WhatsApp.
# Authenticate - Auth guides - Guide to enterprise auth and user identities
> Understanding why Kinde enforces one enterprise identity per user for security, account integrity, and simplified tenant management.
Last updated: 2025-01-16
enterprise identity, SSO, identity provider, IdP, security, account integrity, tenant management
authenticate
At Kinde, each user can only have one enterprise identity provider (IdP) connection as part of their user profile. This is because we want to keep things simple, secure, and reliable. We get asked about this regularly, so this document explains our reasoning from a security and architectural perspective. ## What is an enterprise connection? An enterprise connection allows users to sign in to your product using their organization’s identity provider — such as Okta, Azure AD, or Google Workspace. This enables Single Sign-On (SSO), centralized user management, and improved security for enterprise customers. ## Why only one identity per user? Many customer identity platforms, including Kinde, enforce a one-to-one relationship between a user and an enterprise connection. Here’s why: ### 1. Prevents identity conflicts If a user could sign in through multiple enterprise providers, it becomes difficult to determine whether those identities belong to the same person. This can result in: - Duplicate accounts for the same user - Conflicting user attributes (email, name, roles, etc.) - Confusion around permissions and organization membership Restricting to a single enterprise connection ensures a consistent and predictable identity model. ### 2. Security and account Integrity Allowing multiple enterprise connections introduces significant security risks: - **Risk of account hijacking:** If a user can link multiple IdPs, and identity claims like email or subject ID (`sub`) overlap or are not verified consistently, it becomes possible for unauthorized users to gain access to another user’s account. - **Inconsistent identity claims:** Different IdPs use different formats and identifiers. One provider may use an email address, another a unique internal ID. Reconciling these automatically increases the risk of incorrect mappings and privilege escalation. - **Reduced auditability:** Security audits and access logs rely on a single, traceable identity. If a user can authenticate through multiple IdPs, it becomes harder to guarantee that all actions are traceable to a single, verified identity. - **Clear accountability:** With one connection per user, the responsibility for identity management, password resets, session revocation, and breach response remains clearly with the source identity provider. ### 3. Simplified tenant and access management In multi-tenant applications, each enterprise typically has its own workspace or organization. Supporting one IdP per user: - Keeps tenant boundaries clean - Prevents role or permission leakage between organizations - Simplifies access control logic ## What if someone needs access to multiple organizations? We support users belonging to multiple organizations within Kinde. In edge cases (such as contractors working across companies) we recommend adding [enterprise connections at the organization level](/authenticate/enterprise-connections/enterprise-connections-b2b/). This means the user signs in directly to the relevant organization, with no confusion about where to be routed. This feature is only available on the Kinde Scale plan. If you are not on the relevant plan, other ways to handle this include: - Use separate emails for each organization - Use different auth methods per organization ## Built for security, designed for clarity This choice to allow only one enterprise identity per user aligns with industry best practices and helps keep your users, data, and systems secure. By enforcing this, Kinde provides a stable and trusted identity layer you can build on with confidence. If you have any questions about more advanced SSO or identity configurations, [contact our team](https://kinde.com/contact). We’re happy to help.
# Authenticate - Auth guides - Mixed auth set up for B2B and B2C
> Complete guide to setting up unified authentication for mixed B2B and B2C businesses using Kinde Scale plan features.
Last updated: 2025-01-16
B2B, B2C, mixed authentication, enterprise connections, SAML, organizations, home realm discovery
authenticate
If you have an app or site that supports a mix of business customers and direct customers, this guide shows you how to set up authentication in Kinde to meet both these needs. For example, say you run a finance business and you have separate sign-ins for accounting business partners and direct customers. Accounting businesses sign in with an enterprise identity, e.g. SAML and direct customers sign in with email and an OTP. This topic explains how to create a simple, unified experience for both groups. ## You’ll need the Kinde Scale plan To set up authentication for a mixed B2B and B2C business that includes multiple enterprise connections, you need to be on the [Kinde Scale plan](https://kinde.com/pricing/). This is the only Kinde plan that gives you access to the features you need: - Multiple enterprise connections (e.g. SAML) - Advanced organizations - for managing users and access for business customers You get 5 enterprise connections and 5 advanced organizations included with Kinde Scale. You can add more, but costs apply. ## How to build a unified sign-in experience A unified experience is where everyone signs in through the same sign in screen, and they are routed to the relevant workflow for authentication.  This simplifies the sign in experience for all your users, including your enterprise connections. ### Example of a unified authentication experience This is what happens behind the scenes with the auth setup.  ### Step 1: Set up auth for your B2C users In this scenario, your direct customers will sign in with email and a one-time-passcode (OTP). To set this up: 1. [Enable email + code authentication in your business.](/authenticate/authentication-methods/passwordless-authentication/) 2. [Set email + code as the sign in method in your default organization.](/authenticate/manage-authentication/organization-auth-experience/) 3. (Optional) [Set an organization policy to allow users to sign up to the default org using an email address](/build/organizations/allow-user-signup-org/). ### Step 2: Set up auth for your B2B users Authentication for business customers can be more complex, with additional security considerations and set up time involved. For example, a partner business may require employees to only access your web app using their business email and for authentication to be centralised with their own identity provider via SAML. Let’s go through the process for setting up 5 SAML enterprise connections for 5 different business customers. 1. [Add 5 separate enterprise connections to Kinde](/authenticate/enterprise-connections/about-enterprise-connections/). E.g. EC1, EC2, EC3, and so on. 1. Configure each connection with the domain information, including email domains in the [home realm discovery](/authenticate/enterprise-connections/about-enterprise-connections/#home-realm-discovery) field. You may need to ask the customer’s IT team for this information. 2. (Recommended) Switch on the **Create user on sign up** option to [enable JIT provisioning](/authenticate/enterprise-connections/provision-users-enterprise/). 2. [Create 5 organizations](/build/organizations/add-and-manage-organizations/), one for each business customer (and connection), and select only [the relevant enterprise connection for each organization](/authenticate/manage-authentication/organization-auth-experience/). For example: | For this org… | Switch on this auth connection… | | -------------- | ------------------------------- | | Organization 1 | EC1 (domain x home realm) | | Organization 2 | EC2 (domain y home realm) | | Organization 3 | EC3 (domain a home realm) | | Organization 4 | EC4 (domain b home realm) | | Organization 5 | EC5 (domain c home realm) | 3. In each organization: 1. Go to **Policies** and add the relevant domain to the **Allowed domains** field. 2. Select **Auto-add users from allowed domains**. This activates JIT provisioning for users signing up from this domain. 3. Select **Save**. With home realm discovery and allowed domains set, when a user enters an email that matches the domain name they will be routed through that enterprise connection. There is no need for them to self-select which connection they belong to. ### Step 3: Enable authentication for your application To achieve the above scenario, all the supported sign-in methods need to be switched on in your application. For example, switch on Email + code, EC1, EC2, EC3, EC4, and EC5. 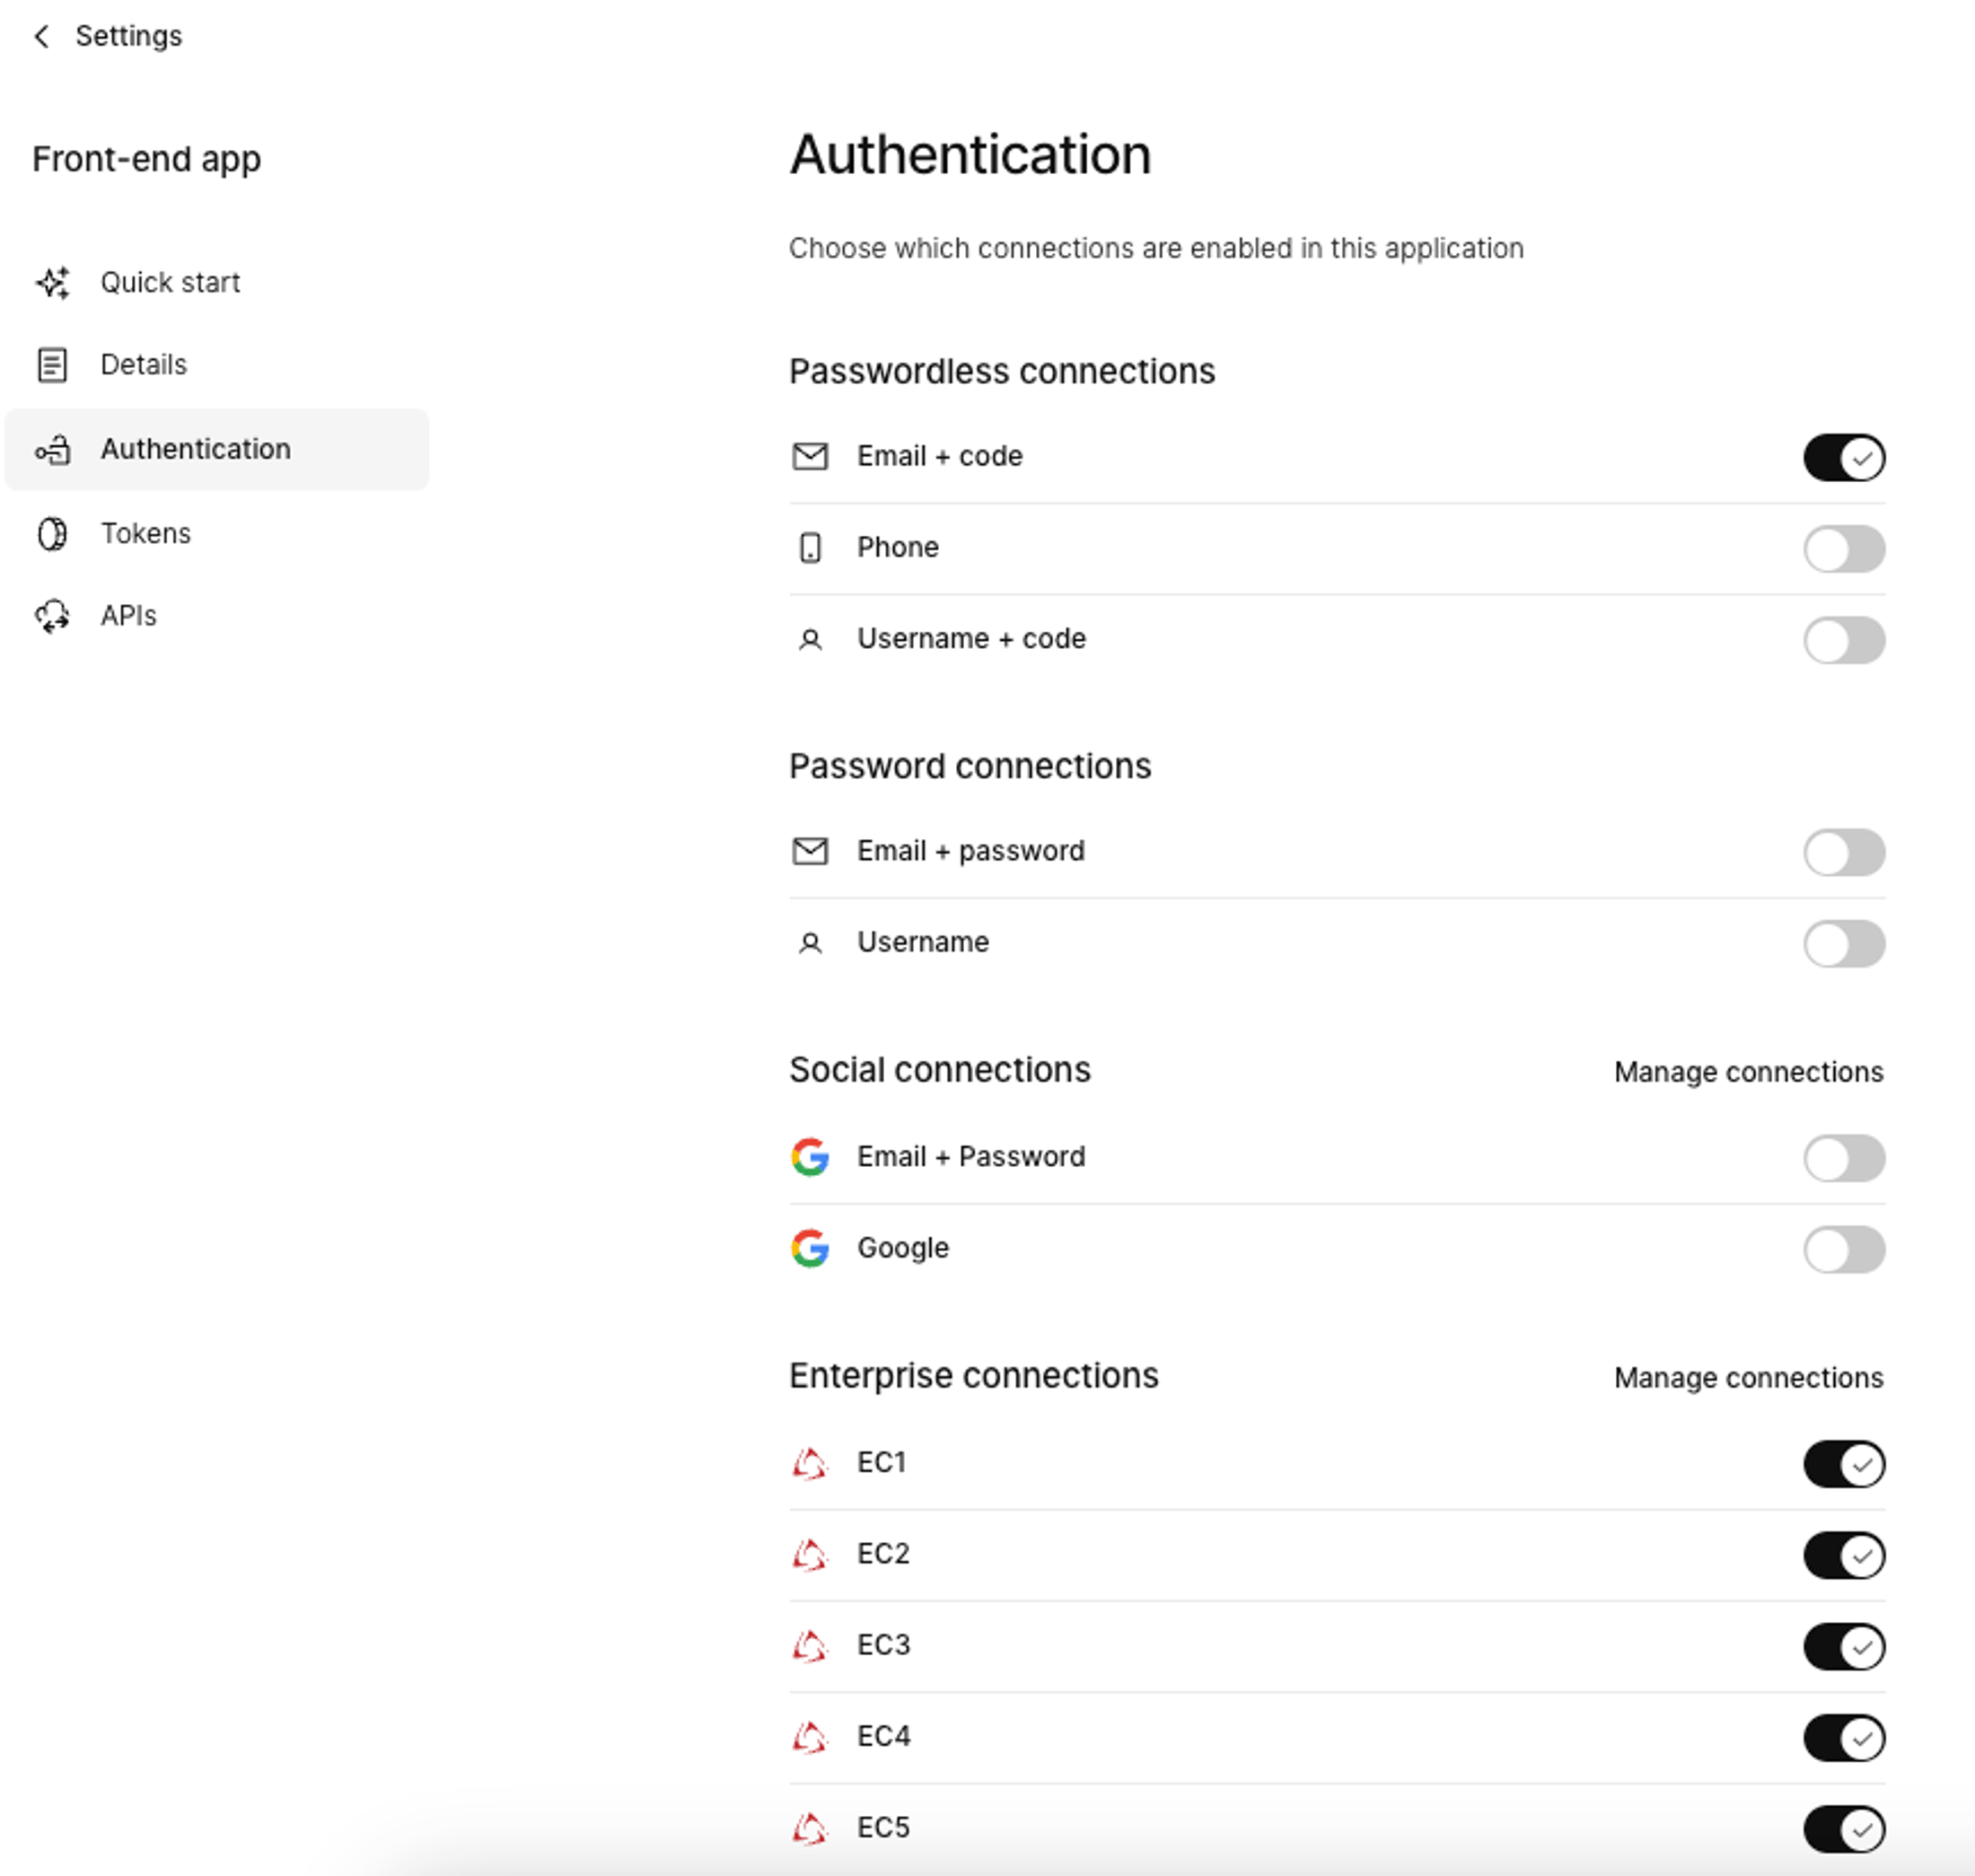 ## Optimize your auth flow This unified model of authentication can be extended to 10’s or 100’s of organizations, all while maintaining the same sign in screen. Other situations you can cater for include: - [Adding MFA for an organization's users](/authenticate/multi-factor-auth/mfa-per-org/) - Adding other [enterprise connections](/authenticate/enterprise-connections/about-enterprise-connections/) (e.g. [Google Workspace](/authenticate/enterprise-connections/custom-saml-google-workspace/) or [Microsoft Entra ID](/authenticate/enterprise-connections/azure/)) - [Auto-assigning user roles](/manage-users/roles-and-permissions/default-user-roles/)
# Authenticate - Auth guides - Pass parameters to identity providers
> Learn how to pass static and dynamic parameters to identity providers during authentication for improved user experience.
Last updated: 2025-01-16
upstream params, identity provider, OAuth 2.0, SAML, login_hint, prompt, account switcher
authenticate
You can pass provider-specific parameters to an Identity Provider (IdP) during authentication. These are also known as 'upstream params'. The values your pass can either be static per connection or dynamic per user. There's a number of reason why you might want to use upstream params: - to create a smoother sign in experience - by passing the email through - to offer an account switcher (such as the Google account switcher) during sign in Upstream params are available for OAuth 2.0 connections, e.g. [social connections](/authenticate/social-sign-in/add-social-sign-in/), [Entra ID OAuth 2.0 enterprise connection](/authenticate/enterprise-connections/azure/), and as part of [advanced configurations](/authenticate/enterprise-connections/advanced-saml-configurations/) in SAML connections. ## Limitations Every identity provider has their own set of supported parameters and values, so you'll need to check their documentation to determine which URL parameters are supported. ## Static parameters Static parameters can be useful when you have specific values you always want to pass on to the IDP. These are set in the connecction configuration screen.  The Upstream parameter field accepts JSON and the structure is as follows: ```json { "": { "value": "" } } ``` Replace `` with the name of the parameter you wish to pass upstream to the IDP. Replace `` with the value of the parameter you wish to pass upstream. ### Example: Force the google account selector to display on sign in If you want Google to always show the account selector even if the user is already logged in with a Google account, pass the `prompt=select_account` parameter from Kinde. This is how that would look: ```json { "prompt": { "value": "select_account" } } ``` Now, when your user clicks on the Google button and Kinde creates the URL to redirect to Google, it will append`&prompt=select_account`. ## Dynamic parameters Dynamic parameters cover the case where you don't know the value of the parameter ahead of time, and it needs to be populated on the fly during the auth flow. For example, if you need to pass on a parameter that was provided to Kinde in the auth URL. This is the structure. ```json { "": { "alias": "" } } ``` The `alias` keyword tells Kinde which parameter from your auth url to use, and the value to pass upstream to the IDP. Here is an example where we provide `login_hint` as part of the auth URL, where the email [`&login_hint=hello@example.com`](mailto:&login_hint=hello@example.com) is included on the URL. ```html https://.kinde.com/oauth2/auth ?response_type=code &client_id= &redirect_uri= &scope=openid%20profile%20email &state=abc &login_hint=hello@example.com ``` In this case both Kinde and the IDP use the parameter name `login_hint` so the configuration is the same on both sides: Add this to the connection configuration: } } ```` In this case we are saying pass the `login_hint` parameter upstream to the IDP with the value Kinde received in the `login_hint` auth url param. So `&login_hint=hello@example.com` would be passed on to the provider. Where the `alias` becomes especially powerful is when you want to re-map a parameter name to match the one an IDP expects. For example, let’s say that our IDP expects `username` instead of `login_hint` for the same value, in this case our JSON would look like this: ```json { "username": { "alias": "login_hint" } } ```` In this case we are saying pass the `username` parameter upstream to the IDP with the value Kinde received in the `login_hint` auth url param. We remap the email value from `login_hint` to `username` and the parameter `&username=hello@example.com` would be passed on to the IDP. ## Kinde-provided aliases When an email address is populated during the auth flow, we make this available via the `login_hint` alias. You might use this if you are using Home realm discovery with an Entra ID OAuth2.0 connection, and you want to pass the URL that the user entered on Kinde as the `login_hint`, upstream to Entra, to prevent the user having to enter their email twice. If the user enters `hello@example.com` in the Kinde email field with the following configuration active, we set the `login_hint` parameter to `hello@example.com` via the Kinde provided alias. ```json { "login_hint": { "alias": "login_hint" } } ``` ## Multiple parameters You can send multple parameters this way and mix-and-match between dynamic and static in the same configuration. For example if the user entered `hello@example.com` and the following was configured: ```json { "prompt": { "value": "login" }, "username": { "alias": "login_hint" } } ``` This would result in `&prompt=login&username=hello@example.com` ## Supported aliases The values which can be used as an `alias` are: - `prompt` - `login_hint` If you need other aliases added, let us know via a [feedback form](https://updates.kinde.com/).
# Authenticate - Authentication methods - Email authentication
> Comprehensive overview of email authentication methods including verification, account linking, and customization options.
Last updated: 2025-01-16
email authentication, email verification, account linking, Gravatar, login_hint, profile pictures
authenticate
The most common application signup and sign in method for users is email. Kinde supports a number of approaches to email authentication. You can set up email authentication so that: - users sign up with their preferred email, but don’t need a password - users sign up with their preferred email and set their own password - only [users you invite](/authenticate/custom-configurations/disable-sign-up/) can sign up and sign in using email ## Verification code email from Kinde to your users To verify a user, Kinde sends a verification code to the email they sign up with. If you’ve also enabled passwordless authentication, this is also where the one time code is sent each time they sign in. The verification email has limited customizations. - You can add your own logo - You can change the sender name, but you cannot change the sender email address - You cannot edit the email content - Email content references your [business] name in Kinde. For example: ## All email sign-ups must verify their email address If your authentication method requires users to sign up with an email, they will be prompted to verify their email address using a one time code. Even if they subsequently sign on using their own password, the user must verify their email the first time by entering a one time code. If a user signs up via a social provider that does not require an email (such as Twitter or Apple), or via another OAuth2 protocol that does not pass the email to us, they will be prompted to enter an email address so their account can be verified. ## Duplicated emails in user identities Unlike some other authentication providers, Kinde automatically matches accounts on sign up by matching verified email addresses. This means that if a user signs up with Google the first time, and they come back and sign up again with Slack, and the same email is detected (and we know they are both verified), then the accounts get linked. This reduces duplication and creates a better experience for users. ## Pre-populate the email field on sign in If you only allow users that you invite to sign up or sign in to your app, you can pre-populate the email field in the sign in window. This can only be achieved by including the `login_hint` parameter as part of the `login` method. It cannot be set in the Kinde UI. When your project knows which user it is trying to authenticate, it can provide their email in this parameter as a hint to Kinde. Passing this hint pre-fills the email box on the sign-up and sign-in screens. ## How profile pictures are passed to Kinde Typically, Kinde receives user profile pictures via the email provider, e.g. Google. If no picture is attached to a profile, Kinde sets the picture to use a Gravatar URL instead. See also [Switch off Gravatar fallback](/authenticate/custom-configurations/authentication-experience/#switch-off-gravatar-fallback-for-profile-pictures).
# Authenticate - Authentication methods - Email deliverability in Kinde
> Guide to email deliverability best practices including custom email senders, authentication records, and troubleshooting delivery issues.
Last updated: 2026-03-03
email deliverability, SMTP, SPF, DMARC, DKIM, email authentication, spam prevention
authenticate
Kinde encourages users to configure their own email sender, so that verification and other emails are sent from your own business, and not Kinde. When emails are sent via Kinde, we support the email routing, and are proactive about monitoring verification email deliverability and speed. This topic describes email delivery via Kinde, deliverability factors, and some common reasons why delivery can fail. ## Manage your own email sender By default, when you first start using Kinde, all emails are sent from @kinde.com. But you can set up your environments to use your own email, so users receive authentication emails from @yourbusiness.com. You’ll want to configure this before your production environment goes live. Add your SMTP details under **Settings > Environment > Messaging > Email Sender**. See [Customize email sender](/get-started/connect/customize-email-sender/). ## Emails sent from Kinde Even if you enter custom sender details, these emails will still be sent from Kinde: - Invitation to join business team - triggered by manual or API addition of team member - Warnings and notifications of data export ## Deliverability factors Email delivery is dependent on a number of factors. ### IP address reputation and blocklists Email providers check against a pool of IP addresses and domain blocklists to help protect against bad actors. They constantly monitor to make sure IP addresses are not on any of these lists. If you experience issues, check that your domain doesn't exist on any of these lists. ### Domain name reputation Every domain name (i.e. `example.com`, `kinde.com`, etc.) has its own reputation score. Newer domains do not have a high score, and this may impact deliverability. ### Setup a real email address Email providers will check if there's an actual mailbox behind the "from address" of an email. Make sure when you set your custom email sender, that you use a real email address such as `notifications@yourbusiness.com`. ### Email content Kinde email content is optimized to (as far as we can) ensure our communications don’t get identified by providers as spam. Maintaining deliverability is one of the reasons we have limited the ability to edit email content. ### SPF, DMARC, and DKIM for email authentication SPF (Sender Policy Framework), DMARC (Domain-based Message Authentication, Reporting, and Conformance), and DKIM (DomainKeys Identified Mail) are email authentication methods used to combat email spoofing, phishing, and other forms of email fraud. These records add a digital signature to every outgoing message, which allows your provider to verify that emails were actually sent from you. Almost all email providers look for these to be set as a strong signal of legitimacy. ### Strengthen email authentication with your provider You and your email provider are ultimately responsible for ensuring the right level security and risk management for email authentication. Because Kinde allows you to use any provider you like, check their documentation to find out if their policies and approach meet your needs. ## Provider-related issues Despite all we can do, verification emails still occasionally end up in spam or quarantined. The cases below are specific, but might help you troubleshoot is they arise. ### Gmail Delivery addresses that are part of Google Workspace can sometimes be delayed by about 4 minutes, due to pre-delivery message scanning. It can help to sign up for Gmail's postmaster tools, to help troubleshoot issues. ### Microsoft (Hotmail / Outlook / Office365) Microsoft Defender's aggressive anti-spam filters sometimes stop verification emails reaching certain Outlook inboxes. Then the email is placed in quarantine and the administrator has to restore it, for it to be delivered. With Kinde, this should be rare, as we only send OTPs and not magic links. Access Outlook Sender Support and check you are following recommendations.
# Authenticate - Authentication methods - Enable Passkeys to sign in users
> Enable WebAuthn passkeys for passwordless sign-in—set environment policies, org overrides, and roll out from optional to mandatory
Last updated: 2026-06-25
passkeys, webauthn, passwordless sign-in, fido2, passkey policy, organization passkey override, passkey rollout, security key
authenticate, authentication-methods, passkeys
Passkeys are a passwordless sign-in method based on the Web Authentication (WebAuthn) standard. Users authenticate with device biometrics (Face ID, Touch ID, Windows Hello), a platform authenticator, or a FIDO2 security key — no password required. Passkeys complement your existing auth methods rather than replace them. [Email/password](/authenticate/authentication-methods/password-authentication/), [passwordless OTP](/authenticate/authentication-methods/passwordless-authentication/), [social sign-in](/authenticate/social-sign-in/add-social-sign-in/), and [enterprise connections](/authenticate/enterprise-connections/about-enterprise-connections/) continue to work as before. When enabled, users can sign in with a passkey from the login page, and credential users can be prompted to register one after sign-in.  ## Enable passkeys in Kinde 1. Go to your Kinde dashboard > **Settings > Policies**. 2. Scroll down to the **Passkeys** section. 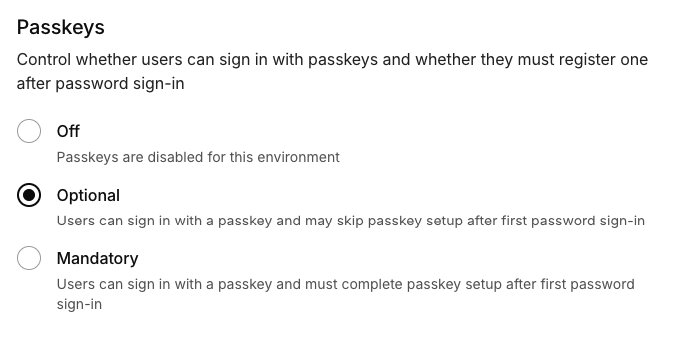 3. Select **Optional** or **Mandatory** to enable passkeys. 4. Select **Save**. This sets the default passkey policy for the entire environment. ### Organization override You can override the default passkey policy for an organization. 1. Go to your Kinde dashboard > **Organizations**, and select the organization you want to configure. 2. Select **Policies**. 3. Under **Passkeys**, enable **Override environment passkey settings**. 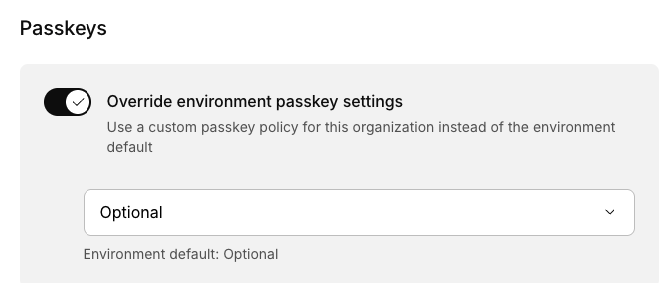 4. From the dropdown menu, choose **Off**, **Optional**, or **Mandatory** for that organization. 5. Select **Save**. When you configure an org override, the UI shows the current environment default. ### Passkey policies Passkeys are controlled by a **policy** with three values: | Policy | Behavior | | --- | --- | | **`off`** | Passkeys are disabled. No sign-in button, no setup prompts, no account portal passkey management. | | **`optional`** | Passkeys are enabled. Users see **Sign in with passkey** on login. After credentials sign-in or registration, users without a passkey are prompted to set one up, but can choose **Not now**. | | **`mandatory`** | Same as optional, except users **must** complete passkey setup before continuing. The skip option is not shown. | The default policy for new environments is **`off`**. When passkeys are enabled, users can: - **Sign in with a passkey** from the login page - **Register a passkey** after signing in with email/password (or other credentials) - **Manage passkeys** from the account portal (add, rename, delete) Passkeys are stored per user per environment. Each registered passkey is linked to a passkey identity on the user record. ### Policy resolution - **Environment policy** — the default for all organizations in the environment. - **Organization override** — an organization can override the environment default with its own policy. When an organization override is disabled, the organization inherits the environment policy. ## User experience ### Post-login passkey setup  After a user signs in or registers using **credentials** (email/password, username, or phone OTP), Kinde may prompt them to set up a passkey if: - Passkeys are enabled for the relevant organization - The user does not already have a passkey - Policy is `optional` or `mandatory` - For `optional` only: the user has not previously chosen **Not now** The setup screen explains that the user can use device biometrics or a security key for faster sign-in next time. | Policy | Setup screen | | --- | --- | | `optional` | **Continue** registers a passkey; **Not now** skips and records the decline | | `mandatory` | **Continue** only — setup is required to proceed | Passkey setup is not triggered after social or enterprise SSO sign-in. ### Sign in with passkey  When passkeys are enabled (`optional` or `mandatory`), the login page shows a **Sign in with passkey** button. - Shown only on **sign-in**, not sign-up (users need an existing account and a registered passkey). - Displayed alongside credential and SSO options according to your auth page layout. - Uses the browser WebAuthn API to perform a challenge–response assertion. Users who have never registered a passkey cannot use this button to create an account. ### Account portal Authenticated users can manage passkeys under **Profile** in the account portal when passkeys are enabled: 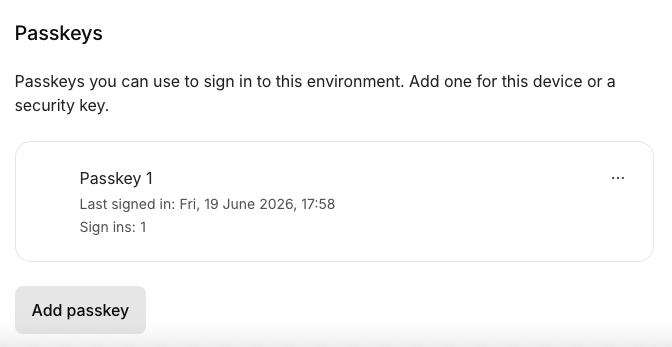 - View registered passkeys (name, last sign-in, sign-in count) - **Add passkey** for the current device or a security key - Rename a passkey - Delete a passkey Admins can also view a user's passkeys from the **Users** section in the Kinde admin.  ## Recommended rollout ### Start with optional 1. Set environment policy to **`optional`**. 2. Confirm **Sign in with passkey** appears on your login page. 3. Sign in with email/password as a test user and complete passkey setup. 4. Sign out and sign back in with the passkey. 5. Subscribe to passkey lifecycle [webhooks](/integrate/webhooks/add-manage-webhooks/) if you need visibility. ### Move to mandatory (if needed) Use **`mandatory`** when you want every user who signs in with credentials to register a passkey after first sign-in. Consider: - Users on devices without WebAuthn support will be blocked at setup - Social/SSO-only users are unaffected (they do not currently see the setup prompt) - Organization overrides let you pilot mandatory policy on a subset of orgs first ### Disable passkeys Set policy to **`off`**. Existing passkey credentials remain stored but are not usable until re-enabled. Users cannot sign in with or manage passkeys while disabled. ## Technical details Passkeys use the Web Authentication (WebAuthn) standard. ### Domain and HTTPS - The **Relying Party ID (RP ID)** is derived from your Kinde auth domain (hostname without port). - **HTTPS is required** in production. HTTP is permitted only for `localhost` during local development. - Your custom auth domain must be correctly configured; passkeys are bound to that domain. ### Browser and device support Users need a browser and device that support WebAuthn. This includes: - Modern Chromium, Safari, and Firefox browsers - Platform authenticators (Touch ID, Face ID, Windows Hello) - FIDO2 hardware security keys ## FAQ ### Do passkeys replace passwords? No. Passkeys are an additional sign-in method. Users who register a passkey can still sign in with email/password unless you restrict that separately. ### Can a user have multiple passkeys? Yes. Each device or security key can be registered separately (for example, laptop, phone, YubiKey). ### What happens if a user skips optional setup? Kinde records the decline. They will not be prompted again until they clear that state (for example, by registering a passkey from the account portal, or if that decline is reset administratively). ### Does passkey sign-in work for new user registration? No. The **Sign in with passkey** button is sign-in only. New users register with credentials (or SSO), then may be prompted to add a passkey. ### Can I configure passkeys per application? Policy is set at the environment or organization level, not per application. All apps in an environment share the same passkey policy (subject to org overrides). ### What Kinde plan do I need to use passkeys? All paid plans support passkeys (Pro, Plus, Scale, Enterprise). See [Kinde pricing](https://kinde.com/pricing/) for more information.
# Authenticate - Authentication methods - Password authentication
> Complete guide to password authentication in Kinde including security features, password strength requirements, forgot password flow, and password reset options.
Last updated: 2026-03-26
password authentication, password strength, password reset, security, hash encryption, MFA, forgot password
authenticate
Password authentication is where an end user supplies and maintains their own password to access your app or project. Depending on your authentication needs and security requirements, you might be okay to allow users to authenticate with a password. However, we recommend using a more secure method, such as through one-time-passwords, or by adding [multi-factor authentication](/authenticate/multi-factor-auth/about-multi-factor-authentication/) to the sign in experience. ## Passwords and identity verification To reset a password for a user, or allow them to reset their own password, they need to have a [verified contact identit](/authenticate/about-auth/identity-and-verification/)y such as an email in their Kinde profile. You’ll need this to securely set a temporary password or to trigger a password reset for a user. ## Password visibility and encryption The way Kinde is built ensures that user passwords can only be stored as hash-encrypted strings, meaning they are not visible and cannot be deciphered or accessed to be exploited. Neither you in your business or Kinde can see any passwords that a user has set. ## Password strength Kinde supports the following password requirements: - 8 character minimum - Blocking of 1,000,000 most common passwords - 5 incorrect attempts locks account out for 5 minutes - No complexity requirements or character limitations - combined with allowing long passwords, this provides better security and ease of use. For example, it’s harder for a computer to crack `FiremanSoccerPoodleLemon` than `FireSoc!22`, and also easier for a human to remember. If using passwords for authentication, we do recommend adding multi-factor authentication as a requirement or option, for added security. ## Options for resetting a password There are several ways to reset a user’s password. ### The user can select ‘forgot password’ Users can trigger a password reset by selecting ‘forgot password’ when they attempt to sign in. When they do this, they will be sent a one-time passcode via email. When they enter the code, they will be prompted to reset their password. As an admin, you can also force a reset on behalf of the user — see [Reset a user’s password](/manage-users/access-control/reset-user-password/). ### Force a password reset via Kinde or API You can trigger a password reset via the Kinde admin or via API. This is only suitable if you have an email for the user, as they will be sent a one-time passcode when they try to sign in next. They must enter the code to reset their password. See [Reset a user’s password](/manage-users/access-control/reset-user-password/). ### Issue a temporary password You can set a single-use password for new or existing users via the Kinde admin or via the Kinde Management API. Once you set the password, you need to communicate it to the user via your own chosen method - it cannot be sent from Kinde. The user enters the temporary password to sign up or sign in, then they set their own password. See [Set a temporary password](/manage-users/access-control/set-temporary-password/). ## Enable password authentication across apps 1. Go to **Settings > Authentication**. 2. In the **Password** section, select **Configure** on the relevant password tile: **Email + password** or **Username**. A configuration window opens. 3. Scroll to the bottom and switch password authentication on for the apps you want. 4. Select **Save**. ## Enable password authentication for a single app 1. Go to **Settings > Applications**. 2. Select **Configure** on the relevant application tile. 3. Select **Authentication** in the menu. 4. Switch on the password options you want. 5. Select **Save**.
# Authenticate - Authentication methods - Passwordless authentication
> Guide to passwordless authentication using one-time passcodes (OTP) via email or phone, including setup and security considerations.
Last updated: 2025-01-16
passwordless authentication, OTP, one-time passcode, email code, phone code, security
authenticate
Passwordless authentication is a type of authentication that does not require end-users to set or maintain passwords for access to an application. Instead, they authenticate using a one-time passcode (OTP). ## About one-time passcodes (OTPs) Kinde does not support magic links as a password alternative, instead, we prefer to use one-time passcodes (OTPs) as they are more secure, and require manual entry as opposed to a single click. For example, someone with access to your email could click a link to get instant access to an application, but they cannot use the code unless they have initiated the correct sign in flow and have your sign-in identity as well. If you receive the OTP via SMS, someone would need to have your device and unlock code, to access it. A OTP can be issued via email or phone, depending how you have set up authentication. It is also common to use OTPs as a factor in [multi-factor authentication](/authenticate/multi-factor-auth/about-multi-factor-authentication/). Passcodes issued from Kinde expire after 2 hours. ## Set up passwordless authentication 1. In Kinde, go to **Settings >** **Authentication**. 2. In the **Passwordless** section, select **Configure** on the relevant tile. 3. If you select the **Email + code** tile: 1. Select which applications will use this authentication method. 2. Select **Save**. 4. If you select the **Phone** tile: 1. Select which applications will use this authentication method. 2. Select **Save**. 5. If you select the **Username + code** tile: 1. Select which applications will use this authentication method. 2. Select **Save**. ## If a user does not receive a code It should not happen often, but occasionally users do not receive their passcode. Here's a few suggestions. - Tell the user to check their junk folder - some email providers, systems, and devices have security in place to prevent spam. An OTP from an unknown provider (like Kinde) might get accidentally treated as such. - Once or twice we have come across a domain provider who has added Kinde to a denylist and OTPs from us get rejected. You'll need to contact us so we can investigate and arrange allowlisting. This is a very rare cause of failed OTPs. ## Attack protection settings Kinde allows you to control the number of sign-in attempts a user gets, how long they get locked out after a failed sign-in attempt, etc. See [Attack protection](/build/set-up-options/attack-protection/).
# Authenticate - Authentication methods - Phone authentication
> Complete setup guide for phone/SMS authentication using Twilio, including configuration, MFA integration, and message formatting.
Last updated: 2026-03-03
phone authentication, SMS, Twilio, MFA, A2P messaging, 10DLC, verification code
authenticate
You can allow users to use their phone as a primary method for authentication. This is a passwordless method, where the user is sent a verification code via SMS (or [WhatsApp](/authenticate/authentication-methods/whatsapp-authentication/) when configured). SMS can also be included as a secondary factor if you have [multi-factor authentication](/authenticate/multi-factor-auth/about-multi-factor-authentication/) set up. ## (Existing phone auth Twilio users only) Switch on SMS for MFA 1. In Kinde, go to **Settings > Environment > Messaging > SMS**. 2. Scroll to the bottom and switch on the **Use this service for SMS MFA** option. 3. Select **Save**. ## Benefits of using a third-party SMS service instead of Kinde - Gives you full control over the SMS delivery nuances, such as SenderID, country registrations, and detailed delivery metrics. - You can register dedicated short codes or sender IDs in countries that have strict SMS sending regulations like Ireland, NZ and Canada, which will greatly improve deliverability. - Access to delivery logs and other service quality details for troubleshooting. ## SMS provider requirements (Twilio) SMS authentication requires the services of a messaging provider, in this case, [Twilio](https://www.twilio.com/en-us). You need a [Twilio](https://www.twilio.com/en-us) business account to ensure messaging works for local and overseas phone numbers. Phone authentication interactions are also known as [A2P (Application to Person)](https://www.twilio.com/docs/glossary/what-a2p-sms-application-person-messaging) messaging. Before you implement A2P, check if you need to register your business for 10DLC (10 Digit Long Code) support to be able to send messages, as this is required in some locations. We also recommend you check [Twilio’s guidelines for setting up messaging](https://www.twilio.com/en-us/guidelines/sms), and carefully follow procedures for registration, and SMS policies for all relevant countries. ## What you need You’ll need the following details that are in the dashboard of your [Twilio account](https://www.twilio.com/en-us). - The SID of your Twilio account - The Auth Token for your Twilio account - Your Twilio phone number or the Messaging Service SID (if you set one up)  Refer to the [Twilio documentation](https://www.twilio.com/docs/messaging/services/tutorials/send-messages-with-messaging-services) for assistance setting up. ## Configure phone SMS auth in Kinde After you set this up, you can use SMS for both phone authentication and SMS MFA. 1. In Kinde, go to **Settings > Environment > Messaging > SMS**. 2. Select the **Default country** that you want to show on the authentication screen when users sign in. 3. Enter the Twilio details from your Twilio account (see above) in the relevant fields. 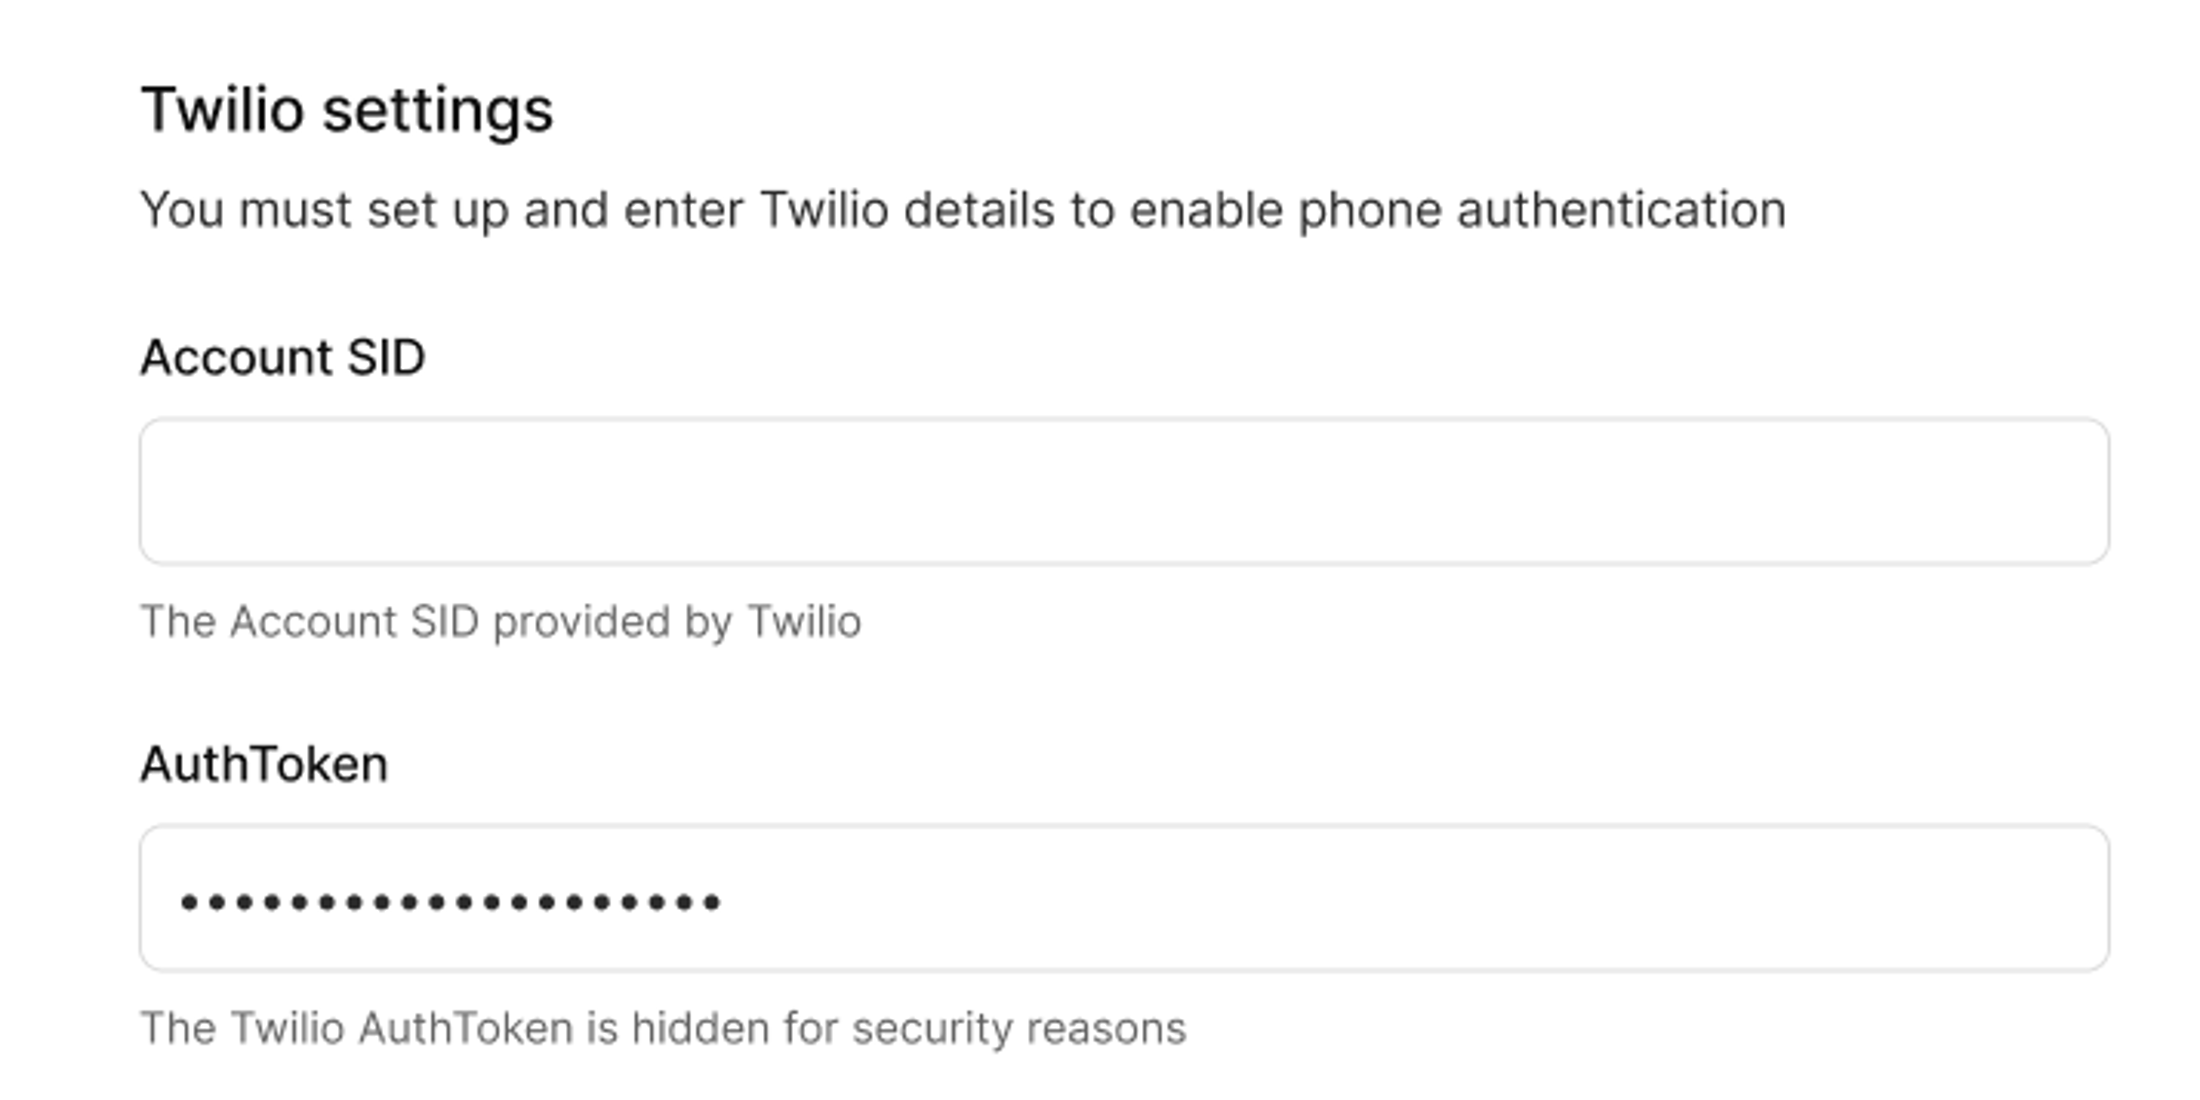 4. In the **SMS source** field, select either the **Use** **Messaging service** or **Use phone number**. Verification codes will be sent from whichever you choose. 5. Depending on your selection in the previous step, enter either the **Messaging service SID** or Twilio **Phone number** in the relevant field.  6. Select if you want to use a fallback service if the provider service is interrupted.  7. Select **Save**. ## Switch on phone authentication for an application After you have set up Twilio details, you’re ready to switch on phone or SMS auth for your applications. 1. Go to **Settings > Environment > Authentication**. 2. In the **Passwordless** section, select **Configure** on the **Phone** tile. 3. Switch on the auth method for the applications you want. 4. Select **Save**. ## Switch on SMS as a factor in MFA If MFA is required or optional for your users, you may want to use the Twilio service for SMS MFA. 1. Go to **Settings > Environment > Multi-factor auth**. 2. Under **Additional authentication methods**, switch on **SMS**. 3. Select **Save**. ## SMS message format You can’t customize the code message that user’s receive. We use a standard format as follows, to allow for easier translation. ``` Your verification code is [xxxxxx] ``` ## Connection ID When you configure phone authentication, you’ll see that a Connection ID is automatically assigned. If you’re building a [custom authentication experience](/authenticate/custom-configurations/custom-authentication-pages/), you’ll need the ID to trigger the phone authentication workflow.
# Authenticate - Authentication methods - Set up authentication methods in Kinde
> Enable passwordless, password, social, enterprise, and custom auth for your Kinde apps—from one dashboard.
Last updated: 2026-06-11
set up authentication, passwordless authentication, email authentication, social sign-in, enterprise authentication, custom OAuth, custom SAML, management API
authenticate, authentication-methods, passwordless, enterprise-connections
Kinde supports many authentication options that let you control how users access your applications. You can set different authentication requirements for different applications and for different organizations (if you use [organizations](/build/organizations/add-and-manage-organizations/)). Set up all your required authentication methods at the Environment level first. 1. Go to **Settings > Environment > Authentication**. 2. Follow the instructions below for your preferred authentication method: ## Passwordless authentication ### Email + code A user enters their email address and Kinde sends a one-time passcode (OTP) to that address. 1. Under the **Passwordless connections** section > **Email + code**, select **Configure**. 2. In the popup that appears, enable the applications that will use this authentication method. 3. Select **Save**. ### Phone You can allow users to authenticate using their phone number as their sign-in identity. 1. Under the **Passwordless connections** section > **Phone**, select **Configure**. 2. In the popup that appears, enable the applications that will use this authentication method. 3. Select **Save**. ### Username + code You can allow users to authenticate using a username as their sign-in identity. 1. Under the **Passwordless connections** section > **Username + code**, select **Configure**. 2. In the popup that appears, enable the applications that will use this authentication method. 3. Select **Save**. ## Password authentication ### Email + password 1. Under the **Password connections** section > **Email + password**, select **Configure**. 2. In the popup that appears, enable the applications that will use this authentication method. 3. Select **Save**. ### Username Users authenticate with a username and password. 1. Under the **Password connections** section > **Username**, select **Configure**. 2. In the popup that appears, enable the applications that will use this authentication method. 3. Select **Save**. ## Social authentication You can allow users to authenticate using social profiles such as Google, Facebook, LinkedIn, etc. 1. Under the **Social connections** section, select **Add connection**. 2. In the popup that appears, select the social apps you want. 3. Select **Save**. 4. Set up the connection for each social app you selected. See the [list of social sign-in providers supported by Kinde](/authenticate/social-sign-in/add-social-sign-in/). ## Enterprise authentication You can allow users to authenticate using enterprise profiles such as Microsoft Entra ID, Google Workspace, etc. 1. Under the **Enterprise connections** section, select **Add connection**. 2. In the popup that appears, select the enterprise app you want. 3. Select **Save**. 4. Set up the connection for each enterprise app you selected. See the [list of enterprise sign-in providers supported by Kinde](/authenticate/enterprise-connections/about-enterprise-connections/). ## Custom authentication Kinde supports the following custom authentication methods: ### Custom OAuth 2.0 1. Under the **Social connections** section, select **Add connection**. 2. In the popup that appears, select **Custom OAuth 2.0**, then select **Next**. 3. Configure the connection details, then select **Save**. Read the full guide to setting up [custom OAuth 2.0 connections](/authenticate/custom-configurations/custom-oauth2-connection/). ### Custom SAML 1. Under the **Enterprise connections** section, select **Add connection**. 2. In the popup that appears, select **Custom SAML**, then select **Next**. 3. Configure the connection details, then select **Save**. Read the full guide to setting up [custom SAML connections](/authenticate/enterprise-connections/custom-saml/). ## Add and manage social and enterprise connections via API Use [Kinde’s management API](/kinde-apis/management#tag/connections) to manage social and enterprise connections. You can list connections, add new connections, retrieve connection details, and update existing connections.
# Authenticate - Authentication methods - SMS deliverability in Kinde
> Guide to SMS deliverability including regional considerations, sender ID configuration, and country-specific delivery rates.
Last updated: 2026-03-03
SMS deliverability, Twilio, sender ID, regional delivery, 10DLC, A2P messaging
authenticate
Kinde encourages customers to configure their own SMS sender, so that verification, country registrations, sender IDs, and deliverability metrics are controlled and managed by you. When SMS messages are sent via Kinde, we use our regional shared service provider and attempt delivery on a best-effort basis. As Kinde is a service provider, there are limitations when applying for dedicated short codes or sender IDs in countries with strict SMS-sending regulations. This topic describes SMS delivery via Kinde, deliverability factors, and some common reasons why delivery can fail. ## Manage your own SMS sender By default, when you first start using Kinde, all SMS messages are sent from Kinde's shared service provider. We recommend configuring your own SMS sender so that users receive authentication messages branded with your business. Configure this before your production environment goes live. Add your SMS details under **Settings > Environment > Messaging > SMS**. See [Set up phone or SMS authentication](/authenticate/authentication-methods/phone-authentication/) for step-by-step instructions. ## Deliverability factors when using Kinde's default SMS shared service provider Kinde provides no guarantees on SMS delivery and attempts delivery as best effort only. ### Countries with known good delivery due to Kinde involvement The following countries have been tested and are known to have good delivery due to Kinde registering with the respective regulatory bodies. - Australia (LONG CODE, SENDER ID) - Canada (LONG CODE) - Great Britain (SENDER ID) - Ireland (SENDER ID) - United States (TOLL FREE) ### Countries with known good delivery without Kinde involvement The following countries have known good delivery without Kinde registering with the respective regulatory bodies. - Generally the rest of the EU - South Africa ### Countries with known bad delivery The following countries have known bad delivery rates. - India - New Zealand - United Arab Emirates ## Sender ID Kinde has set up a shared Sender ID for all customers using the default SMS shared service provider. This cannot be changed. **Sender ID:** `KindeAuth` To brand the Sender ID to your business, you will need to configure your own SMS delivery provider. See [Set up phone or SMS authentication](/authenticate/authentication-methods/phone-authentication/). ## SMS content The content of the SMS is not editable due to strict one-time passcode requirements and industry best practices. An example of the SMS content is below. ``` 123456 is your one-time code to sign in to {Business Name} @business.kinde.com #123456 ```
# Authenticate - Authentication methods - Username authentication
> Guide to username-based authentication including unique constraints, sign-up flow, and integration with password/passwordless methods.
Last updated: 2025-01-16
username authentication, unique usernames, case insensitive, sign-up flow, identity verification
authenticate
Along with email and phone number, Kinde supports authentication where a username is the user’s sign-in identity. On sign-up or registration, the user will need to do a one-time validation of their identity via email - for security - but they can subsequently use a username to sign in. ## Usernames must be unique There are several ways usernames can be added to a user’s profile: - Manually in Kinde - Via API - Self-created by the user on registration - imported with user profiles Kinde treats usernames as case-insensitive. In other words, we ignore case. We do this because it eliminates the possibility of auth issues and fraud when two usernames are identical in every aspect except the case of one of their letters. We are happy to support users choosing an aesthetically pleasing username combination, like `RosyRose` or `BuilderBob`. We just don't also support separate identities for `rosYrosE` and `BUilderbob`. Regardless of how a username is added, it must be unique (in more than case). If a username already exists, an error will be returned. ## The sign-up flow For security reasons, Kinde doesn’t allow fully anonymous users. So when a user signs up, they will need to supply an email, in addition to a username. The email can then be used to verify their identity. The username can be supplied by you, or can be created by the user. ## The sign-in flow When a user signs in, they enter their username and proceed with a [password](/authenticate/authentication-methods/password-authentication/) or a [passwordless OTP](/authenticate/authentication-methods/passwordless-authentication/). Either way, it’s a quick process for sign in. ## Why an email is required In order to be sure that you are signing up a real person, you need to have a way of contacting new users to verify their identity. Without identity verification, the authentication experience you provide could be vulnerable to security threats, fraud, bots, etc. Once an email is verified, we add this email identity for the user. If the auth method is passwordless, this is where we send the OTPs. An email is also required for [password resets](/manage-users/access-control/reset-user-password/). ## Enable username authentication in Kinde 1. In Kinde, go to **Settings > Authentication**. 2. Select **Configure** on the **Username** (password) or the **username + code** (passwordless) tile. A configuration window opens. 3. Select which apps will support username authentication. 4. Select **Save**. The sign up flow will be updated for the applications you selected. ## Rules for usernames - Usernames must be unique - 2-64 characters, no spaces - Can include letters, numbers, -dashes, \_underscores (no special characters) - Case is ignored. Jane and jane are treated the same. You can bring your own validation rule using Workflows ([example](https://github.com/kinde-starter-kits/workflow-examples/blob/main/usernameValidation/customUsernameValidation.ts)) ## One password for multiple identities Users can only have a single password in Kinde. If you allow both email-password and username-password authentication for a user, the password is shared across both their identities. For example, changing a user’s password for username affects their email sign-in and vice-versa. See [the password rules](/authenticate/authentication-methods/password-authentication/#password-strength).
# Authenticate - Authentication methods - WhatsApp authentication
> Configure WhatsApp in Kinde to send OTP and MFA codes via WhatsApp, with fallback to SMS. Uses your Meta/WhatsApp Business account.
Last updated: 2026-03-03
WhatsApp, OTP, MFA, Meta, WhatsApp Business, messaging
authenticate
You can send one-time passcodes (OTP) and multi-factor authentication (MFA) codes via **WhatsApp** in addition to SMS. When WhatsApp is set up and enabled, Kinde prefers WhatsApp for delivering codes and falls back to SMS if WhatsApp delivery fails and SMS is configured. ### What you need - A verified **WhatsApp Business account** in Meta - **WhatsApp API token** (access token) and **WhatsApp Business Account ID** - A configured [SMS provider in Kinde](/authenticate/authentication-methods/phone-authentication/#configure-phone-sms-auth-in-kinde) if you want fallback delivery ## Configure WhatsApp in Kinde 1. In Kinde, go to **Settings > Environment > Messaging > WhatsApp** 2. Turn on **Enable WhatsApp** 3. Enter your **WhatsApp token** (from Meta) 4. Enter your **WhatsApp Business Account ID** 5. (Optional) Enter a **Template name** if you want to use a specific WhatsApp message template. If left blank, Kinde uses a default template. 6. Select **Sync WhatsApp** 7. After sync completes, the **WhatsApp phone number** dropdown appears. 8. In **WhatsApp phone number**, select the phone number you want to use for sending codes. 9. Select **Save** After saving, Kinde sends OTP and MFA codes through WhatsApp when available, and falls back to SMS if delivery fails and SMS is configured. ### Do I need a paid Kinde plan to use WhatsApp authentication? WhatsApp authentication is free to use in Kinde, but the number of messages you can send is subject to the same monthly limit as SMS (10 messages per month). WhatsApp is a bring-your-own-provider integration, and Meta charges separately for each message sent. See [WhatsApp pricing](https://developers.facebook.com/docs/whatsapp/pricing) for details. ### Can I change the language of the WhatsApp messages? Yes, you can change the language by going to **Kinde > Settings > Environment > Languages**. After changing languages, run **Sync WhatsApp** again so template languages are updated. If a configured language is not supported by WhatsApp, Kinde falls back to **en-US**. ## Troubleshooting ### Templates fail to create or sync Template issues are usually caused by Meta account setup or credential mismatches: - Confirm your WhatsApp Business account is verified in Meta and templates can be created in [WhatsApp Manager](https://business.facebook.com/). - Confirm the token and Business Account ID in Kinde match Meta and that the token has correct permissions. - After fixing issues in Meta, run **Sync WhatsApp** again in Kinde. ### Messages not received by users - Confirm the phone number is in a WhatsApp-supported format (for example, E.164 with country code). - Confirm WhatsApp is available in the user's region and the user has an active WhatsApp account. - If you rely on fallback delivery, verify [SMS is configured](/authenticate/authentication-methods/phone-authentication/) in **Settings > Environment > Messaging > SMS**.
# Authenticate - Custom configurations - Manage organization-level auth features
> Guide to advanced organization features including custom policies, default roles, email senders, custom domains, and organization-level MFA.
Last updated: 2025-01-16
advanced organizations, organization policies, default roles, custom email sender, custom domains, organization MFA
authenticate
When you enable advanced organizations features, you can access extended features for individual organizations. Customizations include: - Additional access control via [policies](/build/organizations/organization-access-policies/) - Select [default roles](/manage-users/roles-and-permissions/default-user-roles/#enable-default-roles-in-an-organization) for users who join an organization - Set [custom email sender details](/build/organizations/email-sender-organization/), so users in specific orgs receive OTP and other emails from the custom address (requires own SMTP) - Organization-level [custom domains](/build/domains/organization-custom-domain/) - Organization-level [multi-factor authentication](/authenticate/multi-factor-auth/mfa-per-org/) Read our blog about why you might need [advanced organizations in Kinde](https://kinde.com/blog/authentication/advanced-organizations/). ## Enable advanced organization features 1. In Kinde, go to **Organizations**. 2. Search or browse for the organization you want and select the name to show the org details. 3. Select **Authentication**. 4. In the **Activate advanced organization features** box, select **Activate**. ## Disable advanced organization features 1. In Kinde, go to **Organizations**. 2. Search or browse for the organization you want and select the name to show the org details. 3. Scroll to the bottom of the **Details** page and select **Remove advanced org features**. 4. In the confirmation window, follow the prompts.
# Authenticate - Custom configurations - Manage the authentication experience
> Comprehensive guide to customizing the authentication experience including unified sign-up, name requirements, marketing consent, and profile picture settings.
Last updated: 2025-01-16
authentication experience, unified sign-up, seamless registration, marketing consent, Gravatar, login_hint
authenticate
Kinde aims to give you as much control of your user’s sign up and sign in experience as possible, without compromising security. Here are some options for customizing the authentication experience in your applications. You’ll find these in Kinde: **Settings > Applications > View details** on your application. ## Use your own sign up and sign in screens Kinde offers custom authentication, allowing you to use your own sign up and sign in screens, bypassing the landing screens provided by Kinde. You can enable this for social sign in, email, phone, enterprise connections, or any combination of these sign up methods you support. See [Custom sign-up and sign-in pages](/authenticate/custom-configurations/custom-authentication-pages/) for more details. ## Create a unified sign-up / registration experience (seamless sign up) You can allow all users to register and sign from the same authentication screen, without forcing them to create an account first. To do this: 1. Update your app to redirect all authentication through the registration flow. To do this, change the link for the `sign in` button to go to the `register` button on the authentication screen. In Next.js, for example, you would change `` to use `` instead. 2. Switch off the requirement to ask for first name and last name on registration (see section below). 3. Go to **Settings > Applications > View details** on your application. Scroll to the **Authentication experience** section. 4. Switch off the **Show 'Already have an account? Sign in' on registration page** option. 5. Go to **Design > Page content**, then select **Sign up page** in the dropdown. Update the copy on the sign up page to cater for both the registration and sign in experience. 6. Select **Save**. The result is: - Users with an account will authenticate - Users without an account will be registered - Nobody will see a prompt to create an account You can do this for any authentication method, e.g. email + password, email + OTP, phone + SMS OTP, social connection, or enterprise connection.  ## Ask for first name and last name on sign up By default, the Kinde sign up flow includes fields for users to enter their first name and last name. However, if you don’t want to collect user’s names, you can easily switch this off. This can make the sign up experience a bit faster, because when a user goes to sign up, all they need is their email, phone number, or their social sign in. **To switch off the name requirement for sign up** 1. Go to **Settings > Applications > View details** on your application. 2. Scroll to the **Authentication experience** section. 3. Switch off **Ask for user first name and last name**. 4. Select **Save**. ## Request consent for marketing on sign up If you want, you can add a checkbox to the sign up screen for collecting user consent to receive marketing communications. See [Request user consent for marketing on sign up](/design/pages/marketing-consent/) for details. ## Switch off Gravatar fallback for profile pictures Typically, Kinde receives user profile pictures via the email provider, e.g. Google. If no picture is attached to a profile, Kinde sets the picture to use a Gravatar URL instead. Gravatar sends us a profile URL and either the user picture (if available) or a blank avatar is displayed in Kinde. To avoid blank avatars and to handle profile pictures a different way, you can switch off the Gravatar fallback. 1. Go to **Settings > Applications** and select **View details** on your application. 2. Scroll to the **Authenticaton experience** section and switch off the **Use Gravatar fallback** option. 3. Select **Save**. Read more about [email authentication](/authenticate/authentication-methods/email-authentication/). ## Pre-populate user identity for sign in Create a smoother sign up and sign in experience for users by passing `login_hint` with the auth URL. This prefills the user’s sign in identity, saving them from manually entering their email or phone number. You might want to do this, for example, if you invite users to sign up via email and you want to reduce friction and make signing in faster. See [Pre-populate user identity on sign in](/authenticate/custom-configurations/prepopulate-identity-sign-in/) for details. ## Include 'escape hatch' URLs for authentication errors You can include URLs in error messages so that users can click them to go back to the sign in screen or your home page. 1. Go to **Settings > Applications** and select **View details** on your application. 2. Set the **Application homepage URI** and the **Application login URI**. 3. Select **Save**.
# Authenticate - Custom configurations - Custom sign-up and sign-in pages
> Step-by-step guide to creating custom authentication pages while maintaining Kinde's security for verification and MFA processes.
Last updated: 2025-01-16
custom authentication pages, connection ID, login_hint, social auth, email auth, phone auth, enterprise auth
authenticate
You can host your own custom sign up and sign in pages to use with Kinde. Integrate your own designs for the initial sign up and sign in page, and still get the security of Kinde’s auth (and verification) process. This gives you the best of both worlds: the security of hosted auth, and the ability to customize the initial sign-up experience for your users. ## Custom sign in for social authentication If you only allow users to sign up and sign in with social authentication - such as Google or Apple - then you can achieve a headless-type experience. Users sign up or sign in from your custom screen, then get pushed straight through to the social provider’s account selection screen. For example: ## Custom sign in for email authentication If you allow email sign up and sign in, the initial Kinde screen can be bypassed, but the Kinde code verification screen will still appear before sign in is completed. When a user signs up (say, via email), they do this in fields on your custom sign in screen. Then for verification, they see Kinde’s verification code screen. After that, it’s all you again. ## Screens that remain securely hosted by Kinde This feature lets you to bypass Kinde’s initial sign in screens, but the following screens are still hosted by Kinde and are part of our secure auth experience. - Enter password or One-time password (OTP) screens (see example above) - Multi-factor authentication screens - The organization switcher (if you support multiple organizations) - The screen where users can choose to create an account if one was not found ## Step 1: Switch on the custom auth option for your application 1. Go to **Settings** > **Applications**. 2. Select **View details** on the application you want to switch on custom auth for. 3. Scroll down and switch on the **Use your own sign-up and sign-in screens** option in the **Authentication experience** section. 4. Select **Save**. ## Step 2: Get the auth method connection ID Each authentication type you have set up in Kinde has a unique **Connection ID** attached to it. You need to add this connection ID to your screen design code, so that the Kinde screens get bypassed when users interact. 1. Go to **Settings > Authentication.** 2. Select **Configure** on the relevant authentication method tile. For example, the **Google** tile under the **Social connections** section. 3. Copy the **Connection ID** and paste it somewhere you can access later. 4. Select **Save** or **Cancel**. 5. Repeat for each authentication method you want to be included on your custom sign in screen. ## Step 3: Add the Connection ID to your design code There are different steps depending on the authentication method you use. Update your code for all that apply. ### Social sign in Add the `connectionId` to the auth url. Here is an example using React: ```jsx ``` You can now test if it works by signing in to your project or app. ### Email sign in Add the `connectionId` and `loginHint` params to the auth url. The `login_hint` enables you to pre-populate the email for the user, skipping the step where they have to enter their identity/email. It also tells us where to send their one time password for passwordless verification. Here is an example using React. ```jsx ``` You can now test if it works by signing in to your project or app. ### Phone sign in Add `connectionId` and `loginHint` params to the auth url. The `loginHint` enables you to pre-populate the phone for the user, skipping the step where they have to enter their phone number. It also tells us where to send their one time password for passwordless verification. The `loginHint` needs to be in one of these formats `phone::` or `phone:<+intl_number>:`. The ‘+’ symbol is optional, as long as the country code is included. Here is an example using React: ```jsx ``` You can now test if it works by signing in to your project or app. ### Enterprise sign in (Entra ID or SAML) Add the `connectionId` to the auth url. This takes the user directly to the enterprise authentication process. Here is an example using React: ```jsx ```
# Authenticate - Custom configurations - Custom OAuth 2.0 connections
> Step-by-step guide to setting up custom OAuth2 and OIDC connections including OAuth provider setup, credentials configuration, and Kinde integration.
Last updated: 2026-03-03
custom OAuth2, OIDC, OAuth provider, client ID, client secret, callback URL, custom connection, identity provider
authenticate
You can enable users to sign up and sign in using their credentials from any OAuth2- and Open ID connection- compatible identity provider. To set this up, you need access to your provider's developer console and a little technical know-how. We recommend setting this up in a non-production environment first, to test the connection thoroughly. Custom OAuth 2.0 and Open ID connections allow you to integrate with any compatible identity provider that isn't natively supported by Kinde. This includes custom identity providers, enterprise solutions, or specialized authentication services. ## OAuth 2.0 / OIDC provider requirements Before connecting your custom OAuth2 provider, ensure it supports the OAuth2 authorization code flow and can provide user profile information including email address. The provider must also support HTTPS for all endpoints. ## Step 1: Get the custom connection credentials 1. Navigate to your provider's developer console or admin panel. 2. Create a new application or client. 3. Configure your application settings: 1. Set the application type to **Web Application** or **Confidential Client**. 2. Add your **Authorized redirect URIs**. These are your Kinde domain or custom domain callback URLs. For example, `account.customdomain.com/login/callback`. If you don't have this, you can copy it from the Kinde connection and add it later. 3. Configure the required OAuth2 scopes. At minimum, you'll need scopes to access user profile information and email address. Common scopes are: `openid`, `profile`, `email`. Add any other provider-specific ones you want. 4. Set any additional configuration options required by your provider. These might include key attributes or upstream parameters. 4. Complete all the required application details (noting that you may need to go through a verification process depending on your provider). 5. Save your application configuration. 6. Copy the following information, which is required to set up the Kinde connection: - **Authorization URL**: The authorization endpoint URL - **Token URL**: The token endpoint URL - **User Info URL**: The endpoint to retrieve user profile information - **Client ID**: Your IdP application client ID - **Client Secret**: Your IdP application client secret ## Step 2: Set up the Kinde connection 1. Sign in to Kinde. 2. Go to the **Settings** page and select **Authentication**. 3. In the **Social connections** section, select **Add connection.** 4. In the window that opens, select **Custom OAuth 2.0**, then select **Next**. 5. Enter a **Connection name** for internal identification. If you maintain a lot of external connections, you might want to include the customer's name. 6. Enter an **External name**. This is what appears on the sign up and sign in screens of your app. 7. Enter all the relevant URLs and credentials from the previous step in the corresponding fields: - Authorization URL - Token URL - User Info URL - Client ID - Client Secret 8. Choose the **Client authentication method**. This controls how client credentials are sent to the provider's token endpoint during the OAuth2 authorization code exchange. The options are: - **Client secret in body** (default) — The client ID and client secret are sent as parameters in the POST request body. This is the most common method and works with most OAuth2 providers. - **Client secret in header** — The client ID and client secret are sent as a Base64-encoded `Authorization: Basic` HTTP header. Some providers (e.g., Vipps MobilePay) require this method. The default is **Client secret in body**. Check your identity provider's documentation to determine which method is required. If authentication fails with one method, switching to the other may resolve the issue. 9. Enter any additional configuration options required by your provider (e.g., key attributes and upstream parameters). 10. In the **Callback URL** section: 1. If you use Kinde's domain as your default, copy the Kinde domain URL. 2. If you use custom domains, select the **Use custom domain instead** switch. 3. If you have only one custom domain, copy the Custom domain URL. If you have custom domains for multiple organizations, select each one from the list and copy the callbacks for each. You need to enter all custom domain callbacks in your app. 11. Scroll down to the **Provider icons** section where you can upload a custom icon for this connection. This icon will appear on the sign-up and sign-in screens of your app. 12. Select which applications to switch this on for. If you are in a prod environment, this makes the connection live. 13. Select **Save**. 14. Use the copied Callback URL to finish setting up the provider configuration, see below. ## Step 3: Add the callback URL to your custom connection 1. Navigate to your provider's developer console or admin panel. 2. Enter the callback URL you copied from the Kinde configuration window. 3. Save. ## Test your custom OAuth2 connection After configuring your custom OAuth2 connection, test it thoroughly in a non-production environment before going live. Verify that: - Users can successfully authenticate - User profile information is correctly mapped - Email addresses are properly captured - Any custom claims or attributes are accessible ## Troubleshoot custom OAuth2 connections If you encounter issues with your custom OAuth2 connection, here are some things to try: 1. **Verify endpoint URLs**: Ensure all endpoint URLs are correct and accessible 2. **Check scopes**: Confirm that your provider supports the required scopes 3. **Validate callback URLs**: Ensure all callback URLs are properly configured in the IdP application 4. **Review user info response**: Verify that the user info endpoint returns data in the expected format 5. **Check client authentication method**: If you receive `401 Unauthorized` or `invalid_client` errors during sign-in, try switching the Client authentication method between "Client secret in body" and "Client secret in header" — some providers only accept one of these methods For additional support, contact Kinde support or refer to your OAuth2 provider's documentation.
# Authenticate - Custom configurations - Disable self-sign up
> Disable self-sign up for invitation-only apps—set environment-wide or per-organization access policies in Kinde
Last updated: 2026-07-01
disable sign-up, self-sign up, invitation only, access policies, organization policies, allow self-sign up, user import
authenticate, custom-configurations, access-policies, user-management
You can prevent users from signing up to your business, and only add users selectively. You might do this if you only want to give access to employees or members. Disabling self-sign up applies across an environment. Depending on your Kinde plan, you can also [manage self-sign up per organization](/build/organizations/allow-user-signup-org/). ## Disable self-sign up for your business 1. Go to **Settings > Environment > Policies**. 2. Switch off the **Allow self-sign up** option. You can then [import users](/manage-users/add-and-edit/import-users-in-bulk/), [add them manually](/manage-users/add-and-edit/add-and-edit-users/), or add them [via the Kinde API](/kinde-apis/management#tag/users/post/api/v1/user). Users who receive an organization invitation can still complete sign-up even when self-sign up is disabled. See [Invited user sign-up experience](/authenticate/custom-configurations/invited-user-experience/). ## Disable self-sign up for an organization You can disable self-sign up per organization. However, if you allow self-sign up in your business (and have not disabled it as per the above procedure), at least one organization must allow self-sign up. 1. Go to **Organizations**. 2. Select the organization you want to disable self-sign up for. 3. Go to **Policies**. 4. Switch off the **Allow org members to be auto-added** option. 5. Select **Save**.
# Authenticate - Custom configurations - Invited user sign-up experience
> Learn what invited users see at sign-up—prefilled details, locked email, and how invitation errors are handled in Kinde
Last updated: 2026-07-05
organization invitations, invited users, invitation sign-up, locked email, prefilled registration, invitation error states, self-sign up disabled
authenticate, custom-configurations, invitations, user-management
When organization members invite other people into their organization, the invitees complete sign-up through a tailored registration experience. This page covers what an invited user sees. To enable invitations, see [Set global access policies](/build/set-up-options/access-policies/) and [Enable self-serve portal for orgs](/build/self-service-portal/self-serve-portal-for-orgs/). ## How invited users complete sign-up When someone accepts an organization invitation, Kinde tailors the registration experience to the invitation: - **Prefilled details** — the first name, last name, and email from the invitation are pre-populated on the registration form, so the invited user doesn't retype them. - **Locked email** — the invited email address is read-only and can't be changed, so the invitation can't be redirected to a different address. The "use phone instead" option is hidden in this flow for the same reason. - **Sign-up allowed even when self-sign up is off** — invited users can complete registration even when the environment has self-sign up disabled. Organization-level "Allow registrations" still applies when an organization is in context. ## Invitation error states To keep invitation status private, Kinde shows consistent messages rather than revealing exactly what's wrong with a code: - **Invitation disabled** — shown when invitations are turned off for the environment, or the configured invite application is misconfigured. See [Set global access policies](/build/set-up-options/access-policies/). - **Invitation code not usable** — shown when a code can't be used, including when it's unknown, expired, or already used. The same user-facing message is shown in every case (which may read "Invitation already accepted"), so the underlying reason can't be inferred. - **Invitation email mismatch** — shown when the email submitted during sign-up doesn't match the invited email address.
# Authenticate - Custom configurations - Pre-populate user identity on sign in
> Guide to pre-populating user identity fields using login_hint parameter for email, phone, and username authentication to improve user experience.
Last updated: 2025-01-16
login_hint, pre-populate, user identity, email, phone, username, authentication UX
authenticate
You can create a smoother sign-up and sign-in experience by passing a login_hint when users authenticate. When the user arrives at the sign-in page, their credentials are pre-filled, saving them time. This works for emails, phone numbers, and usernames. You might want to do this, for example, to reduce friction and make signing up extra easy. ## Enable login_hint Add the `login_hint` parameter to the sign up/sign in request on your app or site. ### Email example ```jsx ``` ### Phone example ```jsx ``` ### Username example ```jsx ```
# Authenticate - Custom configurations - Proxy your Kinde auth pages through Cloudflare
> Guide to proxying Kinde authentication pages through Cloudflare to leverage advanced security features like WAF and bot mitigation.
Last updated: 2025-01-16
Cloudflare proxy, WAF, bot mitigation, custom domain, DNS, SSL, security
authenticate
You can take advantage of Cloudflare’s advanced security features such as their WAF and bot mitigation tools by proxying your Kinde hosted auth pages through Cloudflare. ## What you need - A Cloudflare account - A domain managed in Cloudflare ## Set up the custom domain 1. Set up a custom domain in your Kinde business, see [Use your own custom domain](/build/domains/pointing-your-domain/). 2. Set up DNS records for the domain in Cloudflare. We will change this from DNS once the records have been validated. DNS validation confirms the record before we set the proxy. ## Set up the proxy Once you receive the email that the custom domain has been set up in Kinde, go to Cloudflare and change the custom domain record from **DNS only** to **Proxied**. ## Create a Cloudflare Managed Challenge To test the proxied domain, create a WAF rule to show a Cloudflare Managed Challenge on all incoming requests. For example, create a rule to match the hostname of the custom domain used in Kinde and the request originating from Australia. The action is to show a **Managed Challenge**.
# Authenticate - Custom configurations - Redirect users
> Guide to redirecting users after authentication using cookies, local storage, or the state parameter for secure post-auth navigation.
Last updated: 2025-01-16
user redirect, callback URL, state parameter, CSRF protection, local storage, cookies
authenticate
After authenticating a user in Kinde, you can return them to a specific page within your application. Users are initially redirected back to the requested [Callback url](/get-started/connect/callback-urls/) you have included in your allowlist within Kinde. This is necessary to complete the token exchange and finalize the authentication flow. ## When to set a specific redirect A callback URL is not always where you want users redirected after authentication. You may want users to land on a specific dashboard page, or to trigger authentication if a user tries to access a protected page in your application. In both those cases, you can store a URL to redirect the user back to their intended page (after authentication) to provide a more seamless experience. ## Redirect without an SDK Most of our SDKs include a mechanism for redirecting users. However, if you are not using a Kinde SDK, use one of the following methods. 1. Store the intended URL in a cookie or local storage. 2. Use the `state` parameter. ## Store the URL in a cookie or local storage For single page applications the simplest is probably to leverage local storage to store the desired URL. Prior to redirecting to Kinde: ```jsx localStorage.setItem("nextUrl", "/some-protected-route"); ``` After authentication is complete: ```jsx const nextUrl = localStorage.getItem("nextUrl"); window.location.replace(nextUrl); ``` For server-side applications you can achieve the same thing with a cookie - essentially setting the next URL before redirecting to Kinde and fetching the value post-authentication. The implementation will depend on your language or framework choice. ## Use the state parameter You should be using the state parameter already to protect against CSRF attacks. [(Here's how Kinde uses the State param)](/get-started/learn-about-kinde/kinde-product-security/#csrf-protections-via-state-parameter). Essentially it's a random string that you would store in your application, so when you receive the response from Kinde you can validate it matches the one you sent. Because it is just a string, you can leverage it to store additional information, like the intended destination of your user. 1. Generate a random string in your application. For this example we will use:`BlueFox0101`. 2. Use this string as key for an object with the value of your application state and store this locally. For example: ```jsx { "BlueFox0101" : { nextUrl: '/some-protected-route', } } ``` 3. When you redirect your user to Kinde to complete the authentication flow, include the random string as the `state` param: ```jsx https://.kinde.com/oauth2/auth ?response_type=code &client_id= &redirect_uri= &scope=openid%20profile%20email &state=BlueFox0101 ``` 4. After the user has authenticated, they will be redirected back to your application and the `state` value will be included in the url: ```jsx https://.com/auth/callback ?code= &scope=openid%20profile%20email &state=BlueFox0101 ``` 5. As part of your callback processing and response validation, verify that the `state` returned in the URL above matches the random string you stored locally. If it does, retrieve the rest of the application state (like the nextUrl). 6. Use the `code` param to complete the token exchange (as per the [Use Kinde without an SDK](/developer-tools/about/using-kinde-without-an-sdk/) guide) and once the exchange is complete use the `nextUrl` to redirect the user. ## **Limitations and considerations** - Choose a storage method based on your application type. | App Type | Recommended storage | | --------------- | ------------------- | | Regular Web App | Cookie or session | | SPA | Local browser | | Native App | Memory or local | - `State` parameter values are not unlimited. `414 Request-URI Too Large` means you should try a smaller value. - Passing URLs in plain text or in any predictable way is unsafe. Ensure that the `state` parameter value is unique and opaque to ensure that it can be used for defence against CSRF and phishing attacks. - If the `state` parameter value is stored in a cookie, it should be signed to prevent forgery. ## A secure way to store redirect information The `state` parameter can mitigate [**CSRF attacks**](https://en.wikipedia.org/wiki/Cross-site_request_forgery) by using a unique and non-guessable value associated with each authentication request about to be initiated. That non-guessable value allows you to prevent the attack by confirming that the value coming from the response, matches the one you sent. The `state` parameter is also a string, so you can encode any information in it. You can send a random value when starting an authentication request and validate the received value when processing the response. You store something on the client application side (in cookies, session, or local storage) that allows you to perform the validation. Kinde SDKs handle `state` generation and validation automatically.
# Authenticate - Custom configurations - Static IP
> Guide to using a static IP address for your Kinde business.
Last updated: 2025-08-06
static-ip, infrastructure, whitelist
authenticate
For companies who work in highly regulated industries such as government, financial services, or education, it is a common requirement to maintain strict 'whitelists' for accessing the internet. For customers with these requirements, Kinde can provide static IP addresses. ## Dynamic IPs are used by default Kinde uses AWS public cloud to host our services. We make use of AWS's highly scalable infrastructure to ensure the best availability and performance. This infrastructure design means that your Kinde business is assigned a DNS address created during onboarding, which will have a dynamic IP address managed by AWS. You then whitelist the Kinde business domain or your custom domain, to ensure that your customers can access authentication to your product. ## Request a static IP address For Kinde enterprise customers who have strict IP-based whitelists, Kinde can provide a pair of static IP addresses. We use AWS's Global Accellerator to provision 2 IP addresses assigned to your Kinde business and custom domain, which will ensure that the IP addresses are always the same. Please reach out to our team at support@kinde.com to discuss your requirements.
# Authenticate - Device authorization flow - Call your API using device authorization flow
Once you've received an access token from the device authorization flow, you can use it to call your protected APIs. This guide shows you how to validate tokens, handle scopes, and make authenticated API requests. ## Use the access token from the device authorization flow The access token you receive from the device authorization flow is a standard OAuth 2.0 Bearer token. Include it in the `Authorization` header of your API requests: ```bash curl -X GET https://your-api.com/protected-resource \ -H "Authorization: Bearer YOUR_ACCESS_TOKEN" ``` ## Token validation in the device authorization flow Before processing API requests, validate the access token to ensure it's valid and hasn't expired: ### Validate with Kinde's userinfo endpoint ```bash curl -X GET https://.kinde.com/oauth2/v2/user_profile \ -H "Authorization: Bearer YOUR_ACCESS_TOKEN" ``` **Success response**: ```json { "sub": "kp_c3143a4b50ad43c88e541d9077681782", "provided_id": "some_external_id", "name": "John Snow", "given_name": "John", "family_name": "Snow", "updated_at": 1612345678, "email": "john.snow@example.com", "email_verified": true, "picture": "https://example.com/john_snow.jpg", "preferred_username": "john_snow", "id": "kp_c3143a4b50ad43c88e541d9077681782" } ``` **Error response** (invalid token): ```json { "error": "invalid_token", "error_description": "The access token is invalid or expired" } ``` ### Validate with your own API You can also validate tokens in your own API by verifying the JWT signature and claims: ```javascript +// Node.js example using jsonwebtoken with JWKS +const jwt = require("jsonwebtoken"); +const jwksClient = require("jwks-rsa"); + +const client = jwksClient({ + jwksUri: "https://.kinde.com/.well-known/jwks" +}); + +function getKey(header, callback) { + client.getSigningKey(header.kid, (err, key) => { + const signingKey = key.publicKey || key.rsaPublicKey; + callback(null, signingKey); + }); +} + +function validateToken(token) { + return new Promise((resolve, reject) => { + jwt.verify(token, getKey, { algorithms: ["RS256"] }, (err, decoded) => { + if (err) { + resolve({ valid: false, error: err.message }); + } else { + resolve({ valid: true, user: decoded }); + } + }); + }); +} ``` ## Scope enforcement for device authorization Access tokens include scopes that determine what resources the user can access. Check the required scopes before processing requests: ```javascript // Example: Check if user has required scope function hasRequiredScope(token, requiredScope) { const decoded = jwt.decode(token); const tokenScopes = decoded.scope.split(" "); return tokenScopes.includes(requiredScope); } // Usage if (!hasRequiredScope(accessToken, "read:users")) { return res.status(403).json({error: "Insufficient scope"}); } ``` ## Common API patterns for device authorization ### Protected resource endpoint ```javascript // Express.js example app.get("/api/protected-resource", authenticateToken, (req, res) => { // req.user contains the decoded token payload res.json({ message: "Access granted", user: req.user }); }); function authenticateToken(req, res, next) { const authHeader = req.headers["authorization"]; const token = authHeader && authHeader.split(" ")[1]; if (!token) { return res.status(401).json({error: "Access token required"}); } // Validate token with Kinde fetch("https://.kinde.com/oauth2/v2/user_profile", { headers: { Authorization: `Bearer ${token}` } }) .then((response) => { if (!response.ok) { throw new Error("Invalid token"); } return response.json(); }) .then((user) => { req.user = user; next(); }) .catch((error) => { return res.status(401).json({error: "Invalid token"}); }); } ``` ### Error handling for device authorization Handle common token-related errors: ```javascript function handleTokenError(res, error) { switch (error.error) { case "invalid_token": // Token is invalid or expired return res.status(401).json({error: "Please re-authenticate"}); case "insufficient_scope": // Token doesn't have required permissions return res.status(403).json({error: "Insufficient permissions"}); default: return res.status(500).json({error: "Authentication error"}); } } ``` ## Security best practices for device authorization ### Token storage - **Never store tokens in localStorage**: Use secure HTTP-only cookies or memory storage - **Validate tokens server-side**: Always validate tokens on your backend, not just the client ### Rate limiting Implement rate limiting for token validation requests: ```javascript const rateLimit = require("express-rate-limit"); const tokenValidationLimiter = rateLimit({ windowMs: 15 * 60 * 1000, // 15 minutes max: 100, // limit each IP to 100 requests per windowMs message: "Too many token validation requests" }); app.use("/api/protected-resource", tokenValidationLimiter); ``` ### Logging and monitoring Log authentication events for security monitoring: ```javascript function logAuthEvent(token, action, success) { console.log({ timestamp: new Date().toISOString(), action: action, success: success, userId: token.user_id, scopes: token.scope }); } ``` ## Testing your API Test your protected endpoints with the access token: ```bash # Test with curl curl -X GET https://your-api.com/protected-resource \ -H "Authorization: Bearer YOUR_ACCESS_TOKEN" # Test with JavaScript fetch('https://your-api.com/protected-resource', { headers: { 'Authorization': 'Bearer YOUR_ACCESS_TOKEN' } }) .then(response => response.json()) .then(data => console.log(data)); ```
# Authenticate - Device authorization flow - About the device authorization flow
Kinde's device authorization flow adheres to `RFC 8628`, also known as the OAuth 2.0 Device Authorization Grant. It enables authorization for devices with limited input capabilities, such as smart TVs, gaming consoles, or IoT devices. Users authenticate on a secondary device (like a phone or computer) while the primary device receives the access token. ## How the device authentication flow works 1. **Device requests authorization**: The device requests a device code and user code from Kinde. 2. **User authenticates**: The user visits a verification URI on another device and enters the user code. 3. **Device polls for token**: The device polls the token endpoint until authorization is complete. 4. **Access granted**: The device receives an access token and can call protected APIs. ## Endpoints for the device authorization flow ### Device authorization endpoint **URL**: `https://.kinde.com/oauth2/device/auth` **Method**: `POST` **Content-Type**: `application/x-www-form-urlencoded` **Parameters**: - `client_id` (optional): Your application's client ID - can be omitted if you have set an application as the default for device flows - `audience` (optional): The audience to use for the request **Response**: ```json { "device_code": "kinde_dc_device_code_here", "user_code": "CSLDFDUU", "verification_uri": "https://.kinde.com/device", "verification_uri_complete": "https://.kinde.com/device?user_code=CSLDFDUU", "expires_in": 600, "interval": 5, "qr_code": "data:image/png;base64,..." } ``` ### Token endpoint **URL**: `https://.kinde.com/oauth2/token` **Method**: `POST` **Content-Type**: `application/x-www-form-urlencoded` **Parameters**: - `grant_type`: `urn:ietf:params:oauth:grant-type:device_code` - `client_id`: Your application's client ID - `device_code`: The device code received from the authorization endpoint **Success response**: ```json { "access_token": "eyJ...", "expires_in": 86400, "scope": "", "token_type": "bearer" } ``` The scope field may be empty because granted scopes are carried in the access token’s scope claim. **Example error response**: ```json { "error": "authorization_pending", "error_description": "The user has not yet completed the authorization" } ``` ## Polling behavior The device must poll the token endpoint at regular intervals until the user completes authentication: - **Initial interval**: Use the `interval` value from the device authorization response (typically 5 seconds). - **Slow down**: If you receive a `slow_down` error, increase the polling interval by 5 seconds. - **Maximum time**: Stop polling after the `expires_in` time (typically 30 minutes). ## Device authorization flow error codes | Error Code | Description | Action | | ----------------------- | ------------------------------------ | ------------------------------ | | `authorization_pending` | User hasn't completed authentication | Continue polling | | `slow_down` | Polling too frequently | Increase interval by 5 seconds | | `access_denied` | User denied the authorization | Stop polling | | `expired_token` | Device code has expired | Request a new device code | | `server_error` | Misconfigured device code | Request a new device code | ## Security considerations for device authorization - **User code format**: User codes are formatted as `XXXXXXXX` for easy entry. - **Verification URI**: Users should verify they're on the correct domain. - **Token expiration**: Access tokens expire after 1 hour by default. ## Specifying an audience in a device authorization request If an `audience` is specified in the request, the access token will include the audience in the `aud` claim. Kinde supports requesting multiple audiences. The API must be authorized for the device authorization application. ## Scopes and permissions for a device authorization request If an audience is specified in the request, any scopes which are belong to that audience that are granted to the user by their role will also be granted to the device. The list of scopes will be displayed on the consent screen. If the user consents, the scopes will be included in the `scope` claim of the access token.
# Authenticate - Device authorization flow - Quick start
The 'Device Authorization Flow' allows users to authenticate on one device (like a TV or smart device) using another device (like a phone or computer). This is perfect for devices with limited input capabilities. In this quick start, you'll learn how to implement the device authorization flow using Kinde in just 5 minutes. ## Prerequisites for the device authorization flow - `curl` or a similar HTTP client ## Step 1: Create a Device Authorization app 1. From the Kinde home page select **Add application**. 2. Enter a name for the application. 3. Choose **Device and IoT**. 4. Select **Save**. 5. Make a note of the Client ID, you'll need this later. ## Step 2: Enable an authentication method for your application 1. Go to **Settings > Authentication**. 2. Select **Configure** on the **Passwordless** > **Email + code** card. 3. Under **Applications** select the application you created in step 1. 4. Select **Save**. ## Step 3: Request a device code Request a device code from Kinde's authorization endpoint: ```bash curl -X POST https://.kinde.com/oauth2/device/auth \ -H "Content-Type: application/x-www-form-urlencoded" \ -d "client_id=" ``` The response will include a `device_code`, `user_code`, and `verification_uri`: ```json { "device_code": "kinde_dc_...", "user_code": "CSLDFDUU", "verification_uri": "https://.kinde.com/device", "verification_uri_complete": "https://.kinde.com/device?user_code=CSLDFDUU", "expires_in": 600, "interval": 5, "qr_code": "data:image/png;base64,..." } ``` ## Step 4: Display the user code Show the `user_code` to the user and provide the `verification_uri_complete` or QR code from the response. The user should: 1. Visit the `verification_uri_complete` URL on their phone or computer. 2. Complete the authentication process. ## Step 5: Poll for the access token While the user is authenticating, poll the token endpoint: ```bash curl -X POST https://.kinde.com/oauth2/token \ -H "Content-Type: application/x-www-form-urlencoded" \ -d "grant_type=urn:ietf:params:oauth:grant-type:device_code" \ -d "client_id=" \ -d "device_code=" ``` Continue polling every 5 seconds (or the `interval` value from the response) until you receive a successful response like: ```json { "access_token": "eyJ...", "expires_in": 86400, "scope": "", "token_type": "bearer" } ``` ## Step 6: Use the access token Once you have received the access token, you can call your protected APIs: ```bash curl -X GET https://your-api.com/protected-resource \ -H "Authorization: Bearer YOUR_ACCESS_TOKEN" ``` ## Default app for device flows When you set up a default app for device flows, this will be the application that is used if no Client ID is specified in the request. 1. Select **Settings** > **Applications** 2. Select the Device Authorization application you want to set as default 3. Select **Set as default** 4. Select **Save**
# Authenticate - Device authorization flow - Troubleshooting device authorization
> This guide helps you diagnose and resolve common issues with device authorization flow. Learn how to handle errors, debug problems, and implement proper error recovery.
Last updated: 2026-03-26
troubleshooting, device authorization, error codes, error handling, error recovery, error messages, error logging
This guide helps you diagnose and resolve common issues with device authorization flow. Learn how to handle errors, debug problems, and implement proper error recovery. ## Common error codes during device authorization ### authorization_pending **Error**: `authorization_pending` **Description**: The user hasn't completed the authorization process yet. **Solution**: Continue polling the token endpoint. This is normal behavior. ```javascript // Example: Handle authorization_pending if (error === "authorization_pending") { console.log("User has not completed authorization yet. Continue polling..."); // Wait for the specified interval before next poll setTimeout(pollForToken, interval * 1000); } ``` ### slow_down **Error**: `slow_down` **Description**: You're polling too frequently. **Solution**: Increase the polling interval by 5 seconds. ```javascript // Example: Handle slow_down if (error === "slow_down") { console.log("Polling too fast. Increasing interval..."); interval += 5; // Increase interval by 5 seconds setTimeout(pollForToken, interval * 1000); } ``` ### access_denied **Error**: `access_denied` **Description**: The user denied the authorization request. **Solution**: Stop polling and inform the user they need to try again. ```javascript // Example: Handle access_denied if (error === "access_denied") { console.log("User denied authorization"); showErrorMessage("Authorization was denied. Please try again."); stopPolling(); } ``` ### expired_token **Error**: `expired_token` **Description**: The device code has expired (typically after 30 minutes). **Solution**: Request a new device code. ```javascript // Example: Handle expired_token if (error === "expired_token") { console.log("Device code expired"); showErrorMessage("This code has expired. Please request a new one."); requestNewDeviceCode(); } ``` ## Polling mistakes during device authorization ### Too frequent polling **Problem**: Polling more frequently than the recommended interval. **Solution**: Always respect the `interval` value from the device authorization response. ```javascript // Good: Respect the interval function pollForToken(deviceCode, interval = 5) { setTimeout(() => { // Make token request checkTokenStatus(deviceCode); }, interval * 1000); } // Bad: Polling too frequently function pollForToken(deviceCode) { setInterval(() => { // This polls every 1 second - too frequent! checkTokenStatus(deviceCode); }, 1000); } ``` ### Not handling `slow_down` properly **Problem**: Not increasing the interval when receiving `slow_down` errors. **Solution**: Implement exponential backoff. ```javascript let currentInterval = 5; // Start with 5 seconds function pollForToken(deviceCode) { checkTokenStatus(deviceCode).then((response) => { if (response.error === "slow_down") { currentInterval += 5; // Increase by 5 seconds console.log(`Increasing interval to ${currentInterval} seconds`); } // Continue polling with updated interval setTimeout(() => pollForToken(deviceCode), currentInterval * 1000); }); } ``` ### Not stopping on errors **Problem**: Continuing to poll after receiving fatal errors. **Solution**: Stop polling for non-recoverable errors. ```javascript function pollForToken(deviceCode) { checkTokenStatus(deviceCode).then((response) => { if (response.error) { switch (response.error) { case "authorization_pending": // Continue polling setTimeout(() => pollForToken(deviceCode), interval * 1000); break; case "slow_down": // Increase interval and continue interval += 5; setTimeout(() => pollForToken(deviceCode), interval * 1000); break; case "access_denied": case "expired_token": // Stop polling - these are fatal errors stopPolling(); handleError(response.error); break; } } else { // Success - stop polling handleSuccess(response); } }); } ``` ## Scope and token exchange limitations ### Scopes must be set on the device authorization endpoint Scopes for the device authorization flow must be passed to the `/oauth2/v2/device_authorization` endpoint when the device code is requested — not to the `/oauth2/token` endpoint during polling. Passing scopes to the token endpoint is not supported and will be ignored or cause an error. ```bash # Correct: scopes on the device authorization endpoint curl -X POST https://.kinde.com/oauth2/v2/device_authorization \ --data-urlencode "client_id=" \ --data-urlencode "scope=openid profile email offline" ``` ### Exchanging an existing access token via the token endpoint is not supported In Kinde's device authorization flow, exchanging an existing access token for a new access token or ID token via the token endpoint is not supported. Once you have an access token from the device flow, use it directly with your API. If you need a new token, restart the device authorization flow to obtain a fresh device code and complete the authorization process again. ## Network issues during device authorization ### Connection timeouts **Problem**: Network requests timing out. **Solution**: Implement proper timeout handling and retry logic. ```javascript function checkTokenStatus(deviceCode) { return fetch("https://.kinde.com/oauth2/token", { method: "POST", headers: { "Content-Type": "application/x-www-form-urlencoded" }, body: new URLSearchParams({ grant_type: "urn:ietf:params:oauth:grant-type:device_code", client_id: "", device_code: deviceCode }), timeout: 10000 // 10 second timeout }) .then((response) => response.json()) .catch((error) => { console.error("Network error:", error); // Retry after a delay setTimeout(() => checkTokenStatus(deviceCode), 5000); }); } ``` ### DNS resolution issues **Problem**: Cannot resolve the Kinde domain. **Solution**: Verify your domain configuration and network connectivity. ```bash # Test DNS resolution nslookup .kinde.com # Test connectivity curl -I https://.kinde.com/oauth2/v2/device_authorization ```
# Authenticate - Enterprise connections - Manage enterprise connections
> Comprehensive overview of enterprise authentication connections including SAML, Microsoft Entra ID, Google Workspace, Okta, and Cloudflare with provisioning options.
Last updated: 2026-03-26
enterprise connections, SAML, Microsoft Entra ID, Google Workspace, Okta, Cloudflare, SSO, JIT provisioning
authenticate
Enterprise authentication is a common method for managing user access to systems in large organizations. In enterprise connections, Kinde acts as the service provider (SP) and your customer brings their own identity provider. Looking to let your own team sign in to third-party tools using Kinde as the identity provider? See [Workforce identity in Kinde](/workforce-identity/). Kinde supports a number of enterprise connection types, including: - [Microsoft Entra ID (OAuth 2.0, WS-Fed)](/authenticate/enterprise-connections/azure/) - formerly Azure AD - [Microsoft Entra ID (SAML)](/authenticate/enterprise-connections/entra-id-saml/) - [Cloudflare](/authenticate/enterprise-connections/cloudflare-saml/) (via SAML) - [Google Workspace](/authenticate/enterprise-connections/custom-saml-google-workspace/) (via SAML) - [LastPass](/authenticate/enterprise-connections/lastpass-sso/) (via SAML) - [Okta](/authenticate/enterprise-connections/okta-saml-connection/) (via SAML) - [Custom SAML](/authenticate/enterprise-connections/custom-saml/) ## How many enterprise connections can I have? The number of SP-initiated (Service Provider initiated) enterprise connections included in your plan depends on your Kinde tier: | Plan | Enterprise connections included | | --- | --- | | Free | 1 | | Pro | 1 | | Plus and above | Unlimited | See [full plan details and pricing](https://kinde.com/pricing/). ## Provisioning for enterprise connections Kinde offer a number of provisioning options for enterprise connections, including **just in time (JIT)** provisioning and **pre-provisioning** options. See [Provisioning users with enterprise connections](/authenticate/enterprise-connections/provision-users-enterprise/) ## How identities are handled in enterprise connections Users with enterprise identities in Kinde can’t also have other identity types in Kinde. E.g. a user can have an email identity and a social identity. But if a user has an enterprise identity, they cannot have other identities. In this case, identity information is sourced with the identity provider (IdP) and is managed via the identity provider, not in Kinde. Learn more about [identities in Kinde](/authenticate/about-auth/identity-and-verification/). ## Enterprise connections for B2B businesses Many businesses have businesses for customers (B2B), and use Kinde organizations to manage authentication and access. Kinde lets you set a number of enterprise authentication features at the organization level, see [Enterprise authentication for B2B](/authenticate/enterprise-connections/enterprise-connections-b2b/). ## Session sign out behavior Unless you are using a Microsoft Entra ID SAML connection with single logout switched on, when enterprise connection users sign out, they are only signed out of the Kinde session and are not signed out of the identity provider. We do not force sign out of the IdP because this could break existing sessions the user is signed into, for other applications. This behavior also applies for social connections, where a third party is the identity provider. ## Trust email addresses provided by this connection option When you set up a connection, you can choose to trust email addresses provided by the identity provider you are using, e.g. your SAML provider. - If you switch this on - Kinde will look for a user with the same email address and match the record as part of authentication. This can make for a more seamless sign in experience. - If you do not switch this on - Kinde does not try to match the user's email to an existing account, even if one exists. Instead, a new user identity is created in Kinde. ## Routing in enterprise connections When users sign up via an enterprise connection with single-sign-on (SSO), they are routed to the identity provider (IdP) for identity verification. This happens when they select the SSO button on the home screen. You can set up a more seamless routing option using home realm discovery. ### Home realm discovery Home realm discovery routes users based on their email domain. So when a user enters their email and selects the continue button, they are routed to their IdP based on the email domain, to authenticate. For example if the user enters [chris@acme.com](mailto:chris@acme.com) Kinde checks which IdP uses the [**acme.com**](http://acme.com/) domain and silently verifies his identity. He only signs in once. Note that this feature has nothing to do with security or access control and everything to do with routing. Not to be confused with setting access restrictions for [domain allowlists](/authenticate/enterprise-connections/enterprise-connections-b2b/). Learn more about [home realm discovery](/authenticate/enterprise-connections/home-realm-discovery/). ## Show or hide the SSO sign-in button on the auth page When you set up enterprise auth in Kinde, an SSO button appears on the authentication page which is linked to the IdP by default. Users can select this as a sign up method, similar to how they might select a Google or Facebook sign-in option. For a more seamless experience, you can hide the SSO button by entering a home realm domain for the connection (more info above). Users will be routed silently via their IdP when they enter their credentials. If you have multiple enterprise auth methods (E.g. SAML and Entra ID), you may not want to show multiple SSO buttons. Here's the options for showing and hiding, depending how many enterprise auth methods you add: ### (Option 1) Hide all SSO buttons If you configure home realm discovery in each enterprise auth method, all SSO buttons will be hidden by default. The user enters their credentials and they are silently authenticated against the relevant IdP based on email domain. ### (Option 2) Show a universal SSO button for all If you would prefer users explicitly choose to sign in with SSO, you can add a universal button to the sign in screen. 1. Go to **Settings > Applications > Your application**. 2. On the **Details** page scroll down to the **Authentication experience** section. 3. Switch on **Show 'Sign in with SSO' button**. Users click the universal button, enter their credentials, and get routed silently to the IdP for verification. ## Service Provider vs Identity Provider initiated SSO If you run a B2B business, you might allow your business customers to use their own identity provider setup (like Okta SAML) to access your app. By default, enterprise connections use **Service Provider (SP) initiated** SSO, where users start at your application and are redirected to the IdP. However, Kinde also supports **Identity Provider (IdP) initiated** SSO, where users start at their IdP portal and click on your application. Learn more about [IdP-initiated SAML SSO](/authenticate/enterprise-connections/idp-initiated-saml-sso/). ## Disable an enterprise connection 1. Navigate to the connection in Kinde. Via **Organization > Authentication** or via **Settings > Authentication**. 2. For an organization-level connection: 1. Select the three dots menu on the connection tile. 2. Select **Disable connection**. 3. Confirm the action in the confirmation window. 3. For an enterprise level connection: 1. Select **Configure** on the connection tile. 2. Scroll down and disable the connection for each application. 3. Select **Save**. Confirm the action in the confirmation message. ## Delete an enterprise connection 1. Navigate to the connection in Kinde. Via **Organization > Authentication** or via **Settings > Authentication**. 2. Select the three dots menu on the connection tile. 3. Select **Delete connection**. 4. Confirm the action in the confirmation window.
# Authenticate - Enterprise connections - Advanced SAML configurations
> Advanced SAML configuration options including Name ID formats, signing algorithms, protocol bindings, and upstream parameters for enterprise authentication.
Last updated: 2026-04-20
SAML, entity ID, entityID, Name ID, signing algorithm, protocol binding, upstream parameters, RSA-SHA256, HTTP POST binding
authenticate
When you set up a SAML connection, you might need to include advanced configurations to meet identity provider requirements, and to get the connection running properly and securely. Here's some of the advanced options you might come across when setting up an enterprise (SSO) connection. ## Entity ID (entityID) For SAML SSO, the **entity ID** must match between your Kinde enterprise connection and your identity provider (IdP). In SAML metadata and some admin consoles this value appears as **`entityID`**. Enter the same string in Kinde (the **Entity ID** field on the enterprise connection) and in your IdP’s SAML application—field names vary (for example **Audience**, **SP Entity ID**, or **Entity ID**). If these values do not match, sign-in can fail (for example with an invalid SAML response). If you use Microsoft Entra ID (Azure AD), see [Microsoft Entra ID (SAML)](/authenticate/enterprise-connections/entra-id-saml/) for notes on older tenants and the optional `spn:` prefix. ## Name ID Name ID (Name Identifier) is a key element in a SAML assertion that uniquely identifies the user (subject) within a given SAML context. It is included in the `Subject` element of the SAML assertion and is critical for identifying and linking user identities between your Identity Provider (IdP) and Kinde. Available Name ID formats: - **Unspecified**: No particular format is required - **EmailAddress**: A user is identified by their email address - **Persistent**: A stable, opaque identifier intended to remain consistent across sessions - **Transient**: A short-lived identifier, often used in single sign-on (SSO) scenarios for one-time use The Name ID you select in Kinde must be supported and configured in your IdP. ## Sign request algorithm The Sign Request Algorithm defines the cryptographic algorithm used to sign SAML requests (AuthnRequest). Signing ensures the authenticity and integrity of SAML messages. Available algorithms: - **RSA-SHA256**: A commonly used and secure option. - **RSA-SHA1**: Older and less secure; often deprecated. Secure configurations favor SHA256 or stronger algorithms to protect against vulnerabilities. ## Protocol binding Protocol Binding refers to the transport mechanism used to send the SAML authentication request from Kinde to your IdP. Common Binding Types: - **HTTP Redirect Binding**: The SAML request is sent as a URL parameter using a GET request. It is lightweight but limited in message size. - **HTTP POST Binding**: The SAML request is sent via an HTML form using the POST method. It supports larger payloads and is commonly used for transmitting signed requests. The choice of binding affects security, performance, and compatibility. POST Binding is generally preferred for secure communications due to its ability to handle signed messages and larger payloads. ## Key attributes Key Attributes are additional pieces of information about the user that come from your IdP to Kinde. These attributes provide more context about the authenticated user and are often used for access control or personalization. Kinde-supported key attributes: - Email Address: The user’s email, often used for identification or communication. - First Name / Last Name: Used for personalization or internal system mapping. - User ID: The attribute in the SAML token that contains the user ID. Only configure key attributes if supported by your IdP. ## Logout experience When you set up an enterprise connection, you can choose to switch on **Single logout** as an option. This means that when a user signs out of a session, they will also be logged out of all apps that use the connection. For example, if users sign in via Google Workspace (a SAML connection), they will be signed out of all Workspace apps and not just your app when they sign out. Some users prefer this for security reasons. If you or your users enable this option, you'll need to configure the following in the connection setup: - **Single logout endpoint URL** - supplied by the customer for the Kinde-side configuration - **Logout URL** - copy and provide to the customer to add to their IdP configuration See the individual guides for specific instructions for each connection type. ## Upstream parameters You can pass provider-specific parameters to an Identity Provider (IdP) during authentication. These are also known as 'upstream params'. The values your pass can either be static per connection or dynamic per user. You can use upstream params to create a smoother sign in experience - by passing the email through, or to offer an account switcher (such as the Google account switcher) during sign in. Note that every identity provider has their own set of supported parameters and values, so you'll need to check their documentation to determine which URL parameters are supported. For more information, see [Pass parameters to identity providers](/authenticate/auth-guides/pass-params-idp/).
# Authenticate - Enterprise connections - Microsoft Entra ID enterprise connection (OAuth 2.0, WS-Fed)
> Step-by-step guide to setting up Microsoft Entra ID (formerly Azure AD) enterprise authentication with WS Federated and OAuth 2.0 protocols.
Last updated: 2026-01-12
Microsoft Entra ID, Azure AD, WS Federated, OAuth 2.0, enterprise auth, group sync, upstream params
authenticate
Kinde supports the use of Microsoft Entra ID as an authentication method. We support WS Federated and OAuth2.0 (follow the topic below), and [Microsoft Entra ID SAML](/authenticate/enterprise-connections/entra-id-saml/) which is covered in a separate topic.  If you [import users into Kinde](/manage-users/add-and-edit/import-users-in-bulk/), their Entra ID will be picked up and matched to the relevant connection based on their email address, for a seamless transition to Kinde. You can also pass [upstream params](/authenticate/auth-guides/pass-params-idp/) to the IdP as part of this procedure. ### Before you begin - Register an app in the [Microsoft Entra Admin Center](https://entra.microsoft.com/#home) See the docs [here](https://learn.microsoft.com/en-us/entra/identity-platform/quickstart-register-app/). - Copy the Client ID and Client Secret from the Microsoft app. - We recommend you test connections in a non-production environment before activating in a live environment. ## Step 1: Add and configure the connection in Kinde You can make a connection available only to a specific organization, or you can create it so it can be used across any organization in your business. ### Option 1: Add a connection for a specific organization 1. Go to **Organizations** and open the organization. 2. In the menu, select **Authentication**, then select **Add connection**. 3. In the **Add connection** window, select **New enterprise connection**, then click **Next**. 4. Select the Microsoft connection type you want (WS Federated or OAuth2.0) and then select **Next**. 5. Next: 'Step 2: Configure the connection'. ### Option 2: Add a connection that can be shared across multiple organizations 1. Go to **Settings > Environment > Authentication**. 2. Scroll to the **Enterprise connection** section and select **Add connection**. The **Add connection** window opens. 3. Select the Microsoft connection type you want (WS Federated or OAuth2.0) and then select **Save**. 4. Next: 'Step 2: Configure the connection'. ## Step 2: Configure the connection 1. Enter a **Connection name.** Make this something you can easily identify, especially if you are adding multiple connections for different business customers. 2. Enter your **Microsoft Entra domain.** in the **Microsoft Azure AD domain** field. 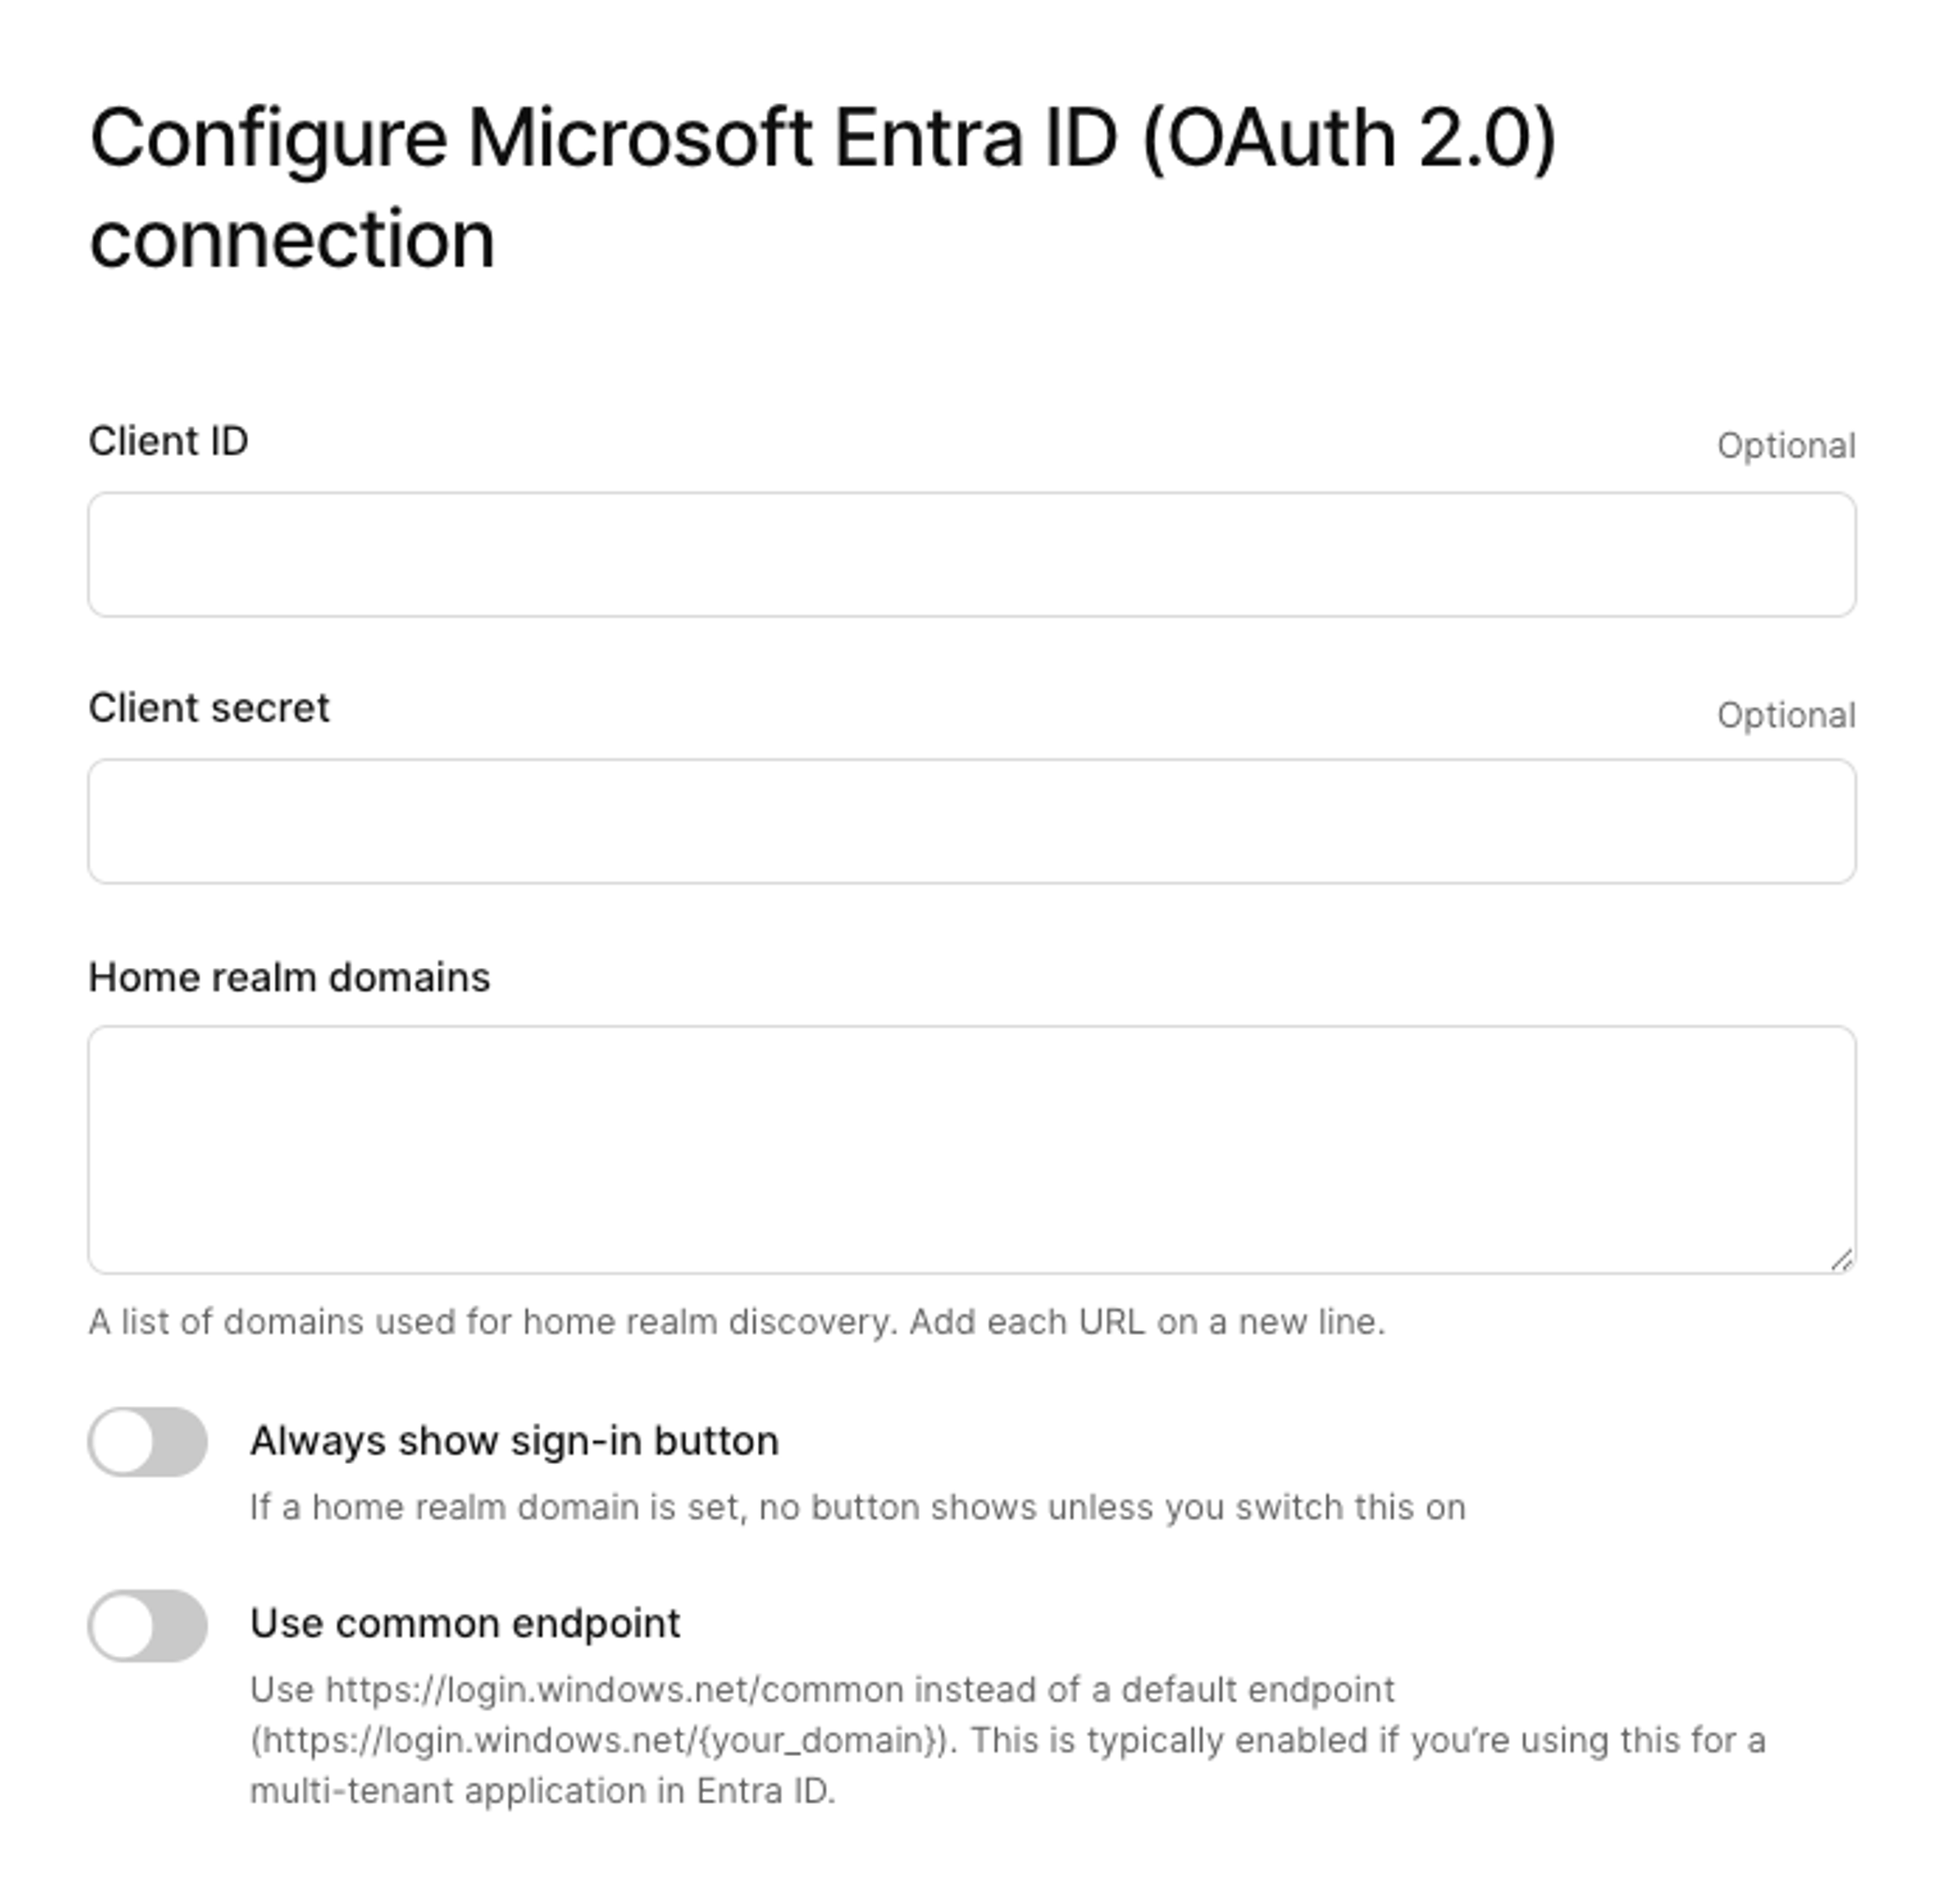 3. Enter the **Client ID** and **Client secret** as they appear in the Microsoft Entra application. Make sure you use the **Value** of the client secret. 4. Enter **Home realm domains**. This speeds up the sign in process for users of those domains. 5. If you use home realm domains, the sign in button is hidden on the auth screen by default. To show the SSO button, select the **Always show sign-in button** option. 6. If you want, select the **Use common endpoint** option. Recommended if you use multi-tenancy. 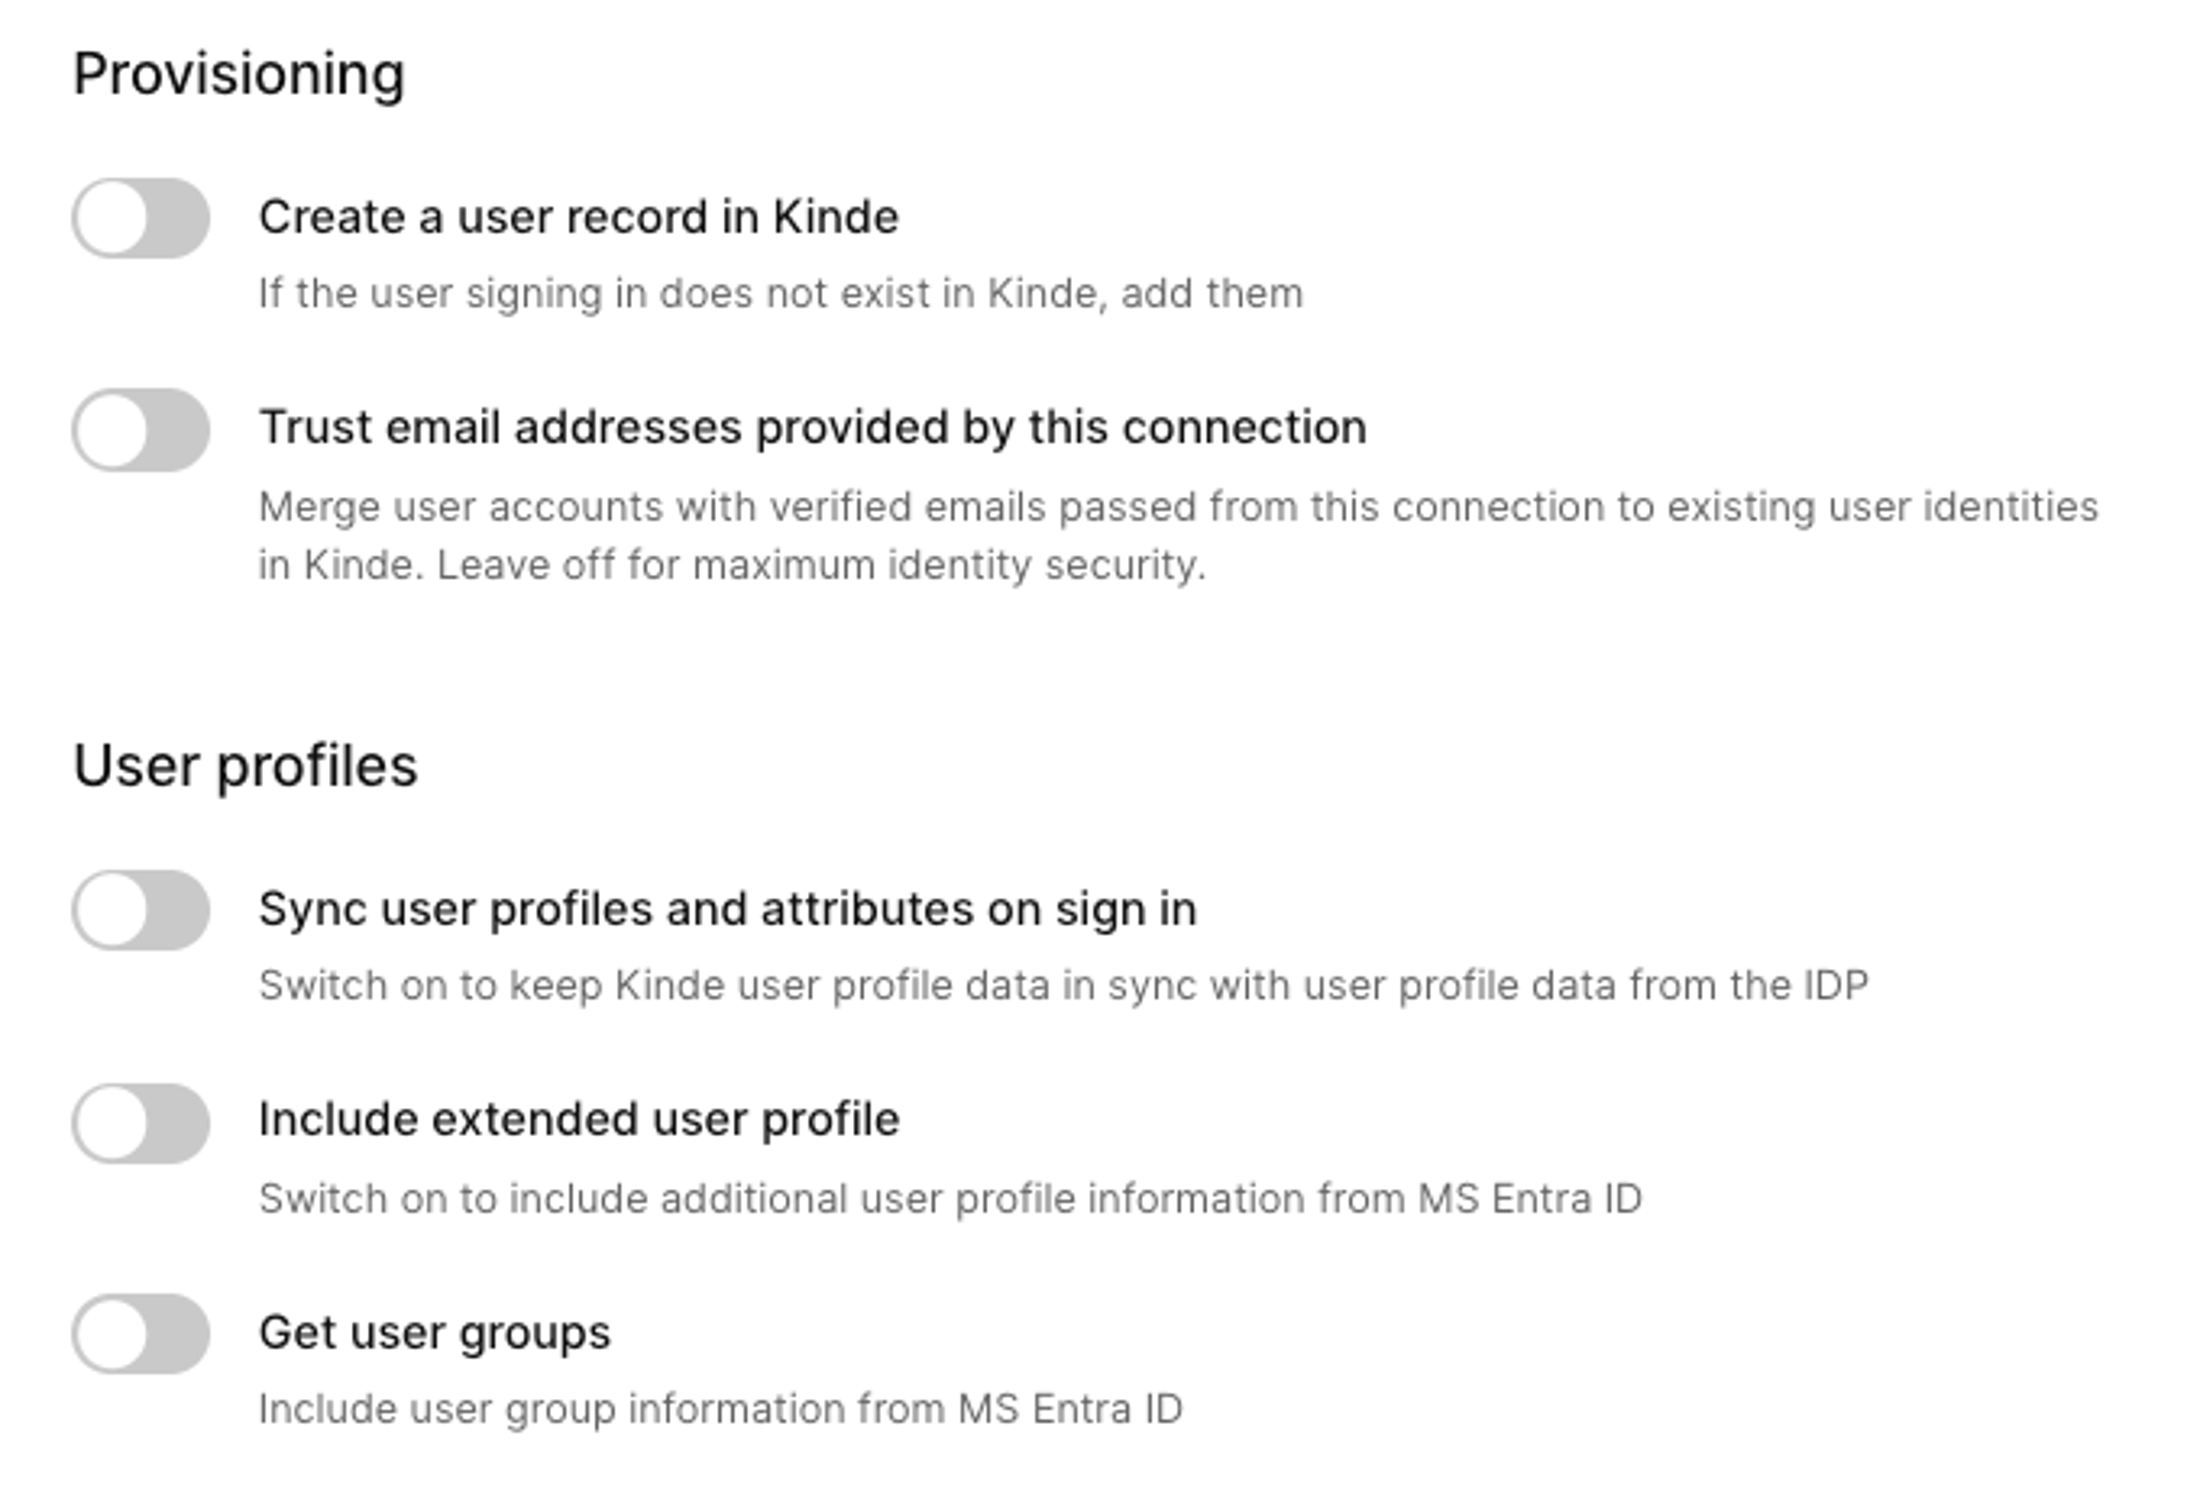 7. If you want to enable just-in-time (JIT) provisioning, select the **Create a user record in Kinde** option. This saves time adding users manually or via API later. 8. Select **Trust email addresses provided by this connection** if you want to treat this connection as a [trusted provider](/authenticate/about-auth/identity-and-verification/#trusting-emails-from-providers). 9. If you want, select **Sync user profiles and attributes on sign in**. Recommended to keep Kinde user profile data in sync with user profile data from Microsoft. 10. Select **Include extended user profile** if you want to sync the additional information stored in a user's Microsoft profile to their Kinde user profile. Extended attributes data is included in the `extra_claims` object of the access token. 11. If you want to sync user groups, select **Get user groups**. Recommended if you manage permissions and access via user groups in Microsoft. You also need to do some additional setup, see below. 12. Copy the **Callback URL**. You'll need to enter this in your Entra ID app. 13. Add any [upstream params](/authenticate/auth-guides/pass-params-idp/) that you want to pass to the IdP. ## Step 3: Add the callback URL to your Entra ID app 1. Open your application in the [Portal](https://entra.microsoft.com/#home). 2. Select the **Redirect URIs** links on the right. 3. Select **Add URI**. 4. In the relevant field, enter your callback URL (from the 'Configure the connection' procedure above). 5. Select **Web** as the platform type for the redirect URI—not **SPA**—even if your application is a single-page app. Microsoft redirects to Kinde's server to complete authentication, not directly to your app. SPA platform settings use different OAuth rules and will cause login failures. 6. Select **Save**. ## Step 4: Enable the connection in Kinde Make sure you test the connection before enabling in production for your users. 1. Open the connection configuration page in Kinde. 2. Switch on the connection. This will make it instantly available to users if this is your production environment. 1. For environment-level connections, scroll down and select the apps that will use the auth method. 2. For organization-level connections, scroll down and select if you want to switch this on for the org. 3. Select **Save**. ## (Optional) Sync Entra ID groups with Kinde ### Add groups claim to Microsoft Entra ID app 1. Open your application in the [Portal](https://entra.microsoft.com/#home). 2. Go to **Token configuration** in the left menu. 3. Select **Add groups claim**. 4. In the window that appears, select the groups to be included in tokens.  5. If you want, customize the token properties by type. 6. Save your changes. For reference, see this Microsoft doc about [configuring optional claims](https://learn.microsoft.com/en-us/entra/identity-platform/optional-claims?tabs=appui/) ### Customize ID token in Kinde 1. Open your application in Kinde. 2. Go to **Tokens**. 3. Scroll to **Token customization** and select **Configure** on the **ID tokens** tile. 4. Switch on **Social identity** as an additional claim. 5. Select **Save**. ### Access group info in tokens - ID token - `ext_provider > claims > profile > groups` - Access token - `ext_groups` ## Step 5: Test the connection 1. Go to your test application and attempt to sign in. 2. If you left the **Home realm domains** field blank in Kinde, when you launch your application, you should see a button to sign in. Select it to proceed. 3. If you completed the **Home realm domains** field, you should be redirected immediately to your IdP sign in screen. 4. Enter your IdP details and complete any additional authentication required. ### Conclusion You've successfully configured Microsoft Entra ID enterprise authentication with Kinde. Your users can now sign in using their Microsoft credentials, and if you've enabled group syncing, their group memberships will be available in your application's tokens. Remember to test the connection thoroughly in a non-production environment before enabling it for your users in production.
# Authenticate - Enterprise connections - Cloudflare enterprise connection (SAML)
> Step-by-step guide to integrating Cloudflare as a SAML identity provider with Kinde for enterprise authentication and access control.
Last updated: 2025-01-16
Cloudflare, SAML, identity provider, IdP, Zero Trust, enterprise auth, SSO, access policies, metadata URL, metadata hosting, XML
authenticate
If you use Cloudflare to centralize authentication and authorization in your business, you can integrate Kinde as a service provider for these processes. This gives you the benefits of Kinde’s robust auth capabilities, while keeping the familiar Cloudflare structure.  You need to set up an enterprise connection in Kinde for this, and add a Cloudflare application. We recommend setting up and testing the connection in a non-production environment before making available to users. ## Advanced configurations Depending on your SAML set up, you may need to include advanced configurations for your connection. See [Advanced SAML configurations](/authenticate/enterprise-connections/advanced-saml-configurations/) ## Step 1: Add the connection in Kinde ### Add a connection for a specific organization 1. Go to **Organizations** and open the organization. 2. In the menu, select **Authentication**, then select **Add connection**. 3. In the **Add connection** window, select **New enterprise connection**, then click **Next**. 4. Select the Cloudflare connection and then select **Next**. 5. Next: 'Step 2: Configure the connection'. ### Add a connection that can be shared across multiple organizations 1. Go to **Settings > Environment > Authentication**. 2. Scroll to the **Enterprise connection** section and select **Add connection**. The **Add connection** window opens. 3. Select the Cloudflare connection and then select **Next**. 4. Next: 'Step 2: Configure the connection'. ## Step 2: Configure the connection 1. Enter a name for the connection. It should match the connection name in Cloudflare. 2. Enter a random string value for Entity ID, for e.g. `870sa9fbasfasdas23aghkhc12zasfnasd`. 3. Enter the **IdP metadata URL**. This URL comes from your identity provider. 4. Enter a **sign in URL** if your IdP requires a specific URL. 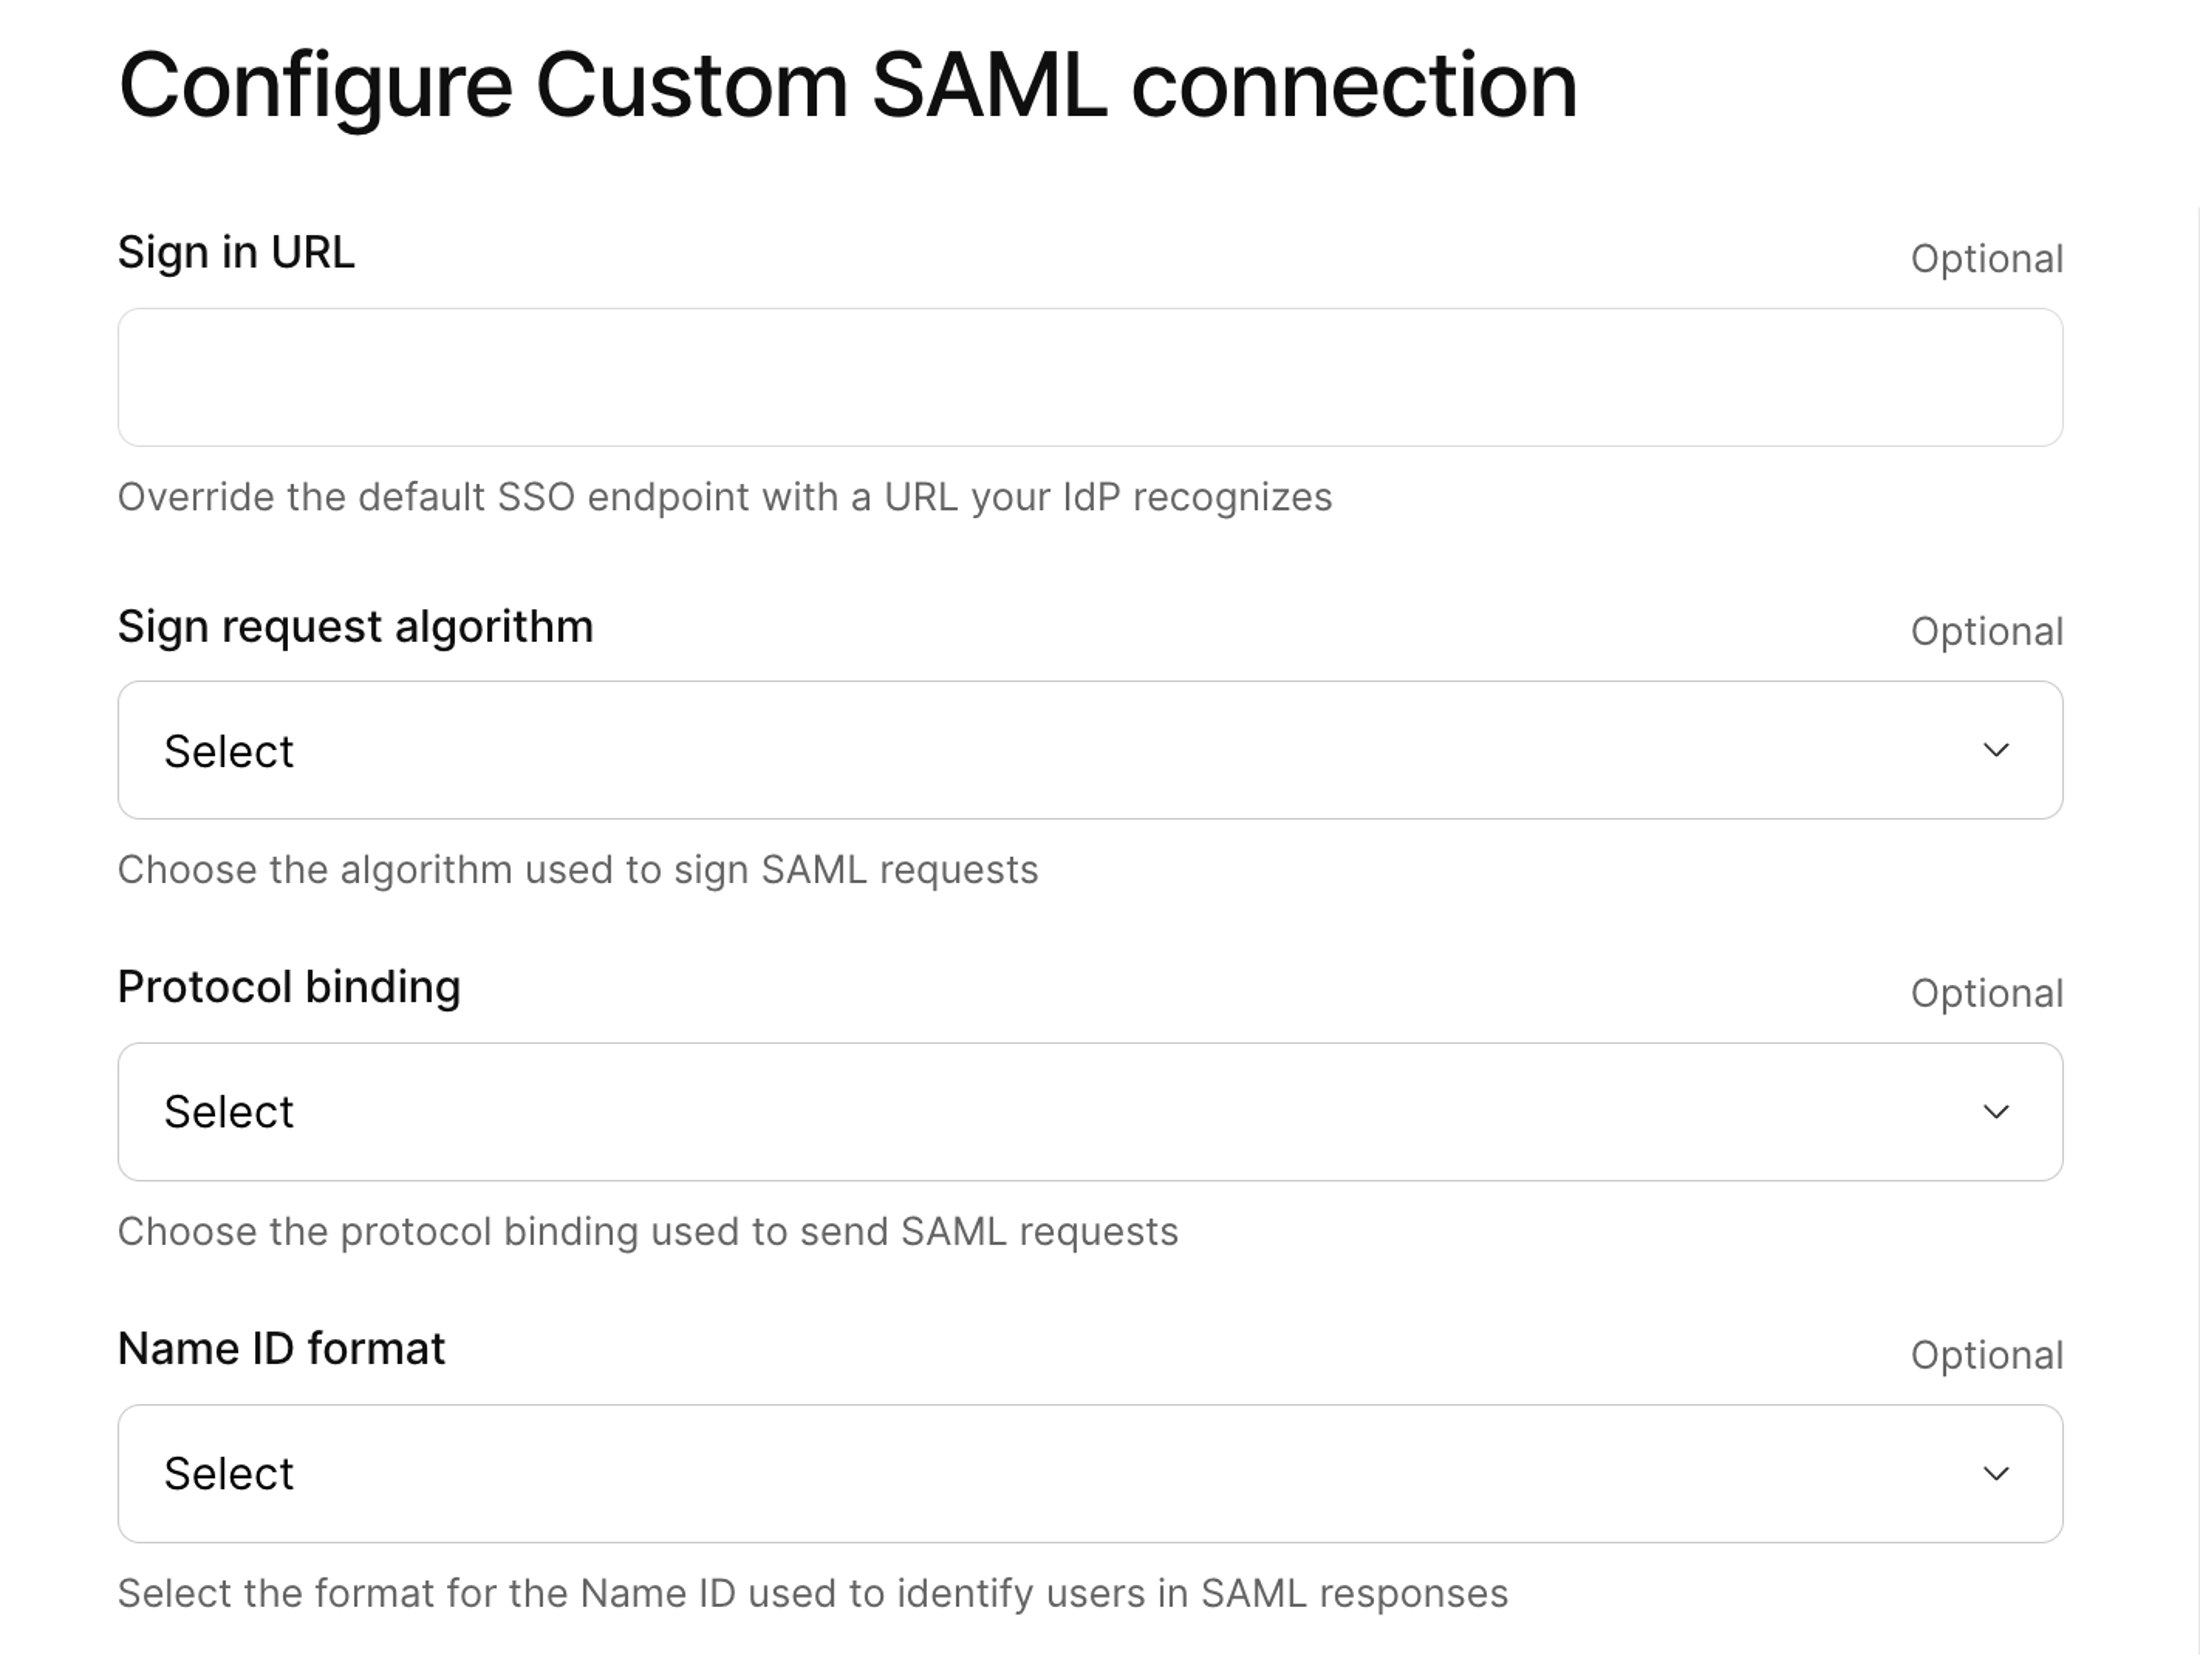 5. If you want, select the **Sign request algorithm** and **Protocol binding**. The options you choose will depend on what your identity provider prefers or requires. 6. Select a **Name ID** format. This helps identify and link user identities between your IdP and Kinde. 7. Enter an **Email key attribute**. This is the attribute in the SAML token that contains the user’s email. Setting this value ensures that the email address returned in the SAML response is correctly retrieved. We do not recommend leaving this field blank, but if you do we will set ‘email’ as the attribute. 8. (Optional) Add a first name and last name key attribute. 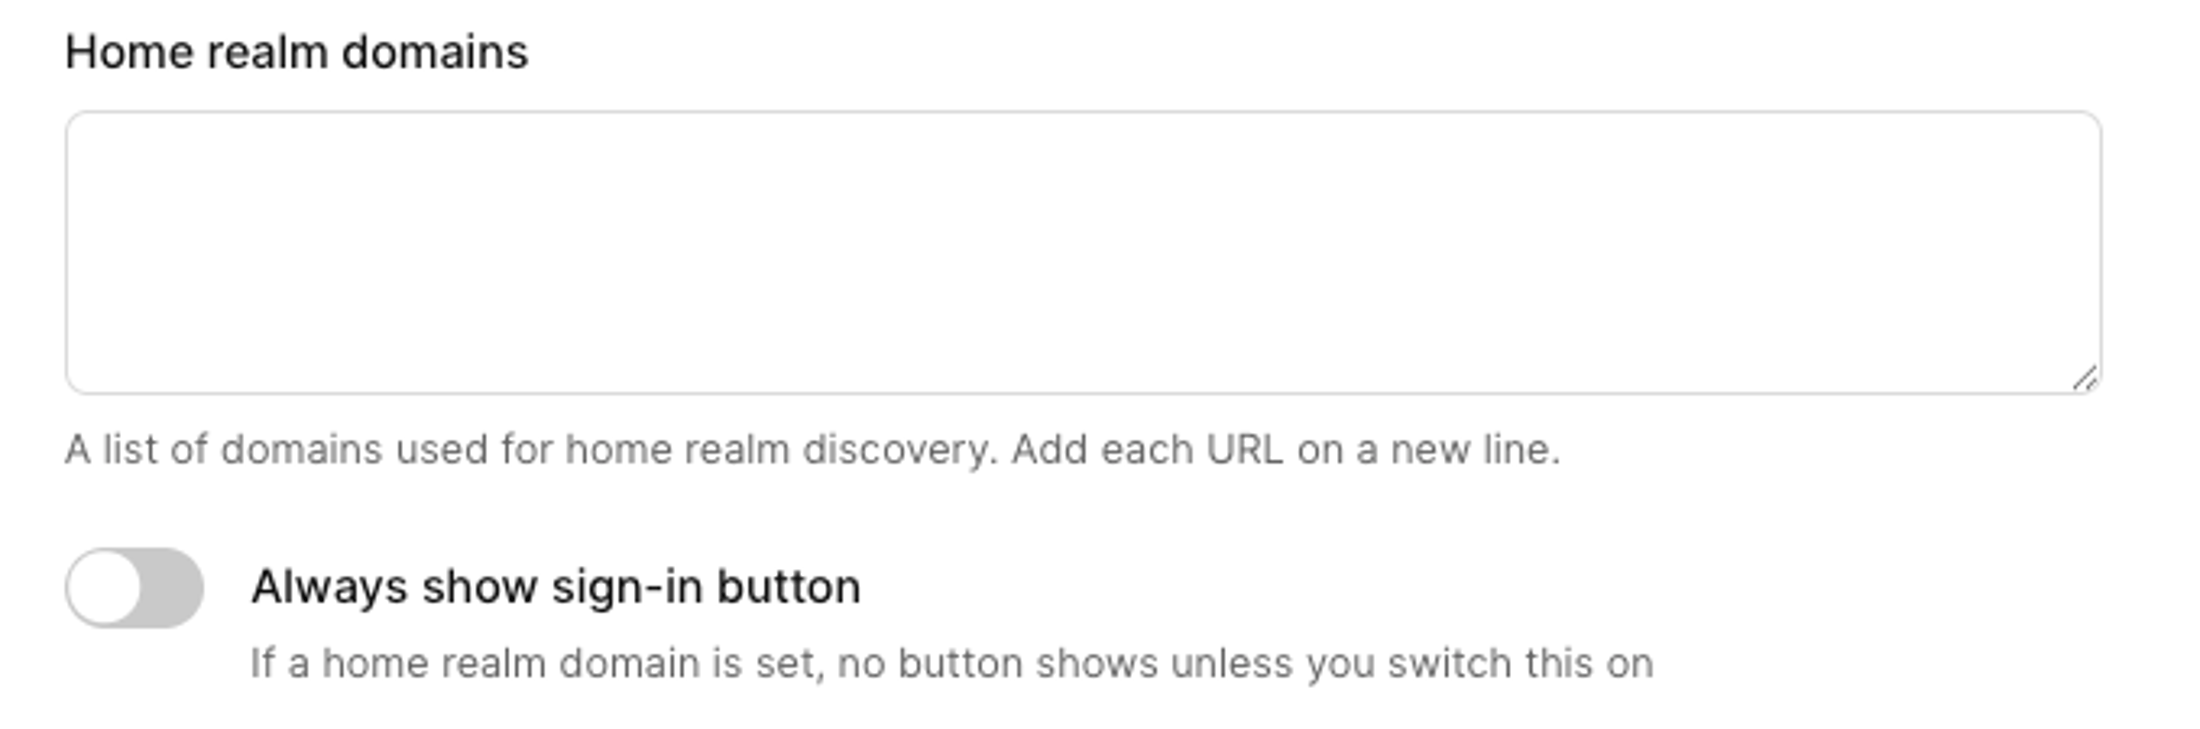 9. Enter any relevant **Home realm domains**. This is how SAML recognizes a user’s credentials and routes them to the correct sign in page. Note that home realm domains need to be unique across all connections in an environment. [Read more about home realm domains](/authenticate/enterprise-connections/home-realm-discovery/). 10. If you use home realm domains, the sign in button is hidden on the auth screen by default. To show the SSO button, select the **Always show sign-in button** option. 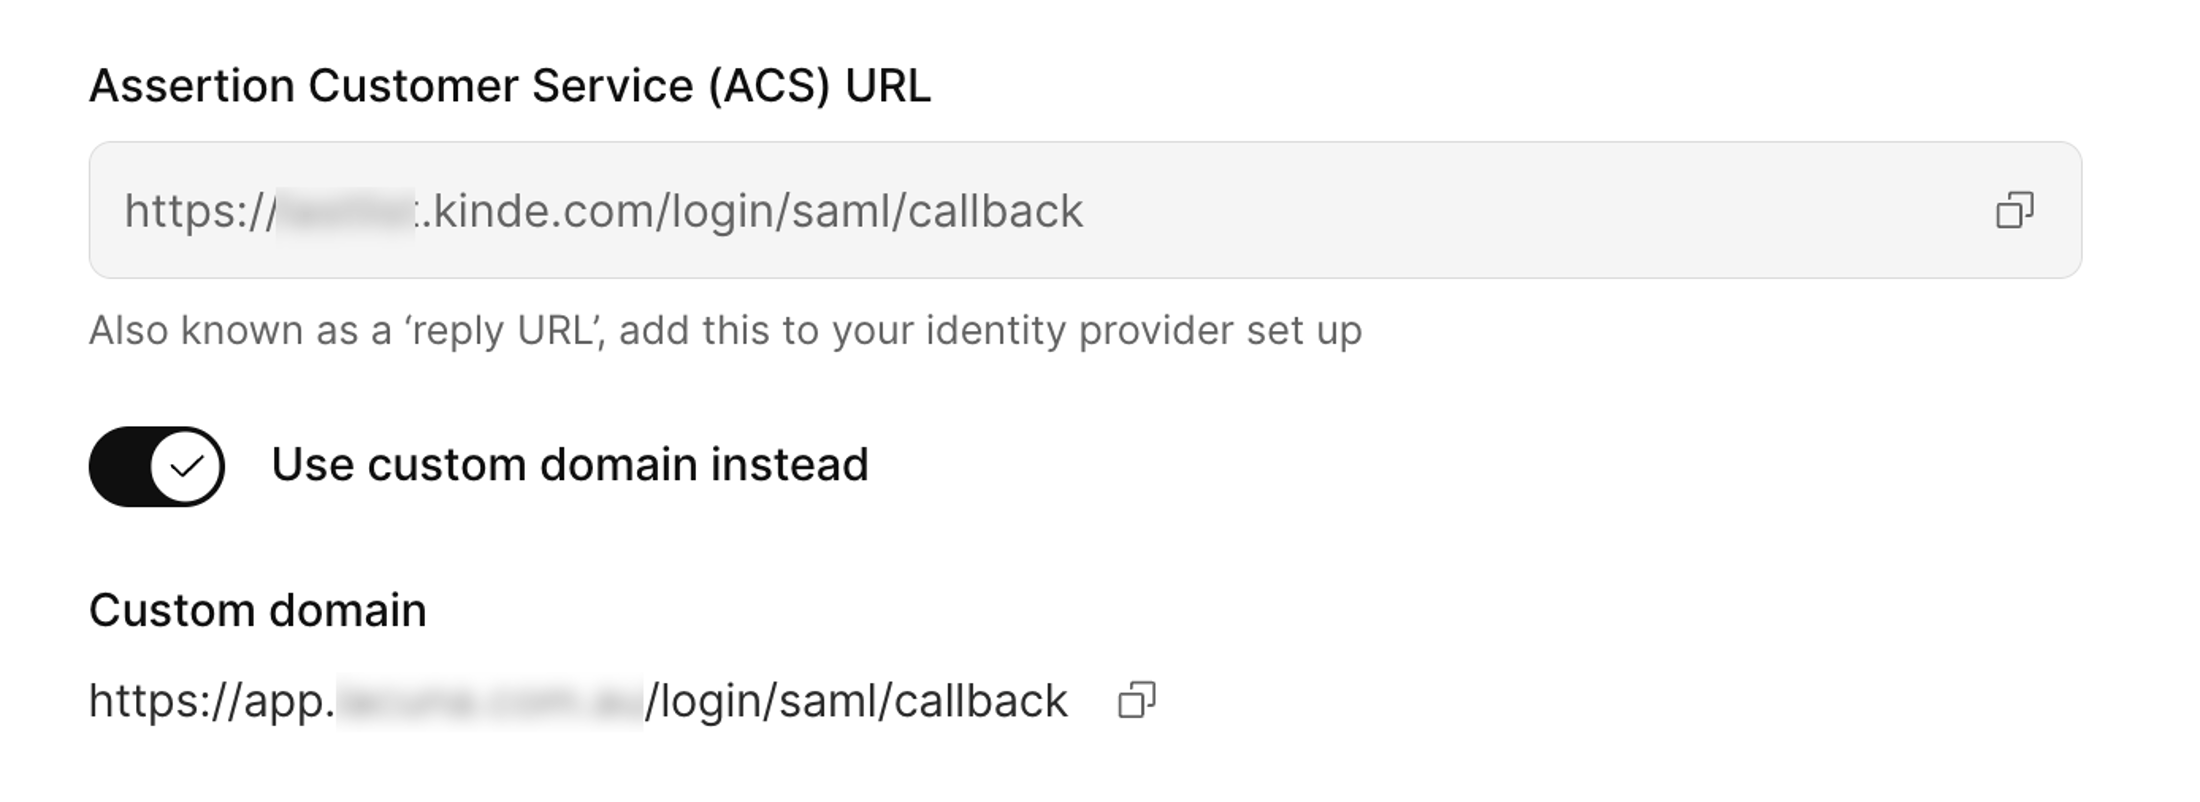 11. Copy the relevant reply URL: 1. If you don't use a custom domain, copy the **ACS URL**. 2. If you do use a custom domain, select the **Use custom domain instead** option and copy the custom domain URL. Later, add this URL to your identity provider configuration. 12. If you want to enable just-in-time (JIT) provisioning for users, select the **Create a user record in Kinde** option. This saves time adding users manually or via API later. 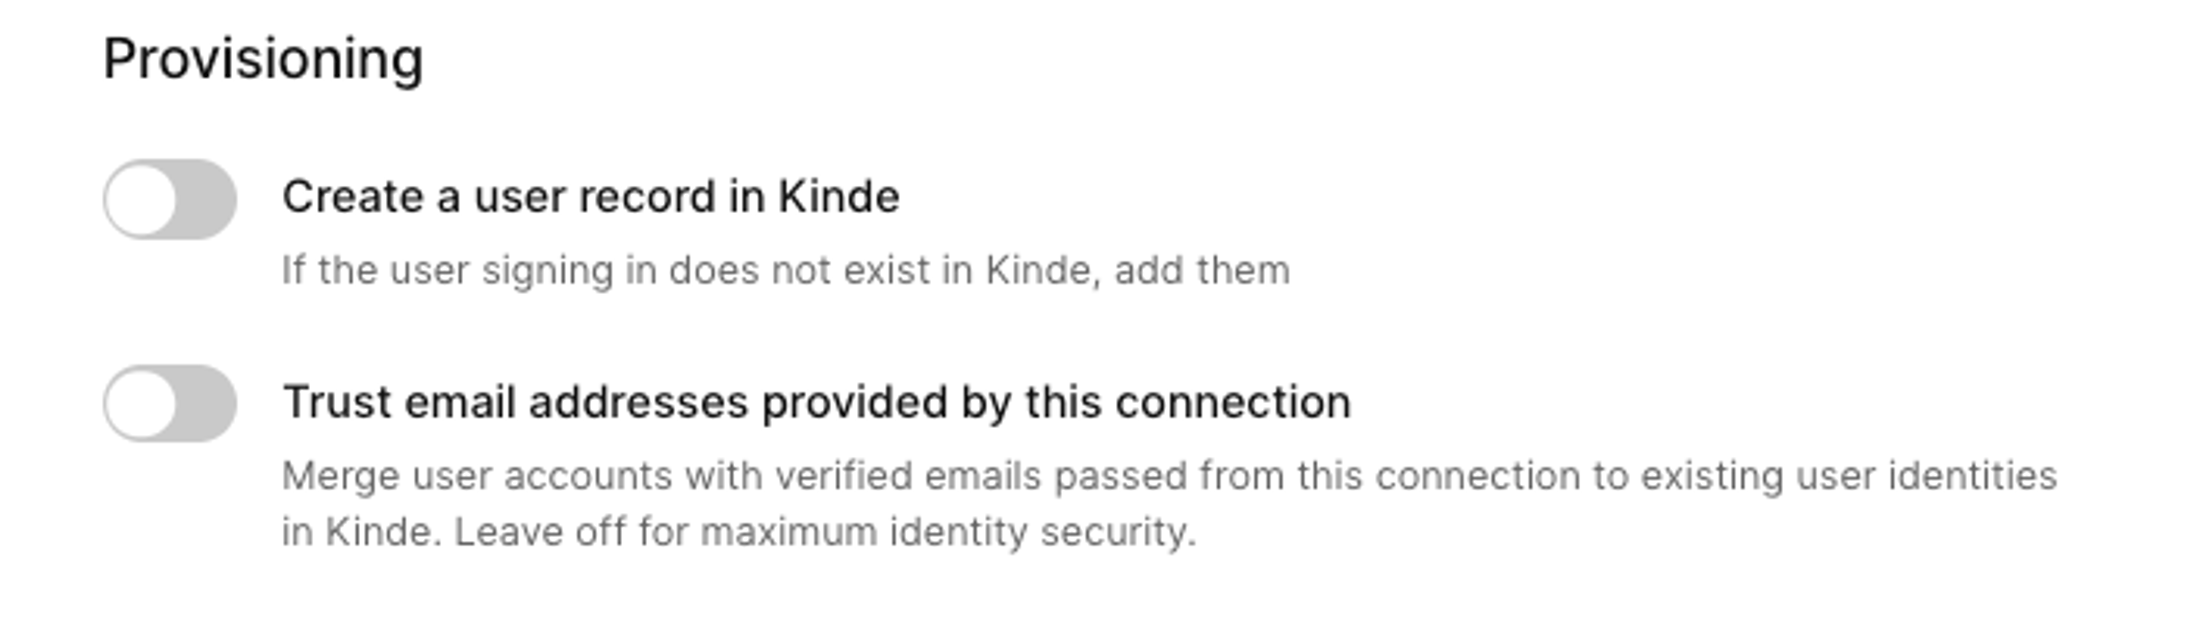 13. Select **Trust email addresses provided by this connection** if you want to treat this connection as a [trusted provider](/authenticate/about-auth/identity-and-verification/#trusting-emails-from-providers). 14. (Optional) In the **Sign SAML request** section, paste in the **Signed certificate** and **Private key**. You may have got these from your IdP or you may have generated yourself (see procedure above). 15. Enter any [upstream params](/authenticate/enterprise-connections/advanced-saml-configurations/#upstream-parameters) that you want to pass to the identity provider. Not all providers support this, so check their documentation first. 16. Select **Save**. ## Step 3: Add and configure your Cloudflare application 1. Sign in to your Cloudflare account. 2. In the menu, select **Zero trust**. 3. Go to **Access > Applications**, then select **Add an application**. 4. Select SaaS as the type of application. The **Add application** window opens. 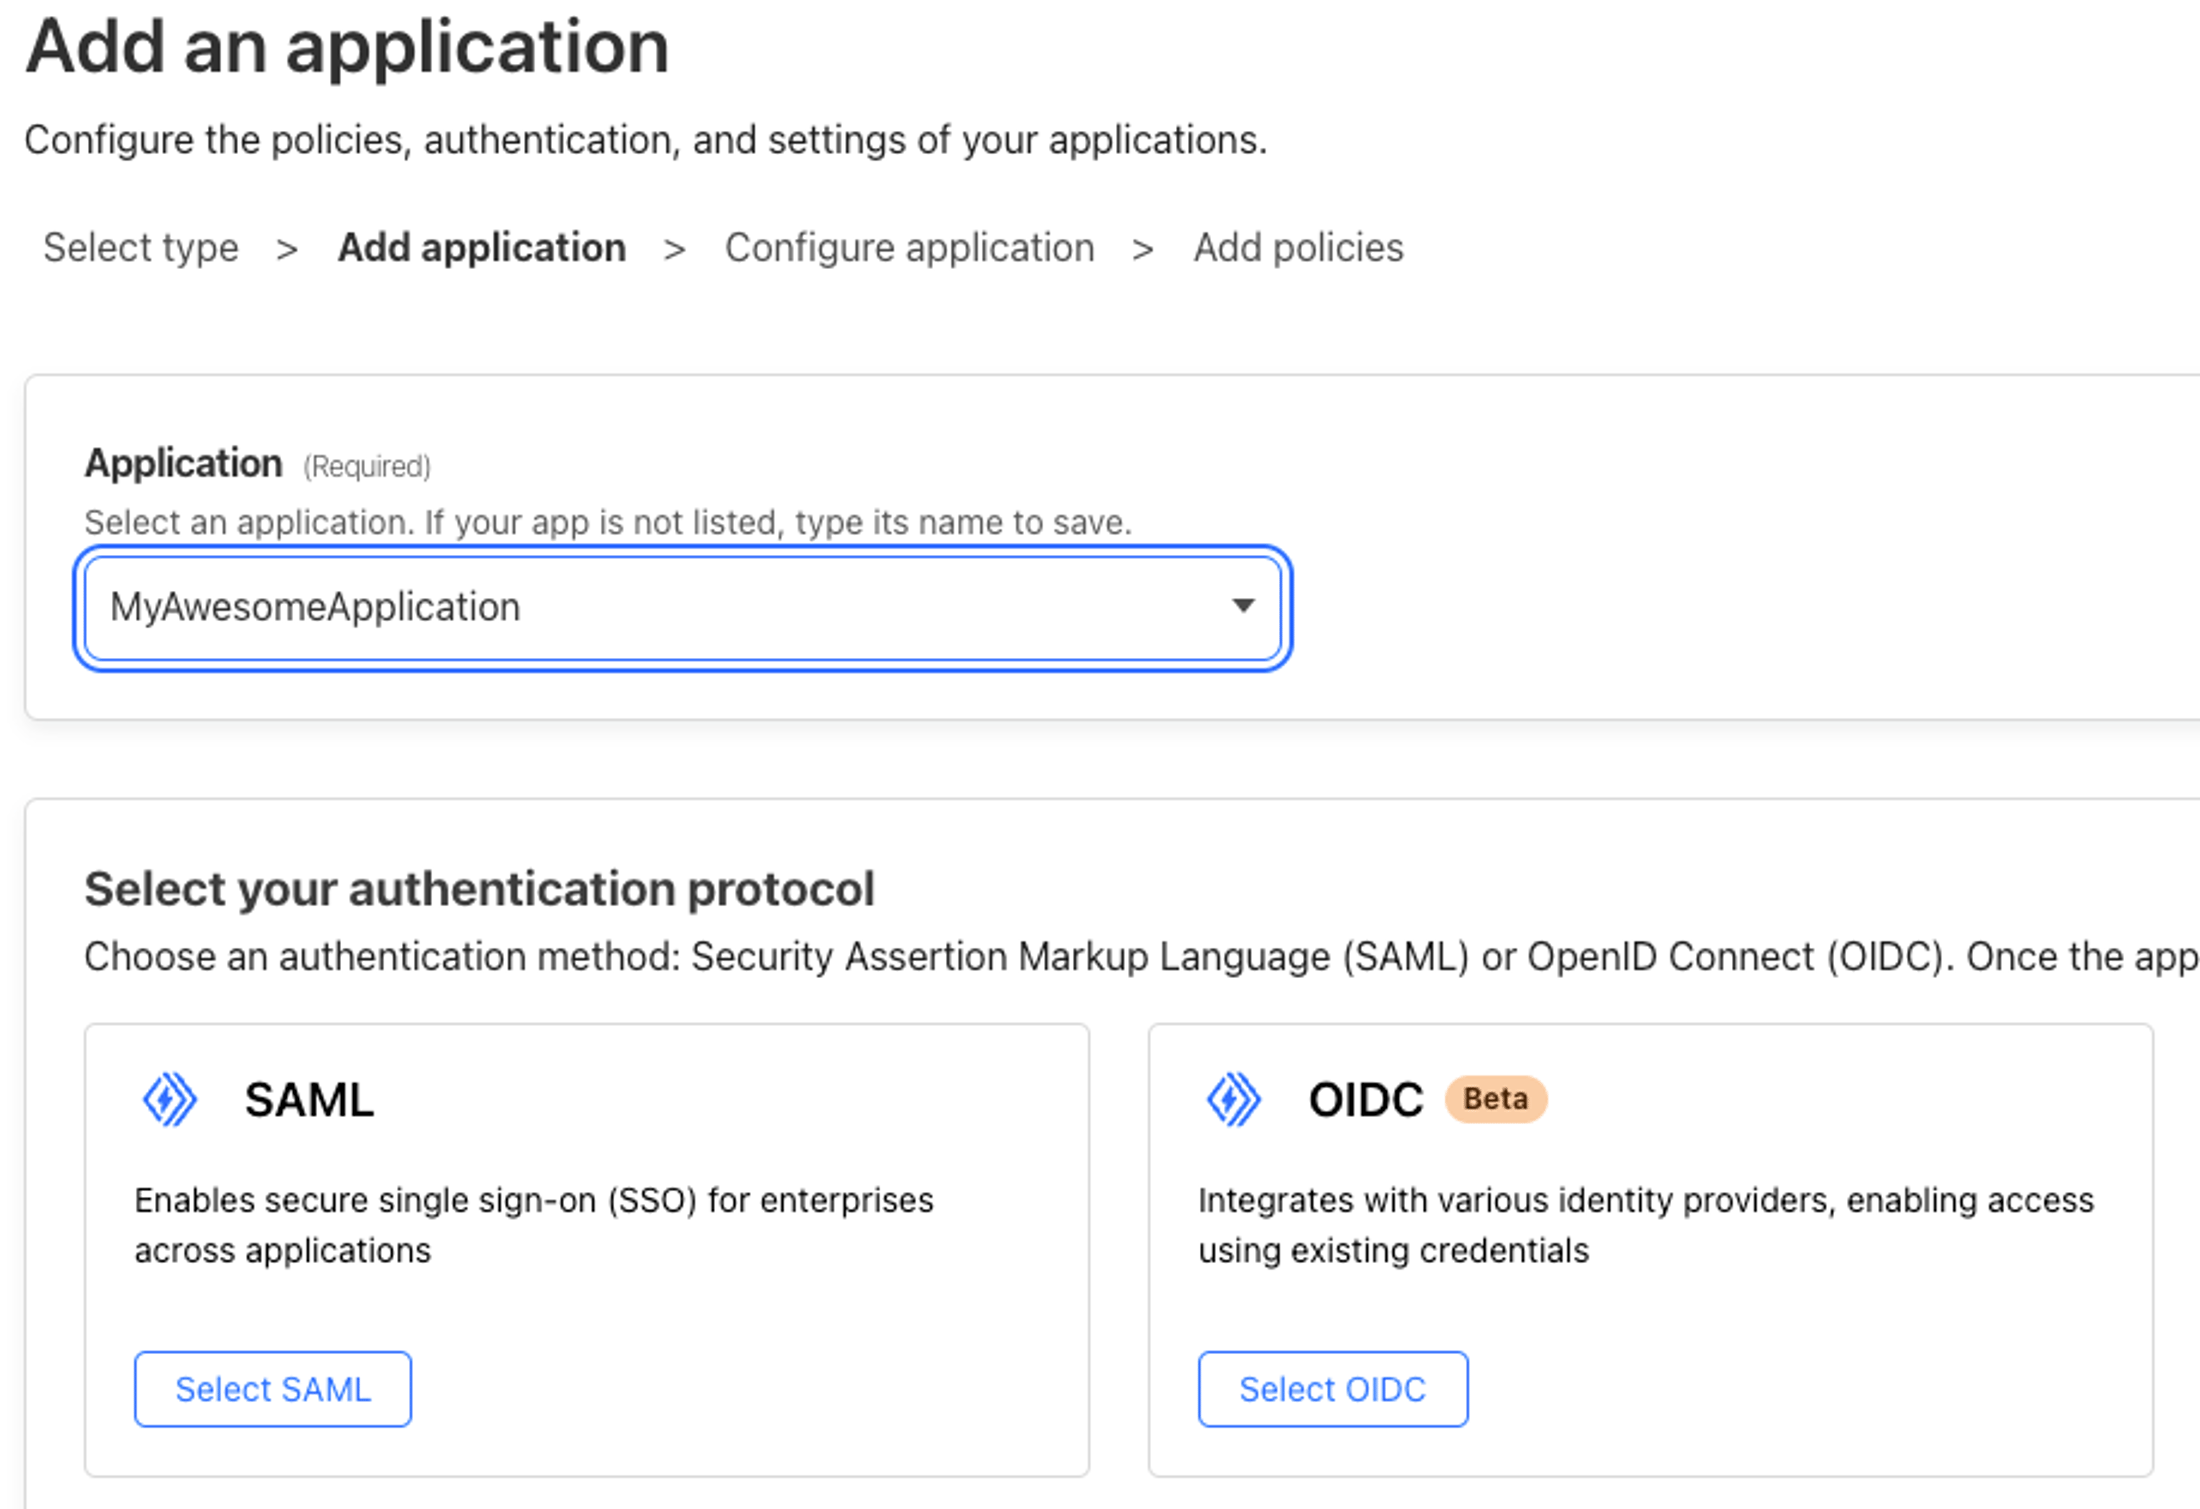 5. Enter an application name or select an application. 6. Choose **Select SAML** for the authentication protocol. 7. Select **Add Application**. The **Configure application** page opens.  7. Add the **Entity ID** and **ACS URL** from Kinde. 8. Copy the **SAML Metadata endpoint** to your clipboard. You'll need to enter this back in Kinde. 9. Scroll through the other sections and then select **Save configuration**. The **Add policies** page opens. 10. Add a policy to define who can access your application. You might do this via an allowlist and groups, or other strategy. 11. Complete any other relevant sections of the window, and then select **Done**. 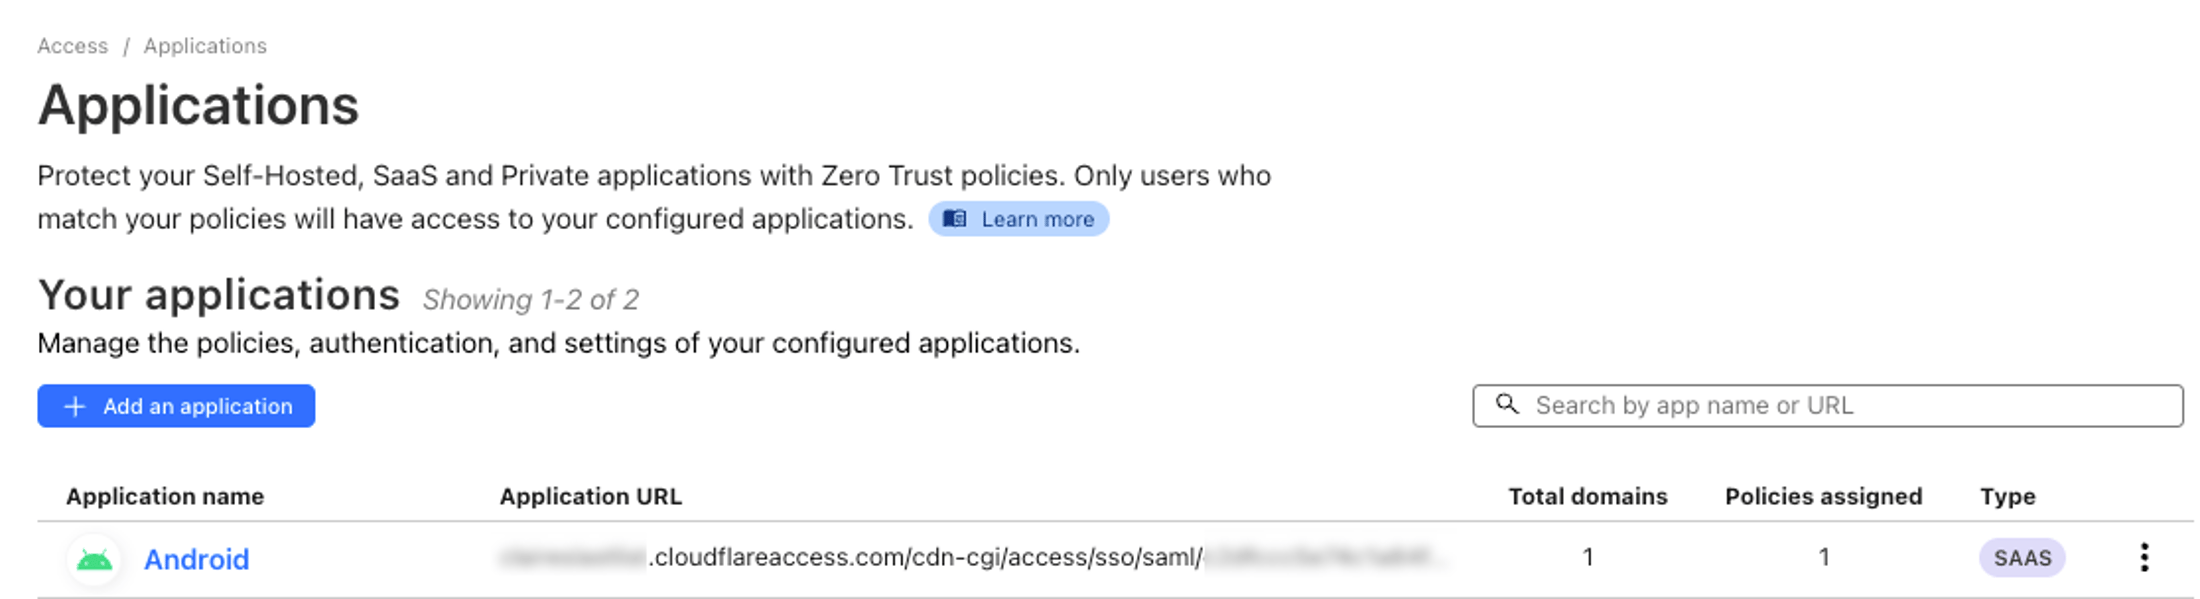 ## Step 4: Finish setting up your Cloudflare connection 1. Open the connection in Kinde. Via **Organization > Authentication** or via **Settings > Authentication**. 2. Scroll to the **IdP metadata URL** field and paste the **Metadata URL** you copied from your Cloudflare app. 3. Switch on the connection. This will make it instantly available to users if this is your production environment. 1. For environment-level connections, scroll down and select the apps that will use the auth method. 2. For organization-level connections, scroll down and select if you want to switch this on for the org. 4. Select **Save**.
# Authenticate - Enterprise connections - Google Workspace enterprise connection (SAML)
> Step-by-step guide to setting up Google Workspace SAML authentication including metadata file hosting and Admin Console configuration.
Last updated: 2025-01-16
Google Workspace, SAML, enterprise auth, metadata hosting, Admin Console, SSO
authenticate
You can set up SAML to work with your Google Workspace.  ## Hosting the SAML metadata XML file Google does not support hosting your SAML metadata XML file on their web services, but Kinde requires access to the file via URL so that certificates are always up to date. We recommend you host the file on a public web service that can be accessed by Kinde. For example, you could use an [AWS S3](https://aws.amazon.com/s3/) bucket, [Cloudflare R2](https://developers.cloudflare.com/r2/), or public website. ## Advanced configurations Depending on your SAML set up, you may need to include advanced configurations for your connection. See [Advanced SAML configurations](/authenticate/enterprise-connections/advanced-saml-configurations/). ## Step 1: Add Google Workspace SAML in Kinde You can make a connection available only to a specific organization, or you can create it so it can be used across any organization in your business. ### Add a connection for a specific organization 1. Go to **Organizations** and open the organization. 2. In the menu, select **Authentication**, then select **Add connection**. 3. In the **Add connection** window, select **New enterprise connection**, then click **Next**. 4. Select the connection type you want and then select **Next**. 5. Next: 'Step 2: Configure the connection'. ### Add a connection that can be shared across multiple organizations 1. Go to **Settings > Environment > Authentication**. 2. Scroll to the **Enterprise connection** section and select **Add connection**. The **Add connection** window opens. 3. Select the connection type you want and then select **Next**. 4. Next: 'Step 2: Configure the connection'. ## Step 2: Configure the connection 1. Enter the **Connection name**. This name is what will appear on the button on the authentication screen. We will call it ‘Google Workspace’ for this example. 2. Enter an **Entity ID**. This field can be any mix of numbers and letters, as long as it matches your IdP configuration. Copy this somewhere you can access it later. 3. If you are adding this connection to a live environment, you will be prompted to enter an **IdP Metadata URL** before you can save. If you are not sure of the file location, enter any URL and we will update this later.  4. Enter a **sign in URL** if your IdP requires a specific URL. 5. If you want, select the **Sign request algorithm** and **Protocol binding**. The options you choose will depend on what your identity provider prefers or requires. 6. Select a **Name ID** format. This helps identify and link user identities between your IdP and Kinde. 7. Enter an **Email key attribute**. This is the attribute in the SAML token that contains the user’s email. Setting this value ensures that the email address returned in the SAML response is correctly retrieved. We do not recommend leaving this field blank, but if you do we will set ‘email’ as the attribute. 8. (Optional) Add a first name and last name key attribute.  9. Enter any relevant **Home realm domains**. This is how SAML recognizes a user’s credentials and routes them to the correct sign in page. Note that home realm domains need to be unique across all connections in an environment. [Read more about home realm domains](/authenticate/enterprise-connections/home-realm-discovery/). 10. If you use home realm domains, the sign in button is hidden on the auth screen by default. To show the SSO button, select the **Always show sign-in button** option.  11. Copy the relevant reply URL: 1. If you don't use a custom domain, copy the **ACS URL**. 2. If you do use a custom domain, select the **Use custom domain instead** option and copy the custom domain URL. Later, add this URL to your identity provider configuration. 12. If you want to enable just-in-time (JIT) provisioning for users, select the **Create a user record in Kinde** option. This saves time adding users manually or via API later.  13. Select **Trust email addresses provided by this connection** if you want to treat this connection as a [trusted provider](/authenticate/about-auth/identity-and-verification/#trusting-emails-from-providers). 14. (Optional) In the **Sign SAML request** section, paste in the **Signed certificate** and **Private key**. You may have got these from your IdP or you may have generated yourself (see procedure above). 15. Enter any [upstream params](/authenticate/enterprise-connections/advanced-saml-configurations/#upstream-parameters) that you want to pass to the identity provider. Not all providers support this, so check their documentation first. 16. Select **Save**. ## Step 3: Configure Google Workspace Admin Console 1. Sign in to your [Google Workspace Admin Console](https://admin.google.com/). 2. In the main menu, go to **Apps > Web and Mobile Apps**. 3. Select **Add App > Add custom SAML app.**  4. Complete the **App details** window: 1. Enter a name in the **App name** field. 2. Enter a **Description** for the app. 3. If you want, upload an icon for the app. 4. Select **Continue**.  5. Copy the **Google Identity Provider details** by selecting **DOWNLOAD METADATA** under Option 1. This is the file you will need to upload to a file storage location and provide a URL to finish setting up in Kinde. 6. Select **Continue**. 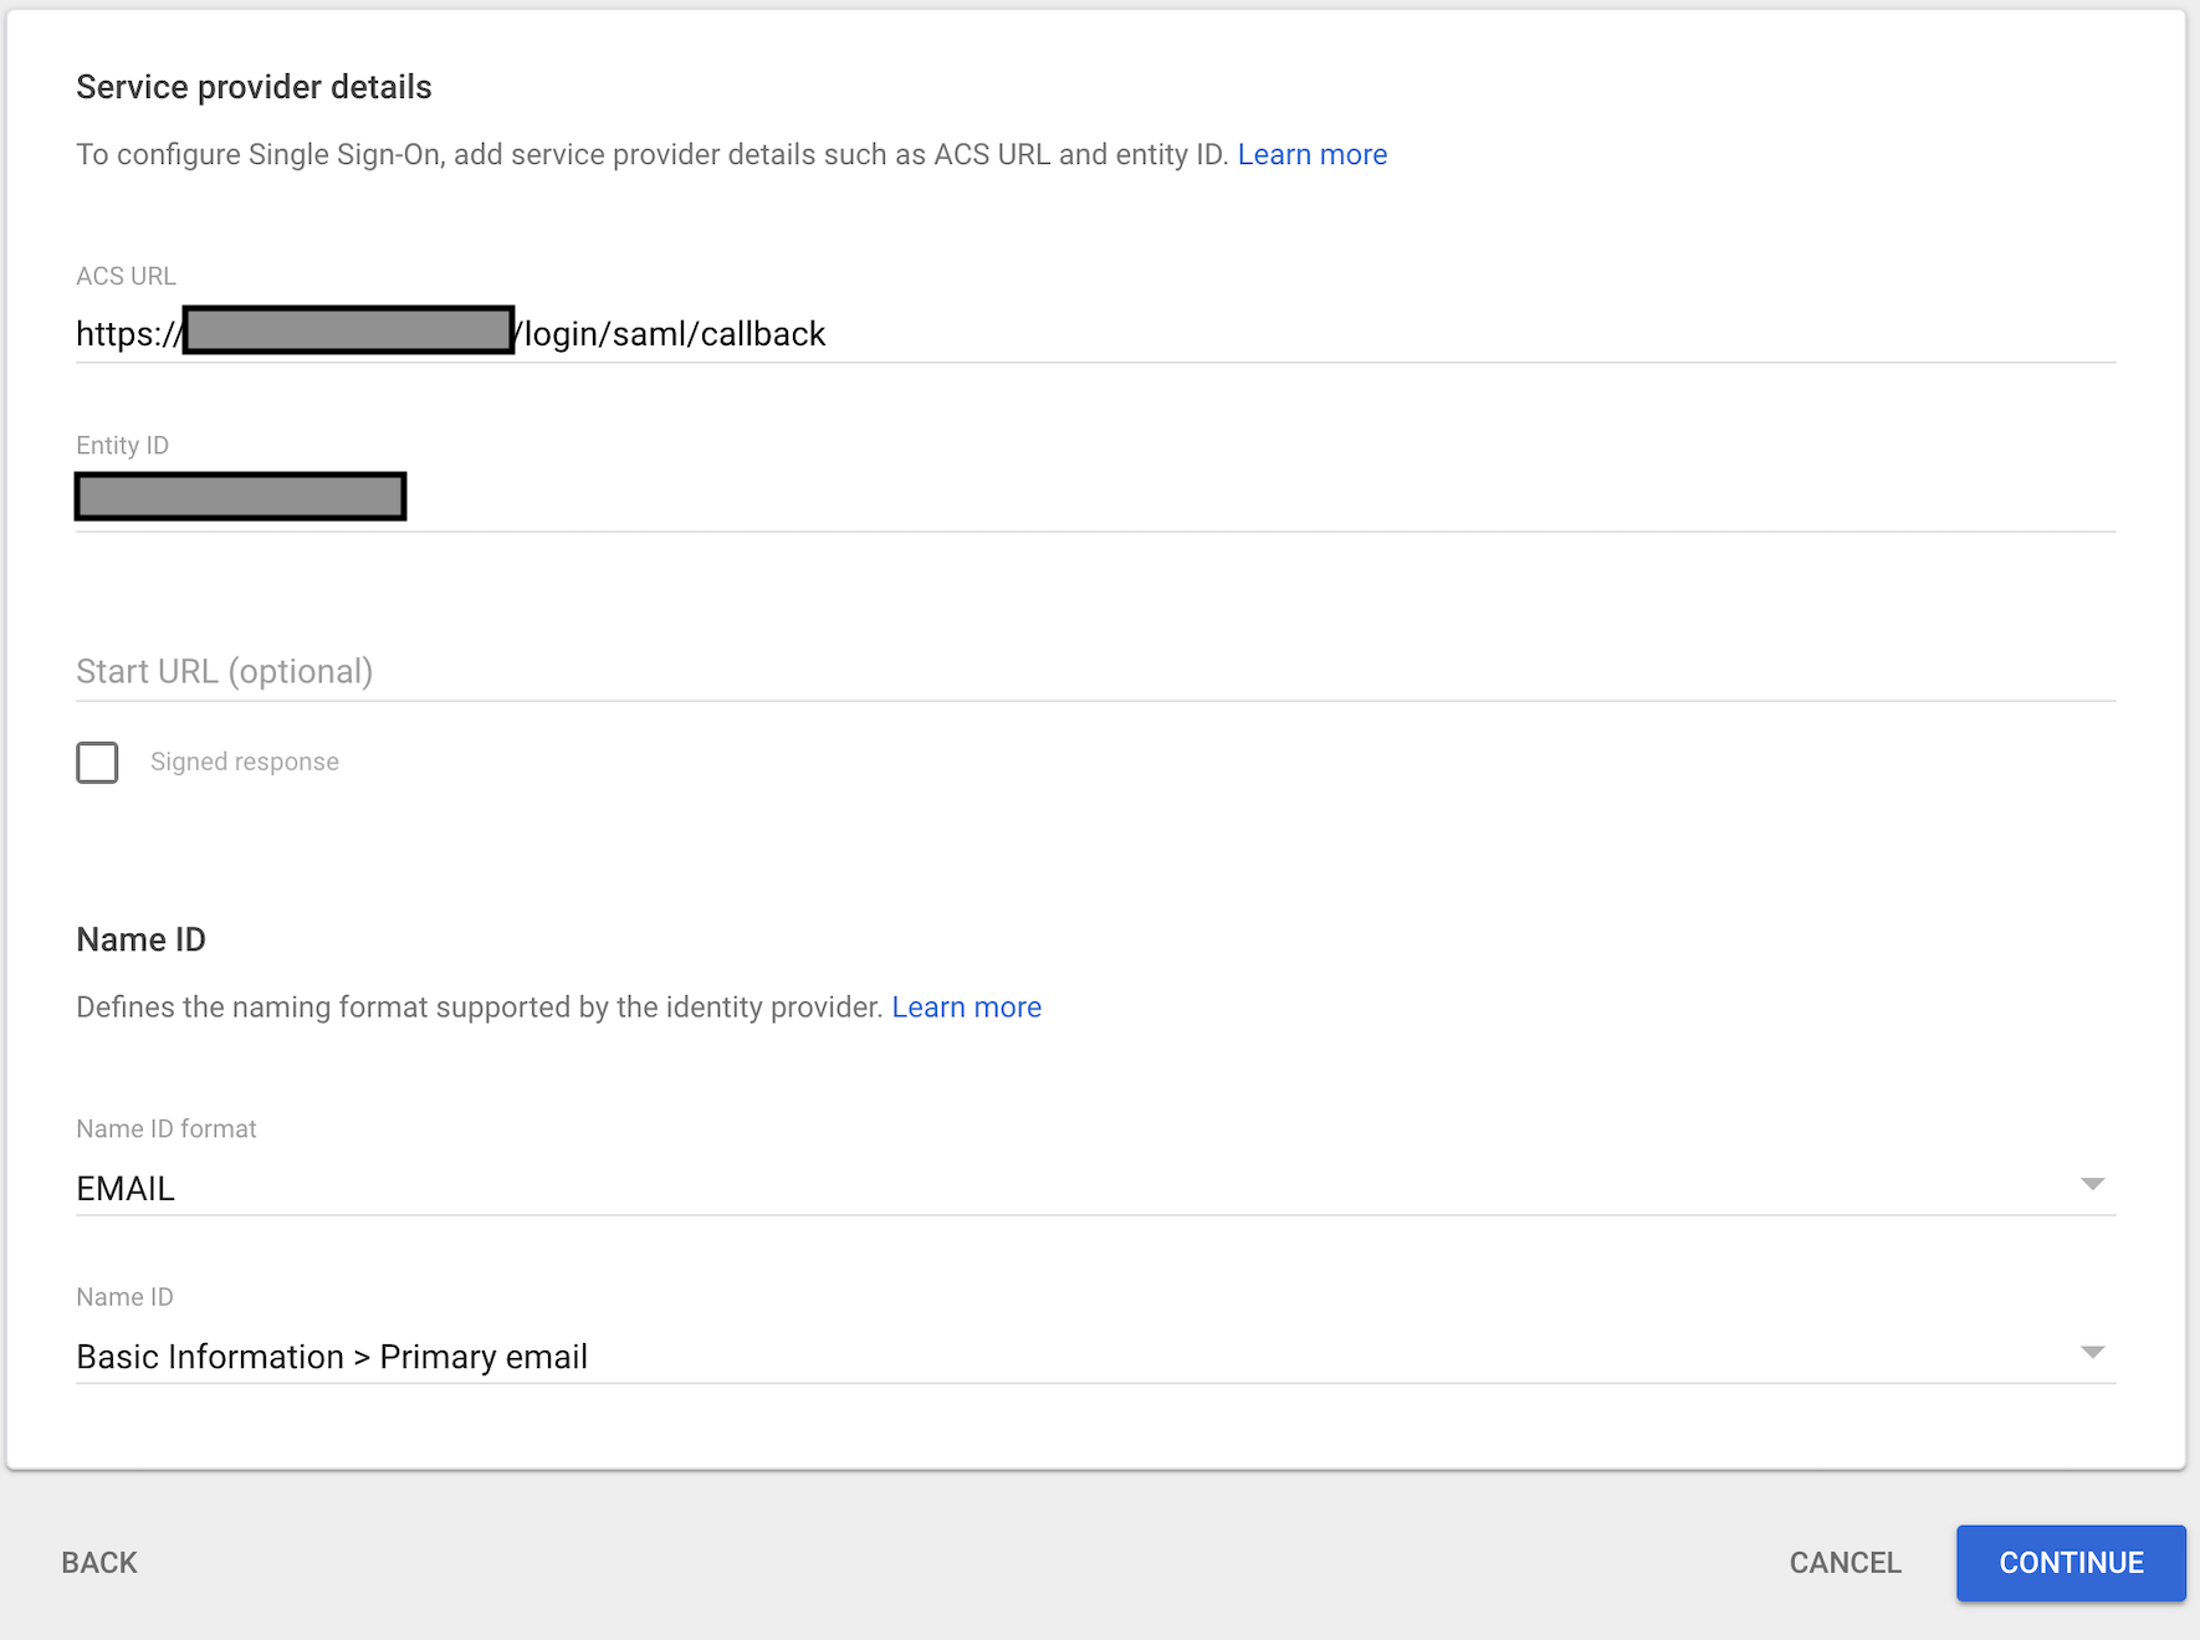 7. Enter the **Service provider details**: 1. Enter or paste in the **ACS URL** you copied from Kinde earlier. 2. Enter or paste the **Entity ID**, this needs to match what was entered in Kinde earlier. 3. Set the **Name ID format** as **EMAIL**. 4. Select **Continue**. 8. On the **Attribute mapping** page, select **Finish**. 9. If you want to grant access to other users, select the chevron in the right corner of the **User access** panel. This opens additional options. 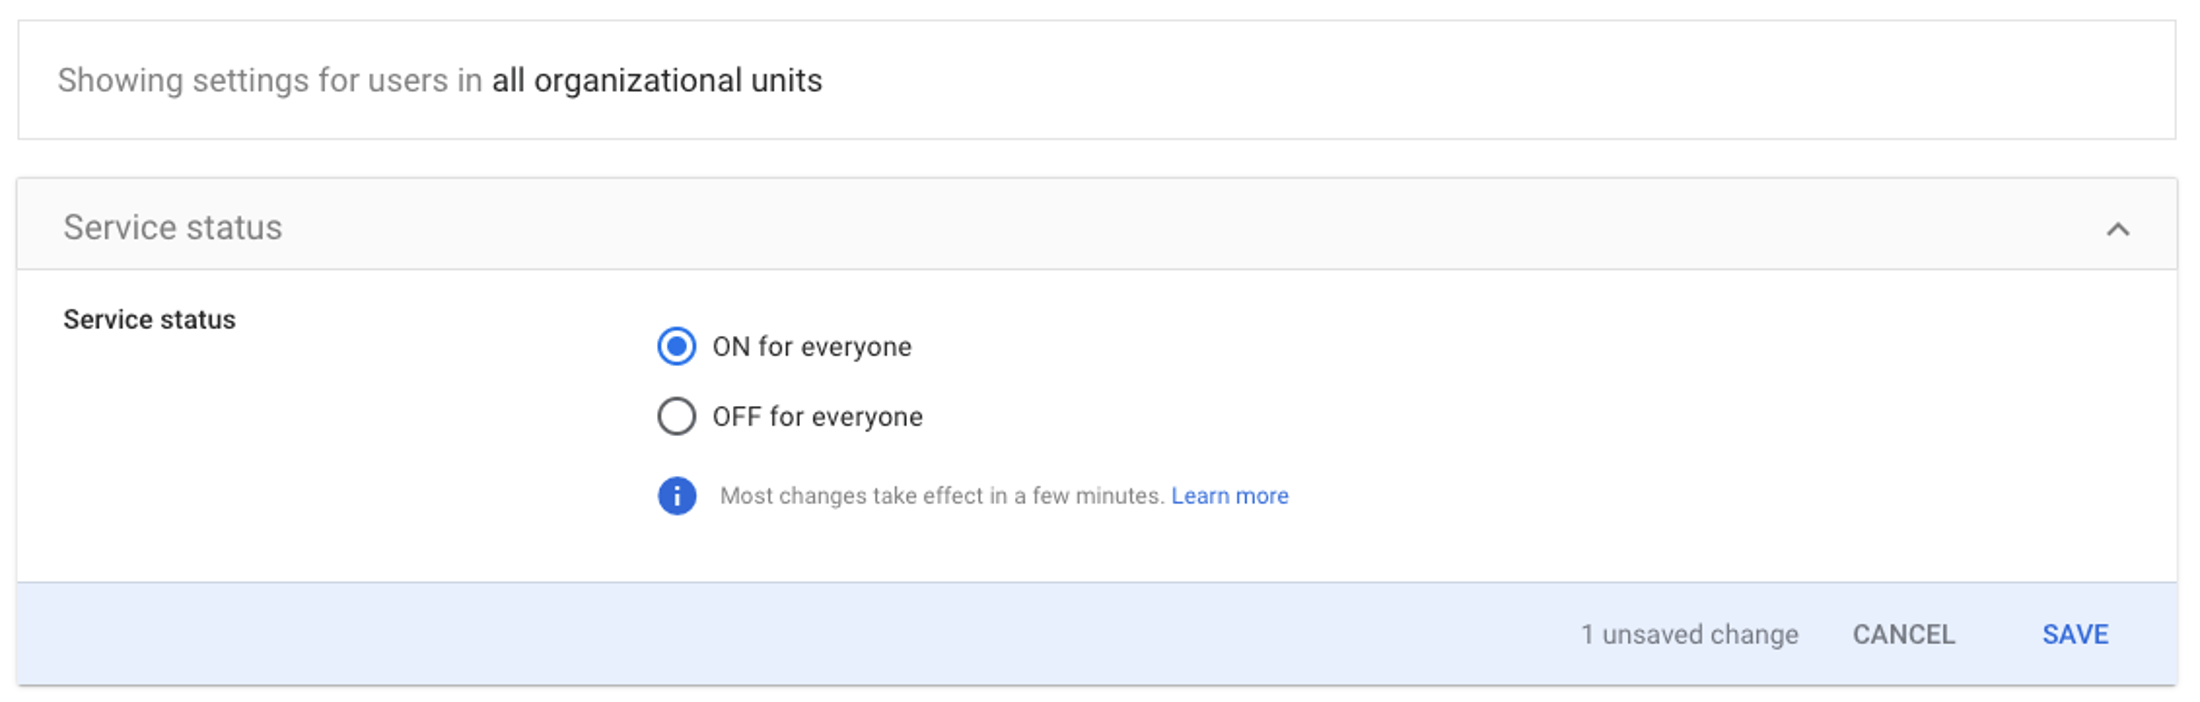 10. If you want, you can change the access to suit your organization’s needs. You can do this per Organizational unit or switch **ON for everyone.** 11. Select **Save**. ## Step 4: Upload metadata file As mentioned at the start, you need to upload the **metadata file** that you downloaded, to somewhere publicly accessible. This is because Google does not provide a publicly available URL for the metadata file. 1. Upload the metadata file to your storage location. 2. Copy the URL for the file. ## Step 5: Complete Kinde configuration 1. Open the connection's configuration page in Kinde. 2. In the **IdP metadata URL** field, paste the URL for the metadata file. 3. Switch on the connection. This will make it instantly available to users if this is your production environment. 1. For environment-level connections, scroll down and select the apps that will use the auth method. 2. For organization-level connections, scroll down and select if you want to switch this on for the org. 4. Select **Save**. ## Test the connection Once you have completed the above steps, you should be able to see a **Google Workspace** sign-in button on your product’s authentication screen. Note: if you gave the enterprise connection a different name in Kinde, the button will have the name you entered. If you can’t see the button: - Check that the metadata URL and other connection details are correct in Kinde. - Check that user access is set up in your app, in the Google Workspace Console. Try to sign in and hopefully - success!!
# Authenticate - Enterprise connections - Custom SAML enterprise connection
> Complete guide to setting up custom SAML authentication with any identity provider including certificate generation, advanced configurations, and testing.
Last updated: 2026-04-20
SAML, custom SAML, identity provider, IdP, service provider, SP, certificate, private key, JIT provisioning, metadata URL, metadata hosting, XML
authenticate
In Kinde, you can use SAML as your authentication protocol. Kinde acts as a service provider (SP), so you still need to bring your own identity provider (IdP) to set it up. Identity providers can include Google, Microsoft, Cloudflare, and others. Looking to let your own team sign in to third-party tools using Kinde as the identity provider? See [Workforce identity in Kinde](/workforce-identity/).  Note: Since there are differences between set ups for each IdP, we are unable to provide full details on how to configure them all to connect with Kinde. However, the fields we mention below, should have similar names in your IdP. Some concepts are explained in the [advanced SAML configurations](/authenticate/enterprise-connections/advanced-saml-configurations/) topic. ## User provisioning Before you set up SAML, you can [import users in bulk](/manage-users/add-and-edit/import-users-in-bulk/), add them via [API](/kinde-apis/management#tag/users/post/api/v1/user), or [manually](/manage-users/add-and-edit/add-and-edit-users/) in Kinde. Alternatively, you can also take advantage of just-in-time (JIT) provisioning (Step 13 below) when you set up the connection. ## (Optional) Signed certificate and private key You can increase SAML security by adding a certificate and private key pair to your setup. Your IdP will check that the certificate and private key matches, each time a user authenticates this way. You can obtain the certificate and key from your IdP or you can generate yourself, see below. ### Generate a certificate and private key pair 1. In your preferred system, run a command to generate a certificate and key. For example, on \*nix systems, the command is: `openssl req -x509 -nodes -sha256 -days 3650 -newkey rsa:2048 -keyout private_key.key -out certificate.crt`. 2. This command may also work in other systems, such as WSL on Windows. Alternatively, you can try installing openssl binaries for your system. 3. Once the files are generated, save them locally. 4. Add the certificate to your IdP settings. The certificate there and the one in Kinde must match exactly. Instructions for how to do this varies, depending on your IdP. 5. Copy the certificate and private key details into Kinde as per the procedure below. ## Advanced configurations Depending on your SAML set up, you may need to include advanced configurations for your connection. See [Advanced SAML configurations](/authenticate/enterprise-connections/advanced-saml-configurations/) ## Step 1: Add SAML connection in Kinde ### Add a connection for a specific organization 1. Go to **Organizations** and open the organization. 2. In the menu, select **Authentication**, then select **Add connection**. 3. In the **Add connection** window, select **New enterprise connection**, then click **Next**. 4. Select the connection type you want and then select **Next**. 5. Next: 'Step 2: Configure the connection'. ### Add a connection that can be shared across multiple organizations 1. Go to **Settings > Environment > Authentication**. 2. Scroll to the **Enterprise connection** section and select **Add connection**. The **Add connection** window opens. 3. Select the connection type you want and then select **Next**. 4. Next: 'Step 2: Configure the connection'. ## Step 2: Configure the connection 1. Enter a name for the connection. It must match the name in your SAML setup. 2. Enter an **Entity ID.** In SAML metadata this identifier is often labeled **`entityID`**. For SAML SSO, the entity ID must match between your Kinde enterprise connection and your IdP. This is a value you can make up using a random alphanumeric string, e.g. `5836g209gbhw09r8y0913`. The Entity ID you enter here must be configured exactly the same in your identity provider (unless your IdP is Microsoft Azure). 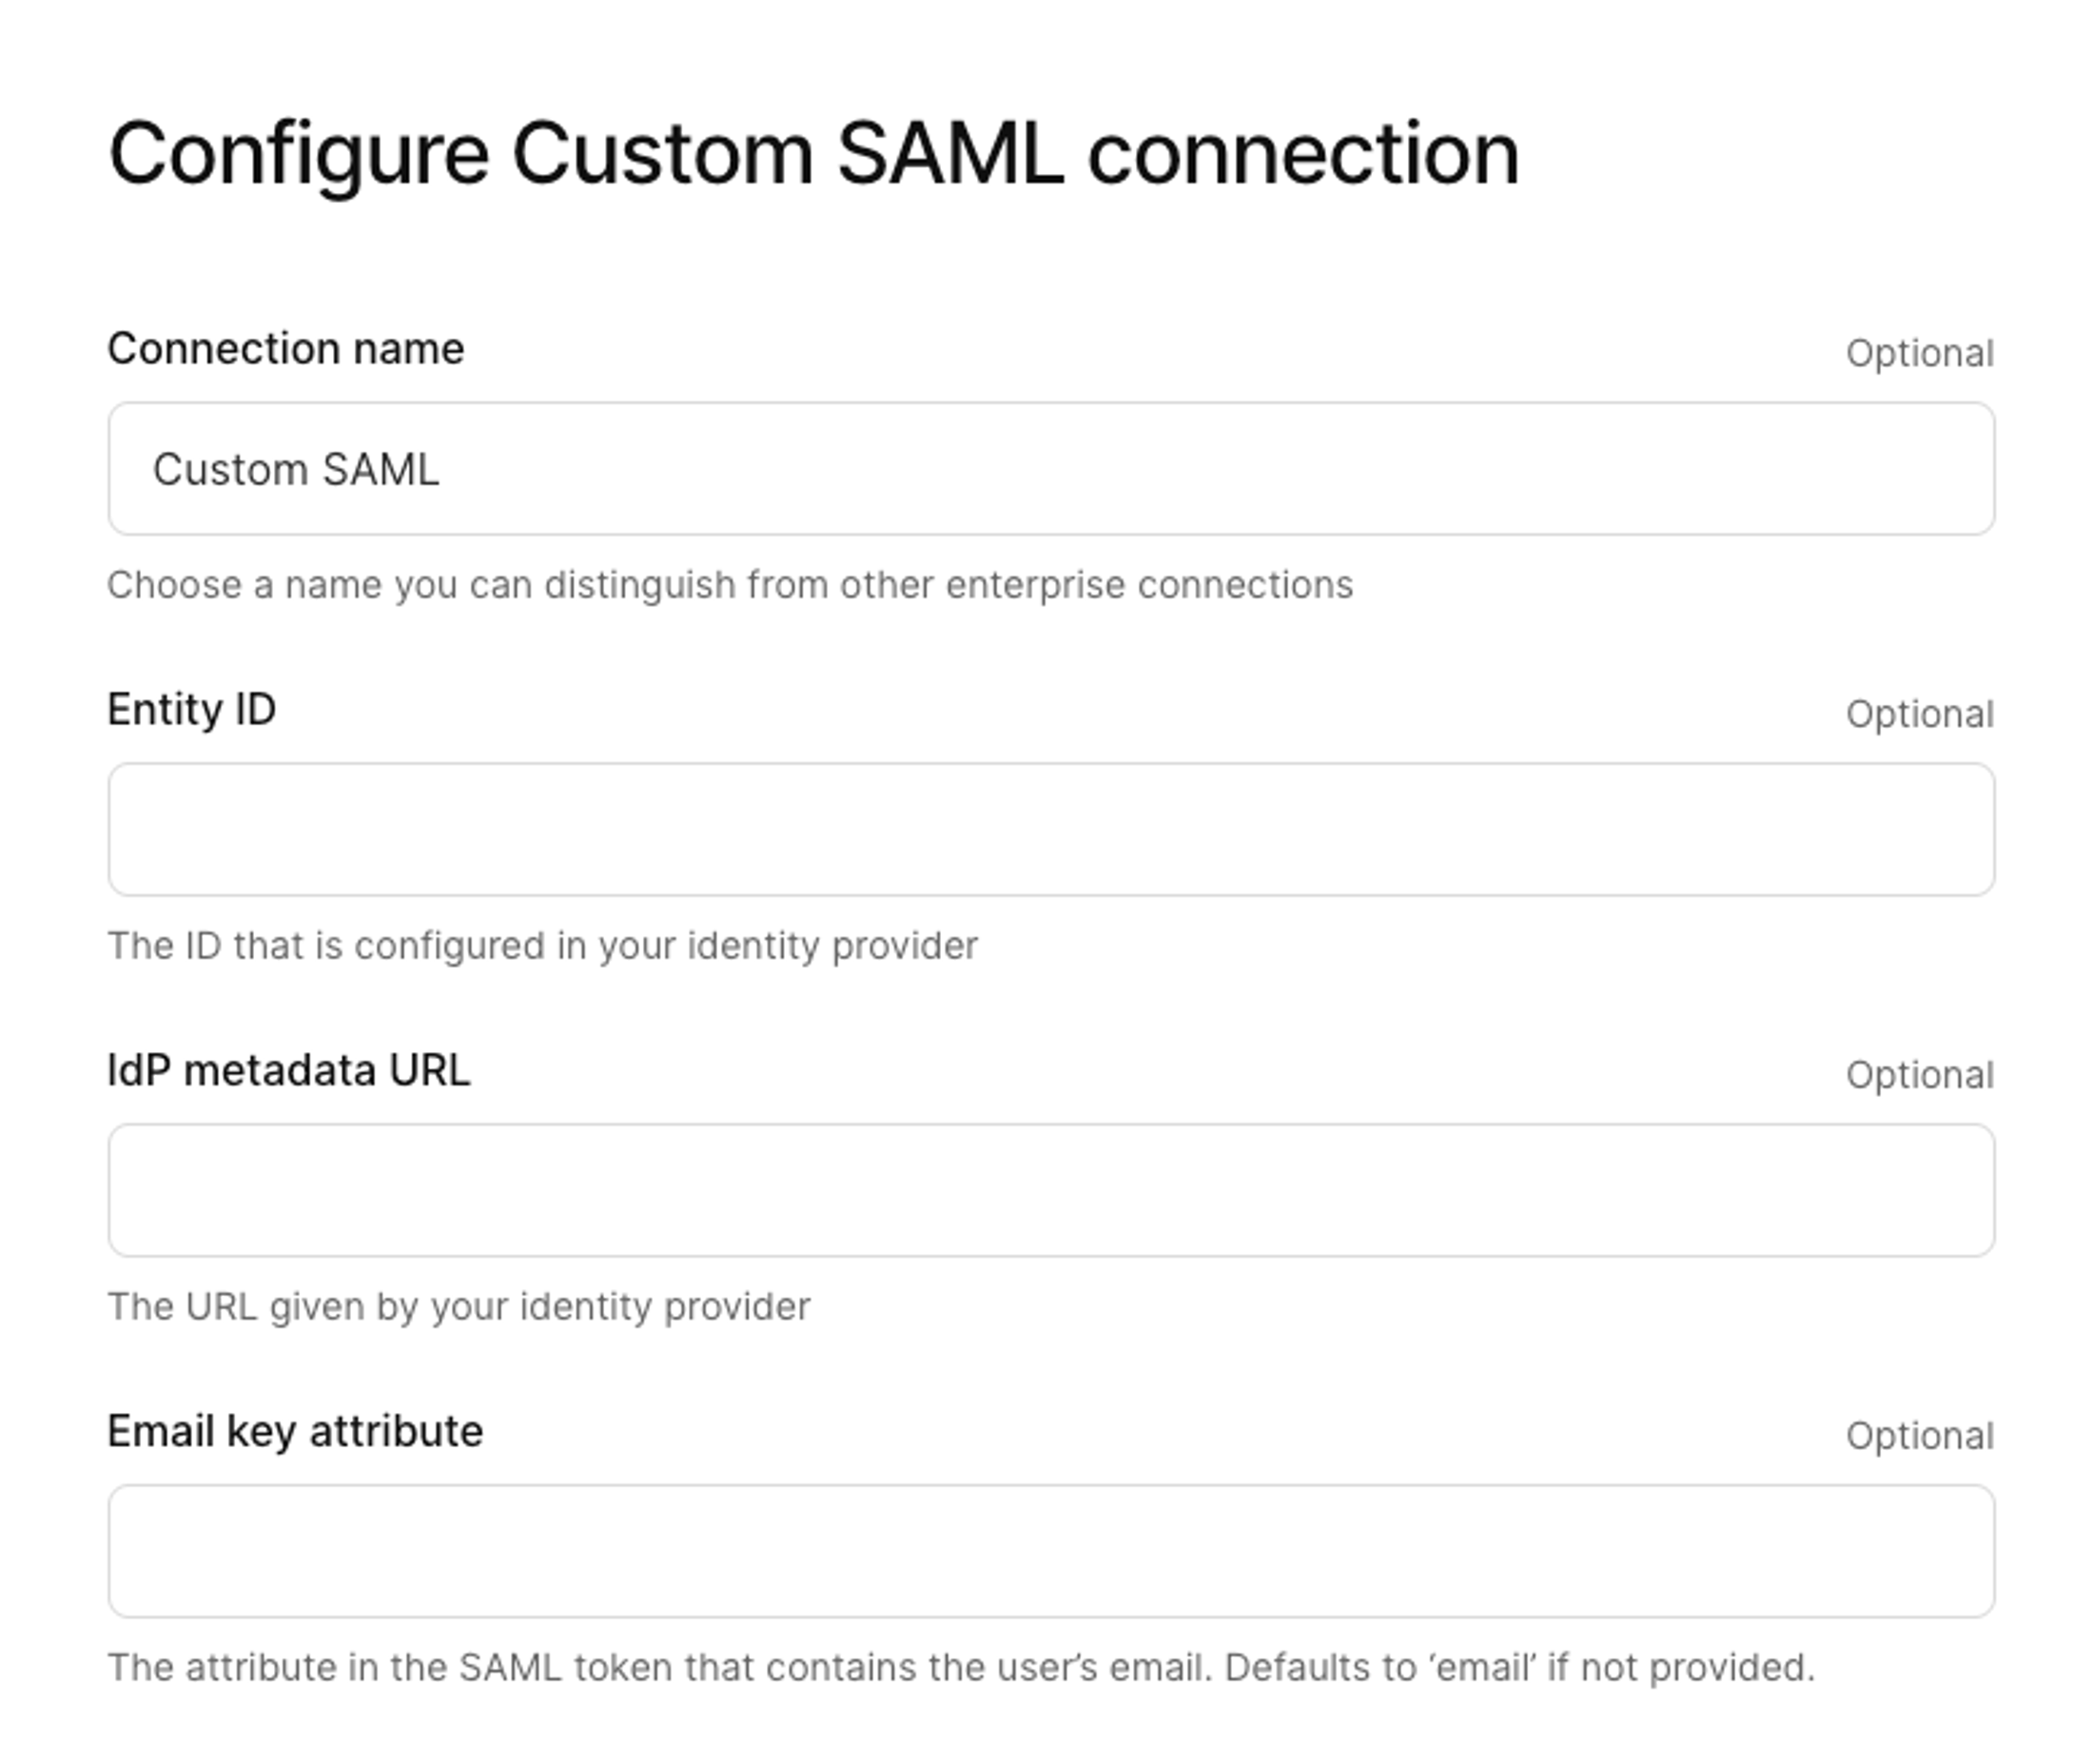 3. If Microsoft is your provider and your app is a bit older, you may need to add `spn:` to the beginning of the **Entity ID** string in Kinde, e.g. `spn:5836g209gbhw09r8y0913`. This is not required for newly created apps. 4. Enter the **IdP metadata URL**. This URL comes from your identity provider. 5. Enter a **sign in URL** if your IdP requires a specific URL.  6. If you want, select the **Sign request algorithm** and **Protocol binding**. The options you choose will depend on what your identity provider prefers or requires. 7. Select a **Name ID** format. This helps identify and link user identities between your IdP and Kinde. 8. Enter an **Email key attribute**. This is the attribute in the SAML token that contains the user’s email. Setting this value ensures that the email address returned in the SAML response is correctly retrieved. We do not recommend leaving this field blank, but if you do we will set ‘email’ as the attribute. 9. (Optional) Add a first name and last name key attribute.  10. Enter any relevant **Home realm domains**. This is how SAML recognizes a user’s credentials and routes them to the correct sign in page. Note that home realm domains need to be unique across all connections in an environment. [Read more about home realm domains](/authenticate/enterprise-connections/home-realm-discovery/). 11. If you use home realm domains, the sign in button is hidden on the auth screen by default. To show the SSO button, select the **Always show sign-in button** option.  12. Copy the relevant reply URL: 1. If you don't use a custom domain, copy the **ACS URL**. 2. If you do use a custom domain, select the **Use custom domain instead** option and copy the custom domain URL. Later, add this URL to your identity provider configuration. 13. If you want to enable just-in-time (JIT) provisioning for users, select the **Create a user record in Kinde** option. This saves time adding users manually or via API later.  14. Select **Trust email addresses provided by this connection** if you want to treat this connection as a [trusted provider](/authenticate/about-auth/identity-and-verification/#trusting-emails-from-providers). 15. (Optional) In the **Sign SAML request** section, paste in the **Signed certificate** and **Private key**. You may have got these from your IdP or you may have generated yourself (see procedure above). 16. Enter any [upstream params](/authenticate/enterprise-connections/advanced-saml-configurations/#upstream-parameters) that you want to pass to the identity provider. Not all providers support this, so check their documentation first. 17. Switch on the connection. This will make it instantly available to users if this is your production environment. 1. For environment-level connections, scroll down and select the apps that will use the auth method. 2. For organization-level connections, scroll down and select if you want to switch this on for the org. 18. Select **Save**. Next: Complete any additional configuration in your identity provider’s settings, such as adding the **Entity ID** and **return URL**. ## Step 3: Test the connection Once you have entered the ACS URL in your identity provider, the connection should be enabled. 1. Go to your test application and attempt to sign in. 2. If you left the **Home realm domains** field blank in Kinde, when you launch your application, you should see a button to sign in. Click it and go to step 4. 3. If you completed the **Home realm domains** field, you should be redirected immediately to your IdP sign in screen. 4. Enter your IdP details and complete any additional authentication required.
# Authenticate - Enterprise connections - Enterprise connections for B2B
> Guide to setting up enterprise connections for B2B businesses including organization-level connections and domain-based access control.
Last updated: 2025-12-19
B2B, enterprise connections, organization-level, domain restrictions, JIT provisioning, allowed domains
authenticate
Enterprise connections are common for B2B setups where each business customer is represented as an organization in Kinde, and that organization is linked to one or more connections. There are two different ways to scope an enterprise connection and restrict it to the organization level. - When the `org_code` is passed to Kinde as part of the authentication url, the correct sign-in options are shown. - Users can only self-join the organization if this was enabled as part of the connection configuration. - Organization access is locked down to allow access based only on connection - including switches between organizations. - If you are using home realm discovery, connections do not have to be enabled at the application level to support redirects to the correct IDP. This behaviour is domain-agnostic and is purely concerned with the connection being used. ## (Recommended) Create the enterprise connection in the Kinde organization The easiest way to restrict an enterprise connection to an organization, is to add the connection to the organization and not create it as a shared connection (at the environment level). To do this, follow the relevant procedure for adding a connection in the relevant topic. ## Select a shared enterprise connection for the organization 1. Open the relevant organization in Kinde and select **Authentication** in the menu. 2. Add a connection and select **existing connection**. Switch on the relevant enterprise connection from the list. 3. Select **Save**. ## Org provisioning and access via allowed domains To manage organization access, you can [set policies](/build/organizations/organization-access-policies/) that restrict access to a list of allowed domains. You can also enable just-in-time (JIT) provisioning via allowed domains. 1. Open the relevant organization in Kinde and select **Policies** in the menu. 2. Select **Allow org members to be auto-added**. 3. Enter all the allowed domains in the **Allowed domains** list. 4. Enable JIT provisioning for all new organization members by selecting **Auto-add users from allowed domains**. 5. Select **Save**. Here’s what happens: - When the `org_code` is passed to Kinde as part of the authentication url, the correct sign-in option is shown. - Kinde checks that users belong to one of the allowed domains before authorizing access. - The user joins the organization if the domain matches any of the allowed domains. - Because this check only happens during sign up, you can still separately add users with email domains which fall outside of this restriction. This can be useful if you wish to add contractors or auditors who may have email addresses not in the domain allowlist. ## Service Provider vs Identity Provider initiated SSO If you set up an enterprise connection for a customer using their IdP credentials, by default they sign in via your app with Kinde as the auth service provider (SP-initiated SSO). However, Kinde also supports **Identity Provider (IdP) initiated** SSO, where users can start at their IdP portal and click on your application. Learn more about [IdP-initiated SAML SSO](/authenticate/enterprise-connections/idp-initiated-saml-sso/).
# Authenticate - Enterprise connections - Microsoft Entra ID enterprise connection (SAML)
> Step-by-step guide to setting up Microsoft Entra ID SAML enterprise authentication including application configuration and group synchronization.
Last updated: 2026-03-26
Microsoft Entra ID, SAML, Azure AD, enterprise application, group claims, federation metadata, metadata URL, metadata hosting, XML
authenticate
Kinde supports the use of Microsoft Entra ID (SAML) as an enterprise-level authentication method. This service used to be Azure AD.  If you are [importing users into Kinde](/manage-users/add-and-edit/import-users-in-bulk/), their Entra ID will be picked up and matched to the relevant connection based on their email address, for a seamless transition to Kinde. ## Before you begin - You need a Microsoft developer account to register an application. - Test the connection in a non-production environment before activating in a live environment. ## Known limitations - **One enterprise identity per organization** -- A user can only have one enterprise identity linked per organization. If a user is a member of multiple organizations, each organization must have its own enterprise connection; the user authenticates through the connection configured for that specific organization. - **Nuxt.js + Entra ID token retrieval** -- If you are using the Kinde Nuxt module with an Entra ID enterprise connection and `getUser()` returns empty despite `isAuthenticated()` returning true and `getToken()` working, this is a known token storage issue specific to how the Nuxt module handles enterprise connection callbacks. Contact [Kinde support](https://kinde.com/support/) for assistance. ## Advanced configurations Depending on your SAML set up, you may need to include advanced configurations for your connection. See [Advanced SAML configurations](/authenticate/enterprise-connections/advanced-saml-configurations/). ## Step 1: Add the connection in Kinde ### Add a connection for a specific organization 1. Go to **Organizations** and open the organization. 2. In the menu, select **Authentication**, then select **Add connection**. 3. In the **Add connection** window, select **New enterprise connection**, then click **Next**. 4. Select the Microsoft connection type you want and then select **Next**. Currently we support WS Federated and OpenID types. 5. Next: 'Step 2: Configure the connection'. ### Add a connection that can be shared across multiple organizations 1. Go to **Settings > Environment > Authentication**. 2. Scroll to the **Enterprise connection** section and select **Add connection**. The **Add connection** window opens. 3. Select the Microsoft connection type you want and then select **Next**. Currently we support WS Federated, SAML, and OpenID types. 4. Next: 'Step 2: Configure the connection'. ## Step 2: Configure the connection in Kinde 1. Enter a **Connection name.** Make this something you can easily identify, especially if you are adding multiple connections for different business customers. 2. For the **Entity ID**, enter a random string like `hEb876ZZlkg99Dwat64Mnbvyh129`. Make a copy of the string as you will add this to your SAML application later. Note that some older Entra ID tenants require the Entity ID to have a prefix of `spn:` If your connection fails, this could be why. 3. Enter the **IdP metadata URL**. This URL comes from your identity provider. If you don't know it, enter any URL and update this later. 4. Enter a **sign in URL** if your IdP requires a specific URL.  5. If you want, select the **Sign request algorithm** and **Protocol binding**. The options you choose will depend on what your identity provider prefers or requires. 6. Select a **Name ID** format. This helps identify and link user identities between your IdP and Kinde. 7. Enter an **Email key attribute**. This is the attribute in the SAML token that contains the user’s email. Setting this value ensures that the email address returned in the SAML response is correctly retrieved. We do not recommend leaving this field blank, but if you do we will set ‘email’ as the attribute. 8. (Optional) Add a first name and last name attribute. 9. Enter **Home realm domains**. This speeds up the sign in process for users of those domains. Note that all home realm domains must be unique across all connections in an environment. For more information, see [Home realm domains or IdP discovery](/authenticate/enterprise-connections/home-realm-discovery/).  10. If you use home realm domains, the sign in button is hidden on the auth screen by default. To show the SSO button, select the **Always show sign-in button** option. 11. Copy the relevant reply URL: 1. If you don't use a custom domain, copy the **ACS URL**. 2. If you do use a custom domain, select the **Use custom domain instead** option and copy the custom domain URL. Later, add this URL to your identity provider configuration.  12. If you want to enable just-in-time (JIT) provisioning, select the **Create a user record in Kinde** option. This saves time adding users manually or via API later. 13. Select **Trust email addresses provided by this connection** if you want to treat this connection as a [trusted provider](/authenticate/about-auth/identity-and-verification/#trusting-emails-from-providers). 14. If you want users to be logged out of all applications that use this connection when they logout of your app, switch on the **Single logout** option in the **Logout experience** section. 1. Enter the **Single logout endpoint URL** - this needs to be supplied by the customer. 2. Copy and provide the **Logout URL** to the customer to add to their IdP configuration. 15. Enter any [upstream params](/authenticate/enterprise-connections/advanced-saml-configurations/#upstream-parameters) that you want to pass to the identity provider. Not all providers support this, so check their documentation first. 16. Select **Save**. ## Step 3: Create and configure an Entra ID enterprise application 1. On the [Microsoft Entra admin center](https://entra.microsoft.com/#home) home screen, select **Applications > Enterprise Applications**. 2. Select **New application** and in the next screen select **Create your own application**. A side panel opens. 3. Enter the name for the application. 4. Select the **Integrate any other application you don't find in the gallery (Non-gallery)** option and then select **Create**. It can take a few seconds for the application to be created. 5. Select **Get started** on the **2. Set up single sign on** tile, then select the SAML tile. 6. Edit the **Basic SAML Configuration**. The side panel opens. 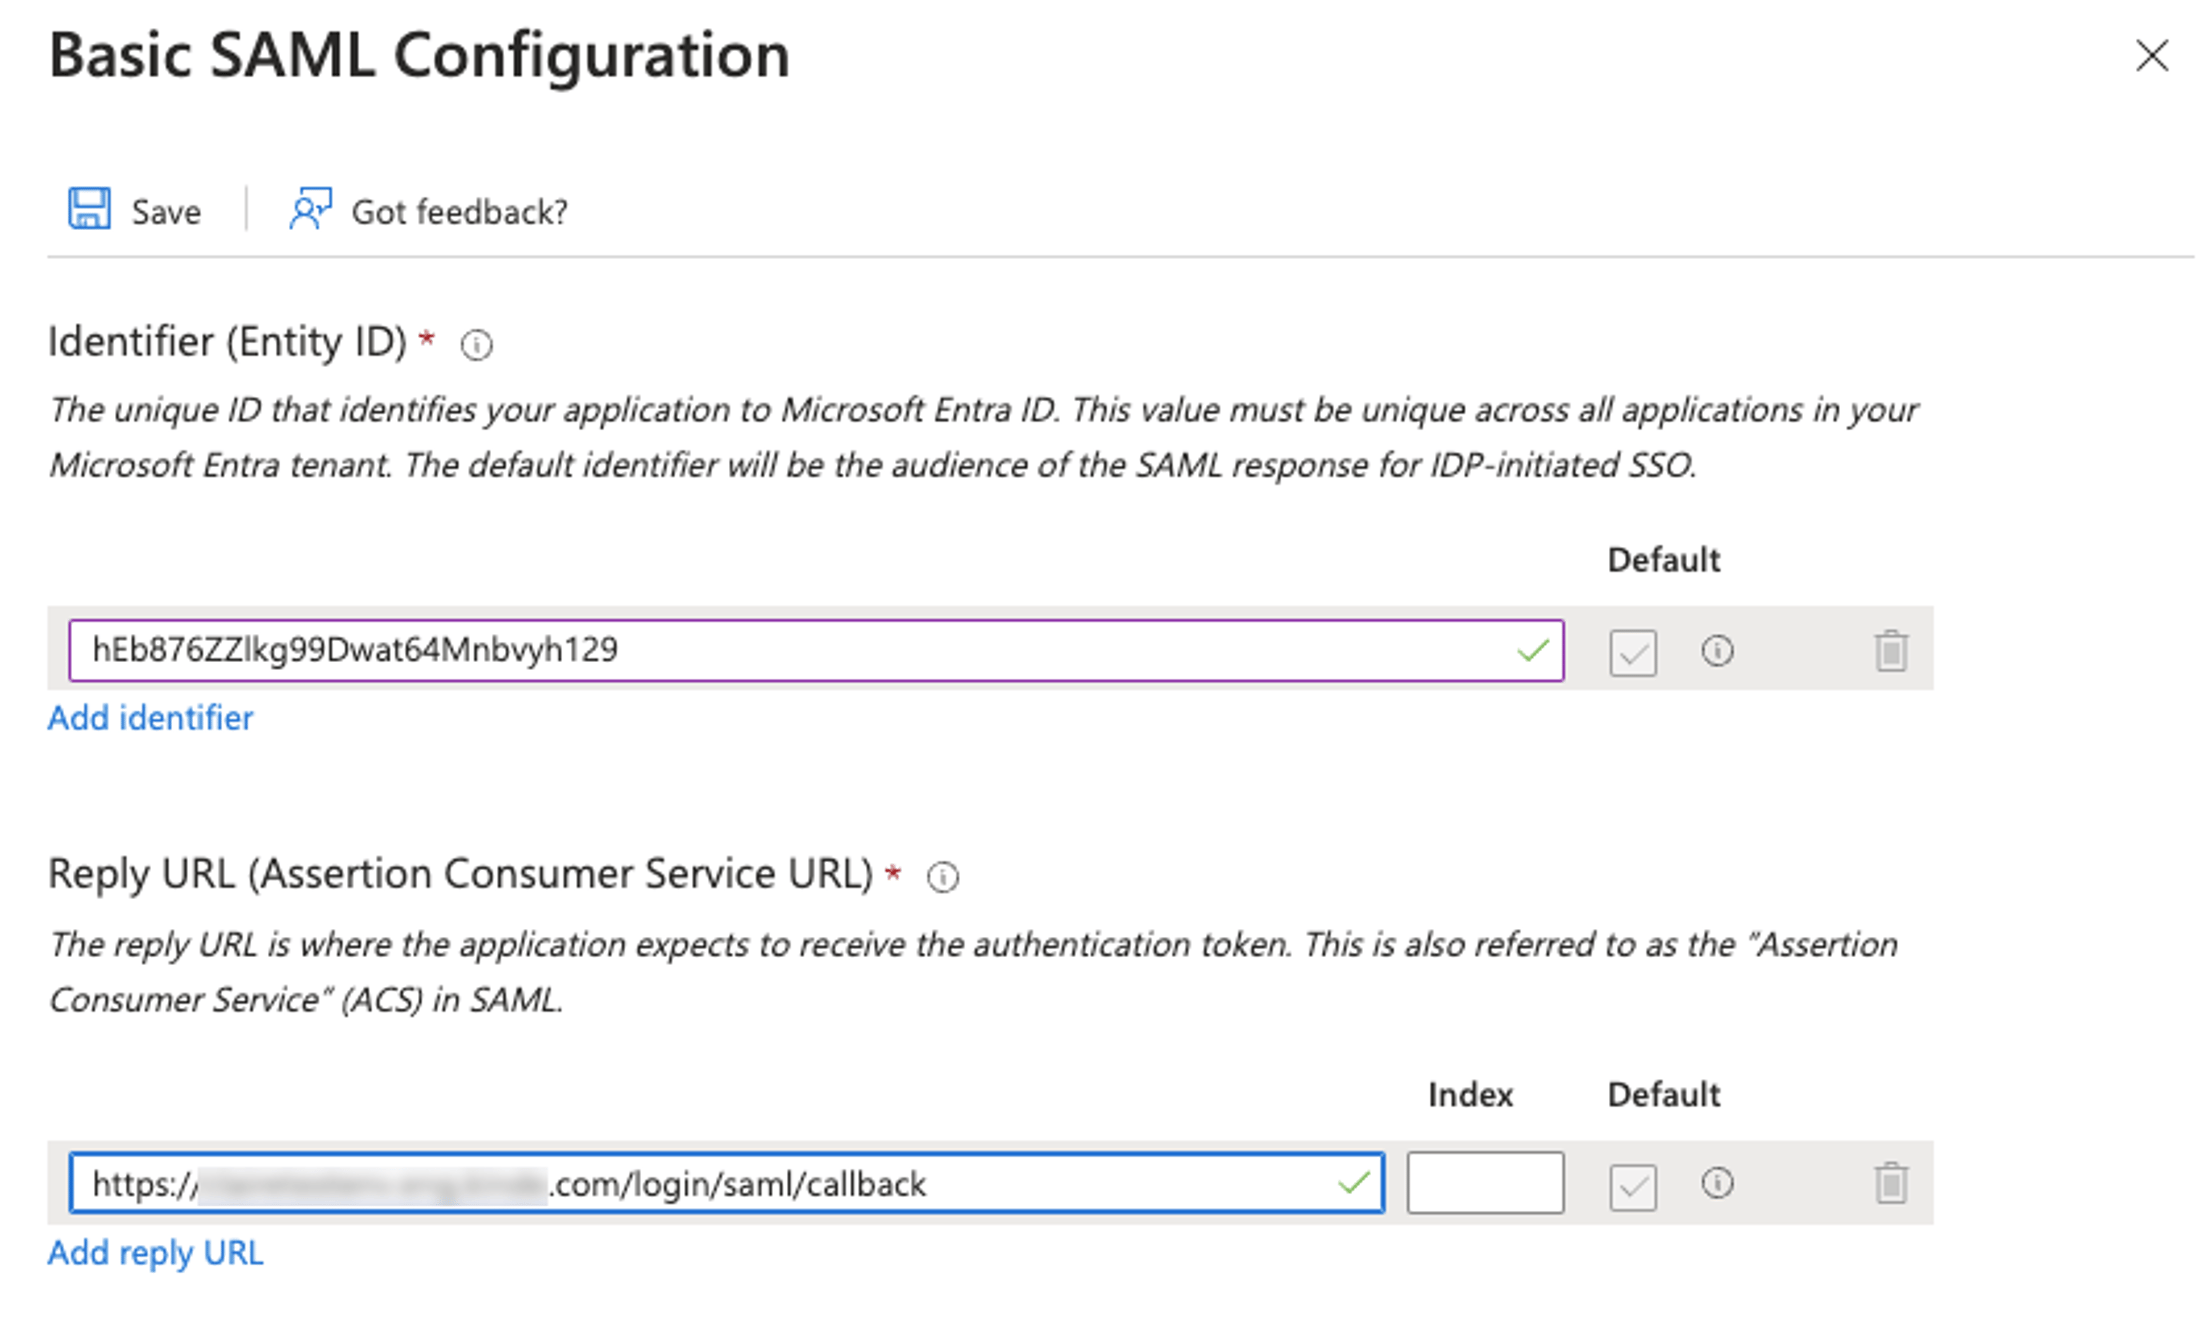 7. Select **Add identifier**, then enter the same random string like you did previously for the Entity ID in Kinde. E.g. `hEb876ZZlkg99Dwat64Mnbvyh129`. 8. Select **Add reply URL** and paste the ACS URL that you copied from the connection configuration screen in Kinde. 9. If you plan to use single logout for this connection, add the ACS URL to the **Logout URL (Optional)** field. 10. Select **Save**. 11. In section 4 (the Set up [app] section), copy the **Logout URL**. This needs to be added back into the connection configuration in Kinde. 12. Close the panel. 13. Select **Edit** on the **Attributes & Claims** section. Copy the values of the identifiers (Principal name, Given name, Surname), for example:  14. In the **SAML certificates** section, copy the **App federation metadata URL**. You'll add this as the **IdP metadata URL** in the Kinde connection. 15. Download the Federation metadata XML file. This is the SAML signed certificate. ## Step 4: Finish configuring the connection in Kinde 1. Open the SAML connection in Kinde. Via **Organization > Authentication** or via **Settings > Authentication**. 2. Paste in the data you got from the SAML app: - IdP metadata URL 3. Update the attributes - Email key attribute (Email), such as `http://schemas.xmlsoap.org/ws/2005/05/identity/claims/emailaddress` - First name attribute (Given name), such as `http://schemas.xmlsoap.org/ws/2005/05/identity/claims/givenname` - Last name attribute (Surname), such as `http://schemas.xmlsoap.org/ws/2005/05/identity/claims/surname` 4. (Optional) if you want to sign the SAML httpRequest: 1. Open the **Federation Metadata XML** file in a text editor. 2. Copy the certificate and private contents of the file to the Sign SAML request section. 5. Paste them into the **Signing certificate** field in the Kinde connection. 6. If you are using the single logout function, paste the **Logout URL** from your Entra ID SAML app in the **Logout experience** section. 7. Switch on the connection. This will make it instantly available to users if this is your production environment. 1. For environment-level connections, scroll down and select the apps that will use the auth method. 2. For organization-level connections, scroll down and select if you want to switch this on for the org. 8. Select **Save**. ## Step 5: Test the connection Make sure you test the connection before enabling in production for your users. 1. Go to your test application and attempt to sign in. 2. If you left the **Home realm domains** field blank in Kinde, when you launch your application, you should see a button to sign in. Click it and go to step 4. 3. If you completed the **Home realm domains** field, you should be redirected immediately to your IdP sign in screen. 4. Enter your IdP details and complete any additional authentication required. ## Sign out behaviour for user sessions Unless you selected the **Single logout** option in the Kinde connection configuration above, when users sign out of this connection in your app, they are just signing out of Kinde. They are not fully being signed out of Entra ID. It also works this way for social connections, where a third party is the identity provider. ## (Optional) Sync Entra ID (SAML) attributes with Kinde If you want to use additional attributes from Entra ID (SAML), you can sync them from the SAML assertion into Kinde custom user properties using a Post Authentication workflow. Workflow example: [syncAttributesSamlWorkflow.ts](https://github.com/kinde-starter-kits/workflow-examples/blob/main/postUserAuthentication/syncAttributesSamlWorkflow.ts) ### Step 1: Add attribute and group claims to your Entra ID (SAML) app 1. On the Microsoft Entra admin center home screen, go to **Enterprise apps** and open your application. 2. Select **Single sign-on**, then select **SAML**. 3. In the **Attributes & Claims** section, select **Edit**. 4. Add the claims you want to send in the SAML assertion (for example: `phone_number`, `user_type`, and `groups`). 5. Make sure the claim **Name** you configure in Entra ID matches one of the values in the workflow’s `samlNames` list. 6. Select **Save**. ### Step 2: Create custom user properties in Kinde 1. In Kinde, go to **Settings > Data management > Properties**. 2. Select **Add property** and create a **User** property for each SAML attribute you want to store (for example: `phone_number`, `user_type`, `groups`). 3. Make sure each property key matches the workflow’s `kindeKey` value for that attribute. 4. If you want these properties to be available in tokens, switch off the **Private** option for each property. 5. Select **Save**. ### Step 3: Add and deploy the workflow 1. Add the workflow file to your Kinde workflows repository (or copy the example into your existing workflows repo). 2. Create an M2M application and enable the following scope: - `update:user_properties` 3. In Kinde, go to **Settings > Environment variables** and set: - `KINDE_WF_M2M_CLIENT_ID` - `KINDE_WF_M2M_CLIENT_SECRET` (mark as sensitive) 4. Update the workflow configuration to match your Entra ID claims: - `samlNames` is the list of SAML claim names to look for (what Entra ID sends) - `kindeKey` is the Kinde user property key to write the value into - Add new entries to sync additional SAML attributes - Set `multiValue: true` for multi-value claims (for example, `groups`) ### Step 4: Include the properties in tokens 1. Open the relevant application in Kinde. 2. Select **Tokens** and scroll to **Token customization**. 3. Select **Customize** on the token type you want to update (ID token and/or access token). 4. Select the user properties you created. 5. Select **Save**. ### Access attributes in tokens Once added via token customization, the values are available under the `user_properties` claim, for example: - `user_properties > phone_number` - `user_properties > user_type` - `user_properties > groups`
# Authenticate - Enterprise connections - Home realm or IdP discovery
> Guide to home realm discovery (HRD) for seamless enterprise authentication routing based on email domains and identity provider selection.
Last updated: 2026-03-26
home realm discovery, HRD, IdP discovery, email domain routing, enterprise auth, SSO button
authenticate
Home realm discovery (HRD) provides a seamless sign-in experience for your enterprise auth users. When HRD is configured and a user sign in, Kinde checks which IdP or connection group a user belongs to, before authenticating them. It is also known as Identity Provider or IdP discovery. When HRD is set up in Kinde, users are authenticated based on the **Home Realm Domain** (email domain) that is entered. HRD is usually applied where your identity provider (IdP) is a third party, such as Microsoft Entra ID, Google, Cloudflare, etc, and you are using an enterprise or SAML auth setup. By default, Kinde provides a universal login page where users of any enterprise connection can sign in. They are then silently routed and verified via the relevant IdP. ## How does Home Realm Discovery work at Kinde? When you set up a [Microsoft Entra ID](/authenticate/enterprise-connections/azure/) or [custom SAML](/authenticate/enterprise-connections/custom-saml/) connection, you’ll configure the home realm (or domains) to be recognized during authentication. All home realm domains must be unique across all connections in the environment. If HRD is not in place, the end-user must select the relevant log in button to be taken through to the right authentication URL. When you apply HRD in Kinde, the end-user is recognized and authenticated based on their email domain, without having to select or click anything. For example, you could configure two different connections as follows: - Email addresses ending with `enterpriseA.com` use SAML connection A - Email addresses ending with `enterpriseB.com` use Entra ID connection B In the back end, the end-user is linked to the correct identity provider via the connection, and they are silently authenticated. So when Jude Watson arrives at the sign in window and enters `judewatson@enterpriseA.com`, they are routed to the IdP for SAML connection A, and authenticated. ## How to show or hide the sign-in buttons? Even if you have set up HRD, you can choose to show an SSO sign-in button so the user has to click to proceed. Learn more [here](/authenticate/enterprise-connections/about-enterprise-connections/#show-or-hide-the-sso-sign-in-button-on-the-auth-page). ## Does HRD affect organization selection and default org settings? Yes. When home realm discovery is active, enterprise users are routed directly to their identity provider based on their email domain — before any organization selection takes place. This has a few important implications: - **The organization selector is bypassed** — HRD takes precedence over any org selection screen. The user is authenticated into the organization associated with their enterprise connection without being prompted to choose. - **The last-used organization setting is bypassed** — The "remember last org" behavior does not apply to users authenticating via HRD. Their session is always tied to the organization configured for their enterprise connection. - **Setting a default organization for enterprise users via `org_code` is not supported under HRD** — Because HRD routes users before org selection occurs, passing `org_code` to override the destination organization is not supported for enterprise connections using home realm discovery. The user will always land in the organization linked to the matching enterprise connection.
# Authenticate - Enterprise connections - IdP-initiated SAML SSO
> Guide to configuring IdP-initiated SAML single sign-on flows where authentication starts at the Identity Provider rather than your application.
Last updated: 2025-12-19
IdP-initiated, SAML, SSO, identity provider, service provider, SP-initiated, enterprise authentication, metadata URL, metadata hosting, XML
authenticate
In this guide, you'll learn how to configure IdP-initiated SSO in Kinde, including setting up the SAML connection, configuring your Identity Provider, and testing both SP-initiated and IdP-initiated authentication flows. ## What is IdP-initiated SSO? IdP-initiated SSO is an authentication flow where the login process **starts at the Identity Provider** rather than at your application (the Service Provider). When setting up enterprise authentication, you'll encounter two main ways to start a SAML single sign-on flow: Service Provider (SP) initiated and Identity Provider (IdP) initiated. IdP-initiated SSO differs from SP-initiated SSO, where the user first visits your application and is then redirected to the IdP to authenticate. ### How it works 1. A user logs into their corporate Identity Provider portal (such as Okta, Azure AD, or Google Workspace) 2. From the IdP dashboard, the user clicks on your application 3. The IdP creates a SAML assertion containing the user's identity and attributes 4. The IdP sends this assertion directly to your Kinde ACS URL 5. Kinde validates the assertion and creates a user session 6. The user is redirected to your application ### What you need - A [Kinde](https://kinde.com) account with an **enterprise connections** entitlement - Admin access to your [enterprise identity provider](/authenticate/enterprise-connections/about-enterprise-connections) (Okta, Azure AD, Google Workspace, etc.) - A [verified domain configured in Kinde](/build/domains/organization-custom-domain/) (for organization-level connections) ## Step 1: Add a SAML enterprise connection in Kinde ### Option A: Environment-level connection (shared across organizations) 1. Sign in to your Kinde admin portal 2. Navigate to **Settings** > **Authentication** 3. Select **Add connection** in the **Enterprise connections** section 4. Select your SAML provider: - **Custom SAML** (for any SAML 2.0 IdP) - **Google Workspace** (pre-configured for Google) - **Okta** (pre-configured for Okta) - **Cloudflare** (pre-configured for Cloudflare Access) 5. Select **Next** ### Option B: Organization-level connection (specific to one organization) 1. Sign in to your Kinde admin portal 2. Navigate to **Organizations** > select your organization 3. Go to the **Authentication** tab 4. Select **Add connection**. A pop-up appears 5. Select **Organization SSO connection**, then select **Next** 6. Choose your connection type (Custom SAML, Cloudflare, Okta, etc.) 7. Select **Next** ## Step 2: Configure the SAML connection details in Kinde After creating the connection, configure these settings: 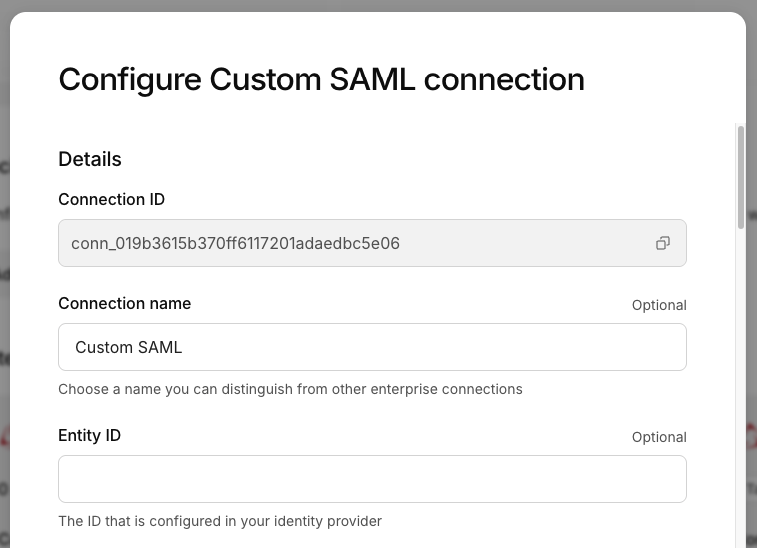 1. **Connection name**: A name to identify this connection (e.g., "Acme Corp SSO") 2. **Entity ID**: The unique identifier configured in your IdP (e.g., `https://yourapp.kinde.com`) 3. **IdP metadata URL**: You will add this after finishing setup in your Identity Provider (see Step 3) 4. **Sign in URL** (optional): Override the default SSO endpoint with a URL your IdP recognizes 5. **Sign request algorithm**: Choose the algorithm used to sign SAML requests (RSA-SHA1 or RSA-SHA256) 6. **Protocol binding**: Choose the protocol binding used to send SAML requests 7. **Name ID format**: Select the format for the Name ID used to identify users in SAML responses (*persistent* recommended) 8. Set up the attribute mapping for user: - **Email key attribute**: The attribute in the SAML token that contains the user's email. Defaults to `email` if not provided. - **User ID key attribute**: The attribute in the SAML token that contains the user ID. Defaults to `http://schemas.xmlsoap.org/ws/2005/05/identity/claims/nameidentifier` if not provided. - **First name key attribute**: The attribute in the SAML token that contains the user's first name. Defaults to `http://schemas.xmlsoap.org/ws/2005/05/identity/claims/givenname` if not provided. - **Last name key attribute**: The attribute in the SAML token that contains the user's last name. Defaults to `http://schemas.xmlsoap.org/ws/2005/05/identity/claims/surname` if not provided. 9. **Home realm domains**: A list of domains used for home realm discovery. Add each URL on a new line: ``` acmecorp.com acme.co ``` 10. **Always show sign-in button**: - **Off (default):** If home realm domains are set, the SSO button only shows after email domain detection - **On:** The SSO button is always visible on the login screen 11. Copy the **Assertion Consumer Service (ACS) URL**. You will need to add this to your IdP configuration. 12. **Provisioning**: Control how users are created when authenticating via SAML: - **Create a user record in Kinde**: When enabled, users who don't exist in Kinde are automatically created on first sign-in - **Trust email addresses provided by this connection**: Merge accounts when email matches an existing Kinde user 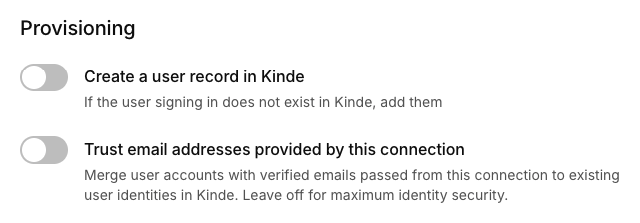 - **Auto-add users** (org-level only): Users are automatically added as members of the organization 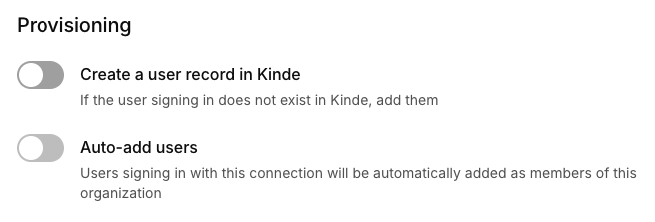 13. Select **Save** ## Step 3: Configure your Identity Provider In your IdP admin console, create a new SAML application with these settings: 1. **ACS URL / Reply URL**: Use the ACS URL you copied from Kinde in Step 2 (e.g., `https://yourdomain.kinde.com/login/saml/callback`) 2. **Entity ID / Audience**: Use the Entity ID you configured in Kinde 3. **Name ID format**: Select the format for the Name ID used to identify users in SAML responses (*Persistent* recommended) 4. **RelayState** (optional): Configure a default RelayState URL if your IdP supports it. This is where users are redirected after authentication. 5. **Enable IdP-initiated SSO**: In your IdP's application settings, enable the option to allow IdP-initiated sign-on (the exact setting name varies by provider) 6. Copy the **Metadata URL** from your IdP. This is typically found in the SAML application settings or can be downloaded as an XML file. You'll need this URL in the next step. ## Step 4: Finish setting up your IdP connection 1. Open the connection in Kinde. Go to **Organizations** > **Authentication** or **Settings** > **Authentication**. 2. Scroll to the **IdP metadata URL** field and paste the Metadata URL you copied from Step 3. 3. (Optional) Enter the signed certificate and key information if you have it. You can do this later as well. See [Advanced SAML configurations](/authenticate/enterprise-connections/advanced-saml-configurations/) for more details. 4. Switch on the connection. This will make it instantly available to users if this is your production environment. - For environment-level connections, scroll down and select the apps that will use the auth method. - For organization-level connections, scroll down and select if you want to switch this on for the org. 5. Select **Save**. You can now use the IdP for the selected applications. ## Step 5: Test the configuration ### Test SP-initiated flow (standard) 1. Navigate to your application's login page 2. Enter an email address matching a home realm domain 3. You should be redirected to your IdP 4. After authentication, you should be redirected back to your app ### Test IdP-initiated flow 1. Log in to your Identity Provider's portal 2. Click on your application in the IdP dashboard 3. You should be redirected to your app and logged in automatically ## Troubleshooting ### Common issues | Issue | Possible cause | Solution | | --- | --- | --- | | "Invalid SAML response" | Mismatched Entity ID | Ensure the Entity ID in Kinde matches your IdP configuration exactly | | "Signature verification failed" | Certificate mismatch | Verify your IdP's signing certificate is correctly configured | | User not created | Provisioning disabled | Enable "Create a user record in Kinde" | | Wrong attributes | Attribute mapping | Check that your IdP attribute names match the mapped keys | ### Error codes For a comprehensive list of error codes, see [Common errors and codes](/get-started/guides/error-codes/). ## Security best practices - **Prefer SP-initiated when possible**: SP-initiated SSO includes additional security validations (InResponseTo, state/nonce) - **Enable IdP-initiated only when required**: Only enable for enterprise customers who specifically require portal-based access - **Use signed requests**: Configure SAML request signing for enhanced security - **Enforce MFA at the IdP**: Since authentication happens at the IdP, ensure MFA is required there - **Keep certificates current**: Monitor certificate expiration and rotate before they expire ### Conclusion You've successfully configured IdP-initiated SAML SSO in Kinde. Your enterprise users can now access your application directly from their Identity Provider portal. Remember that while IdP-initiated SSO offers convenience, SP-initiated flows provide additional security validations. Use IdP-initiated SSO only when your enterprise customers specifically require portal-based access. Test both authentication flows thoroughly before enabling in production.
# Authenticate - Enterprise connections - LastPass enterprise connection (SAML)
> Step-by-step guide to integrating LastPass as a SAML identity provider with Kinde for enterprise authentication and access control.
Last updated: 2025-01-16
LastPass, SAML, identity provider, IdP, enterprise auth, SSO, access policies
authenticate
If you use LastPass to centralize authentication and authorization in your business, you can integrate Kinde as a service provider for these processes. This gives you the benefits of Kinde’s robust auth capabilities, while keeping the familiar LastPass structure.  ## Before you begin Here's what you need to do before you add the connection: - Sign up for a LastPass business account to add a LastPass application. - Generate a SAML Metadata XML file as LastPass does not support hosting this for you (more information below). ## Recommendations - Open the Kinde Enterprise connection in one browser tab, and the LastPass app configuration in another tab, as you will need to copy connection information across between them. - Set up and testing the connection in a non-production environment before making available to users. ## Advanced configurations Depending on your SAML set up, you may need to include advanced configurations for your connection. See [Advanced SAML configurations](/authenticate/enterprise-connections/advanced-saml-configurations/) ## Step 1: Add the connection in Kinde ### Add a connection for a specific organization 1. Go to **Organizations** and open the organization. 2. In the menu, select **Authentication**, then select **Add connection**. 3. In the **Add connection** window, select **New enterprise connection**, then click **Next**. 4. Select the LastPass connection and then select **Next**. 5. Next: 'Step 2: Configure the connection'. ### Add a connection that can be shared across multiple organizations 1. Go to **Settings > Environment > Authentication**. 2. Scroll to the **Enterprise connection** section and select **Add connection**. The **Add connection** window opens. 3. Select the LastPass connection and then select **Next**. 4. Next: 'Step 2: Configure the connection'. ## Step 2: Configure the connection 1. Enter a name for the connection. It should match the connection name in LastPass. 2. Enter a random string value for Entity ID, for e.g. `870sa9fbasfasdas23aghkhc12zasfnasd`. 3. You will need to create a url to host the data for the **IdP metadata URL**. Details on the content for this file are provided by LastPass covered in Step 3. 4. Enter a **sign in URL** if your IdP requires a specific URL. 5. If you want, select the **Sign request algorithm** and **Protocol binding**. The options you choose will depend on what your identity provider prefers or requires. 6. Select `Email` as the **Name ID** format. This helps identify and link user identities between your IdP and Kinde. 7. Enter `emailAddress` as the **Email key attribute**. This is the attribute in the SAML token that contains the user’s email. Setting this value ensures that the email address returned in the SAML response is correctly retrieved. 8. (Optional) Add a first name and last name key attribute. This is not necessary for LastPass.  9. Enter any relevant **Home realm domains**. This is how SAML recognizes a user’s credentials and routes them to the correct sign in page. Note that home realm domains need to be unique across all connections in an environment. [Read more about home realm domains](/authenticate/enterprise-connections/home-realm-discovery/). 10. If you use home realm domains, the sign in button is hidden on the auth screen by default. To show the SSO button, select the **Always show sign-in button** option.  11. Copy the relevant reply URL: 1. If you don't use a custom domain, copy the **ACS URL**. 2. If you do use a custom domain, select the **Use custom domain instead** option and copy the custom domain URL. Later, add this URL to the LastPass configuration. 12. If you want to enable just-in-time (JIT) provisioning for users, select the **Create a user record in Kinde** option. This saves time adding users manually or via API later.  13. Select **Trust email addresses provided by this connection** if you want to treat this connection as a [trusted provider](/authenticate/about-auth/identity-and-verification/#trusting-emails-from-providers). 14. (Optional) In the **Sign SAML request** section, paste in the **Signed certificate** and **Private key**. You may have got these from your IdP or you may have generated yourself (see procedure above). 15. Enter any [upstream params](/authenticate/enterprise-connections/advanced-saml-configurations/#upstream-parameters) that you want to pass to the identity provider. Not all providers support this, so check their documentation first. 16. Select **Save**. ## Step 3: Add and configure your LastPass application View the [LastPass docs](https://support.lastpass.com/s/document-item?language=en_US&bundleId=lastpass&topicId=LastPass/uac_applications_sso_apps.html&_LANG=enus) for the full procedure. 1. Sign in to your LastPass business account. 2. In the menu, select **AdminConsole**. 3. Go to **Applications**, then select **SSO apps**. 4. Select **Search the catalogue**. A side panel slides out.  6. Follow the prompt to initialize SAML keys. This will take up to 15 minutes to process. 7. Refresh the page and select **Search the catalogue** again. The side panel slides out showing a list. 8. Scroll and select **Custom service**. 9. Select **Add a new domain** if prompted. The configuration panel opens.  10. Enter a **Name** and select which groups will be able to sign in using this SSO connection. 11. At the top of the **Configuration section** select **Export SAML IdP Metadata**. 12. Select **Copy** or **Download**, then select **OK**. Copy this data to a self-hosted public URL—for example, a [GitHub Gist](https://docs.github.com/en/get-started/writing-on-github/editing-and-sharing-content-with-gists/creating-gists/).  13. In the **Service Provider entity ID** field, enter the random ID you generated for the **Entity ID** in Kinde. 14. In the **Assertion consumer service** field, enter the **ACS URL** or your custom domain, from Kinde. 15. Make sure the **Name ID format** is `emailAddress` and the **Name ID** is `Email address'. 16. Enter any custom attributes required.  17. Make sure the **Service is enabled** option is selected. 18. Select **Save**. ## Step 4: Finish setting up your LastPass connection in Kinde 1. Open the connection in Kinde. Go to **Organization > Authentication** or via **Settings > Authentication**. 2. In the **IdP metadata URL** use the self-hosted url created in step 3.12. 3. In the **Sign-in URL** field paste the **Single Sign-on URL** you copied from LastPass. 4. Switch on the connection. This will make it instantly available to users if this is your production environment. 1. For environment-level connections, scroll down and select the apps that will use the auth method. 2. For organization-level connections, scroll down and select if you want to switch this on for the org. Note that it will be automatically available for all apps if you choose this option. 5. Select **Save**. Test the connection works by trying to sign in to your test environment using this method. Re-test when you deploy the option to users.
# Authenticate - Enterprise connections - Mapping and syncing users for enterprise auth
> Guide to mapping and syncing users for enterprise authentication including user ID mapping, profile sync, and webhook integration.
Last updated: 2025-01-16
user mapping, user syncing, enterprise auth, webhooks, profile sync, user ID, API integration
authenticate
When you use Kinde to authenticate users via an enterprise connection such as SAML, you also need a way for users to be identified in Kinde so they match the identities stored in your Identity Provider (IdP). In general, an email address can be used to map users across systems, but because enterprise connection users can have aliases and proxy addresses, there are better ways to keep identities in sync. Here’s how we recommend mapping user profiles and keeping them synced for enterprise connections. ## Map the Kinde user ID to your product When users are imported or added to Kinde, a unique user ID is generated. For example, `kp:1876b10742894a0c9M8e725048e7a323`. We recommend you map each user’s Kinde ID back to your product, and use this as the primary auth identifier. This will keep profiles in sync and support a seamless authentication experience. ### Get Kinde user IDs via API You can access user IDs [via the API](http://localhost:4321/kinde-apis/management#tag/users/post/api/v1/users/{user_id}/identities) by calling GET `/api/v1/users`. This will return a response with a users array with the following data: ```json { "code": "string", "message": "string", "users": [ { "id": "string", "provided_id": "string", "email": "string", "username": "string", "last_name": "string", "first_name": "string", "is_suspended": true, "picture": "string", "total_sign_ins": 0, "failed_sign_ins": 0, "last_signed_in": "string", "created_on": "string", "organizations": ["string"], "identities": [ { "type": "string", "identity": "string" } ] } ], "next_token": "string" } ``` Where: - `id` is the kinde ID - `provided_id` is the ID you may have provided when you imported your users. This ID can also be useful to match imported users to your local database records. ## Switch on profile sync As part of your business authentication setup, we recommend switching on user profile sync to keep enterprise and social profiles up to date across providers. 1. Go to **Settings > Policies**. 2. Switch on **Sync user profiles on sign in**. 3. Select **Save**. ## Sync users with webhooks Webhooks are a method of being notified when an event occurs in Kinde, e.g. a user is created. You can [register your own endpoint URLs](/integrate/webhooks/add-manage-webhooks/) in Kinde, and each time the event occurs, data for that event will be sent to your endpoint. Here’s some examples of webhook events that can be used to keep your users in sync: - `user.created` - when a user is created in Kinde either via the admin UI or registering - `user.updated` - when a user is added to an organization, or their roles or permissions change - `user.deleted` - when a user is deleted via the UI or via the API Here’s an example json schema for user.updated that could be used to sync your data: ```json { "id": "et_018df239698d29177684be3f5ad1266d", "code": "user.updated", "name": "User updated", "origin": "kinde", "schema": { "$id": "https://kinde.com/user.updated.schema.json", "type": "object", "title": "User Updated Webhook Event", "$schema": "https://json-schema.org/draft/2020-12/schema", "properties": { "data": { "type": "object", "properties": { "user": { "type": "object", "properties": { "id": { "type": "string", "pattern": "kp[:_][0-9a-f]{32}", "description": "ID of the user" }, "phone": { "type": ["null", "string"] }, "last_name": { "type": ["string", "null"], "description": "The users updated last name" }, "first_name": { "type": ["string", "null"], "description": "The users updated first name" }, "is_suspended": { "type": "boolean", "description": "The users updated status" }, "organizations": { "type": ["array", "null"], "items": [ { "type": "object", "properties": { "code": { "type": "string", "pattern": "org[:_][0-9a-f]{11}" }, "roles": { "type": ["array", "null"], "items": [ { "type": "object", "properties": { "id": { "type": "string", "format": "uuid" }, "key": { "type": "string" } } } ] }, "permissions": { "type": ["array", "null"], "items": [ { "type": "object", "properties": { "id": { "type": "string", "format": "uuid" }, "key": { "type": "string" } } } ] } } } ] }, "is_password_reset_requested": { "type": "boolean", "description": "The users updated password reset status" } }, "description": "User event data" } }, "description": "Webhook event data" }, "type": { "constant": "user.updated" }, "source": { "enum": ["api", "admin"], "description": "Source of the action" }, "event_id": { "type": "string", "pattern": "event_[0-9a-f]{32}", "description": "ID of the event" }, "timestamp": { "type": "string", "format": "date-time", "description": "Datetimestamp of the action" } }, "description": "Webhook detail the user updated event" }, "version": 1 } ``` You can see a full list of events in the Kinde UI under **Settings > Webhooks**, or by calling the [Kinde management API](/kinde-apis/management#tag/webhooks) which also provides the JSON schema GET `/api/v1/event_types`. Read more [about webhooks](/integrate/webhooks/about-webhooks/).
# Authenticate - Enterprise connections - Migrating users from email identity to enterprise identity
> Step-by-step guide to migrating existing email/password users to Enterprise SSO connections (SAML/Entra ID) using JIT provisioning, including testing, pilot rollout, and post-migration security best practices.
Last updated: 2026-01-12
email, enterprise, user migration, SSO, SAML, Entra ID, Azure AD, JIT provisioning, enterprise connections, identity migration, trust email, IdP
integrate, third-party-tools
This guide walks you through migrating existing email/password users to Enterprise SSO connections (such as SAML, Entra ID, or other enterprise connections). This process uses just-in-time (JIT) provisioning to map existing users to their enterprise identities based on matching email addresses. ### What you need - A [Kinde](https://kinde.com) account with existing users. - An enterprise app connected in Kinde, see the list of [enterprise connections](/authenticate/enterprise-connections/about-enterprise-connections/) for more information. - Users with email addresses that match exactly their Enterprise Identity (capitalization and structure must match) - A test application in Kinde. ## Test the integration with Kinde Before testing with real users, verify the connection works correctly with a single test user. This helps identify any configuration issues early. ### Enable the connection for your test application 1. In Kinde, go to **Environment > Settings > Authentication**. 2. Find your Enterprise Connection and select **Configure**. 3. Scroll down to the **Applications** section. 4. Toggle the connection **ON** for your test application. Ideally, this should be an application that is not publicly available. 5. Select **Save**. ### Prepare a test user 1. Identify one existing Kinde user who has an email/password identity. 2. Verify that this user's email address in Kinde **exactly matches** their email address in your identity provider (capitalization and structure must be identical). 3. Ensure this test user has access to your test application. 4. Confirm you can access your identity provider's sign-in logs and Kinde logs for verification purposes. ### Test the SSO flow 1. Open your test application in an incognito/private browser window. 2. Initiate the SSO login flow: - If you configured home realm domains, enter the test user's email address and select **Continue**. You should be redirected to your identity provider. - If you didn't configure home realm domains, select the **Sign in with Enterprise** or **SSO** button. 3. Authenticate with the test user's identity provider credentials. 4. After successful authentication, your identity provider should redirect back to Kinde (via the ACS URL). 5. Kinde should process the SAML response and either: - Map to the existing Kinde user (if the email matches and **Trust email addresses** is enabled), preserving the user's profile, roles, and permissions; **or** - Create a new Kinde user via JIT provisioning with the SAML attributes if no match exists. 6. You should be redirected back to your application with a valid authenticated session. ### Verify the test was successful Check the following to confirm everything worked correctly: **In your identity provider:** - Go to **Sign-in logs** and verify the authentication attempt appears. - Confirm the SAML response was sent successfully to Kinde. **In Kinde:** - Go to **Users** and find your test user. - Verify the user's profile information (name, email) was preserved. - Check that roles and permissions are intact (if applicable). - Review the user's identity - it should now show the Enterprise Connection identity instead of email/password. **In your application:** - Confirm the user can access protected resources. - Verify the session/token is valid. - Test that the user's profile data is correctly displayed. **Test email/password login (optional):** - Attempt to sign in with the test user's email/password credentials. - If home realm discovery is configured, you should be redirected to your identity provider's login page instead of the email/password form. ### Troubleshooting If the test doesn't work: - **Disable the Enterprise Connection** in Kinde to prevent further issues. - **Collect debug information:** - Check your identity provider's sign-in logs for error messages. - Review Kinde logs for SAML processing errors. - Verify the ACS URL in your identity provider matches the one in Kinde. - Confirm the Entity ID matches in both systems. - **Email address format mismatches:** Different identity providers may return email addresses in different formats, which can prevent successful user mapping: - Ensure email addresses match exactly (case-sensitive) between Kinde and your IdP. - Verify the **Email key attribute** matches the exact attribute name your IdP uses (e.g., `emailaddress`, `emailAddress`, `email`, or full claim URIs). - Check your IdP's SAML response to confirm the exact email format being sent. - **Revert the test user** back to email/password identity if needed. - **Fix any configuration issues** and repeat the test. For more information on troubleshooting SSO issues, see [Troubleshoot SSO issues](/authenticate/enterprise-connections/provision-users-enterprise/#troubleshoot-sso-issues). ## Pilot roll-out Once you've successfully tested with a single user, expand testing to a small group of representative users: - Select several test users from different departments or teams. - Test across different browser configurations (Chrome, Firefox, Safari, Edge). - Have each test user complete the SSO login flow. - Monitor both Kinde and your identity provider's logs for any errors or mapping problems. - Verify each user's profile, roles, and permissions are preserved correctly. - Document any issues encountered and resolve them before proceeding to full migration. ### Enable the connection for live applications After successful pilot testing, enable the Enterprise Connection for your production applications: 1. In Kinde, go to **Environment > Settings > Authentication**. 2. Find your Enterprise Connection and select **Configure**. 3. Scroll down to the **Applications** section. 4. Toggle the connection **ON** for each production application that should use this Enterprise Connection. 5. Select **Save**. ### Complete migration and disable trust email Once all existing users for that Enterprise Connection have signed in successfully at least once: 1. In Kinde, go to **Environment > Settings > Authentication**. 2. Find your Enterprise Connection and select **Configure**. 3. Scroll down to the **Trust email addresses provided by this connection** option. 4. Turn this setting **OFF** (improves security and prevents silent linking of emails). 5. Select **Save**. ## Post-migration checks and housekeeping ### After completing the migration: **Audit logs:** - Review Kinde logs for any unknown or failed sign-ins. - Check your identity provider's sign-in logs for authentication issues. - Verify all expected users have successfully migrated. **Security:** - Revoke or rotate any signing certificates if needed per your security policy. - Confirm that email/password login is disabled for migrated accounts (if desired). **User verification:** - Spot-check user profiles to ensure data integrity. - Verify roles and permissions are correctly maintained. --- ### Expected outcome (success criteria & what to look for) **Primary success criteria:** - User can initiate SSO login from the application and is redirected to your identity provider. - Your identity provider accepts credentials and returns a successful SAML response to Kinde (redirect to ACS URL). - Kinde either: - Maps the incoming SAML `emailaddress` to the **existing** Kinde user (when `Trust email addresses` is ON), preserving profile and permissions; **or** - Creates a new Kinde user via JIT provisioning with the SAML attributes if no match exists. - The user is redirected back to the application with a valid authenticated session and can access resources according to their preserved permissions. - Your identity provider's sign-in logs show the successful authentication; Kinde logs show either the mapped existing user sign-in or creation of the user from the enterprise connection. - After migration completion and verification, `Trust email addresses` can be turned **OFF** and email/password login disabled for migrated accounts. --- ## Items to be aware of ### Identity removal At the moment when a user has been given an Enterprise Connection identity, their existing identity is removed from their profile at the same time. ### Email capitalization issue Users created in Kinde before March 2025 may experience an email capitalization mismatch that prevents proper syncing between their Kinde profile and Enterprise Connection identity. This affects users created in Kinde before March 2025, regardless of whether they were originally created with email authentication or an Enterprise Connection. The email address stored in the Enterprise Connection may have incorrect capitalization that doesn't match their existing Kinde profile, preventing automatic syncing during migration. **To resolve:** 1. Delete the affected user in Kinde. 2. Have the user log in via their enterprise SSO. 3. Kinde will automatically create their enterprise identity with the correct email capitalization matching your identity provider. ### Customer IdP setup Your customers' IdP setups will be different from each other, we would recommend: 1. Organising a time with them to agree to when the change will happen 2. Flag with Kinde when this will happen, so we can be on hand to help 3. Be on a call with them at the point of change to ensure they can authenticate in. Doing this will mean that when there are nuances between IdP setups, they can be identified and addressed swiftly. We would recommend, starting with a customer with a smaller user base first. For more information on troubleshooting SSO issues, see [Troubleshoot SSO issues](/authenticate/enterprise-connections/provision-users-enterprise/#troubleshoot-sso-issues). ### Summary This guide covered migrating existing email/password users to Enterprise Identity connections using just-in-time (JIT) provisioning. The migration process relies on email address matching between Kinde and your identity provider to map existing users to their enterprise identities. **Key takeaways:** 1. Email addresses must match exactly (case-sensitive) between Kinde and your identity provider—verify your Email key attribute configuration matches your IdP's SAML response format 2. Enable **Trust email addresses** during migration to enable automatic mapping, then disable it after all users have migrated for improved security 3. Test with a single user first, then expand to a pilot group before full rollout 4. Users created in Kinde before March 2025 may require manual resolution due to email capitalization issues 5. Monitor authentication logs during and after migration to ensure successful user mapping
# Authenticate - Enterprise connections - Okta enterprise connection (SAML)
> Step-by-step guide to integrating Okta as a SAML identity provider with Kinde, including application setup and troubleshooting.
Last updated: 2025-01-16
Okta, SAML, identity provider, IdP, enterprise auth, SSO, application assignment, metadata URL, metadata hosting, XML
authenticate
If you use Okta to centralize authentication and authorization in your business, you can integrate Kinde as a service provider for these processes. This gives you the benefits of Kinde’s robust auth capabilities, while keeping the familiar Okta structure.  You need to set up an enterprise connection in Kinde for this, and add an Okta application. See steps below. ## Advanced configurations Depending on your SAML set up, you may need to include advanced configurations for your connection. See [Advanced SAML configurations](/authenticate/enterprise-connections/advanced-saml-configurations/). ## Step 1: Add an Okta connection in Kinde ### Add a connection for a specific organization 1. Go to **Organizations** and open the organization. 2. In the menu, select **Authentication**, then select **Add connection**. 3. In the **Add connection** window, select **New enterprise connection**, then click **Next**. 4. Select the Okta connection and then select **Next**. 5. Next: 'Step 2: Configure the connection'. ### Add a connection that can be shared across multiple organizations 1. Go to **Settings > Environment > Authentication**. 2. Scroll to the **Enterprise connection** section and select **Add connection**. The **Add connection** window opens. 3. Select the Okta connection and then select **Save**. 4. On the tile for the new connection, select **Configure**. 5. Next: 'Step 2: Configure the connection'. ## Step 2: Configure the connection 1. Enter a name for the connection. 2. Enter a random value for the **Entity ID**, e.g. `870sa9fbasfasdas23aghkhc12zasfnasd`. 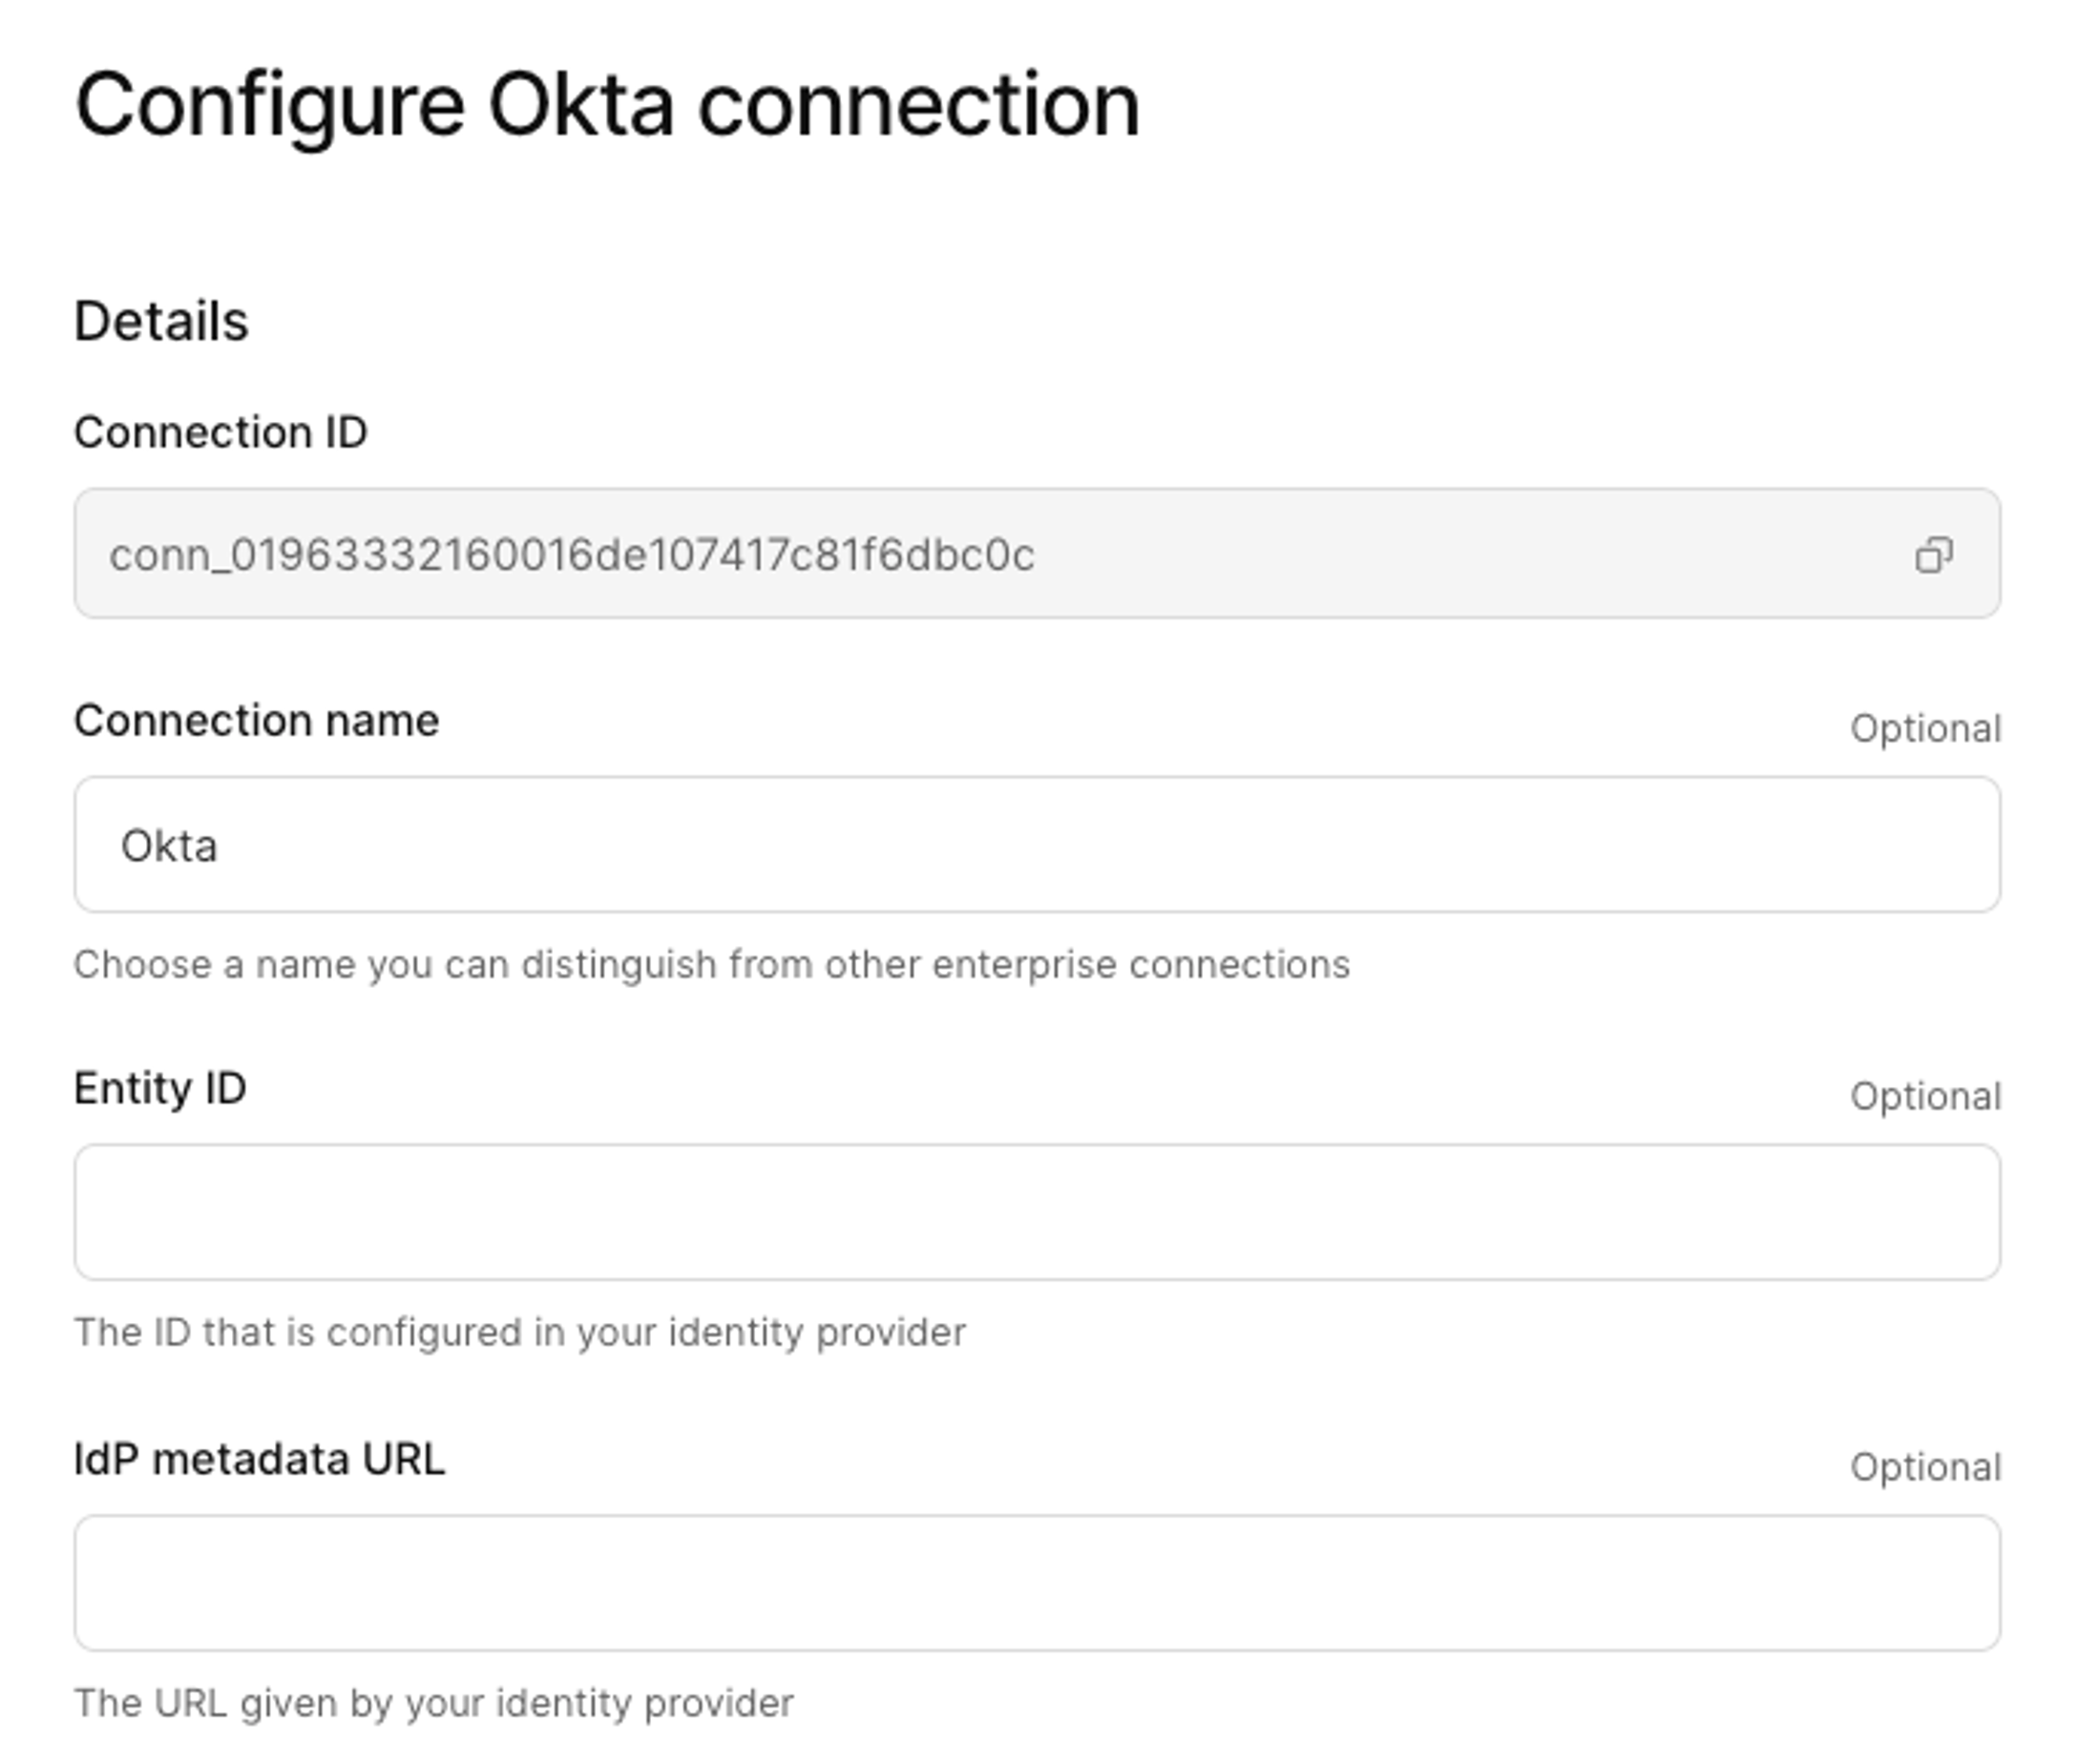 3. Enter the **IdP metadata URL**. This URL comes from your identity provider. If you haven't set up your app yet, you can add this later. 4. Enter a **sign in URL** if your IdP requires a specific URL.  5. If you want, select the **Sign request algorithm** and **Protocol binding**. The options you choose will depend on what your identity provider prefers or requires. 6. Select a **Name ID** format. This helps identify and link user identities between your IdP and Kinde. 7. Enter an **Email key attribute**. This is the attribute in the SAML token that contains the user’s email. Setting this value ensures that the email address returned in the SAML response is correctly retrieved. We do not recommend leaving this field blank, but if you do we will set ‘email’ as the attribute. 8. (Optional) Add a first name and last name key attribute.  9. Enter any relevant **Home realm domains**. This is how SAML recognizes a user’s credentials and routes them to the correct sign in page. Note that home realm domains need to be unique across all connections in an environment. [Read more about home realm domains](/authenticate/enterprise-connections/home-realm-discovery/). 10. If you use home realm domains, the sign in button is hidden on the auth screen by default. To show the SSO button, select the **Always show sign-in button** option.  11. Copy the relevant reply URL: 1. If you don't use a custom domain, copy the **ACS URL**. 2. If you do use a custom domain, select the **Use custom domain instead** option and copy the custom domain URL. Later, add this URL to your identity provider configuration. 12. If you want to enable just-in-time (JIT) provisioning for users, select the **Create a user record in Kinde** option. This saves time adding users manually or via API later.  13. Select **Trust email addresses provided by this connection** if you want to treat this connection as a [trusted provider](/authenticate/about-auth/identity-and-verification/#trusting-emails-from-providers). 14. (Optional) In the **Sign SAML request** section, paste in the **Signed certificate** and **Private key**. You may have got these from your IdP or you may have generated yourself (see procedure above). 15. Enter any [upstream params](/authenticate/enterprise-connections/advanced-saml-configurations/#upstream-parameters) that you want to pass to the identity provider. Not all providers support this, so check their documentation first. 16. Select **Save**. ## Step 3: Add and configure your Okta application 1. Sign in to the Okta admin console. 2. Select **Applications > Applications**. 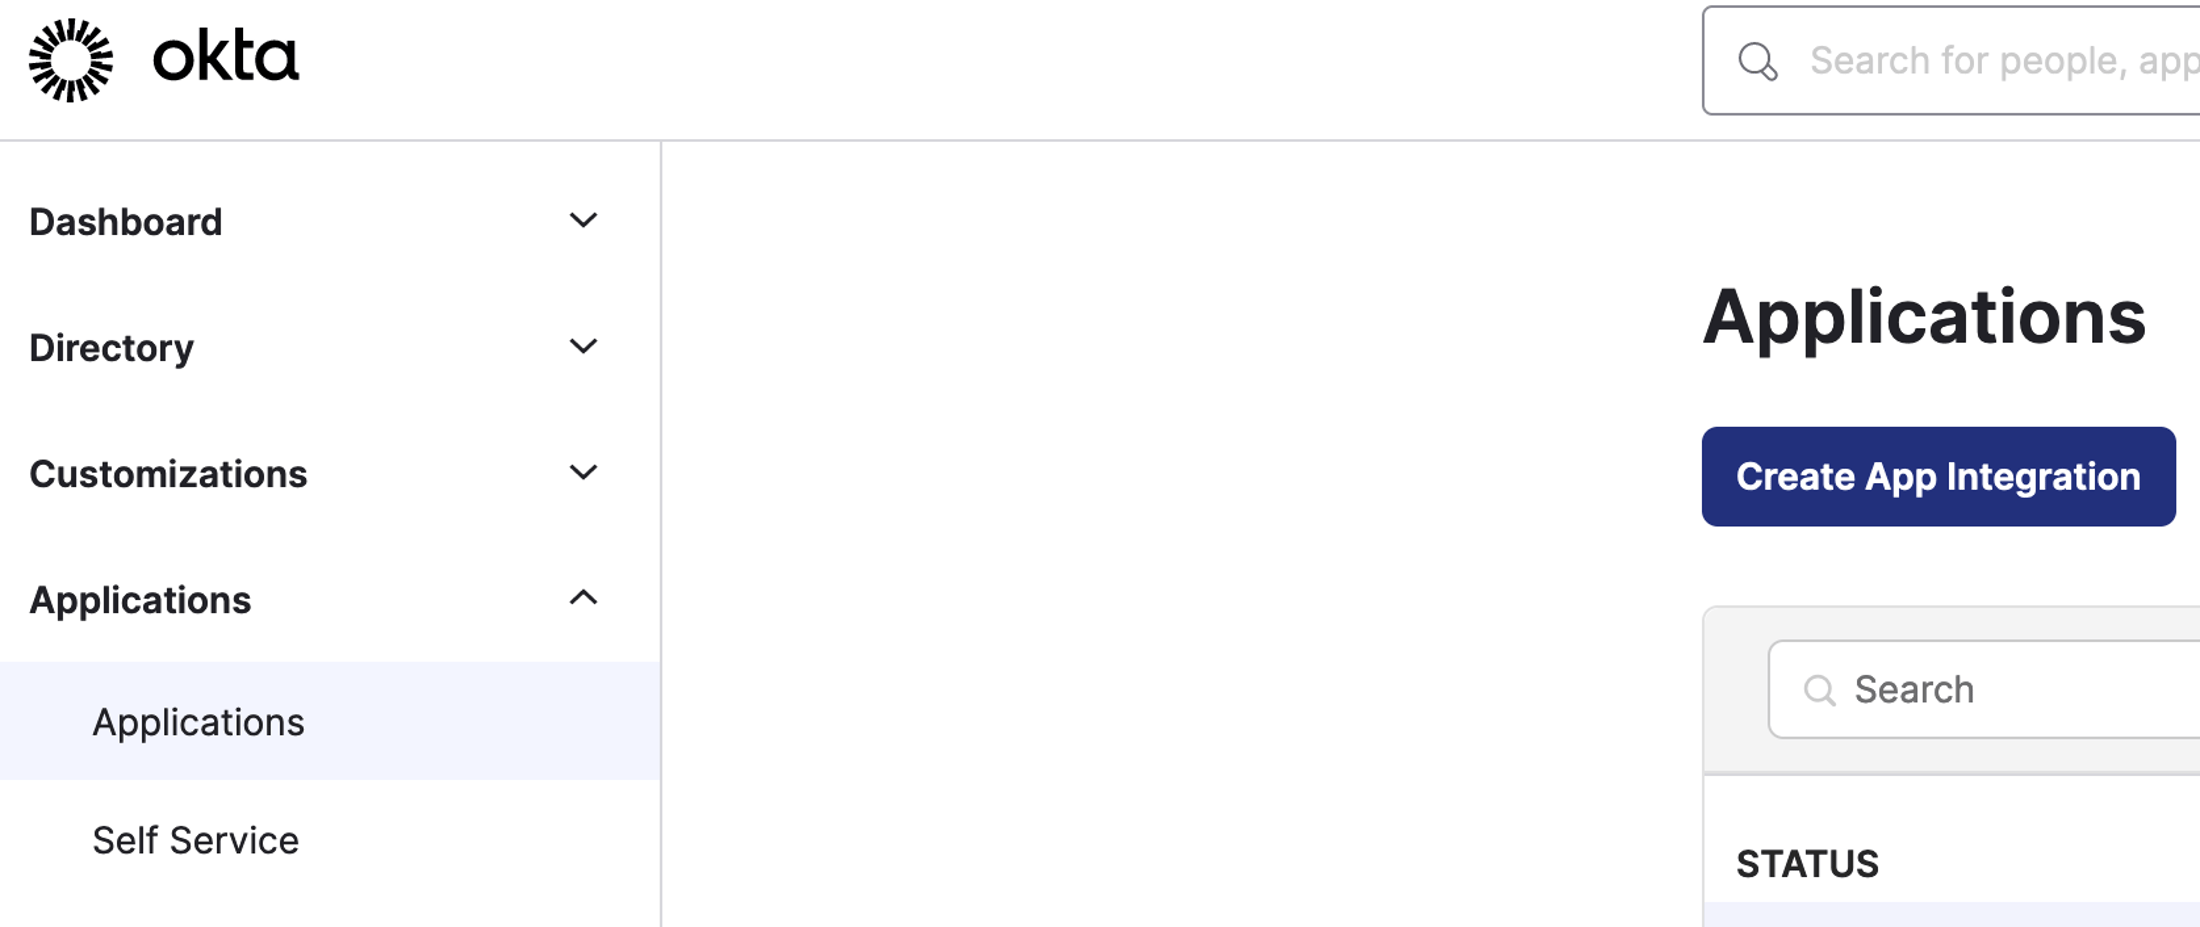 3. Select **Create App Integration**. The **Sign-in method** options opens. 4. Select SAML 2.0 and then select **Next**. The app’s general settings opens. 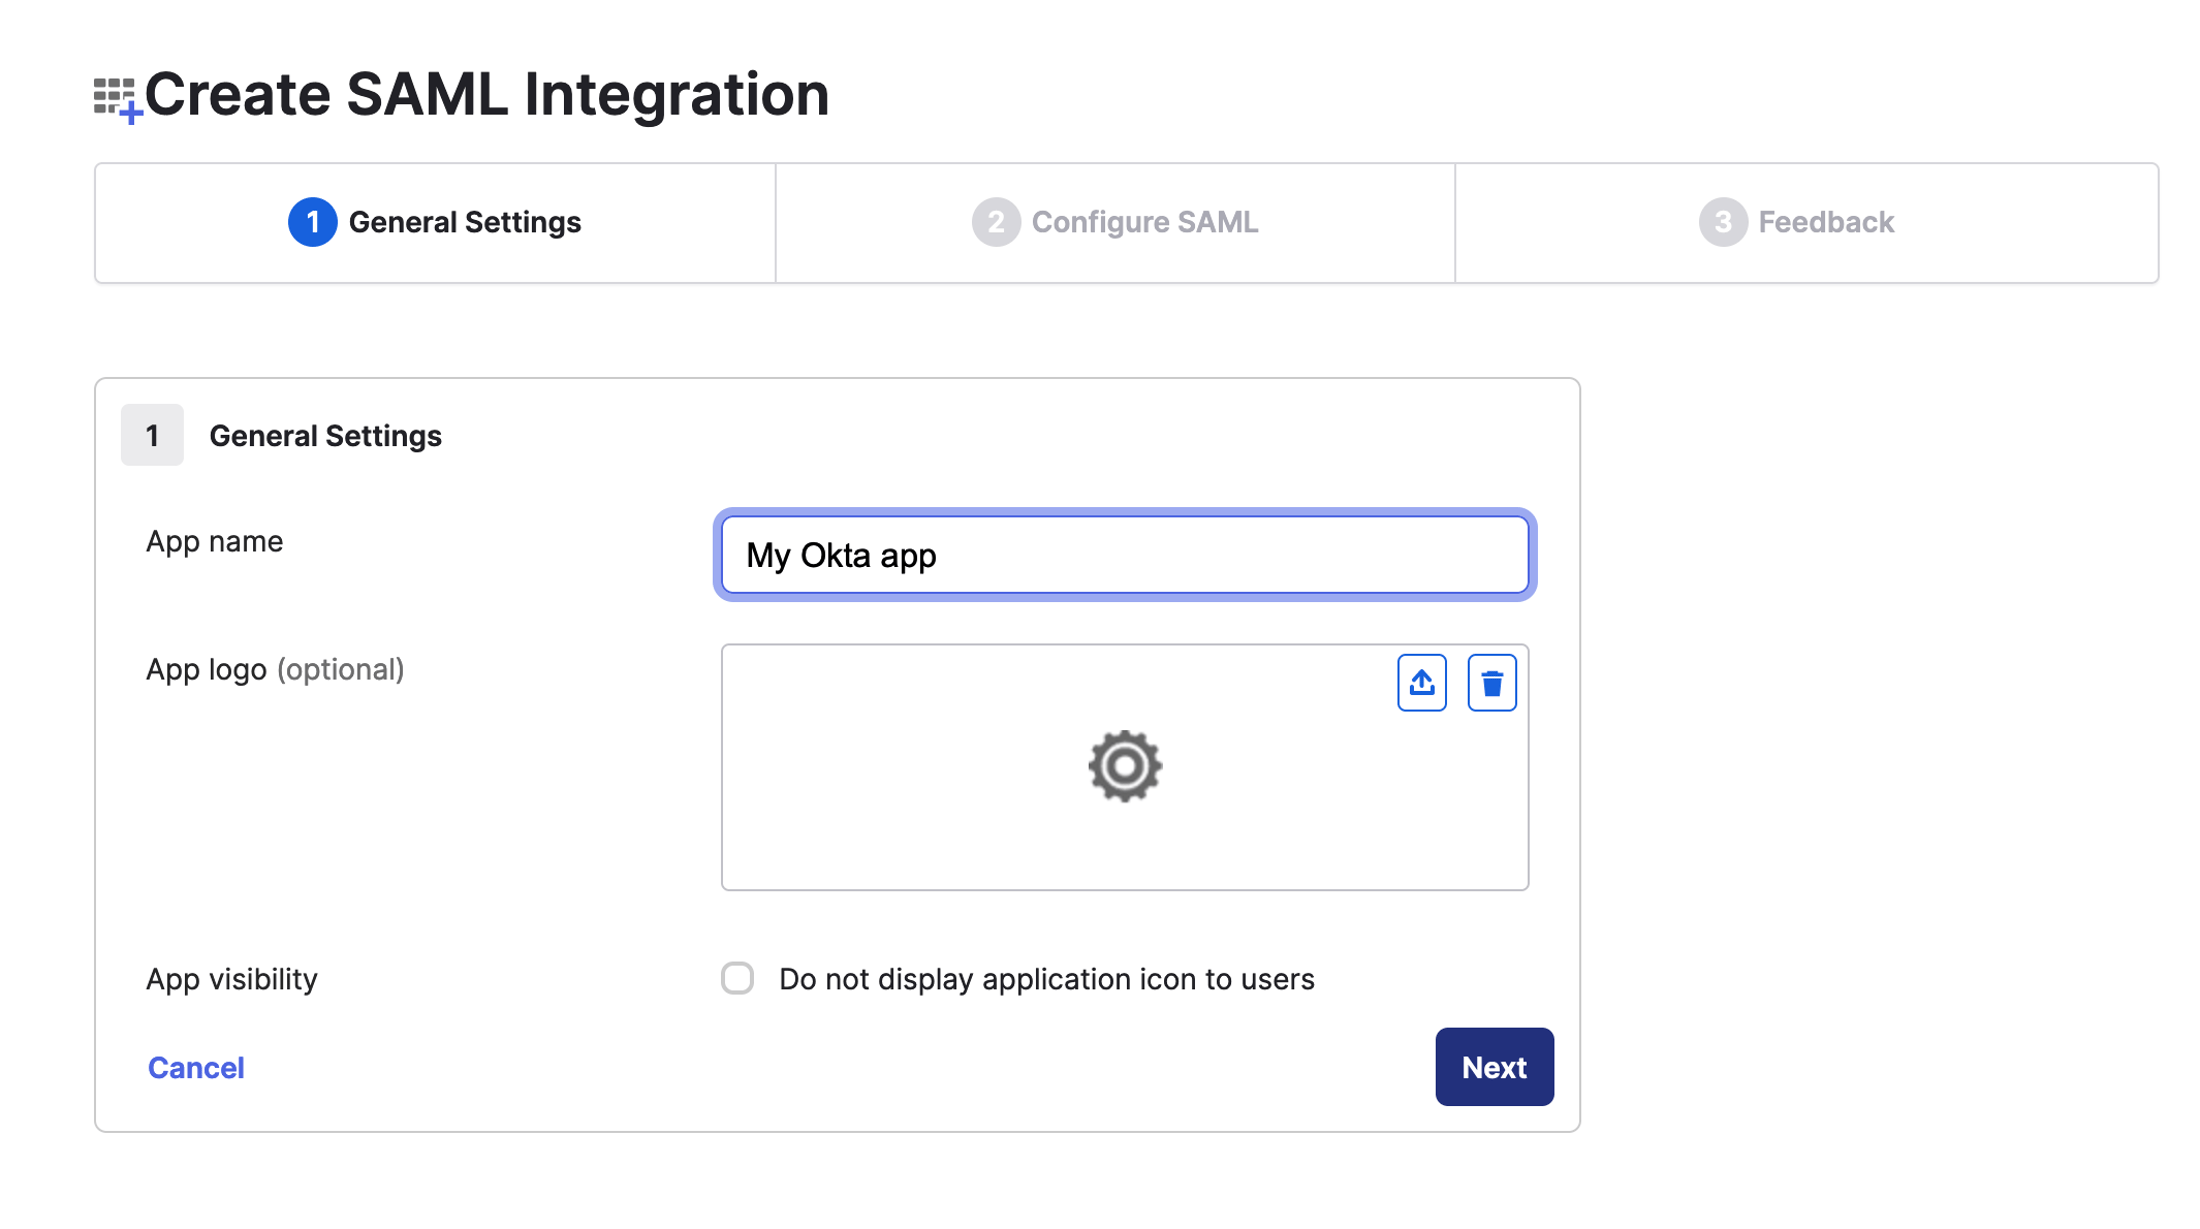 5. Add a name in the **App name** field then select **Next**. The **Configure SAML** screen opens.  6. In the **SAML settings** section, enter the following values: 1. **Single sign-on URL:** Paste the **Assertion Customer Service (ACS) URL** you copied from Kinde. 2. **Audience URI (SP Entity ID)**: Paste the **Entity ID** you copied from Kinde. 3. **Name ID format:** Select **EmailAddress**. 4. **Application username**: Select **Email**. 5. Leave all other options to their default value and select **Next**. 7. Select **Finish**. You will be redirected to the newly created application in Okta. 8. Select the **Sign on** tab and copy the metadata URL. 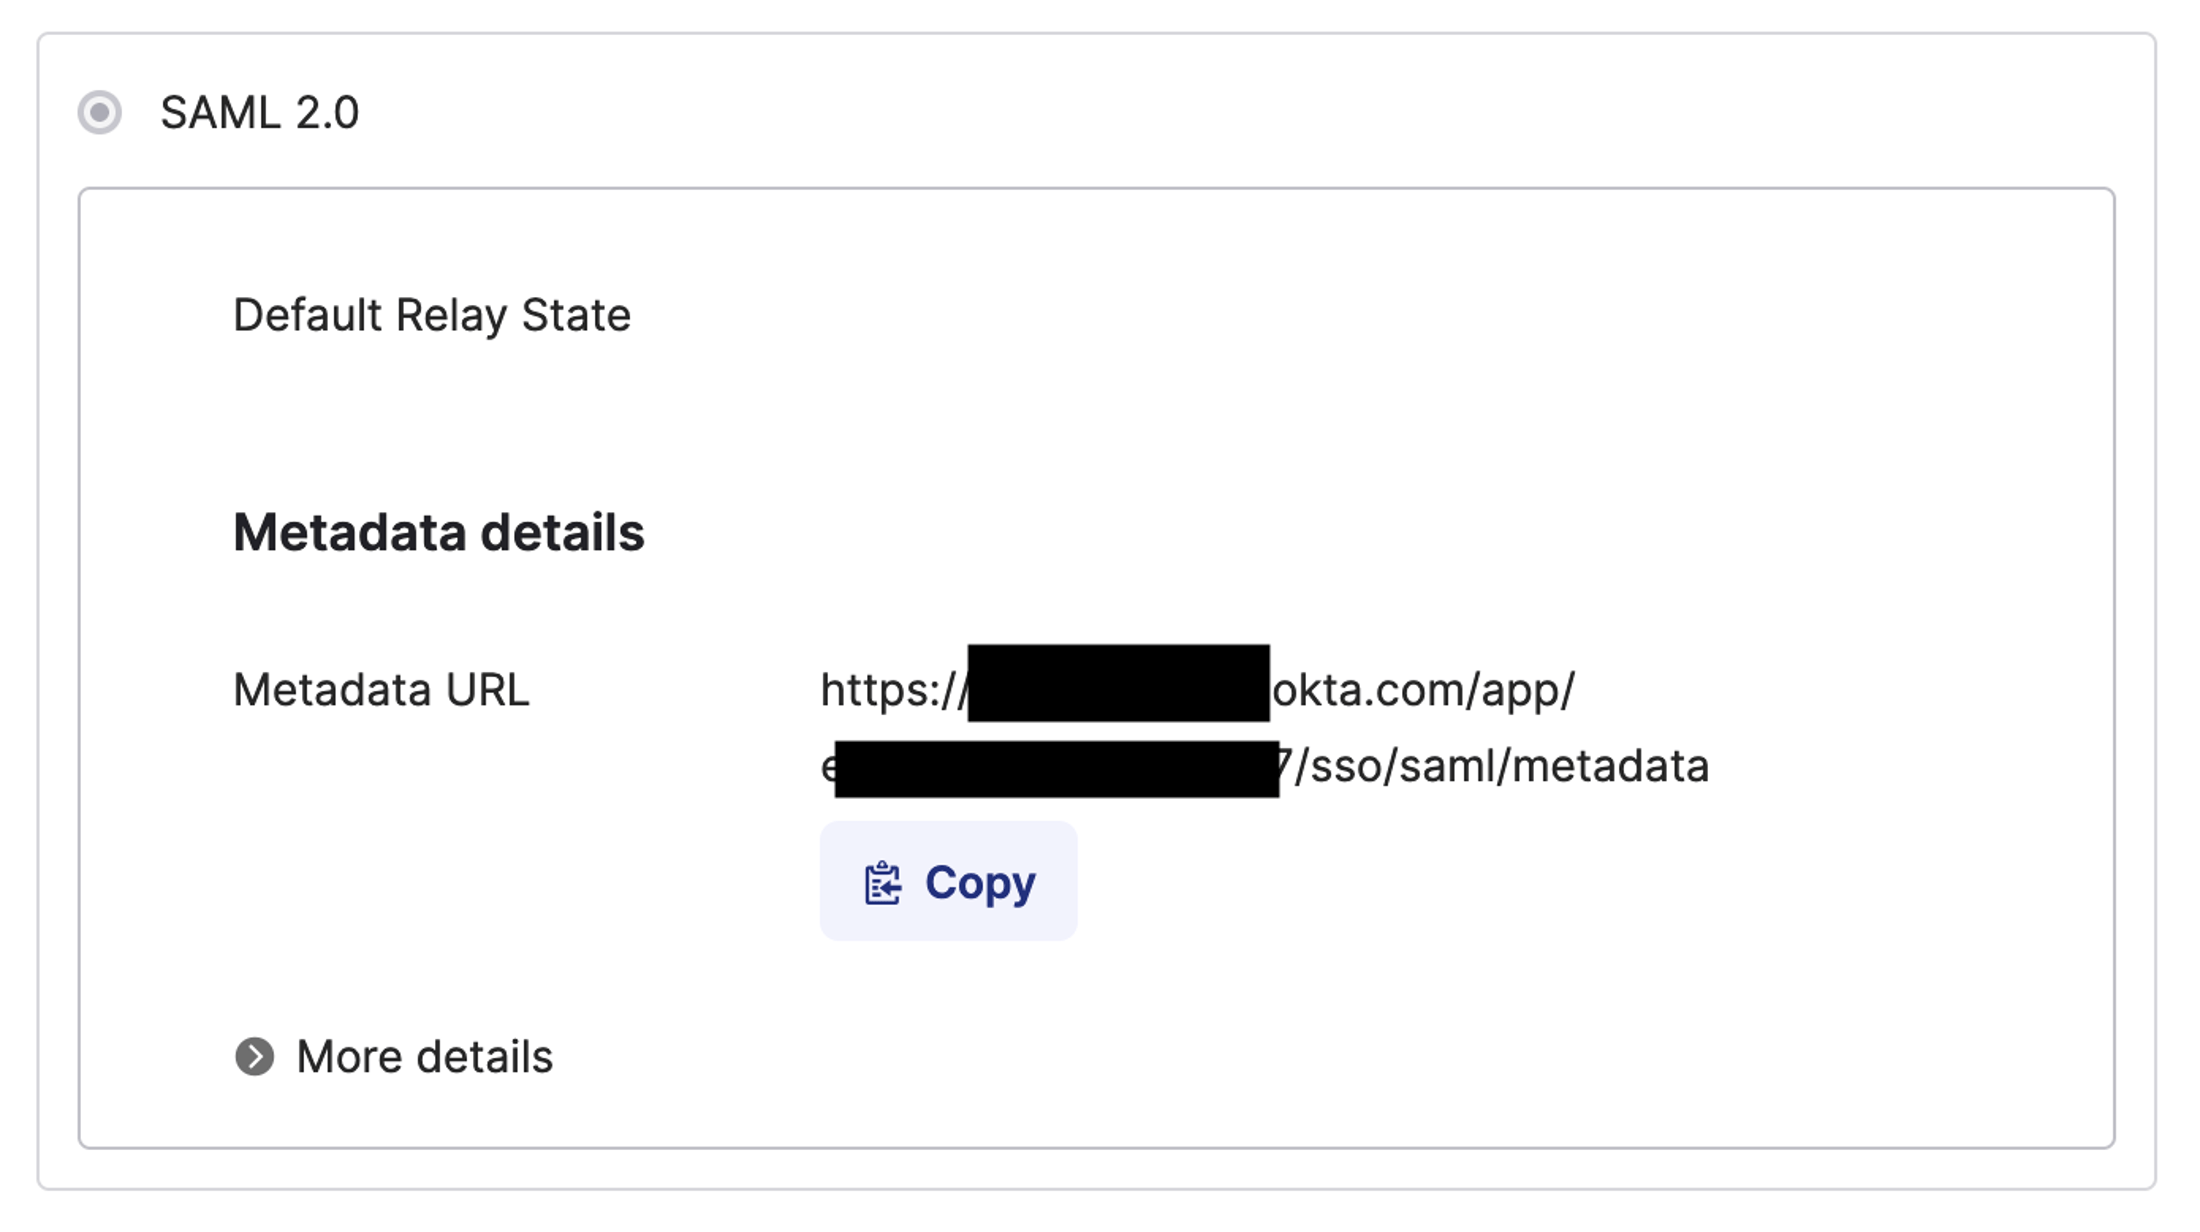 ## Step 4: Finish setting up your SAML connection in Kinde 1. Open the connection in Kinde. Via Organization > Authentication or via Settings > Authentication. 2. Scroll to the **IdP metadata URL** field and paste the **Metadata URL** you copied from Okta. 3. Enter the signed certificate and key information if you have it. You can do this later as well. 4. Switch on the connection. This will make it instantly available to users if this is your production environment. 1. For environment-level connections, scroll down and select the apps that will use the auth method. 2. For organization-level connections, scroll down and select if you want to switch this on for the org. 5. Select **Save**. You can now use Okta as an IdP for the selected applications. ## Troubleshooting the connection If you get an error in Okta that says **User is not assigned to this application**, it means you need to assign a user or group to your Okta application. 1. Go to the **Applications** section in your Okta Admin Console. 2. Select the SAML 2.0 app you set up. 3. Under the **Assignments** tab, click **Assign > Assign to People or Assign to Groups**. 4. Choose the user or group you want to assign to this application and save your changes.
# Authenticate - Enterprise connections - Provisioning users for enterprise connections
> Comprehensive guide to user provisioning for enterprise connections including JIT provisioning, pre-provisioning, and troubleshooting SSO issues.
Last updated: 2026-04-13
user provisioning, JIT provisioning, enterprise connections, SSO, identity management, troubleshooting
authenticate
When you set up Kinde with enterprise authentication like SAML or Cloudflare, you’ll want to make sure that users are set up with the correct access and identity from day one. How you do this depends on how you ‘provision’ their enterprise user identity. Users in Kinde are able to have multiple identities to support all the ways they can sign in, such as via email, social sign-in, etc. However, users managed through enterprise connections can only have an enterprise identity. ## Just-in-time (JIT) provisioning for user creation (recommended) JIT provisioning is the simplest way to add users to Kinde and allow them to authenticate. Rather than importing or pre-provisioning, your users are added to Kinde at the point of their first authentication. To enable JIT provisioning, select the **Create a user record in Kinde** option when you set up your enterprise connection.  The first time the user authenticates, Kinde creates a new user record for them with the identity information passed from your IdP. ## Pre-provision or pre-create users Sometimes, JIT provisioning is not the right path or may not be possible. For example: - The user already exists in Kinde and you're switching the auth method to SSO. - You are importing users from another system and there is existing data related to the user you also wish to import. - You only want to add a sub-set of users from your directory. ### Add users to Kinde In all these cases, the users must first exist in Kinde to implement enterprise SSO. You can add users to Kinde [via import](/manage-users/add-and-edit/import-users-in-bulk/) or [via API](/kinde-apis/management#tag/users/post/api/v1/user). All users must have an email address that matches their email with the IdP. This is not necessarily the email identity for sign in, it is purely for initial matching against the IDP provided email. ### Provisioning method 1: Assign a connection identity to a user (recommended) This method of provisioning requires you to add the enterprise connection as part of the user’s identity in Kinde. **Add the enterprise connection identity via API** Post identity details to this endpoint `POST /api/v1/users/{user_id}/identities` with `enterprise` as the type and the `connection_id`. For more information, see [Create identity](https://docs.kinde.com/kinde-apis/management/#tag/users/post/api/v1/users/{user_id}/identities). You can search connections via API and filter them by domain. This can help you obtain the connection ID. **Add the enterprise connection identity manually** 1. Open a user’s profile and select **Add identity**. 2. In the window that appears, select **Enterprise SSO** as the **Identity type**. 3. Select the relevant **Enterprise connection** from the list. 4. Enter the user’s email as it appears in the identity provider directory. 5. Select **Save**. The user’s profile is updated to show only the enterprise connection identity. ### Provisioning method 2: Set the connection to trust emails from the IDP A slightly less secure option is to set the enterprise connection to trust emails from your IdP. This does save you adding and linking users as per method 1 above, but it also overrides any existing identity information in Kinde (such as email or phone number) with the connection data from the IdP. To employ this method, select the **Trust email addresses provided by this connection** option in the connection configuration. **Settings > Authentication > Enterprise connections > Configure.**  When the user signs in with an SSO connection that provides an email that matches the pre-provisioned users email, we will automatically combine the users. Their original email identity will be removed and from this point on they can only authenticate via the SSO connection. ## Troubleshoot SSO issues **We can’t find your account** If a user goes to sign in and encounters the ’We can’t find your account’ message, it could be because **Self-joining** for the organization is switched off. This is the right behaviour if you don’t want users without the `org_id` to join the org, but the message is confusing. Switch this on via **Organization > Policies**. **Duplicate identities** If duplicate identities are created for users in Kinde, it may because the **Trust email addresses provided by this connection** option is not switched on in the connection configuration. **Customer's SSO auth not working** Some B2B businesses allow their customers to sign in using their own enterprise SSO. When setting this up, a common mistake is that they supply incorrect values for the Client ID and Client Secret, based on the identity provider information. Double check these if you come across connection issues. ## Automated provisioning with SCIM (coming soon) SCIM (System for Cross-domain Identity Management) support is currently in development. When available, SCIM will allow you to automatically provision and de-provision users in Kinde from your identity provider, and map IdP user groups to roles and permissions in Kinde — keeping user access in sync without manual steps. Follow progress and signal interest on the [Kinde roadmap](https://updates.kinde.com/board/integrate-scim-identity-management).
# Authenticate - Enterprise connections - Refresh SAML certificate
> Quick guide to refreshing SAML certificates and private keys for enterprise authentication security maintenance.
Last updated: 2025-01-16
SAML certificate, private key, certificate refresh, enterprise auth, security maintenance
authenticate
If you secure your authentication setup with SAML certificate and private key, you’ll need to update or refresh these periodically. Your IdP might issue new certificates, or you can generate a certificate and private key yourself. See the [main SAML topic](/authenticate/enterprise-connections/custom-saml/#optional-signed-certificate-and-private-key). 1. In Kinde, go to **Settings > Authentication**. 2. In the **Enterprise connections** section, select **Configure** on the SAML tile. 3. Scroll to the **Sign SAML request** section and override the **Signing certificate** and **Private key** with the new certificate content. 4. Select **Save**.
# Authenticate - Manage authentication - Change authentication for an application
> Guide to configuring different authentication methods for different applications including mobile apps and platform-specific auth.
Last updated: 2025-01-16
application authentication, mobile auth, platform-specific auth, Google auth, Apple auth
authenticate
If you want, you can select different authentication methods for different applications. You might want to do this, for example, so users sign in with Google for your Android app and Apple for your iOS app. You first need to [set up all your auth methods](/authenticate/authentication-methods/set-up-user-authentication/) and [set up each application](/build/applications/add-and-manage-applications/). 1. Go to **Settings > Environment > Applications**. 2. Select **View details** on the application you want to edit. 3. In the **Application details** screen, select **Authentication** in the left menu. 4. Use the toggle switches to change the authentication methods for the app. 5. If there is a method that you want that is not listed, [set it up](/authenticate/authentication-methods/set-up-user-authentication/). 6. When you’re finished, select **Save**. 7. Repeat for each application.
# Authenticate - Manage authentication - Build a switch to navigate between organizations
> Step-by-step guide to building an organization switcher for B2B applications using ID tokens and React components.
Last updated: 2026-04-13
organization switcher, B2B, ID tokens, React, multi-organization, org navigation
authenticate
A common pattern in B2B products is for users who belong to multiple organizations to be able to switch between them. This topic demonstrates how to achieve this. ## Step 1: Add org data to ID tokens The first step is to include a list of organizations a user belongs to, in their ID token. 1. In Kinde, open the application you want to enable a switcher for. For example, go to **Settings > Applications > [View details] > Tokens.** 2. Scroll down to the **Token customization** section and select **Configure** on the **ID token** card. The **Customize ID token** window opens. 3. Select the **Organizations (array)** checkbox in the **Additional claims** section. 4. Select **Save**. This adds the organization `id` and `name` to the user’s ID token, in the following format: ```jsx "organizations": [ { "id": "org_4ba6821b521", "name": "Golden Finance" }, { "id": "org_b7226a3b5f0", "name": "UTM Bank" }, { "id": "org_16374a4fc3f", "name": "Trueblue Pty Ltd" } ] ``` You can now extract the `organizations` claim from ID tokens in the way you normally would. Typically the SDK you are using will have a method for this. For example, in React you could use: ```jsx const { getClaim } = useKindeAuth() getClaim('organizations', 'idToken').then((organizations) => { console.log('value:', organizations?.value) }) ``` ## Step 2: Build the switcher To build a simple list of orgs, use something like the following React example. You’ll need to include a call to the `login` method for each organization, passing in the id. In this example, we’ve also included a check to see if this is the current organization. ```jsx const { login, getClaim, getOrganization } = useKindeAuth() const [orgs, setOrgs] = useState<{ id: string; name: string }[]>([]) const [currentOrgCode, setCurrentOrgCode] = useState(null) useEffect(() => { getClaim('organizations', 'idToken').then((organizations) => { setOrgs(organizations?.value ?? []) }) getOrganization().then((org) => { setCurrentOrgCode(org) }) }, [getClaim, getOrganization])
{orgs.map((item) => (
))}
``` With some extra styling, a switcher might look something like this: ## Does the refresh token cookie affect other browser tabs when switching orgs? Yes. The refresh token cookie is shared across all browser tabs on the same domain. When a user switches to a different organization, the shared cookie is updated with the new org's refresh token. Other open tabs will pick up the new organization context on their next token refresh. For more on how this works and available workarounds, see [Session management](/authenticate/manage-authentication/session-management/#does-switching-organizations-affect-other-browser-tabs).
# Authenticate - Manage authentication - Set custom authentication per organization
> Guide to setting custom authentication methods per organization including shared connections and enterprise connections for B2B customers.
Last updated: 2025-01-16
organization authentication, custom auth, shared connections, enterprise connections, B2B auth
authenticate
You can set different authentication methods for each organization you manage in Kinde. You might want to do this if your customers are businesses that require unique auth setups. ## Environment-level and organization-level auth methods Most authentication methods need to be [set up at the environment level](/authenticate/authentication-methods/set-up-user-authentication/), including social sign in and core mthods such as passwordless, phone auth, etc. These are known as 'Shared connections'. You might also have [organization-level enterprise connections](/authenticate/enterprise-connections/enterprise-connections-b2b/), which are unique to an organization. The way each of these connection types is managed, is very similar. ## Set authentication methods for an organization This procedure covers adding shared connections, but you can also [add enterprise connections directly to an organization](/authenticate/enterprise-connections/about-enterprise-connections/). 1. In Kinde, view details of the organization. 2. Select **Authentication** in the menu. 3. Activate the advanced features for this org, if you haven’t already. 4. Select **Add connection**. The **Add connection** window opens. 5. Select **Existing connection**, then select **Next**. A list of all existing connections appears. 6. Use the switches to enable and disable authentication methods for the organization. 7. When you’ve finished making changes, select **Save**. ## Disable authentication method for an organization If you remove an auth method for an organization, users can use any remaining methods to authenticate. If you remove all authentication methods, the organization will revert back to using the default auth set up from the environment level. 1. In Kinde, view details of the organization. 2. Select **Authentication** in the menu. 3. Select the three dots menu on the connection you want to remove, and select **Disable connection**. 4. A confirmation window opens. 5. Confirm that you want to disable the connection. For shared connections, the connection can be easily added back. For org-level enterprise connection, the connection can be re-enabled.
# Authenticate - Manage authentication - Session management per organization
> Guide to managing Kinde authenticated sessions at the organization level including session persistence and inactivity timeouts for enterprise customers.
Last updated: 2026-04-03
organization session management, SSO session, session cookies, inactivity timeout, enterprise auth
authenticate
If you are on the Kinde Scale plan, you can change Kinde authenticated session configuration at the organization level as well as the environment level. An authenticated session (or SSO session) is the period during which Kinde treats the user as signed in. You can define whether a session persists after the browser is closed, and how much time can elapse before prompting the organization’s users to re-authenticate. These settings only apply to Kinde sessions and not sessions you maintain through your own application. ## Limitations of Kinde session configuration - Session cookies are not destroyed when a tab is closed, the full browser window must be closed. - Modern browsers usually allow session restoration. Restoring a browser session can also restore a session cookie. ## Manage SSO session behaviors and policies per organization When you change session settings at the organization level, this overrides session settings at the environment level. 1. In Kinde, go to **Organizations** and open the organization whose session settings you want to configure. 2. Select **Sessions** in the side menu. 3. In the **SSO sessions** section, decide on the policy for session cookies. A persistent session leaves the cookie active when the browser is closed. A non-persistent session is terminated when the browser window closes (unless the limitations listed above apply). 4. In the **Session inactivity timeout** section, set how long a session can be inactive before prompting re-authentication. This setting is applied in seconds - where 3,600 seconds is one hour; 86,400 seconds is one day. 5. When you're finished, select **Save**. The session settings will now be applied to members of this organization. ## What counts as activity for SSO session inactivity? Organization-level **Session inactivity timeout** follows the **same rules** as environment-level session settings. For what Kinde treats as activity (including how token refresh and API traffic relate to the timer), see [Session management](/authenticate/manage-authentication/session-management/). ## Manage organization session behavior via API Use this endpoint to update session settings [via API](https://docs.kinde.com/kinde-apis/management/#tag/organizations/patch/api/v1/organizations/{org_code}/sessions/). `PATCH /api/v1/organizations/{org_code}/sessions`
# Authenticate - Manage authentication - Session management
> Set SSO persistence and inactivity timeouts, then end user sessions from your backend with the Management API
Last updated: 2026-08-31
session management, SSO session, inactivity timeout, persistent cookies, delete user sessions, refresh tokens, sign out everywhere, session cookies
authenticate, manage-authentication, sso
You can manage Kinde-authenticated sessions via your application settings. An authenticated session (or SSO session) is the period during which Kinde treats the user as signed in. You can define whether a session persists after the browser is closed, and how much time can elapse before prompting a user to re-authenticate. These settings only apply to Kinde sessions and not sessions you maintain through your own application. If you want, you can [change session settings for an organization](/authenticate/manage-authentication/session-management-per-organization/), without affecting other organizations. ## Manage SSO session behaviors and policies Session settings are managed on a per-application basis. Do the following to manage them: 1. Sign in to your Kinde dashboard. 2. Go to **Settings > Environment > Applications.** 3. Select **View details** on the application tile you want to manage. 4. Select **Sessions** in the side menu. 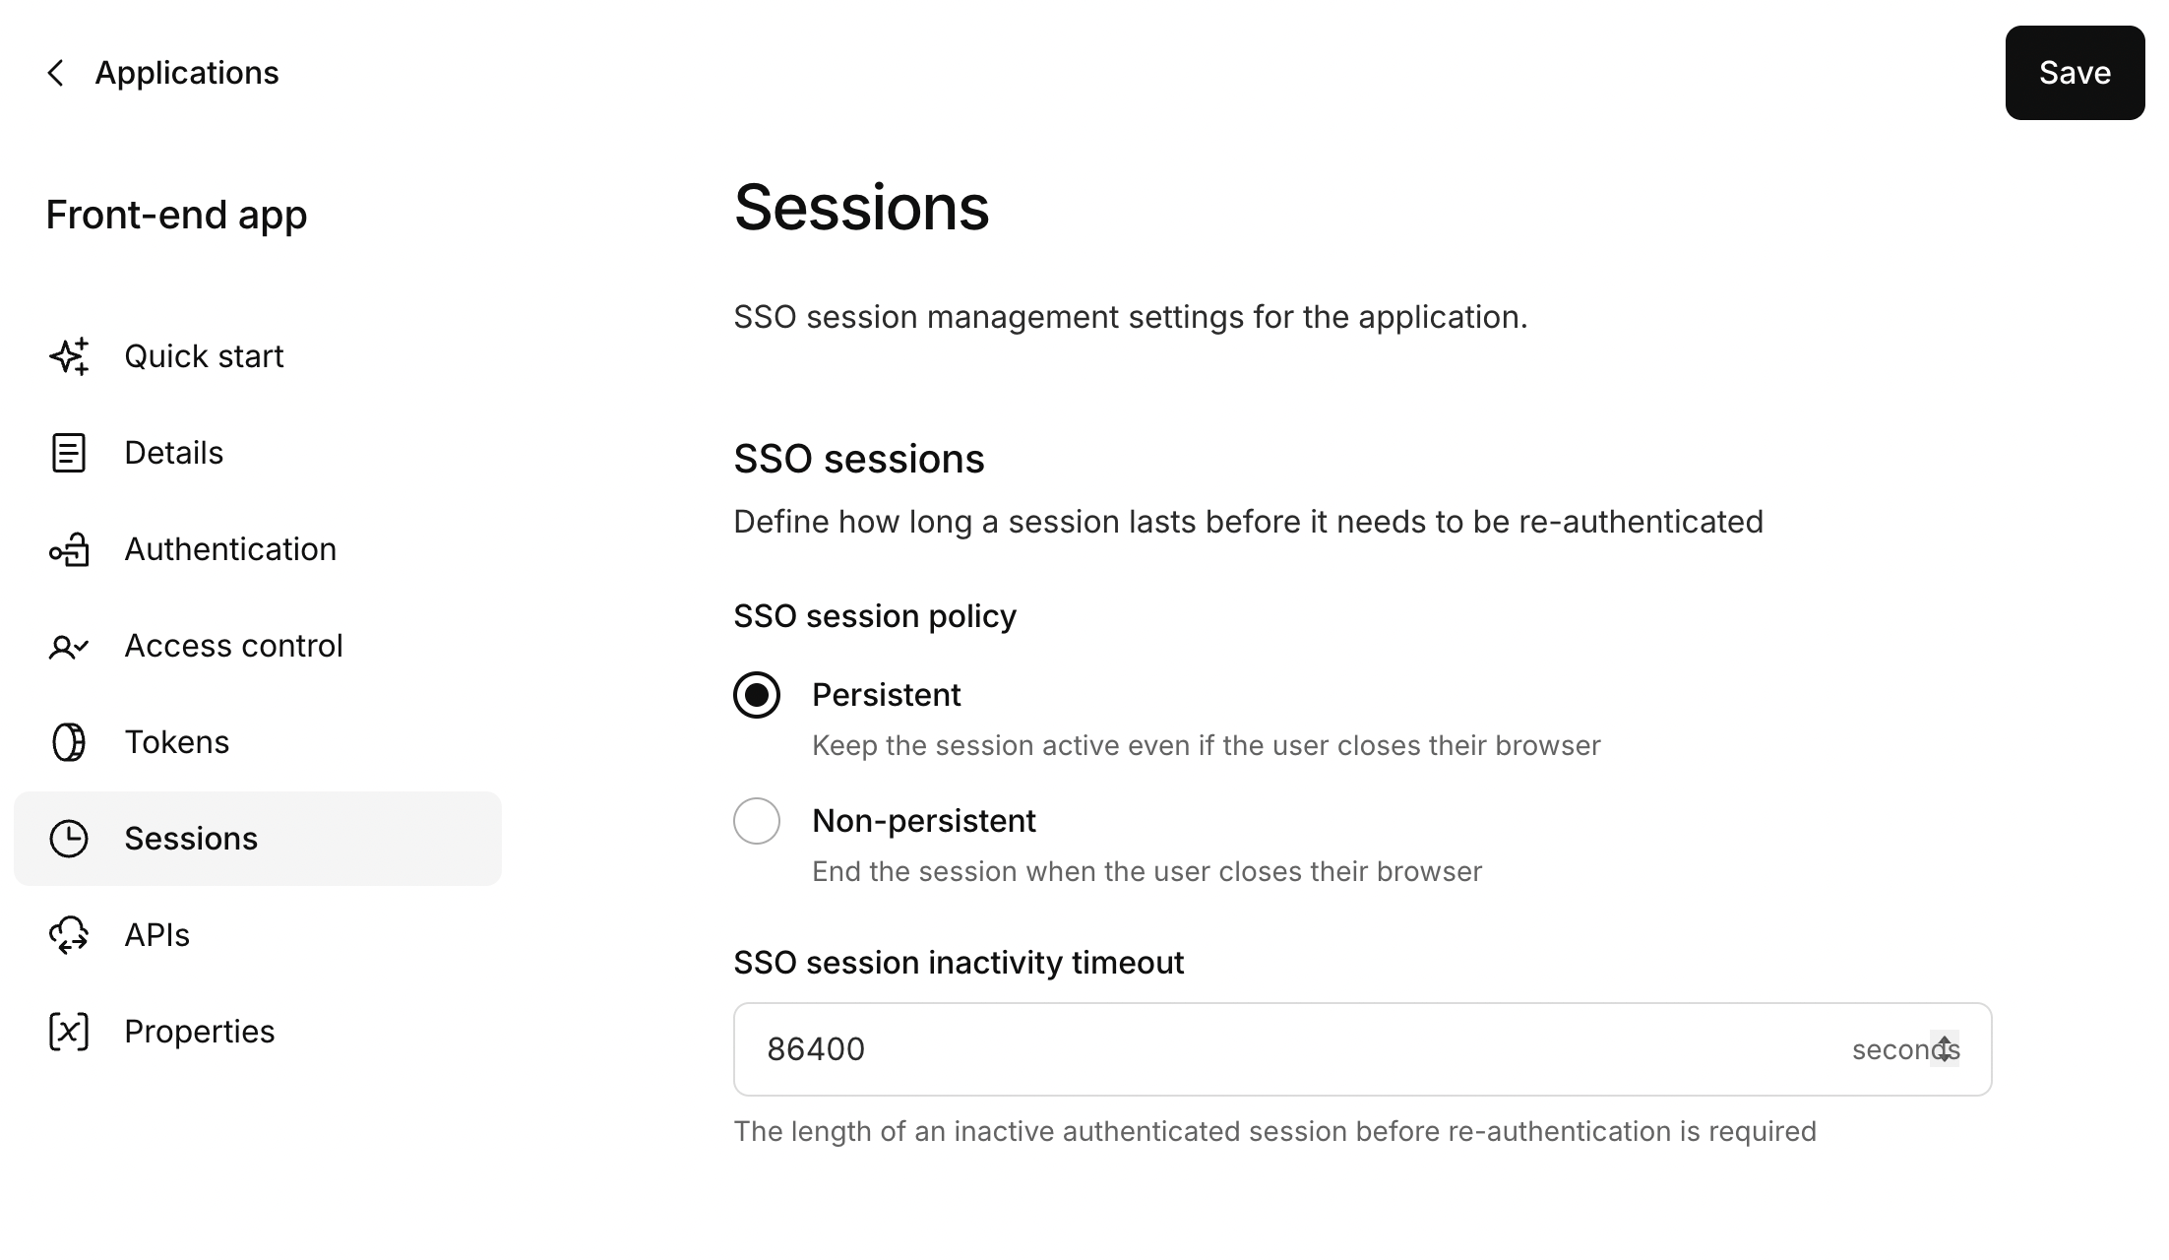 5. In the **SSO sessions** section, decide on the policy for session cookies: - Persistent: Keep the session active even if the user closes their browser. - Non-persistent: End the session when the user closes their browser (some [limitations](#limitations) apply). 6. In the **SSO session inactivity timeout** section, set how long a session can be inactive before prompting re-authentication. This setting is applied in seconds. Default is `86400` seconds (one day). 7. When you're finished, select **Save**. ## Limitations - Session cookies are not destroyed when a tab is closed, the full browser window must be closed. - Modern browsers usually allow session restoration. Restoring a browser session can also restore a session cookie. ## End a user's sessions from your backend The session settings above control how long a session lasts on its own. You can also end a user's sessions on demand from your own backend, using the Management API. This is useful when an admin deactivates an account, when you detect suspicious activity, or when you want a "sign out everywhere" control in your app. Call `DELETE /api/v1/users/{user_id}/sessions` using an M2M application with the `delete:user_sessions` scope. See the [Management API reference](/kinde-apis/management#tag/users) for request and response details. This ends the user's SSO sessions and invalidates their refresh tokens immediately. Access tokens their app already holds remain valid until they expire, because those are validated locally by your API rather than checked against Kinde on each request. For how to narrow that window, see [What revocation does and doesn't do](/build/tokens/configure-tokens/#what-revocation-does-and-doesnt-do). ## FAQ ### What counts as activity for SSO session inactivity? Kinde measures inactivity **on the server**. Browsing your own app—switching pages or using the UI—does not reset the timer **unless** that work leads to **authenticated calls to Kinde** for the signed-in user. **Token refresh** is a familiar example: when your app or SDK exchanges a refresh token at Kinde, that interaction can count as activity for this timeout. There is **no public list of every action** that resets inactivity. In practice, treat **authenticated, end-user-facing traffic to Kinde** as the model, rather than assuming every client-side event is visible to Kinde. **Machine-to-machine (M2M)** integrations and the **Management API** use separate credentials and contexts. They are **not** equivalent to activity on a specific person’s browser SSO session when you interpret this setting. ### Does switching organizations affect other browser tabs? Yes. When a user switches to a different organization (by calling `login({ orgCode })` from your app), a new refresh token for that organization is issued and stored in the `refresh_token` cookie. Because this cookie is shared across all tabs on the same domain, other tabs that were authenticated to a different organization will use the new cookie on their next token refresh — and will then be operating in the context of the most recently signed-in organization. If your application needs each browser tab to maintain an independent org context, you will need to manage org tokens at the application layer (for example, storing org-specific tokens in tab-local state rather than relying on the shared cookie).
# Authenticate - Manage authentication - Sign users in to last organization
> Guide to automatically signing users into their most recent organization instead of showing an organization switcher for improved UX.
Last updated: 2025-01-16
last organization, organization switcher, B2B, user experience, automatic sign-in
authenticate
A common pattern in B2B products is for users who belong to multiple organizations, to be able to [switch between them](/authenticate/manage-authentication/navigate-between-organizations/). However, if you have a switcher in your application, you may want users to be signed in to the most recent organization instead. If you switch this function on, users will not be shown an organization switcher on the authentication screen, and instead will be signed in to the most recent organization. ## Sign users in to the last used organization 1. In Kinde, go to **Settings > Policies**. 2. In the **Sign in** section, select the **Sign users in to most recent org** option. 3. Select **Save**.
# Authenticate - Manage authentication - Keep your product in sync with Kinde
> Comprehensive guide to keeping your application in sync with Kinde using refresh tokens, API calls, and webhooks for real-time data consistency.
Last updated: 2025-01-16
sync with Kinde, refresh tokens, API integration, webhooks, token claims, real-time sync
authenticate
Kinde’s main object delivery method is to include claims in ID and access tokens when a user authenticates. This is a very efficient delivery method because as soon as a user signs in, you have everything you need to give them access, including their permissions. A minor downside of relying on claims, is that tokens go stale and data can get out of sync, and users may not be able to see the updates you make until they are issued a new token. This is the classic ‘eventual consistency’ problem. If you make frequent updates to permissions, flags, or other objects, this is likely an issue for you and your users, and this topic will help. Here are some options. ## Sync using refresh tokens You can use [refresh tokens](/build/tokens/refresh-tokens/) to extend the longevity of an access token. A refresh token is a way to request a new access token, without disrupting a session. Most of our SDKs handle refreshing tokens for you automatically. ### Auto-updating of token claims For optimum performance our tokens are cached, so that when a new access token is issued it contains the same claims as the previous token. A token cache becomes invalid, however, when user information is updated in the UI or via API. This includes updates to profile information, organization membership, roles, permissions, properties, and user-level feature flags. So when you use a refresh token to renew the access token (and user info has been updated), the claims will also be updated. One way to minimize periods of inconsistency is to set a low value for the [access token lifetime](/build/tokens/configure-tokens/), to trigger a refresh token. ### Force-update of token claims There are events that do not trigger individual users tokens to be updated. These include: - Feature flag changes at an organization or environment level that are inherited by a user - Permissions added to a role that the user has For these type of changes you can force a token update using your backend to call the [Refresh User Claims](/kinde-apis/management#tag/users/post/api/v1/users/{user_id}/refresh_claims) endpoint of our Kinde management API. This invalidates the cache for a specific user and means the next time an access token is issued for that user the claims will reflect the current state in Kinde. ## Sync through the Kinde Management API You can use the Kinde management API to keep your product in sync with Kinde. Calls to the API are always real time, meaning you have a few sync options. ### Force a real-time update Even if you are using refresh tokens (above), there might be a few sensitive areas of your application where immediate consistency is vital, for example checking a permission for a payments flow. To deal with this, you could make a call to out to the permissions API when that flow is triggered. This gives you the additional security of real time data where it counts. ### Periodic polling Another option for syncing is to make an initial call to the API when your user logs in and store the claim information locally. Then, periodically poll the API to update your stored claim with a real-time response. This could be overkill for things that are not mission-critical, but might be useful for important areas like permissions. ### Refresh user claims endpoint As mentioned above, the [Refresh User Claims](/kinde-apis/management#tag/users/post/api/v1/users/{user_id}/refresh_claims) API endpoint can be used to invalidate the cache for a user, which will ensure they receive updated claims on the next token refresh. ## Webhooks Webhooks let you subscribe your own url endpoints to events, and receive updates as they occur. Events refer to activities that occur within your Kinde business, for example user creation, updates to users, etc. When an event occurs, such as `user.created`, Kinde sends all the event data to any subscribed endpoints. You can then trigger your own application code in response, or just maintain your own copy of the event data. Webhooks can be managed directly in the Kinde admin area, or by using the Kinde Management API Webhook endpoints. ### Webhook subscription events Call the `/api/v1/event_types` endpoint in the Kinde Management API to view the full list of available events and the schema for the data you receive. See the [webhooks documentation](/integrate/webhooks/about-webhooks/) for more information.
# Authenticate - Manage authentication - Authenticated sessions across multiple applications
> Guide to sharing authenticated sessions across multiple applications using SSO cookies, refresh tokens, and multi-domain authentication.
Last updated: 2026-03-03
multi-application sessions, SSO cookies, refresh tokens, offline scopes, multi-domain auth
authenticate
Kinde supports shared authenticated sessions across applications. For example, in a scenario where you have multiple apps running on separate subdomains, and you want to share a session between apps without prompting the user to sign in again. ## Session cookies On the first sign in, Kinde creates an SSO cookie for the authenticated user. Until this cookie expires or you request that the user signs in again (using the [prompt parameter](/developer-tools/about/using-kinde-without-an-sdk/#prompt)), all your apps can initiate sign in requests without prompting. ## Offline scopes and refresh tokens If you include an `offline` scope in your request, you can maintain long-running sessions via refresh tokens. This works both in back-end apps and in web apps. Kinde supports short-lived refresh and refresh token rotation for increased security of browser-based and mobile apps. In this case, on page reload, the SDK will resume the session via the refresh token exchange. ## Set up overview 1. Create two or more Kinde apps. 2. Enable the same authentication method for both apps. 3. In each app, create a link to the other app using the applicable `login` method. You might do this using an application switcher, for example. 4. Sign in to one app. 5. Select a link to sign in to the second app. You should be signed in to the second app without re-authentication. ## Example Say you are signed into your **Admin app** and want to switch to the **Employee app**. Here’s how it might look.  As long as an authenticated session exists, users should be able to move seamlessly between applications. ## Client-specific refresh token cookies By default, applications on the same custom domain share a single `refresh_token` cookie. Signing in to one application can overwrite the refresh token set by another, which may break the other app's session. Kinde supports **client-specific refresh token cookies** to avoid this. When enabled for an application, the refresh token is stored in a uniquely named cookie (for example, `refresh_token_abc123`), so each app maintains its own refresh token independently. Enable this per application under **Settings > Applications > [your app] > Tokens > Refresh token cookies**. A custom domain must be configured. See [Refresh tokens](/build/tokens/refresh-tokens/) for more detail. See also [multi-domain authentication](/authenticate/about-auth/about-authentication/#multi-domain-authentication).
# Authenticate - Multi factor auth - About multi-factor authentication
> Comprehensive overview of multi-factor authentication (MFA) including available factors, user experience, recovery codes, and organization-level enforcement.
Last updated: 2025-01-16
multi-factor authentication, MFA, authenticator app, SMS, email, recovery codes, security
authenticate
To increase security for your product, you can enable multi-factor authentication (MFA). This means that your users sign in using at least two authentication methods, for example, password _plus_ verification code. If you don't want to apply MFA settings for all users, you can set [MFA per organization](/authenticate/multi-factor-auth/mfa-per-org/) if you're on the Kinde Scale plan. ## **Available MFA factors** Kinde supports the following secondary factors for MFA. - **Email** - users are sent a one-time-password (OTP) via email - **SMS** - users receive a one-time-password (OTP) via SMS - **Authenticator app** - users receive a verification code via an authentication app. You might recommend a specific app or allow users to choose. We recommend against choosing a secondary factor that is the same as the primary auth method. For example, if the primary method is email/passwordless, then choose SMS or Authenticator app as the secondary factor. ## **The MFA experience for users** If you make MFA optional, users will be prompted to opt in to MFA when they next sign in. If mandatory or after they opt in, users will be prompted to use (or choose) a secondary authentication method, through which they will receive a verification code. They will also be offered a set of recovery codes (See below). We suggest you advise users ahead of time if you are changing your sign-in requirements, and if you require them to download an authenticator app such as Google Authenticator. ### MFA **using an authenticator app** - On first time use, the user can scan a QR code to enable the verification method and get a verification code sent to their app of choice. - On subsequent sign in, a verification code will appear in their authenticator app of choice, or they can use a recovery code to sign in. ### MFA **using email verification** - A code is sent to their email that they need to enter into the verification code field on the sign up / sign in screen. ### MFA **using SMS verification** - A code is sent via SMS that the user must enter into the verification code field on the sign up / sign in screen. ## **Recovery codes** When a user signs in for the first time, or signs up as a new user (and MFA is activated), they will be offered a set of recovery codes that they can store for future use. They can then use a recovery code if they don’t have access to their device or authenticator app. ## MFA can be enforced for individual organizations Customers on the Kinde Scale plan are able to set MFA at the organization level. This is especially useful for B2B businesses who have many organizations, with varying auth requirements. See [Set MFA for an organization](/authenticate/multi-factor-auth/mfa-per-org/).
# Authenticate - Multi factor auth - Enable multi-factor authentication
> Step-by-step guide to enabling multi-factor authentication including mandatory and optional settings for enhanced security.
Last updated: 2026-03-03
enable MFA, multi-factor authentication, mandatory MFA, optional MFA, security setup
authenticate
Add security to the authentication process by enabling multi-factor authentication (MFA). MFA means users sign in using at least two authentication factors, for example, password _plus_ SMS code. You can make MFA mandatory for users, or optional. Kinde supports the following secondary factors. - **Email** - users are sent a one-time-password (OTP) via email. - **SMS** - users receive a one-time-password (OTP) via SMS (or via [WhatsApp](/authenticate/authentication-methods/whatsapp-authentication/) when configured; WhatsApp is preferred with fallback to SMS). - **Authenticator app** - users receive a verification code via an authentication app. We recommend against enabling a secondary factor that is the same as the primary auth method. ## Set up MFA When you set up MFA using this procedure, it will apply to all users in the environment. If you want, you can [enforce MFA for individual organizations](/authenticate/multi-factor-auth/mfa-per-org/), so it only affects users in that organization. 1. In Kinde, go to **Settings > Environment >** **Multi-factor auth**. 2. To make MFA mandatory, in the **Require multi-factor authentication** section, select **Yes**. Users will be required to set up MFA when they first sign up or next sign in. 3. To make MFA optional, in the **Require multi-factor authentication** section, select **Optional**. Users will have the option to set up MFA when they first sign up or next sign in. 4. Select the additional authentication options that you want to be available to your users. Such as an authenticator app, email, or SMS. 5. Use the **Enable recovery codes** toggle to choose whether users see recovery codes when setting up MFA. This is **enabled** by default for backward compatibility. If you turn it off, users will skip the recovery code generation and and display step when setting up any MFA method. 6. Select **Save**. Users will now be directed to use multi-factor authentication when they sign in.
# Authenticate - Multi factor auth - Set multi-factor authentication for an organization
> Advanced guide to setting multi-factor authentication per organization including role exemptions and enterprise connection exemptions for B2B customers.
Last updated: 2026-02-23
organization MFA, role exemptions, enterprise connections, B2B MFA, advanced org features
authenticate
As part of being able to set unique authentication methods for an organization, you can also set how multi-factor authentication (MFA) works per organization. You might want to use MFA for some of your orgs, such as for business customers that require their users to have MFA as part of sign in. This is common in finance and government sectors. As part of this feature, you can: - exempt certain roles within the organization from having to use MFA. For example, you may only want Admins to use MFA. - exempt MFA authentication for certain enterprise connection types, such as SAML authentication. You might want to do this if MFA is already set up with the enterprise auth provider. ## Configure environment-level MFA settings If you do not want every organization in your business to use MFA, you must switch off the environment-level requirement. In Kinde, go to **Settings > Environment > Multi-factor auth**. 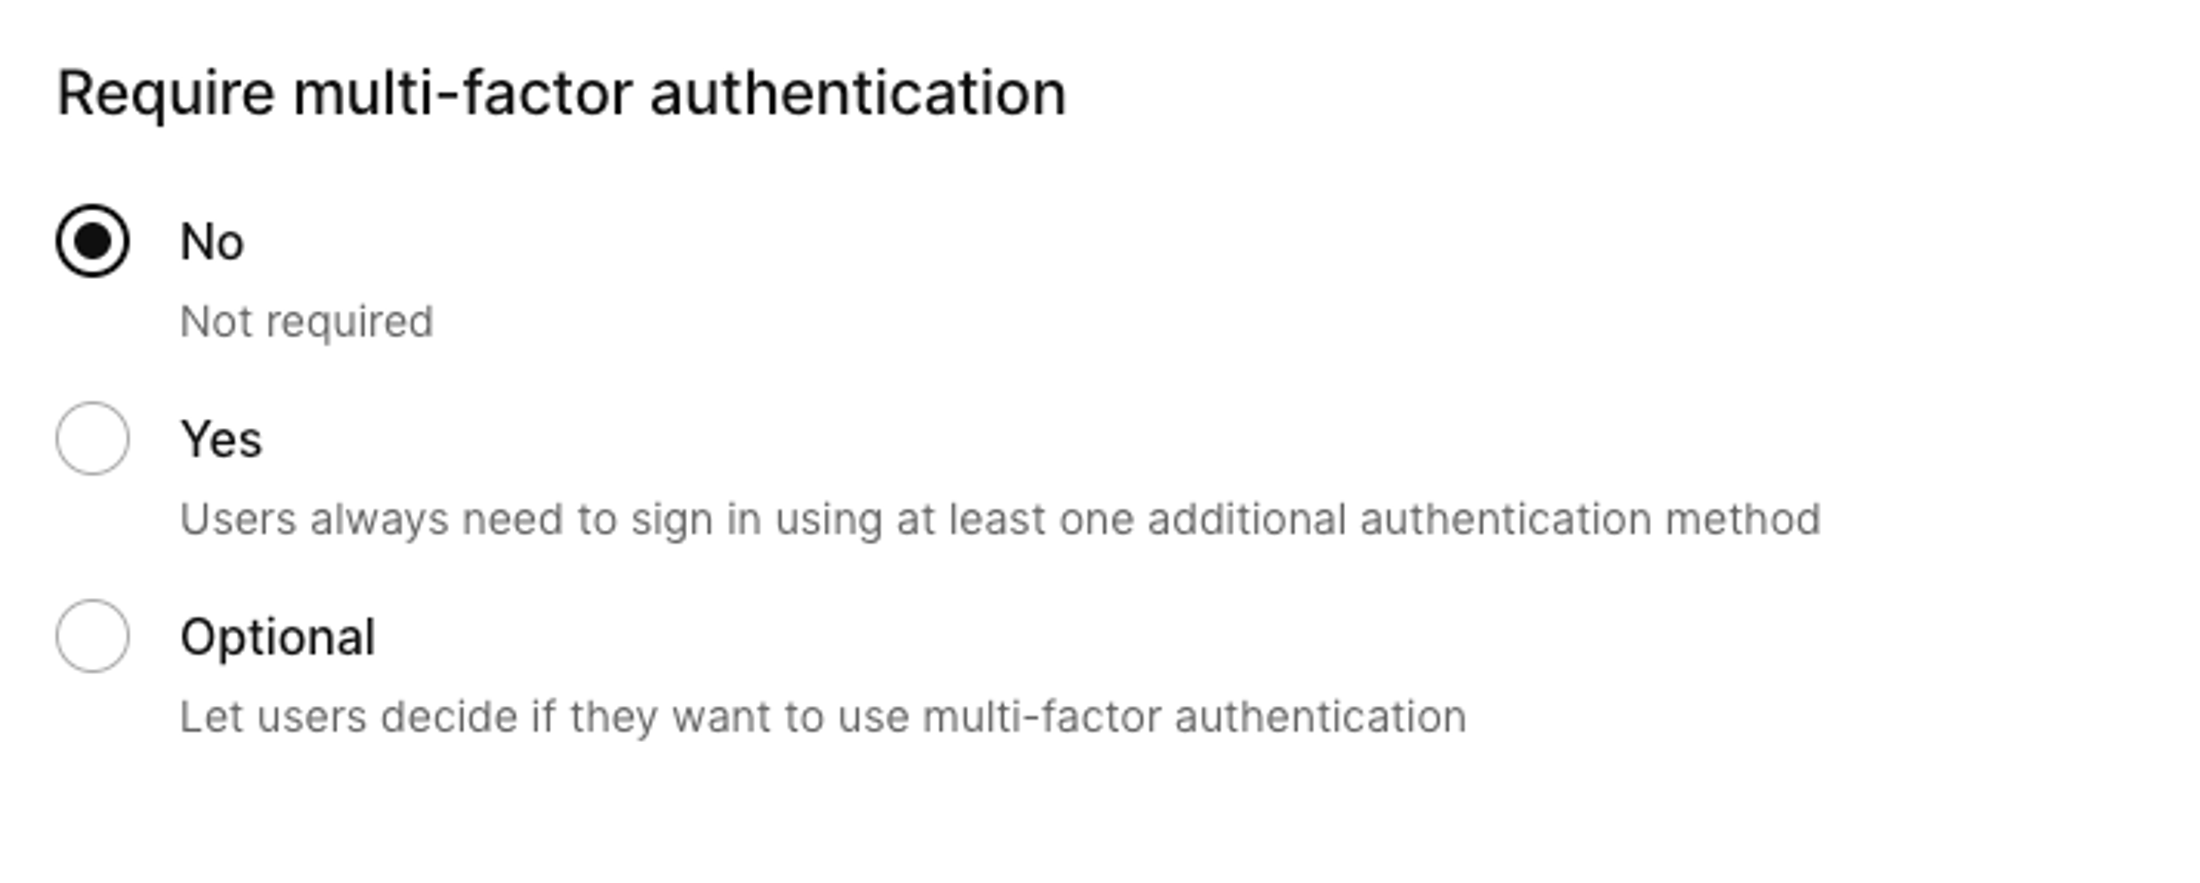 - Select **No** - If you want MFA to be applied in only some organizations or for some connections in your business. You will then need to set MFA in each organization separately. - Select **Yes** or **Optional** - If you want everyone, in every organization to use MFA’. Note that if you select **Yes** here, MFA will apply in all organizations regardless of what you set at the organization level. Whatever you select here, you can still exempt roles from MFA per organization. ## Switch on MFA for an organization MFA methods selected here will replace those selected at the environment level. 1. In Kinde, go to **Organizations**. 2. Browse or search for the organization. 3. In the list, select the organization to open the **Details** page. 4. Select **Multi-factor auth** in the menu. 5. If applicable, activate the advanced organization feature. 6. Toggle the **Enforce multi-factor authentication for this organization** switch on. 7. Select the authentication **Methods**. You can choose more than one. 8. Use the **Enable recovery codes** toggle to control whether users in this organization see recovery codes during MFA setup. This overrides the environment-level recovery codes setting. If disabled, users in this organization will skip the recovery code step when setting up MFA. 9. Select **Save**. ## Add and remove exempt roles from MFA You need to have roles set up in Kinde. 1. In the **Exempt roles** section of the MFA page for the organization. 2. Select **Add exempt role** and select a role from the list. 3. Press **Enter**. 4. Repeat step 2 to add more roles. 5. You can remove an exempt role by selecting the three dots menu and selecting **Remove**. 6. Select **Save**. If a user has a mix of exempt and non-exempt roles, MFA will apply as default. ## Add and remove exempt enterprise connections from MFA You need to have enterprise connections set up in Kinde. 1. In the **Exempt enterprise connections** section of the MFA page for the organization. 2. Select **Add exempt enterprise connection** and select a connection from the list. 3. Press Enter. 4. Repeat step 2 to add more connections. 5. You can remove an exempt connection by selecting the three dots menu and selecting **Remove**. 6. Select **Save**. If a user signs in via Okta (exempt) and has an Admin role (not exempt), they will not be prompted for MFA. ## Switch off MFA for an organization This procedure only works if you have also switched off the environment-level setting for MFA. 1. In Kinde, go to **Organizations** and browse or search for the organization. 2. In the list, select the organization to open the **Details** page. 3. Select **Multi-factor auth** in the menu. 4. Toggle the **Enforce multi-factor authentication for this organization** switch off. 5. Select **Save**.
# Authenticate - Self serve sso - Add SSO connection via self-serve portal
> Guide for enabling a business customer to set up their own SSO enterprise connection via the self-serve portal.
Last updated: 2025-08-25
organization portal, enterprise connection, SSO, self-serve portal
self-serve-portal, organizations, billing
Your business customers who have their own organizations in Kinde can set up and manage their own SSO connections. This can save time going back and forth trying to get app credentials configured. Instead, your customer (who is the Identity Provider for their users) can set up an app and use the credentials to configure a connection. While you manage Kinde settings as the Service Provider. ## Before an organization can set up an SSO connection - Ensure that you have switched on the option in the [self-serve portal settings](/build/self-service-portal/self-serve-portal-for-orgs/) - Check that the person setting up the connection has the [right role and permissions](/manage-users/roles-and-permissions/user-roles/). They need to be an Admin. - Add a domain to the verified domains list for the org (see below). Connections can only be set up for verified domains. ### Add a verified domain to the customer organization in Kinde This is like pre-setting the home realm domain for a connection. 1. Open the organization record in Kinde. 2. If prompted, in the **Activate advanced organization features** box, select **Activate**. 3. Go to **Policies** in the menu. 4. In the **Verified domains** text field, add the customer's domain or domains. Add each on a new line. Make sure you include only the domain, e.g. `mybusiness.com` and not the full domain URL such as `http://www.mybusiness.com`. 5. Select **Save**. ## Add an SSO connection via the self-serve portal (Instructions for end-users) Provide these instructions to the customer in case they need assistance. 1. Navigate to the self-serve portal and select **SSO**. 2. Select **Add connection**. 3. Select the connection type and then select **Next**. The configuration dialog opens. 4. Add a name for the connection - this name will be shown to end users when they sign in. 5. Complete the other fields with details from your IdP, e.g. **Entity ID**, provisioning options, mapping, certificates, etc. 6. Copy the **ACS URL** - you will need to add this to your IdP application. 7. Select **Save**. ## Finish setting up the connection for the organization (Instructions for Kinde admin) There are some enterprise connection functions that are only configurable by you in Kinde. After the customer has entered their details, you can finish setting up the connection. Open the connection in Kinde and adjust any of the following settings (if relevant): - **Create a user record in Kinde** - Add users if they do not exist when signing in. This is switched on by default. - **Always show sign-in button** - Show the SSO button on the app home screen. This is switched on by default. - **Auto-add users** - Allows users to join the organization if their credentials are accepted. Default is switched on. - **Upstream params** - these have the following default, but more can be added at the customer's request. ```txt { "login_hint": { "alias": "login_hint" } } ``` ## Make the connection available to end-users This is the process for end-users to make the connection live. It can also be enabled in the Kinde admin. 1. Open the connection configuration dialog via the self-service portal (end users). 2. Select the **Enable for organization** option. 3. Select **Save**. ## Enable or disable a connection 1. Navigate to the self-serve portal and select **SSO**. 2. Select the three dots menu on the connection card, and choose **Enable** or **Disable**. ## Delete a connection 1. Navigate to the self-serve portal and select **SSO**. 2. Select the three dots menu on the connection card, and choose **Delete**. 3. Confirm that you want to delete the connection.
# Authenticate - Self serve sso - Manage SSO connections added by customers
> This is a support topic for when a business customer sets up their own SSO enterprise connection via the self-serve portal.
Last updated: 2025-08-25
organization portal, enterprise connection, SSO, self-serve portal
self-serve-portal, organizations, billing
If you allow your business customers to set up and manage their own SSO enterprise connections in your app, this topic describes how to help manage and troubleshoot the connections. Self-serve portal connections for accessing your site or app are fully under your control. Even though your customer can do the basic configuration, there are some things you'll probably want to manage on your side, such as provisioning behavior and other connection defaults. ## Troubleshoot self-serve SSO connections If a customer can't sign in using the SSO connection they set up, check these things. - They have added the ACS URL to the application on their identity provider side - They have a verified domain (home realm domain) selected in the configuration - The email they are trying to test belongs to the verified domain - The credentials and certificates are all valid - The connection is enabled and is being accessed in the relevant environment - The org code is being passed when a user goes to sign in - If there are any issues with upstream params being parsed - All required fields are included in the configuration, including key attributes (if relevant) ## How to access and manage enterprise connections created by your customers 1. Open the organization for the customer. 2. In the left menu, select **Authentication**. The customer's connections are shown. 3. Select the three dots on the connection, and select **Configure**. 4. In the connection configuration window, make the changes you want, and select **Save**. ## Enable or disable a connection You might need to disable a connection if you think it has been compromised or at the customer's request. 1. Open the organization for the customer. 2. In the left menu, select **Authentication**. The customer's connections are shown. 3. Select the three dots menu on the connection card, and choose **Enable** or **Disable**. ## Delete a connection This completely disables and deletes the connection. This action can't be reversed. 1. Open the organization for the customer. 2. In the left menu, select **Authentication**. The customer's connections are shown. 3. Select the three dots menu on the connection card, and choose **Delete**. 4. Confirm that you want to delete the connection.
# Authenticate - Self serve sso - Switch on SSO self-management per organization
> Set up access to the self-serve portal SSO function at the org-level
Last updated: 2025-08-25
organization portal, enterprise connection, SSO, self-serve portal
self-serve-portal, organizations, enterprise SSO
You can give specific permission for an organization to set up and manage SSO connections, without giving it to all organizations in your business. 1. In Kinde, open the organization you want to give access. 2. In the side menu, select **Self-serve portal**. 3. Switch on the SSO function. 4. Select **Save**.
# Authenticate - Social sign in - Add and manage social connections
> Comprehensive guide to adding and managing social sign-in connections including setup, security considerations, and provider-specific configurations.
Last updated: 2026-03-26
social sign-in, social connections, OAuth, client ID, client secret, trusted providers
authenticate
Social connections enable you to sign up and sign in users with credentials from their existing social accounts, such as Google or GitHub. An advantage of social sign in is that users don't have to create new credentials to use your app or service, making it more convenient and secure for them. If they have a gravatar picture associated with their social account, it will flow through to Kinde. ## Set up a social connection Follow the docs below for each social provider you want to use. This will give you the `Client ID` and `Client secret` (keys) you need to set up each auth method on the Kinde side. - [Apple](/authenticate/social-sign-in/apple/) - [Bitbucket](/authenticate/social-sign-in/bitbucket-sso/) - [Clever](/authenticate/social-sign-in/clever/) - [Discord](/authenticate/social-sign-in/discord/) - [Facebook](/authenticate/social-sign-in/facebook/) - [GitHub](/authenticate/social-sign-in/github/) - [GitLab](/authenticate/social-sign-in/gitlab/) - [Google](/authenticate/social-sign-in/google/) - [LinkedIn](/authenticate/social-sign-in/linkedin/) - [Microsoft](/authenticate/social-sign-in/microsoft-sso/) - [Roblox](/authenticate/social-sign-in/roblox-sso/) - [Slack](/authenticate/social-sign-in/slack/) - [Twitch](/authenticate/social-sign-in/twitch/) - [Twitter](/authenticate/social-sign-in/twitter/) - [Xero](/authenticate/social-sign-in/xero-sso/) You can also add Custom OAuth 2.0 connections via the same **Social connections** area. Custom OAuth2 connections now support configuring the client authentication method (body vs. header) for the token exchange — see the [Custom OAuth 2.0 connection](/authenticate/custom-configurations/custom-oauth2-connection/) guide for details. ### When an email is not provided Some social providers don't require an email for sign up, e.g. X. When a user signs up or in with one of these providers, Kinde will ask for an email (just once). This is so we can verify the user's identity and be sure it's a genuine sign up. We treat social identities different to email identities in Kinde, and record social providers as a social identity in their user profile. For more information, see [User identity and verification](/authenticate/about-auth/identity-and-verification/). ## Trusting emails from social providers There's no guarantee that the email kept on file with a social provider remains current. Because of this, Kinde does not automatically treat social provider emails as 'trusted', and therefore we do not automatically sync email profiles. When you add a social connection, you can choose whether to 'trust' provider emails for each connection type. For more information, see [User identity and verification](/authenticate/about-auth/identity-and-verification/#trusting-emails-from-providers). ## Delete a social connection 1. In Kinde, go to **Settings > Environment > Authentication**. 2. Scroll down to the **Social connections** section and select the three dots on the tile for the connection, then select **Delete connection**. 3. In the confirmation window, select **Delete connection**. ## Can I display conditional social login options? No, Kinde's hosted authentication screens do not support conditional show/hide logic for social sign-in buttons based on the user's device platform. For example, it is not possible to hide the Apple sign-in button for Android users or hide the Google sign-in button for iOS users. All configured social connections are shown to all users on the hosted auth screen regardless of device. If you need platform-conditional authentication options, consider building [custom authentication pages](/authenticate/custom-configurations/custom-authentication-pages/) where you have full control over which buttons are rendered. ## Manage social connections via API You can [add, update, and delete social connections via the Kinde management API](/kinde-apis/management#tag/connections) using predefined endpoints.
# Authenticate - Social sign in - Apple social sign in
> Complete guide to setting up Apple social sign-in including Apple Developer account setup, Services ID configuration, and JWT client secret generation.
Last updated: 2025-01-16
Apple sign-in, Apple Developer, Services ID, JWT, client secret, private key, token renewal
authenticate
You can enable users to sign up and sign in using their Apple credentials. It's also important to note that Apple limits the information it passes when users sign up this way. Avatars and profile pictures do not flow through to the auth experience in Kinde. The user's email may also be excluded or replaced with a private relay email address if they have Apple's "**Hide My Email**" feature enabled. When this feature is active, users receive a unique private email address (like `abc123@privaterelay.appleid.com`) that forwards to their real Apple ID email, which means you'll see this relay address in Kinde instead of their actual email address. ## **What you need** - An [Apple Developer account](https://developer.apple.com/) including a subscription to the Apple developer program - Your Kinde callback URL (see below) - Some developer know-how ## **Copy the callback URL from Kinde** 1. In Kinde, go to **Settings** > **Authentication**. 2. If you have not yet added the Apple connection, select **Add connection**, select **Apple**, then **Next**. 3. In the **Callback URL** section: 1. If you use Kinde’s domain as your default, copy the **Kinde domain** URL. 2. If you use custom domains, select the **Use custom domain instead** switch. 3. If you have only one custom domain, copy the **Custom domain** URL. If you have custom domains for multiple organizations, select each one from the list and copy the callbacks for each. You need to enter all custom domain callbacks in the provider app. 4. Select **Save**. 5. Use the copied Callback URLs to set up the app, see below. ## **Configure sign in for your app** ### **Set up your app** 1. In your Apple developer account, go to **Identifiers**. 2. Select the plus (+) icon next to **Identifiers**. 3. Select **App IDs**, then select **Continue**. 4. Select **App**, then select **Continue.** 5. Enter a description and Bundle ID. 6. In the **Capabilites** list, select **Sign in with Apple**. 7. Select **Register**. ### **Register** **services** 1. Select the plus icon (+) next to **Identifiers**. 2. Select **Services ID**, then select **Continue.** 3. Enter a description and identifier (make a note of this because it will be used as the Client ID). 4. Select **Register.** ### **Configure domains** 1. Click on the newly created service to edit. 2. Check the box to enable **Sign In with Apple** and click **Configure.** 3. In the **Domains and Subdomains** field, enter your Kinde URL, e.g. `yourdomain.kinde.com` (excluding the https:// protocol) 4. In the **Return URLs** field, enter your Kinde callback URL or custom domain callback URL, e.g. `https://yourdomain.kinde.com/login/callback`. 5. Add additional entries for all your organization custom domain callbacks, e.g. `account.customdomainone.com/login/callback`, `account.customdomaintwo.com/login/callback`, etc. 6. Select **Next**, then select **Done.** 7. In the **Edit your Services ID Configuration** window, select **Continue**, then select **Save.** ### **Set up keys** 1. Select **Keys** in the left hand menu and click the plus icon (+) next to the page title. 2. Enter a **Key Name**. 3. Select **Sign In with Apple** and next to this option, select **Configure**. 4. Select your app from the Primary App ID field, then select **Save.** 5. Select **Continue** then select **Register.** 6. Download your key as per the screen instructions. You will need this to generate the client secret. 7. When you have downloaded the key, select **Done**. ### **Generate the client secret** There are several ways to generate the client secret. An example is provided below. _**Example using Ruby**_ You can use open source libraries for creating and signing JWT tokens for your client secret (see [JWT.io](https://jwt.io/)). The below steps provide an example of accomplishing this using Ruby. 1. Install jwt using the following command: `gem install jwt`. 2. Create a file titled `client_secret.rb` and replace the empty values in your script as follows: - `key_file` is the p8 file containing your private key that you downloaded. - `team_id` can be found in the top right of your apple developer account under your name. - `client_id` is the identifier used for the service. - `key_id` was provided on the key creation screen. ```ruby require 'jwt' key_file = 'key.txt' team_id = '' client_id = '' key_id = '' ecdsa_key = OpenSSL::PKey::EC.new IO.read key_file headers = { 'kid' => key_id } claims = { 'iss' => team_id, 'iat' => Time.now.to_i, # Note that this is the maximum exp value of 6 months 'exp' => Time.now.to_i + 86400*180, 'aud' => 'https://appleid.apple.com', 'sub' => client_id, } token = JWT.encode claims, ecdsa_key, 'ES256', headers puts token ``` 3. Run the script with ruby `client_secret.rb` and copy the generated `client_secret`. 4. Add these credentials into Kinde. ## **Add credentials to Kinde** 1. In Kinde, go to **Settings** > **Authentication**. 2. On the Apple tile, select **Configure**. 3. Paste the **Client ID** (Service ID) and **Client secret** (Private key) into the relevant fields. 4. Select if you want to treat this connection as a trusted provider. A [trusted provider](/authenticate/about-auth/identity-and-verification/) is one that guarantees the email they issue is verified. We recommend leaving this off for maximum security. 5. Add any [upstream params](/authenticate/auth-guides/pass-params-idp/) that you want to pass to the IdP. 6. Select which apps will use Apple sign in. 7. Select **Save**. Users will now see Apple as an option to sign up and sign in to your product. ## **Renew Apple token periodically** To continue to enable users to sign in with Apple, you will need to periodically renew the Apple token by generating a new client secret. Usually every six months. To do this, repeat the procedures from **Set up keys** to **Add credentials to Kinde**, above. ## **Third party references for this article** We do our best to test all our procedures, but sometimes third party companies change things without us knowing. Here’s the sources we used to create this article. - [Validating “Sign in with Apple” Authorization Code](https://p.agnihotry.com/post/validating_sign_in_with_apple_authorization_code/) - [Configuring your environment for Sign in with Apple](https://developer.apple.com/documentation/sign_in_with_apple/configuring_your_environment_for_sign_in_with_apple) - [Sign in with Apple REST API](https://developer.apple.com/documentation/sign_in_with_apple/sign_in_with_apple_rest_api) - [Apple Developer Center](https://developer.apple.com/)
# Authenticate - Social sign in - Bitbucket social sign in
> Step-by-step guide to setting up Bitbucket social sign-in including Bitbucket app creation, OAuth configuration, and Kinde integration.
Last updated: 2025-01-16
Bitbucket sign-in, Bitbucket app, OAuth, client ID, client secret, callback URL, permissions
authenticate
You can enable users to sign up and sign in using their Bitbucket credentials. To enable this, follow all the steps below to create a Bitbucket app and configure credentials in Kinde. ## **Get your Kinde callback URL** 1. In Kinde, go to **Settings** > **Authentication**. 2. In the **Social connections** section, select **Add connection.** 3. In the window that appears, select **Bitbucket,** then select **Next**. 4. In the **Callback URL** section: 1. If you use Kinde’s domain as your default, copy the **Kinde domain** URL. 2. If you use custom domains, select the Use custom domain instead switch. 3. If you have only one custom domain, copy the Custom domain URL. If you have custom domains for multiple organizations, select each one from the list and copy the callbacks for each. You need to enter all custom domain callbacks in the Bitbucket app. 5. Select **Save**. 6. Use the copied Callback URL to set up the app, see below. ## **Create and configure a Bitbucket app** 1. Create an account on [https://bitbucket.org/](https://bitbucket.org/). 2. Go to **Workspaces** if you are not automatically directed. 3. Create a workspace. 4. Enter a **Name** and **ID**. 5. Open **Settings** > **Apps and features** > **oauth consumers.** 6. Add a consumer. 7. Enter a name and add the callback URLs copied from your Kinde app. Add entries for all your organization custom domain callbacks, e.g. `account.customdomainone.com/login/callback`, `account.customdomaintwo.com/login/callback`, etc. 8. Under **Permissions**, in the **Account** section, select **email** and **read.** 9. Select **Save**. 10. Go back to **Apps and features** > **oauth consumers.** 11. Select the workspace you’ve just created and copy the key (client id) and secret (client secret) to paste into the kinde app. ## **Add Bitbucket app credentials to Kinde** 1. In Kinde, go to **Settings** > **Authentication**. 2. On the **Bitbucket** tile, select **Configure**. 3. Paste the **Client ID** (key) and **Client secret** (secret) into the relevant fields. 4. Select if you want to treat this connection as a trusted provider. A [trusted provider](/authenticate/about-auth/identity-and-verification/) is one that guarantees the email they issue is verified. We recommend leaving this off for maximum security. 5. Add any [upstream params](/authenticate/auth-guides/pass-params-idp/) that you want to pass to the IdP. 6. Select which applications will allow Bitbucket social sign in. 7. Select **Save**. Users will now see Bitbucket as an option to sign up and sign in to the selected applications.
# Authenticate - Social sign in - Clever social sign in
> Step-by-step guide to setting up Clever social sign-in including Clever app creation, OAuth configuration, and Kinde integration.
Last updated: 2026-01-08
Clever sign-in, Clever app, OAuth, client ID, client secret, callback URL
authenticate
You can enable users to sign up and sign in using their Clever credentials. To enable this, follow all the steps below to create a Clever app and configure credentials in Kinde.  ### What you need - A [Kinde](https://kinde.com) account (Sign up for free) - A [Clever development application](https://apps.clever.com/signup) (Sign up for free) ## Step 1: Get your Kinde callback URL 1. In Kinde, go to **Settings** > **Authentication**. 2. In the **Social connections** section, select **Add connection.** 3. In the window that appears, select **Clever,** then select **Next**. 4. In the **Callback URL** section: 1. If you use Kinde's domain as your default, copy the **Kinde domain** URL. 2. If you use custom domains, select the **Use custom domain instead** switch. 3. If you have only one custom domain, copy the Custom domain URL. If you have custom domains for multiple organizations, select each one from the list and copy the callbacks for each. You need to enter all custom domain callbacks in the Clever app. 5. Select **Save**. Use the copied Callback URL to set up the app (see below). ## Step 2: Get Clever app credentials 1. Sign in to the [Clever developer](https://apps.clever.com) dashboard. 2. Go to **Settings** > **Integration** > **OAuth Settings**, select **Edit**. A popup appears. - In the **REDIRECT URIS** field, enter your Kinde Callback URL from Step 1 and select **Save**. 3. On the same page, select **Edit** on **Additional Settings**. A popup appears. - Select **Teachers** and **Students** from the dropdown menu, and select **Save** 4. Go to **Library** > **Integration Guide** > scroll down to **Configure your app** section 5. Select **View Client ID and Secret**. A popup appears with the credentials you need to add to Kinde. - Copy the **CLIENT ID** and **CLIENT SECRET**. You will need these in the next step. ## Step 3: Add Clever app credentials to Kinde 1. In Kinde, go to **Settings** > **Authentication**. 2. On the **Clever** tile, select **Configure**. 3. Paste the **Client ID** and **Client secret** into the relevant fields. 4. Select if you want to treat this connection as a trusted provider. A [trusted provider](/authenticate/about-auth/identity-and-verification/) is one that guarantees the email they issue is verified. We recommend leaving this off for maximum security. 5. Add any [upstream params](/authenticate/auth-guides/pass-params-idp/) that you want to pass to the IdP. 6. Select which applications will allow Clever social sign in. 7. Select **Save**. Users will now see Clever as an option to sign up and sign in to the selected applications. ## Step 4: Test the connection You can test your development Clever Library application by signing in with a Clever test user. Find the [test credentials here](https://docs.google.com/spreadsheets/d/1VTFeG9J9zvYNgyukEEW7iuNC_sv65pLoyxHa34DQgks/edit?gid=167761082#gid=167761082). 1. Go to the test URL provided by Clever: ```text https://clever.com/oauth/authorize?response_type=code&redirect_uri={kinde_callback_url}&client_id={clever_client_id}&district_id=5b2ad81a709e300001e2cd7a ``` Replace `{kinde_callback_url}` with your Kinde callback URL and `{clever_client_id}` with your Clever client ID. 2. Sign in with a test Teacher credential (username: `teacher1` password: `clever`) 3. Set up a test application in Kinde such as the [Next.js starter kit](https://github.com/kinde-starter-kits/kinde-nextjs-app-router-starter-kit) 4. Run the application and select **Sign in** or **Sign up** 5. Select **Continue with Clever** and sign in with the test Teacher credential  6. Accept the permissions and you will be logged in to your test application 7. Go to your **Kinde dashboard** > **Users** to see the user's information  ## Next steps You have successfully set up Clever social sign-in. Submit your development application to Clever to use this login in your production environment.
# Authenticate - Social sign in - Discord social sign in
> Step-by-step guide to setting up Discord social sign-in including Discord app creation, OAuth configuration, and Kinde integration.
Last updated: 2025-01-16
Discord sign-in, Discord app, OAuth, client ID, client secret, callback URL
authenticate
You can enable users to sign up and sign in using their Discord credentials. To enable this, you’ll need a Discord app and some developer know-how. ## **Get your Kinde callback URL** 1. In Kinde, go to **Settings** > **Authentication**. 2. In the **Social connections** section, select **Add connection.** 3. In the window that appears, select **Discord,** then select **Next**. 4. In the **Callback URL** section: 1. If you use Kinde’s domain as your default, copy the **Kinde domain** URL. 2. If you use custom domains, select the Use custom domain instead switch. 3. If you have only one custom domain, copy the Custom domain URL. If you have custom domains for multiple organizations, select each one from the list and copy the callbacks for each. You need to enter all custom domain callbacks in the Discord app. 5. Select **Save**. 6. Use the copied Callback URL to set up the app, see below. ## Create and configure a Discord app 1. Log in to the [Discord developer site](https://discord.com/developers/applications/) and create a new app. 2. Give it a name and then go to **OAuth2** in the side menu. 3. In **OAuth2 > General**, copy the **Client ID** and **Client secret** somewhere you can access it later. If the client secret is not showing, select **Reset Secret**. 4. Paste in the **Callback URLs** (the ones you copied above), e.g. `https://yourdomain.kinde.com/login/callback`. Add entries for all your organization custom domain callbacks, e.g. `account.customdomainone.com/login/callback`, `account.customdomaintwo.com/login/callback`, etc. 5. Save your changes. ## **Add Discord credentials to Kinde** 1. In Kinde, go to **Settings** > **Authentication**. 2. On the **Discord** tile, select **Configure**. 3. Paste the **Client ID** and **Client secret** from the Discord app into the relevant fields. 4. Select if you want to treat this connection as a trusted provider. A [trusted provider](/authenticate/about-auth/identity-and-verification/) is one that guarantees the email they issue is verified. We recommend leaving this off for maximum security. 5. Add any [upstream params](/authenticate/auth-guides/pass-params-idp/) that you want to pass to the IdP. 6. Select which applications will allow Discord social sign in. 7. Select **Save**. Users will now see Discord as an option to sign up and sign in to the selected applications.
# Authenticate - Social sign in - Facebook social sign in
> Comprehensive guide to setting up Facebook social sign-in including Meta app creation, OAuth configuration, and Kinde integration.
Last updated: 2025-01-16
Facebook sign-in, Meta app, OAuth, client ID, client secret, callback URL, Facebook Login for Business
authenticate
You can enable users to sign up and sign in using their Facebook credentials. To enable this, you’ll need a Facebook app and some developer know-how. ## **Copy the callback URL from Kinde** 1. In Kinde, go to **Settings** > **Authentication**. 2. If you have not yet added the Facebook social connection, select **Add connection** in the **Social authentication** section. 3. Select **Facebook**, then **Next**. 4. In the **Callback URL** section: 1. If you use Kinde’s domain as your default, copy the **Kinde domain** URL. 2. If you use custom domains, select the **Use custom domain instead** switch. 3. If you have only one custom domain, copy the Custom domain URL. If you have custom domains for multiple organizations, select each one from the list and copy the callbacks for each. You need to enter all custom domain callbacks in the Meta app. 5. Select **Save**. 6. Use the copied Callback URLs to set up the app, see below. ## **Create a Meta app** The following steps were correct when we published this, but third-party providers sometimes change things. [Here’s the Meta Developer docs](https://developers.facebook.com/docs/facebook-login/) in case you get stuck. 1. Go to the [Facebook/Meta developer space](https://developers.facebook.com/) and select **My apps**, then **Create app**. 2. On the **Business portfolio** page, select **Next**. 3. On the **Use cases** page, select **Authenticate and request data from users with Facebook Login** option and then select **Next.** 4. Follow the prompts and enter the app details, then select **Create app**. 5. In the confirmation window that appears, select **View dashboard**. 6. Under **App settings**, select **Basic** and copy the client ID and client Secret (labeled as **App ID** and **App Secret**) and paste them in a text file or somewhere you can easily copy them. ## **Configure the Meta app** The following steps were correct when we published this, but third party providers sometimes changes things. [Here’s the Meta Developer docs](https://developers.facebook.com/docs/facebook-login/) in case you get stuck. 1. In your Meta app dashboard, select **Use cases** then select **Configure** on the **Authentication and account creation** tile. 2. On the **Permissions** tab, make sure `email` and `public_profile` are selected. 3. On the **Settings** tab, add your callback URL in the **Redirect URI** field. E.g. `https://domain.kinde.com/login/callback` 4. Select **Save changes** at the bottom of the screen. 5. Go back to the Dashboard page (home icon). 6. In **App settings**, select **Basic**. 1. Paste your Kinde domain URL in the **App domains** field, but **do not** include the https/http or path. For example, paste `yourdomain.kinde.com`. 2. Add other details such as app icon, category, terms of service and privacy policy link. 3. Select **Save changes**. 7. Go to **Settings** > **Advanced.** 8. Under **Domain manager**, select **Add a domain** to add your Kinde domain. 1. When you add the domain here (include the https/http part of the URL). 2. Under the **Security** section, ensure the **Require app secret** switch is turned off. 3. Add any other relevant information. 4. Select **Save changes**. 9. Next, you'll need to complete the preparation tasks and submit your app for approval. Note that this requires providing business documentation, contacts, etc. See the **Review** area for more information. 10. Once the approval process is complete, you can publish the app. See the [Meta/Facebook docs](https://developers.facebook.com/docs/development/create-an-app/) for more information about apps. ## **Create a product in your Meta app** The following steps were correct when we published this, but third party providers sometimes changes things. [Here’s the Meta Developer docs](https://developers.facebook.com/docs/facebook-login/) in case you get stuck. 1. In your app dashboard, select **Add product**. 2. Select the **Opt in Facebook Login for Business** prompt**.** 3. When prompted, select **Switch to Facebook Login for business**. 4. In the confirmation window, select **Certain permissions aren’t available with this product** as the reason. 5. In the **Select the permissions you require** field that appears, select **email** and **public_profile**. 6. Select **Switch to Facebook Login**. 7. Enter the Kinde callback URLs in the **Valid OAuth Redirect URLs field**. Add entries for all your organization custom domain callbacks, e.g. account.customdomainone.com/login/callback, account.customdomaintwo.com/login/callback, etc. 8. Select **Save Changes**. 9. In the red warning message at the top of the page, select **Get Advanced Access**. The **Permissions and Features** page opens. 10. Next to the **email** entry: 1. Select **Request advanced access**. 2. In the confirmation window, select the checkbox and enter your facebook password. 3. Select **Submit**. 11. Next to the **public_profile** entry: 1. Select **Request advanced access**. 2. In the confirmation window, select the checkbox and enter your Facebook password. 3. Select **Submit**. ## **Add Facebook credentials to Kinde** 1. In Kinde, go to **Settings** > **Authentication**. 2. On the **Facebook** tile, select **Configure**. 3. Paste the **Client ID** and **Client secret** from the Facebook app into the relevant fields. 4. Select if you want to treat this connection as a trusted provider. A [trusted provider](/authenticate/about-auth/identity-and-verification/) is one that guarantees the email they issue is verified. We recommend leaving this off for maximum security. 5. Add any [upstream params](/authenticate/auth-guides/pass-params-idp/) that you want to pass to the IdP. 6. Select which applications will allow Facebook SSO. 7. Select **Save**. Users will now see Facebook as an option to sign up and sign in to the selected applications. ### When an email is not provided Facebook does not require an email for sign up, but Kinde does. So if a user signs up with Facebook and an email is not detected, we will ask for one. The user only needs to provide their email once, then they can sign in via Facebook without disruption. If the email they provide is already detected in Kinde, we will automatically link the accounts so as not to duplicate.
# Authenticate - Social sign in - GitHub social sign in
> Step-by-step guide to setting up GitHub social sign-in including GitHub app creation, OAuth configuration, and Kinde integration.
Last updated: 2025-01-16
GitHub sign-in, GitHub app, OAuth, client ID, client secret, callback URL, webhooks
authenticate
You can enable users to sign up and sign in using their GitHub credentials. To enable this, you’ll need some technical know-how and a [GitHub app](https://docs.github.com/en/apps/creating-github-apps/about-creating-github-apps/about-creating-github-apps) and credentials. ## **Get the Kinde callback URL** 1. In Kinde, go to **Settings** > **Authentication**. 2. In the **Social Connections** section, select **Add connection**. 3. In the window that appears, select **GitHub**, then select **Next**. 4. In the **Callback URL** section: 1. If you use Kinde’s domain as your default, copy the **Kinde domain** URL. 2. If you use custom domains, select the **Use custom domain instead** switch. 3. If you have only one custom domain, copy the Custom domain URL. If you have custom domains for multiple organizations, select each one from the list and copy the callbacks for each. You need to enter all custom domain callbacks in the provider app. 5. Select **Save**. 6. Use the copied Callback URL to set up the app, see below. ## **Create GitHub app** 1. Sign in to your GitHub account, select the **Account** dropdown menu at the top right corner, and choose **Settings**. 2. From the menu on the left, select **Developer settings**. ([https://github.com/settings/apps](https://github.com/settings/apps)) 3. Select **GitHub Apps** and then select **New GitHub app**. 4. Give the app a name. 5. Enter your app’s **Homepage URL**. 6. Enter or paste the Kinde callback URLs you copied earlier, into the **Authorization callback URL** field. Add entries for all your organization custom domain callbacks, e.g. account.customdomainone.com/login/callback, account.customdomaintwo.com/login/callback, etc. 7. Select the **Request user authorization (OAuth) during installation** option**.** 8. In the **Webhooks** section, deselect the Webhook **Active** option (unless you want to add webhook URL details). 9. (Recommended) In the **Permissions** section, open the **Account permissions** options and change the **Email addresses** access to **Read only**. This enables Kinde to more easily match up user accounts with access to all the users' email addresses. 10. Select **Create GitHub App**. The app is created. ## Copy Client ID and Client secret 1. On the App you just created, select **Edit**. 2. Copy the **Client ID.** 3. Select **Generate a new client secret**. 4. Copy these values to a text file or other temporary and secure place for adding to Kinde. ## **Add GitHub credentials to Kinde** 1. In Kinde, go to **Settings** > **Authentication**. 2. On the GitHub tile, select **Configure**. 3. Paste the **Client ID** and **Client secret** into the relevant fields. 4. Select if you want to treat this connection as a trusted provider. A [trusted provider](/authenticate/about-auth/identity-and-verification/) is one that guarantees the email they issue is verified. We recommend leaving this off for maximum security. 5. Add any [upstream params](/authenticate/auth-guides/pass-params-idp/) that you want to pass to the IdP. 6. Select which applications will use GitHub sign in. 7. Select **Save**. Users will now see GitHub as an option to sign up and sign in to your product.
# Authenticate - Social sign in - GitLab social sign in
> Step-by-step guide to setting up GitLab social sign-in including GitLab app creation, OAuth configuration, and Kinde integration.
Last updated: 2025-01-16
GitLab sign-in, GitLab app, OAuth, client ID, client secret, callback URL, scopes
authenticate
You can enable users to sign up and sign in using their GitLab credentials. To enable this, you’ll need some technical know-how and a GitLab app and credentials. Here’s some [GitLab docs](https://docs.gitlab.com/ee/integration/oauth_provider.html) that might help. ## **Get the Kinde callback URL** 1. In Kinde, go to **Settings** > **Authentication**. 2. In the **Social Connections** section, select **Add connection**. 3. In the window that appears, select **GitLab**, then select **Next**. 4. In the **Callback URL** section: 1. If you use Kinde’s domain as your default, copy the **Kinde domain** URL. 2. If you use custom domains, select the **Use custom domain instead** switch. 3. If you have only one custom domain, copy the Custom domain URL. If you have custom domains for multiple organizations, select each one from the list and copy the callbacks for each. You need to enter all custom domain callbacks in the GitLab app. 5. Select **Save**. 6. Use the copied Callback URL to set up the app, see below. ## **Create GitLab app** 1. Sign in to your GitLab account and follow [these instructions](https://docs.gitlab.com/ee/integration/oauth_provider.html) for adding a group-owned or user-owned application. 2. Ensure these scopes are enabled in your application: `read_user`, `openid`, `profile`, `email`. 3. Paste the Kinde callback URL in the **Redirect URI** field. Add additional entries for all your organization custom domain callbacks, e.g. `account.customdomainone.com/login/callback`, `account.customdomaintwo.com/login/callback`, etc. 4. Select **Save**. 5. Copy the **Application ID** and **Secret**, and paste them where you can access them later. ## **Add GitLab credentials to Kinde** 1. In Kinde, go to **Settings** > **Authentication**. 2. On the GitLab tile, select **Configure**. 3. Paste the **Client ID** (**Application ID**) and **Client secret** (**Secret**) into the relevant fields. 4. Select if you want to treat this connection as a trusted provider. A [trusted provider](/authenticate/about-auth/identity-and-verification/) is one that guarantees the email they issue is verified. We recommend leaving this off for maximum security. 5. Add any [upstream params](/authenticate/auth-guides/pass-params-idp/) that you want to pass to the IdP. 6. Select which applications will have a GitLab sign in option. 7. Select **Save**. Users will now see GitLab as an option to sign up and sign in to your product.
# Authenticate - Social sign in - Google social sign in
> Step-by-step guide to setting up Google social sign-in including Google Cloud project setup, OAuth credentials, and Kinde integration.
Last updated: 2025-01-16
Google sign-in, OAuth, Google Cloud, client ID, client secret, callback URL, webview limitations
authenticate
You can enable users to sign up and sign in using their Google credentials. To set this up, you need a Google cloud account and project, and a little technical know-how. Note that Google has provided a topic about [Google’s Create authorization credentials](https://developers.google.com/identity/sign-in/web/sign-in#create_authorization_credentials), but the steps don’t quite work. Until they update their docs, we recommend you use ours. ## **Before you begin** 1. Create a [Google Cloud](https://cloud.google.com/) account. 2. Create a [Google Project](https://cloud.google.com/resource-manager/docs/creating-managing-projects#console). 3. Get Google credentials (see below). ### **Get the Kinde Callback URL** 1. Sign in to Kinde. 2. Go to the **Settings** page and select **Authentication**. 3. In the **Social connections** section, select **Add connection.** 4. In the window that opens, select **Google**, then select **Next**. 5. In the **Callback URL** section: 1. If you use Kinde’s domain as your default, copy the Kinde domain URL. 2. If you use custom domains, select the **Use custom domain instead** switch. 3. If you have only one custom domain, copy the Custom domain URL. If you have custom domains for multiple organizations, select each one from the list and copy the callbacks for each. You need to enter all custom domain callbacks in the Google app. 6. Select **Save**. 7. Use the copied Callback URL to set up the app, see below. ## **Get Google credentials** 1. Navigate to the [Google Cloud](https://cloud.google.com/) home page. 2. Click **Console** in the top menu bar. 3. In the left menu, select **APIs & Services.** 4. If you are prompted to, create a new project. 5. Select **OAuth consent** **screen.** 6. Select if your project is **Internal** or **External,** then select **Create**. 7. Complete all the app details (noting that you may need to go through the verification process if you upload a logo). 8. Select **Save** **and Continue**. 9. In the **Scopes** step, select **Add or remove scopes.** 10. In the screen that appears, add the following non-sensitive scopes: `./auth/userinfo.email` and `./auth/userinfo.profile` then select **Update**. 11. Select **Save and continue.** 12. Add test users if you want, then select **Save and continue**. 13. Back in the main menu, select **Credentials**. 14. Click **Create Credentials** at the top of the page and select **OAuth client ID**. 15. In the **Web application** dropdown menu, choose **Web Application**. 16. Name your OAuth 2.0 client. 17. Add your **Authorized redirect URIs**. These are the Callback URLs you copied in the previous procedure. Add entries for all your organization custom domain callbacks, e.g. `account.customdomainone.com/login/callback`, `account.customdomaintwo.com/login/callback`, etc. 18. Click **Create**. 19. Copy your **Client ID** and **Client Secret** from the confirmation window. ## **Add Google credentials to Kinde** 1. In Kinde, go to **Settings** and select **Authentication**. 2. On the Google tile, select the **Configure** link. 3. Paste your **Client ID** and **Client Secret** into the two fields. 4. Select if you want to treat this connection as a trusted provider (this is on by default for Google). A [trusted provider](/authenticate/about-auth/identity-and-verification/) is one that guarantees the email they issue is verified. We recommend leaving this off for maximum security. 5. Add any [upstream params](/authenticate/auth-guides/pass-params-idp/) that you want to pass to the IdP. For example, you can pass a param that forces the Google account selector to display. 6. Select which applications to switch this on for. 7. Select **Save**. Your users will now be able to sign in using their Google credentials.
# Authenticate - Social sign in - LinkedIn social sign in
> Step-by-step guide to setting up LinkedIn social sign-in including LinkedIn app creation, OpenID Connect configuration, and Kinde integration.
Last updated: 2025-01-16
LinkedIn sign-in, OpenID Connect, OAuth, client ID, client secret, callback URL, LinkedIn developer
authenticate
You can enable users to sign up and sign in using their LinkedIn credentials. To enable this, you’ll need a LinkedIn app and some developer know-how. ## **Get the Kinde Callback URL** 1. Sign in to Kinde. 2. Go to the **Settings** page and select **Authentication**. 3. In the **Social connections** section, select **Add connection.** 4. In the window that opens, select **LinkedIn**, then select **Next**. 5. In the **Callback URL** section: 1. If you use Kinde’s domain as your default, copy the **Kinde domain** URL. 2. If you use custom domains, select the Use custom domain instead switch. 3. If you have only one custom domain, copy the Custom domain URL. If you have custom domains for multiple organizations, select each one from the list and copy the callbacks for each. You need to enter all custom domain callbacks in the LinkedIn app. 6. Select **Save**. 7. Use the copied Callback URLs to set up the app, see below. ## **Create a LinkedIn app and set up** 1. Go to the [LinkedIn developer space](https://developer.linkedin.com/) and select **Create app**. 2. Complete the details, including name, logo, company LinkedIn page, privacy policy link, etc. 3. Select **Create app**. 4. In the **Products** tab, select **Request access** on the **Sign in with LinkedIn using OpenID Connect** tile. 5. In the dialog that opens, agree to the terms and conditions to continue. You can now view the endpoints. ## **Configure your LinkedIn app** 1. Go to the **Auth** tab. 2. In the **Auth 2.0 settings** area, select the edit icon next to the **Authorized redirect URLs for your app.** 3. Paste the **Callback URLs** you copied from Kinde in the first procedure. Add entries for all your organization custom domain callbacks, e.g. account.customdomainone.com/login/callback, account.customdomaintwo.com/login/callback, etc. 4. In the same tab, copy the **Client ID** and **Client Secret** and paste them in a text file or somewhere you can easily copy them. For additional help, see the [LinkedIn docs](https://learn.microsoft.com/en-gb/linkedin/consumer/integrations/self-serve/sign-in-with-linkedin). ## **Add LinkedIn credentials to Kinde** 1. In Kinde, go to **Settings** > **Authentication**. 2. On the **LinkedIn** tile, select **Configure**. 3. Paste the **Client ID** and **Client secret** from the LinkedIn app into the relevant fields. 4. Select if you want to treat this connection as a trusted provider. A [trusted provider](/authenticate/about-auth/identity-and-verification/) is one that guarantees the email they issue is verified. We recommend leaving this off for maximum security. 5. Add any [upstream params](/authenticate/auth-guides/pass-params-idp/) that you want to pass to the IdP. 6. Select which applications will allow LinkedIn SSO. 7. Select **Save**. Users will now see LinkedIn as an option to sign up and sign in to the selected applications.
# Authenticate - Social sign in - Microsoft social sign in
> Step-by-step guide to setting up Microsoft social sign-in including Azure app registration, OAuth configuration, and Kinde integration.
Last updated: 2025-01-16
Microsoft sign-in, Azure, Entra ID, app registration, OAuth, client ID, client secret, home realm
authenticate
You can enable users to sign up and sign in using their Microsoft credentials. To enable this, you’ll need a Microsoft Azure account and some developer know-how. ## **Get the Kinde Callback URL** 1. Sign in to Kinde. 2. Go to the **Settings** page and select **Authentication**. 3. In the **Social connections** section, select **Add connection.** 4. In the window that opens, select **Microsoft**, then select **Next**. 5. In the **Callback URL** section: 1. If you use Kinde’s domain as your default, copy the **Kinde domain** URL. 2. If you use custom domains, select the **Use custom domain instead** switch. 3. If you have only one custom domain, copy the Custom domain URL. If you have custom domains for multiple organizations, select each one from the list and copy the callbacks for each. You need to enter all custom domain callbacks in the Microsoft app. 6. Select **Save**. 7. Use the copied Callback URL to set up the app, see below. ## Register a Microsoft app and set up 1. Go to your account at [https://portal.azure.com/](https://portal.azure.com/). 2. Navigate to **Entra ID**. You can do this from links on the main screen or in the left side menu. 3. Select **Add+ > App registration** or go to **Manage > App registrations > New registration**. 4. Enter a name for the app. 5. Select a **Supported account types option**. In testing, we selected **Accounts in any organizational directory and personal Microsoft accounts**. 6. In the **Redirect URI (optional)** section, select **Web** in the **Select a platform** dropdown. 7. Enter the **Callback URL** from Kinde. The ones you copied in the procedure above. Add additional entries for all your organization custom domain callbacks, e.g. account.customdomainone.com/login/callback, account.customdomaintwo.com/login/callback, etc. 8. Select **Register**. Details of your new app appear. 9. Copy the **Application (client) ID** and paste it in a text file or somewhere you can easily access it again. 10. Select **Certificates and secrets** from the left menu, select + **New client secret.** 11. Enter a name and give it an expiry date (or accept the default), then select **Add**. Details of the secret are generated. 12. Copy the value in the **Value** column and paste it in a text file or somewhere you can easily access it again. Make sure you copy from the **Value** column, not the **Secret ID** column. ## Add Microsoft app credentials to Kinde 1. In Kinde, go to **Settings** > **Authentication**. 2. In the **Social connections** section, on the **Microsoft** tile, select **Configure**. 3. Paste the **Client ID** (Application (client) ID) and **Client secret value** (that you copied from the **Value** column at step 12 above) into the relevant fields. 4. Select if you want to treat this connection as a trusted provider. A [trusted provider](/authenticate/about-auth/identity-and-verification/) is one that guarantees the email they issue is verified. We recommend leaving this off for maximum security. 5. When a user signs in with an email that matches an existing home realm domain (i.e. part of an enterprise connection), you can allow them to sign in using their existing credentials, rather than creating a new identity in Kinde. To make this happen automatically, select the **Auto redirect home realm users** option. 6. Add any [upstream params](/authenticate/auth-guides/pass-params-idp/) that you want to pass to the IdP. 7. Select which applications will allow Microsoft social SSO. 8. Select **Save**. Users will now see Microsoft as an option to sign up and sign in to the selected applications.
# Authenticate - Social sign in - Roblox social sign in
> Step-by-step guide to setting up Roblox social sign-in including Roblox app creation, OAuth configuration, and Kinde integration.
Last updated: 2025-01-16
Roblox sign-in, Roblox app, OAuth, client ID, client secret, callback URL
authenticate
You can enable users to sign up and sign in using their Roblox credentials. To enable this, you’ll need some technical know-how and a Roblox app. ## Get your Kinde callback URL 1. In Kinde, go to **Settings** > **Authentication**. 2. In the **Social connections** section, select **Add connection.** 3. In the window that appears, select **Roblox,** then select **Next**. 4. In the **Callback URL** section: 1. If you use Kinde’s domain as your default, copy the **Kinde domain** URL. 2. If you use custom domains, select the **Use custom domain instead** switch. 3. If you have only one custom domain, copy the **Custom domain** URL. If you have custom domains for multiple organizations, select each one from the list and copy the callbacks for each. You need to enter all custom domain callbacks in the Roblox app. 5. Select **Save**. 6. Use the copied Callback URLs to set up the app, see below. ## Create and configure a Roblox app 1. Sign up for a [Roblox](https://www.roblox.com/) account. 2. Follow [these instructions](https://create.roblox.com/docs/cloud/open-cloud/oauth2-registration/) to create an OAuth 2.0 app in Roblox. 3. Make sure you enable the `open id` and `profile` scopes. 4. Copy the app **Client ID** and **Secret**. You need these to set up Roblox in Kinde. ## Add Roblox credentials to Kinde You don’t need to wait for app approval to finish configuring Roblox in Kinde. 1. In Kinde, go to **Settings** > **Authentication**. 2. On the **Roblox** tile, select **Configure**. 3. Paste the **Client ID** and **Secret** from the Roblox app into the relevant fields. 4. Select if you want to treat this connection as a trusted provider. A [trusted provider](/authenticate/about-auth/identity-and-verification/) is one that guarantees the email they provide is verified. We recommend leaving this off for maximum security. Depending on your selection, here’s the behaviour in Kinde: - trusted off + existing email - creates new user, only updates people_profiles - trusted off + new email - creates new email identity (adds to people_identities) - trusted on + existing email - merges accounts w/existing user - trusted on + new email - creates new email identity (adds to people_identities) 5. Add any [upstream params](/authenticate/auth-guides/pass-params-idp/) that you want to pass to the IdP. 6. Select which applications will allow Roblox social sign in. 7. Select **Save**. Users will now see Roblox as an option to sign up and sign in to the selected applications.
# Authenticate - Social sign in - Slack social sign in
> Step-by-step guide to setting up Slack social sign-in including Slack app creation, OAuth configuration, and Kinde integration.
Last updated: 2025-01-16
Slack sign-in, Slack app, OAuth, client ID, client secret, callback URL, scopes
authenticate
You can enable users to sign up and sign in using their Slack credentials. To enable this, you’ll need some technical know-how and a Slack app. ## **Copy the callback URL from Kinde** 1. In Kinde, go to **Settings** > **Authentication**. 2. If you have not yet added the Slack social connection, select **Add connection** in the **Social authentication** section. 3. Select Slack, then **Next**. 4. In the **Callback URL** section: 1. If you use Kinde’s domain as your default, copy the **Kinde domain** URL. 2. If you use custom domains, select the Use custom domain instead switch. 3. If you have only one custom domain, copy the Custom domain URL. If you have custom domains for multiple organizations, select each one from the list and copy the callbacks for each. You need to enter all custom domain callbacks in the Slack app. 5. Select **Save**. 6. Use the copied Callback URL to set up the app, see below. ## **Create a Slack app** 1. Go to [Slack API Applications](https://api.slack.com/apps) and log in to your workspace. 2. Select **Create an App**. The **Create an app** window opens. 3. Choose how you’d like to configure your app’s scopes and settings. 4. If you are not sure, choose the **From scratch** option. 5. Enter your **App Name** and **Select a workspace**. 6. Click **Create App**. Your app is created. 7. Scroll to the **App Credentials** section and copy the **Client ID** and **Client Secret** and paste them in a text file or somewhere you can easily copy them. ### **Configure your Slack app** 1. In your Slack app, go to the **OAuth & Permissions** section. 2. Scroll to the **Redirect URLs** area and add the callback URLs you got from Kinde, then select **Save URLs**. Add additional entries for all your organization custom domain callbacks, e.g. account.customdomainone.com/login/callback, account.customdomaintwo.com/login/callback, etc. 3. To define what info will be shared when a user signs up or signs in with Slack, scroll to the **Scopes** section. 4. In the **User Token Scopes** area, select **Add an OAuth Scope** and from the dropdown menu choose **users.profile:read**. 5. Scroll up to the **OAuth Tokens for Your Workspace** section and select **Install to Workspace**. And when prompted, select **Allow**. 6. Select **Manage distribution** on the left and go to the **Share Your App with Other Workspaces** section. 7. Select **Remove Hard Coded Information** and in the area that appears, select the **I’ve reviewed and removed any hard-coded information** option. 8. Select **Activate Public Distribution**. Your app is now ready to use. ### **Add Slack credentials to Kinde** 1. In Kinde, go to **Settings** > **Authentication**. 2. On the Slack tile, select **Configure**. 3. Paste the **Client ID** and **Client secret** from the Slack app into the relevant fields. 4. Select if you want to treat this connection as a trusted provider. A [trusted provider](/authenticate/about-auth/identity-and-verification/) is one that guarantees the email they issue is verified. We recommend leaving this off for maximum security. 5. Add any [upstream params](/authenticate/auth-guides/pass-params-idp/) that you want to pass to the IdP. 6. Select which applications will allow Slack SSO. 7. Select **Save**. Users will now see Slack as an option to sign up and sign in to the selected applications.
# Authenticate - Social sign in - Twitch social sign in
> Step-by-step guide to setting up Twitch social sign-in including Twitch app registration, OAuth configuration, and Kinde integration.
Last updated: 2025-01-16
Twitch sign-in, Twitch app, OAuth, client ID, client secret, callback URL, 2FA
authenticate
You can enable users to sign up and sign in using their Twitch credentials. To enable this, you’ll need a Twitch account and some developer know-how. ## **Before you begin** **Enable Twitch 2FA** — Sign up for a Twitch account and [enable two-factor authentication](https://help.twitch.tv/s/article/two-factor-authentication?language=en_US) (2FA). You will need your mobile number and an authenticator app e.g. Google authenticator, to do this. ## **Get the Kinde callback URL** 1. In Kinde, go to **Settings** > **Authentication**. 2. In the **Social authentication** section, select **Add connection.** 3. Select **Twitch** and then select **Next.** 4. In the **Callback URL** section: 1. If you use Kinde’s domain as your default, copy the **Kinde domain** URL. 2. If you use custom domains, select the **Use custom domain instead** option. 3. If you have only one custom domain, copy the Custom domain URL. If you have custom domains for multiple organizations, select each one from the list and copy the callbacks for each. You need to enter all custom domain callbacks in the Twitch app. 5. Select **Save**. 6. Use the copied Callback URLs to set up the app, see below. ## **Register a Twitch app** 1. Go to the [Twitch developer console](https://dev.twitch.tv/) and select **Applications**. 2. Select **Register your application**. 3. Enter a name and the Kinde callback URLs you copied above. Add entries for all your organization custom domain callbacks, e.g. `account.customdomainone.com/login/callback`, `account.customdomaintwo.com/login/callback`, etc. 4. Select the **Category** as an **Application Integration**. 5. Select **Create**. See the [Twitch docs](https://dev.twitch.tv/docs/authentication/register-app#registering-your-app) for additional help. ## **Get app Client ID and Client secret** 1. In the **Application** section in Twitch, select **Manage** next to your application. 2. Copy the **Client ID.** 3. Select **New secret** and when prompted, confirm. 4. Copy and paste the **Client ID** and **Client Secret** into a text file or somewhere you can easily copy them. ## **Add Twitch credentials to Kinde** 1. In Kinde, go to **Settings** > **Authentication**. 2. On the Twitch tile, select **Configure**. 3. Paste the **Client ID** and **Client secret** from the app into the relevant fields. 4. Select if you want to treat this connection as a trusted provider. A [trusted provider](/authenticate/about-auth/identity-and-verification/) is one that guarantees the email they issue is verified. We recommend leaving this off for maximum security. 5. Add any [upstream params](/authenticate/auth-guides/pass-params-idp/) that you want to pass to the IdP. 6. Select which applications will allow Twitch SSO. 7. Select **Save**. Users will now see Twitch as an option to sign up and sign in to the selected applications. ## When an email is not provided Twitch does not require an email for sign up, but Kinde does. So if a user signs up with Twitch and an email is not detected, we will ask for one. The user only needs to provide their email once, then they can sign in via Twitch without disruption. If the email they provide is already detected in Kinde, we will automatically link the accounts so as not to duplicate.
# Authenticate - Social sign in - X (formerly Twitter) social sign in
> Step-by-step guide to setting up X (formerly Twitter) social sign-in including X developer platform app creation, OAuth configuration, and Kinde integration.
Last updated: 2025-01-16
X sign-in, Twitter sign-in, X developer platform, OAuth, client ID, client secret, callback URL
authenticate
You can enable users to sign up and sign in using their X credentials. To enable this, you’ll need an X developer platform account and some developer know-how. ## **Create an X app** Sign up for a X developer platform account and [add your app](https://developer.twitter.com/en/portal/dashboard). If you are signing up for the first time, you will be given a default app. If you already have apps, you’ll need to create a project and then add the new app within that project. ## **Get the Kinde callback URL** 1. In Kinde, go to **Settings** > **Authentication**. 2. In the Social connections section, select **Add connection.** 3. In the window that appears, select **X**, then select **Next**. 4. In the **Callback URL** section: 1. If you use Kinde’s domain as your default, copy the **Kinde domain** URL. 2. If you use custom domains, select the **Use custom domain instead** switch. 3. If you have only one custom domain, copy the **Custom domain** URL. If you have custom domains for multiple organizations, select each one from the list and copy the callbacks for each. You need to enter all custom domain callbacks in the X app. 5. Select **Save**. 6. Use the copied Callback URL to set up the app, see below. ## **Set up your X app** 1. Sign in to the [X Developer Platform](https://developer.twitter.com/). 2. In the side menu, select **Projects & apps** and then select your app. 3. In the **User authentication settings** section, select **Set up**. 4. Set the **App Permissions.** 5. Switch on **Request email from users.** 6. Select the **Type of App** as **Native app**. 7. Enter the Kinde callback URL you copied earlier. Add entries for all your organization custom domain callbacks, e.g. `account.customdomainone.com/login/callback`, `account.customdomaintwo.com/login/callback`, etc. 8. Enter your Kinde domain URL, e.g. `https://yourdomain.kinde.com`. 9. Enter details in other fields if you wish. 10. Select **Save**. 11. Select the **Key and tokens** tab at the top of the page. 12. Copy the **Client ID** and **Client Secret** from the **Oauth2.0** section and paste them into a text doc or other place where you can get them again later. View **X Developer Platform’s** docs for more info about [authentication](https://developer.twitter.com/en/docs/authentication/overview). ## **Add X credentials to Kinde** 1. In Kinde, go to **Settings** > **Authentication**. 2. In the list of **Social connections**, select **Configure** on the **X** tile. 3. Paste the **Client ID** and **Client secret** from the X app into the relevant fields. 4. Select if you want to treat this connection as a trusted provider. A [trusted provider](/authenticate/about-auth/identity-and-verification/) is one that guarantees the email they issue is verified. We recommend leaving this off for maximum security. 5. Add any [upstream params](/authenticate/auth-guides/pass-params-idp/) that you want to pass to the IdP. 6. Select which applications will allow users to sign in with X. 7. Select **Save**. Users will now see X as an option to sign up and sign in to the selected applications. ## When an email is not provided X does not require an email for sign up, but Kinde does. So if a user signs up with X and an email is not detected, we will ask for one. The user only needs to provide their email once, then they can sign in via X without disruption. If the email they provide is already detected in Kinde, we will automatically link the accounts so as not to duplicate.
# Authenticate - Social sign in - Xero social sign in
> Step-by-step guide to setting up Xero social sign-in including Xero app creation, OAuth configuration, and Kinde integration.
Last updated: 2025-01-16
Xero sign-in, Xero app, OAuth, client ID, client secret, callback URL
authenticate
You can enable users to sign up and sign in using their Xero credentials. To enable this, you’ll need a Xero app and some developer know-how. ## **Get your Kinde callback URL** 1. In Kinde, go to **Settings** > **Authentication**. 2. In the **Social connections** section, select **Add connection.** 3. In the window that appears, select **Xero,** then select **Next**. 4. In the **Callback URL** section: 1. If you use Kinde’s domain as your default, copy the **Kinde domain** URL. 2. If you use custom domains, select the **Use custom domain instead** switch. 3. If you have only one custom domain, copy the **Custom domain** URL. If you have custom domains for multiple organizations, select each one from the list and copy the callbacks for each. You need to enter all custom domain callbacks in the Xero app. 5. Select **Save**. 6. Use the copied Callback URLs to set up the app, see below. ## **Create and configure a Xero app** 1. Create a Xero developer account. [https://developer.xero.com/](https://developer.xero.com/) 2. Verify your email when prompted. 3. Select New app. 4. Give the app a name and select Web app as the type. 5. Add your company URL. 6. Enter your Kinde callback URL in the **Redirect URI** field. Add additional entries for all your organization custom domain callbacks, e.g. `account.customdomainone.com/login/callback`, `account.customdomaintwo.com/login/callback`, etc. 7. Accept the terms and conditions and select **Create App**. 8. Go to **Configuration** and copy the **Client id** somewhere you can access it later. 9. Generate a **Client secret** and copy it immediately somewhere you can access it again. You will not get to copy it again. ## **Add Xero credentials to Kinde** 1. In Kinde, go to **Settings** > **Authentication**. 2. On the **Xero** tile, select **Configure**. 3. Paste the **Client ID** and **Client secret** from the Xero app into the relevant fields. 4. Select if you want to treat this connection as a trusted provider. A [trusted provider](/authenticate/about-auth/identity-and-verification/) is one that guarantees the email they issue is verified. We recommend leaving this off for maximum security. 5. Add any [upstream params](/authenticate/auth-guides/pass-params-idp/) that you want to pass to the IdP. 6. Select which applications will allow Xero social sign in. 7. Select **Save**. Users will now see Xero as an option to sign up and sign in to the selected applications.
# Billing - About billing - About Kinde billing feature
> Launch SaaS billing in Kinde - plans, mixed-interval pricing, Stripe Tax, trials, and self-serve upgrades
Last updated: 2026-09-07
billing overview, mixed-interval pricing, Stripe Tax, VAT, collect tax automatically, free trial, pricing table, self-serve portal, one-time charges
billing, about-billing, stripe, tax
Kinde billing gives you the ability to charge customers for your services and collect revenue. With billing, you can: - Create plans and pricing tables, version them in the Kinde dashboard, and make them visible to your users - Create and customize a built-in pricing table to launch faster - Bill customers on daily, weekly, monthly, or yearly intervals for fixed plan charges (subscription plans) - Add more than one fixed charge per plan, each on a daily, weekly, monthly, or yearly interval - Offer non-annual subscriptions with custom annual pricing (for example, $10/month, or $100/year if paid annually) - Let customers choose annual pricing during sign-up or in the self-serve portal - Add entitlements that control access to features, and metered features whose usage may generate customer charges - Configure **one-time charges** on plans for single purchases such as [credit top-ups or add-on unlocks](/billing/manage-plans/create-plans/#add-one-time-charges-to-a-plan) (subscriber purchase rolling out) - Create a free plan alongside your paid offerings - Offer free trial periods and choose whether a credit card is required to start the trial - If you collect a credit card during a free trial, Kinde can notify customers when the trial is about to expire and automatically convert them to paid subscriptions. You can configure this in the Kinde dashboard. - Use Stripe for payments, invoicing, and tax collection - Link organizations (B2B) and individual customers (B2C) to a plan - Handle plan upgrades, downgrades, and cancellations from the Kinde dashboard, or let customers do this in the self-serve portal - Customize the pricing table to match your brand Billing helps you manage the customer lifecycle—from registration and plan selection through authorization, provisioning, releases, and upgrades. ## How is sales tax or VAT handled in Kinde billing? Kinde can enable Stripe Tax with automatic collection on new subscriptions. You control whether tax is collected in Kinde; Stripe still calculates tax and shows it on invoices based on your Stripe Tax setup. ### Turn on automatic tax in Kinde 1. Go to **Settings > Environment > Billing**. 2. In the **Settings** section, turn on **Collect tax automatically**. 3. Select **Save**. By default this setting is off. When it is on, new subscriptions use Stripe Tax unless a plan overrides the account setting. Plans can use the account setting or override it under **Plan settings > Collect tax automatically**: - **Use account setting** (default) — inherit the Billing settings toggle - **Collect** — always collect tax for this plan - **Don’t collect** — never collect tax for this plan See [Create billing plans](/billing/manage-plans/create-plans/#collect-tax-automatically) for plan configuration details. ### What you still configure in Stripe Automatic tax only works when Stripe Tax is set up on your connected Stripe account. In the Stripe Dashboard, configure tax registrations, and whether prices are tax-inclusive or tax-exclusive, for the regions where you sell. See also [Connect to Stripe and set policies](/billing/get-started/connect-to-stripe/#collect-tax-automatically). ### How Kinde determines tax location Stripe needs a customer location to calculate tax. Kinde uses the customer’s billing country when available (for example from the payment method). Until a customer has a billing country—such as during a trial before a card is added—tax may temporarily use your Stripe account’s registered address. If you need help mapping this to your Kinde plans, contact [Kinde support](https://kinde.com/support). ## Known limitations These are known limitations we are actively working to address. - Custom billing intervals (e.g., quarterly) are not supported. Fixed charges are limited to daily, weekly, monthly, or yearly intervals. - Changes to the billing cycle (e.g., custom billing anniversaries) are not supported - Add-ons and discounts applied to individual subscriptions are not supported - One-time charge purchase by subscribers, and applying one-time charges to existing subscriptions, are not supported yet. You can create one-time charges and add them to plans in the Kinde dashboard now. ## This is our first billing release Billing is a really complex area of app development, so while this release is tested and ready, we are actively working on improvements from day one. ### How to send feedback We’d appreciate your feedback—please send it to [support@kinde.com](mailto:support@kinde.com) so we can quickly collect and prioritize improvements.
# Billing - About billing - Commonly used billing concepts and terms
> Learn Kinde billing terms — fixed charges, one-time charges, mixed-interval pricing, annual payments, next invoice details, trials, and token claims
Last updated: 2026-09-07
billing terminology, fixed charges, mixed-interval pricing, annual payments, next invoice details, trial period, customer agreement, access token claims, one-time charges
billing, plans, pricing-models, entitlements
'Billing' refers to the broad function of creating plans, setting pricing, collecting payments, etc. Here are some of the common concepts and terms you will come across. ## Billing identifiers - **Customer ID** - A `customer_id` uniquely identifies a user or org who has signed up for a plan. This is different from a `user_id` or `org_id`, which identify the user or org as an entity. - **Customer Agreement ID** - A `customer_agreement_id` identifies the contract or agreement created in Stripe when a customer signs up for a plan. The agreement ID is then associated with the `customer_id` in Kinde. ## Key concepts - **Plan groups** - Plan groups organize multiple plans under a common category, helping segment offerings by use case, customer size, or market. A group is scoped to either organizations (B2B) or individual customers (B2C). You can have multiple plan groups, but each plan must belong to a group. - **Plans** - Plans define the specific features, usage limits, and pricing tiers offered to customers in a SaaS product. - **Plan settings** - Configuration options that control subscription behavior, such as whether to require credit card details during sign-up. The "Ask for credit card" setting allows free plans to skip payment collection for a frictionless experience. - **Trial period** - An optional setting on paid plans that lets customers try the plan for a set number of days before being charged. During the trial, the customer has full access to the plan's features. Kinde creates the trial using Stripe's subscription trial. Plans with a trial enabled show a badge on the pricing table. - **Features** - Plan features are the specific capabilities or entitlements included in a plan. They can be chargeable (incurring additional fees) or non-chargeable (included at no extra cost). Features can be metered (usage-based) or unmetered (fixed access). - **Fixed charges** – A recurring amount that does not change with usage and is billed in advance. - **One-time charges** – Single-purchase items attached to a plan (for example credit top-ups or add-on unlocks). Separate from fixed recurring charges and from subscription entitlements. You can [configure them on plans](/billing/manage-plans/create-plans/#add-one-time-charges-to-a-plan) now; subscriber purchase is rolling out. - **Pricing models** - Pricing models are the different methods of charging customers, such as flat-rate, usage-based, tiered, or per-seat pricing. Your pricing model is determined by your product and customer needs. Consider scalability and longevity when choosing one. - **Payment processor** - A payment processor is a third-party service that securely processes customer payments via credit cards, ACH, or other methods—such as Stripe Billing. - **Pricing table** - A pricing table is a visual representation of your different subscription plans, showcasing features and prices to help users compare options. You can build one in Kinde and then show it to your customers in the auth flow or self-service portal. - **Self-serve account portal** - Kinde provides a self-serve portal that lets customers manage their subscriptions—such as upgrading plans, updating payment information, or canceling. This reduces support overhead and improves user autonomy. In Kinde, you can decide what your customers can self-manage or remove the functionality completely. ## Common billing terms - **Agreement** - The term used in Stripe and the Kinde API to refer to a customer's subscription. Both terms are used throughout the docs. - **Base price** – The starting cost of a subscription plan, typically the cost for a core set of features or a minimum level of usage. - **Chargeable / Non-chargeable feature** – - **Chargeable feature**: Incurs an additional fee when used. Might be metered or per unit price. - **Non-chargeable feature**: Included in the plan at no extra cost. Use for features that aren't independently chargeable but need to be gated in your product. - **Credit card prompt (trial)** – The number of days before a trial ends when the customer is prompted to add payment details. This helps ensure payment information is collected before the trial expires and the subscription converts to a paid subscription. - **Expiry (one-time charge)** – When access from a one-time purchase ends. **Never expires** keeps access across billing cycles; **Expires with the billing cycle** ends access at the end of the current billing cycle. Access starts when the subscriber pays (once purchase is live). - **Feature** – A specific function or capability of your SaaS product that you provision for app users. In the context of a plan, these are chargeable or non-chargeable features provisioned to customers. - **Fixed charge** – A recurring amount that does not change with usage and is billed in advance. - **Metered and unmetered feature** – Metered features are provisioned in units, often with pricing per unit, e.g., MAU. An unmetered feature behaves like a boolean toggle—a basic entitlement with no pricing attached. - **Mixed-interval pricing** – A plan where fixed charges renew on different schedule. For example: `$100 / year + $3 / month`. - **Multi-currency** – The ability to set plan prices in different currencies to support global customers. Kinde supports nearly all currencies, but you can currently only pick one as the default for all plans. - **Next invoice** – In the self-serve portal and admin billing views, the upcoming charge preview: licensed amounts due on the next charge date plus metered usage recorded so far. May include a caption that the total can still change with usage before the invoice is issued. - **One-time charge** – A plan item billed as a single purchase rather than as part of the recurring subscription. Configured under **One-time charges** on the plan editor. - **Package pricing (one-time)** – A one-time pricing model where customers pay an **Amount** for a set **Number of units** (for example $20 per 100 credits). Contrast with **Flat**, which is a single amount per purchase. - **Pay annually** – Paying for a non-yearly interval charge at a predefined yearly price, often offered at a discount. - **Plan** – A packaged offering of features, prices, and terms available for subscription, typically tiered across a group (e.g., Basic, Pro, Enterprise). - **Plan group** – A collection of related plans, often grouped by customer type or usage level, allowing easier management and comparison. - **Pricing model** – The structure used to determine how features in a plan are priced. E.g. fixed charge, tiered, per-user, or usage-based pricing. Kinde lets you use multiple pricing models within one plan. - **Subscription** – The ongoing agreement where a customer pays for access to a SaaS product via a recurring plan. This is referred to as an agreement in Stripe. - **Tiered pricing** – This refers to unit pricing that has different unit costs based on the volume of units purchased. E.g. $10 per unit for 1–10 units, $8 per unit for 11–50 units, $5 per unit over 51 units. - **Trial expires on** – The date and time when a customer's trial period ends. This value is available in billing-related access token claims as `trial_expires_on` when a trial is active. - **Trial period** – A configurable window of time during which a customer can use a paid plan for free. At the end of the trial, the subscription automatically converts to a paid subscription via Stripe. Trial length is set in days. - **Unit price** – Where a price is set per unit of usage, e.g. a seat or license. Unit prices can also be applied to metered features, e.g. x per unit. Unit prices can also be tiered, e.g. x per unit up to 10 units, then y for 10+ units. - **Usage-based price** – A billing method where charges vary based on the metered consumption of resources or services (e.g., API calls, storage). ## What trial-related claims appear in access tokens? When a customer is on a plan with Kinde billing trials enabled, access tokens can include the following billing trial fields: | Claim | Type | Description | | --- | --- | --- | | `has_trial_period` | boolean | Whether the customer's current plan includes an active trial period | | `trial_expires_on` | string (ISO 8601 datetime) | The date and time when the trial period ends. Typically present when `has_trial_period` is `true` | For general access token structure, see [Access tokens](/build/tokens/about-access-tokens/).
# Billing - About billing - Billing FAQ
> Get answers on Kinde billing—Stripe setup, plans, trials, tax, metered usage, upgrades, and self-serve support
Last updated: 2026-09-07
stripe connection, free trial, sales tax, VAT, metered billing, plan upgrades, pricing table, billing webhooks, one-time charges
billing, faq, stripe, plans
Find quick answers to common questions about Kinde billing. Each section covers specific aspects of billing setup, management, and customer support. ## About Billing & Core Concepts What is Kinde billing and how does it work? Kinde billing allows you to monetize your product by creating subscription plans, processing payments through Stripe, and managing customer lifecycles. It integrates directly with your authentication system, so when users sign up, they can immediately select plans and start paying for your services. The system handles plan creation, pricing tables, payment processing, subscription management, and customer self-service portals - all within your existing Kinde infrastructure. **Learn more:** [About billing](/billing/about-billing/about-billing/) What billing models does Kinde support? Kinde currently supports monthly subscription billing with plans that can include feature limits, metered usage, and tiered pricing. The system is designed for SaaS and subscription-based business models, allowing you to create multiple plan tiers with different feature sets and pricing. **Learn more:** [Kinde billing model](/billing/about-billing/kinde-billing-model/) How does Kinde handle different currencies and billing cycles? Kinde billing supports multiple currencies, but you must set your default billing currency before publishing your first plan. Currently, only monthly billing cycles are supported. The currency setting is permanent once you publish plans, so choose carefully during initial setup. **Learn more:** [Default billing currency](/billing/get-started/default-billing-currency/) ## Getting Started & Setup What do I need to set up before starting with Kinde billing? Before setting up Kinde billing, you'll need a Stripe account, a clear plan structure for your product features and pricing, and billing roles configured if you're using B2B organizations. It's also helpful to have your feature list organized in a spreadsheet to streamline the plan creation process. **Learn more:** [Setup overview](/billing/get-started/setup-overview/) How do I connect my Stripe account to Kinde? To connect Stripe, go to your Kinde dashboard, navigate to the billing section, and follow the Stripe connection process. Kinde will automatically create a test Stripe environment when using non-production environments, allowing you to test billing features without real charges. **Learn more:** [Connect to Stripe](/billing/get-started/connect-to-stripe/) What billing roles and permissions do I need to configure? For B2B applications, you'll need to set up billing roles that allow users to manage subscriptions and billing for their organizations. This includes creating billing administrators who can handle plan changes, upgrades, and cancellations on behalf of their organization. **Learn more:** [Add billing role](/billing/get-started/add-billing-role/) ## Plan Management & Creation How do I create and structure my subscription plans? Kinde's plan builder allows you to create plans with different feature sets, usage limits, and pricing tiers. You can define features, set limits, and configure pricing variations. Plans can be grouped into plan groups for better organization, and you can publish them individually or in batches. **Learn more:** [Create plans](/billing/manage-plans/create-plans/) Can I modify plans after they're published? Once plans are published, you can make limited modifications, but major changes may require creating new plan versions. You can manage plan groups, add new plans, and handle plan upgrades/downgrades for existing subscribers. It's important to plan your structure carefully before publishing. **Learn more:** [About plans](/billing/manage-plans/about-plans/) How do I handle plan upgrades and downgrades? Kinde provides methods for users to upgrade or downgrade their plans, either through self-service portals or programmatically. You can configure upgrade/downgrade rules, handle prorated billing, and manage the transition between different plan tiers. **Learn more:** [Upgrade and downgrade plans](/billing/manage-plans/upgrade-downgrade-plans/) Can I let users subscribe to a free plan without entering payment details? Yes, Kinde allows you to configure whether credit card collection is required for each plan. When creating or editing a plan, look for the **Ask for credit card** toggle in the Plan settings section. You can disable this for plans with no charges, allowing users to subscribe without providing payment information. This is useful for reducing signup friction on free tiers. Note that plans with any positive-price fixed charge or chargeable metered (usage-based) billing always require payment details. Priced one-time charges alone do not require a credit card at signup. **Learn more:** [Create plans](/billing/manage-plans/create-plans/) Can I add one-time charges (top-ups or add-ons) to a plan? Yes. In the plan editor, use the **One-time charges** section to add single-purchase items such as credit top-ups or add-on unlocks. You can create a new charge or reuse an existing one across plans. Each one-time charge can be: - **Unmetered** or **Metered** - Priced with a **Flat** amount or a **Package** (amount per a set number of units) - Set to **Never expire** or **Expire with the billing cycle** You can configure one-time charges on plans now. Subscribers can’t buy them yet, and they can’t be applied to existing subscriptions. **Learn more:** [Create plans — Add one-time charges](/billing/manage-plans/create-plans/#add-one-time-charges-to-a-plan) | [About plans](/billing/manage-plans/about-plans/#one-time-charges) Can I set up free trial periods that automatically convert to paid plans? Yes. Kinde billing supports free trial periods on paid plans. When you enable a trial on a plan, customers can use the plan for a configurable number of days before being charged. At the end of the trial, the subscription automatically converts to a paid subscription via Stripe. You configure trials in plan settings: - **Trial length** — how many days the trial lasts (default 30, minimum 1). - **Credit card prompt** — how many days before the trial ends to prompt the customer for payment details (default 3). Plans with a trial display a "Free trial for N day(s)" badge on the pricing table. The **Ask for credit card** option must be on for trial plans. **Learn more:** [Create plans — Configure trial period](/billing/manage-plans/create-plans/#configure-trial-period) ## Payment Processing & Management How is tax (sales tax or VAT) handled in Kinde billing? You can enable **Collect tax automatically** in **Settings > Environment > Billing** (off by default). When enabled, Kinde turns on Stripe Tax for new subscriptions. Individual plans can inherit that setting via **Use account setting**, or override it with **Collect** or **Don’t collect**. Stripe Tax calculates tax amounts; Stripe Billing presents them on invoices. Configure tax registrations and related Stripe Tax options in the Stripe Dashboard for the regions where you sell. Until a customer has a billing country (for example on a trial before a card is added), tax may use your Stripe account’s registered address. **Learn more:** [About billing](/billing/about-billing/about-billing/#how-is-sales-tax-or-vat-handled-in-kinde-billing) | [Create plans](/billing/manage-plans/create-plans/#collect-tax-automatically) | [Connect to Stripe and set policies](/billing/get-started/connect-to-stripe/#collect-tax-automatically) What payment methods does Kinde support through Stripe? Kinde billing supports all payment methods that Stripe supports, including credit cards, debit cards, digital wallets, and bank transfers. The specific payment methods available depend on your Stripe account configuration and the countries you operate in. **Learn more:** [Payment processor](/billing/payment-management/payment-processor/) How do I manage my Stripe connection and billing policies? You can manage your Stripe connection through the Kinde dashboard, where you can configure billing policies, set up webhooks for payment events, and monitor your payment processing. This includes handling failed payments, refunds, and subscription lifecycle events. **Learn more:** [Manage Stripe connection](/billing/payment-management/manage-stripe-connection/) What happens when payments fail or subscriptions expire? Kinde integrates with Stripe's subscription management to handle failed payments, automatic retries, and subscription lifecycle events. You can configure webhooks to receive real-time updates about payment failures, successful payments, and subscription status changes. **Learn more:** [Manage customer activity webhooks](/billing/manage-subscribers/manage-customer-activity-webhooks/) ## Subscription Management & Customer Lifecycle How do I track and manage customer subscriptions? Kinde provides tools to view customer subscription status, manage plan changes, and handle customer lifecycle events. You can see which plans customers are on, manage subscription upgrades, downgrades, and cancellations. **Learn more:** [Manage subscribers](/billing/manage-subscribers/upgrade-downgrade-methods/) Can I implement usage-based or metered billing? Yes, Kinde supports metered billing where customers are charged based on actual usage rather than fixed plans. You can set up usage-based pricing tiers, and implement pay-as-you-go billing models alongside traditional subscription plans. **Learn more:** [Add metered usage](/billing/manage-subscribers/add-metered-usage/) How do I handle customer cancellations and refunds? Kinde provides methods for customers to cancel their subscriptions through self-service portals, and you can handle cancellations programmatically. Refunds are processed through Stripe, and you can configure cancellation policies and grace periods for your plans. **Learn more:** [Cancel plans](/billing/manage-plans/cancel-plans/) ## Pricing & User Experience How do I create and customize pricing tables? Kinde allows you to build customizable pricing tables that display your plans and features to customers. You can customize the appearance, layout, and content to match your brand, and integrate these tables into your signup flow or dedicated pricing pages. **Learn more:** [Add pricing table](/billing/get-started/add-pricing-table/) Can I customize the billing pages and user experience? Yes, you can customize billing pages to match your brand and user experience requirements. This includes customizing plan selection flows, pricing table displays, and integrating billing into your existing application URLs and SDK implementations. **Learn more:** [Customize billing pages](/billing/billing-user-experience/customize-billing-pages/) How do I integrate billing into my application's signup flow? Kinde provides SDK methods and URL parameters to integrate billing directly into your authentication flow. Users can select plans during signup, and you can redirect them to appropriate billing pages based on their selections and requirements. **Learn more:** [Add billing to URL SDK](/billing/billing-user-experience/add-billing-to-url-sdk/) ## Customer Support & Troubleshooting How do I help customers who can't access their billing information? Kinde provides self-service portals where customers can view their subscription details, update payment methods, and manage their plans. For B2B customers, you can also access billing information on their behalf through the Kinde dashboard to provide support. **Learn more:** [Self-serve portal setup](/billing/get-started/self-serve-portal-setup/) What should I do if a customer reports billing errors? First, check the customer's subscription status in your Kinde dashboard and verify their payment method in Stripe. Common issues include expired cards, insufficient funds, or plan configuration problems. You can also check webhook logs for any payment processing errors. **Learn more:** [Manage customer activity webhooks](/billing/manage-subscribers/manage-customer-activity-webhooks/) How do I handle customer requests for plan changes or refunds? For plan changes, customers can use self-service portals or you can make changes on their behalf through the Kinde dashboard. Refunds are processed through Stripe, and you can configure your refund policies based on your business requirements and customer service standards. **Learn more:** [Upgrade and downgrade methods](/billing/manage-subscribers/upgrade-downgrade-methods/) ## Best Practices & Advanced Features What are the best practices for structuring my billing plans? Start with a clear understanding of your product's value proposition and create plans that align with different customer segments. Use feature flags to control access, implement clear usage limits, and design plans that encourage upgrades. Test your billing flow thoroughly in non-production environments before going live. **Learn more:** [Plan selection](/billing/billing-user-experience/plan-selection/) How can I optimize my pricing strategy with Kinde? Use Kinde's plan builder to create tiered pricing that captures different customer segments. Consider implementing metered billing for usage-based services, and use plan groups to organize related offerings. Monitor customer behavior and adjust pricing based on conversion rates and customer feedback. **Learn more:** [Pricing models](/billing/pricing/pricing-models/) What monitoring and analytics should I set up for billing? Configure webhooks to track payment events, subscription changes, and customer lifecycle events. Monitor failed payments, plan upgrade/downgrade patterns, and customer churn rates. Use Stripe's dashboard alongside Kinde's billing insights to get a complete picture of your revenue and customer behavior. **Learn more:** [Manage customer activity webhooks](/billing/manage-subscribers/manage-customer-activity-webhooks/) ## Integration & Development How do I integrate billing into my existing authentication flow? Kinde provides SDK methods and URL parameters that allow you to seamlessly integrate billing into your signup and authentication processes. You can redirect users to plan selection pages, handle plan selection in your application, and manage the entire customer journey from signup to subscription. **Learn more:** [Add billing to URL SDK](/billing/billing-user-experience/add-billing-to-url-sdk/) Can I use Kinde billing without the full authentication system? Kinde billing is designed to work with the complete Kinde platform, including authentication, user management, and organization handling. While you can customize many aspects of the billing experience, the system is optimized for use with Kinde's full feature set. **Learn more:** [About billing](/billing/about-billing/about-billing/) What webhook events should I listen for in my billing integration? Key webhook events include subscription creation, payment success/failure, plan changes, and subscription cancellations. These events allow you to sync billing data with your application, trigger feature provisioning, and maintain accurate customer records across your systems. **Learn more:** [Manage customer activity webhooks](/billing/manage-subscribers/manage-customer-activity-webhooks/)
# Billing - About billing - Top questions about Kinde billing
> Answers on Kinde billing - pricing models, mixed-interval charges, Stripe Tax, trials, portal links, and webhooks
Last updated: 2026-08-30
annual payments, mixed-interval pricing, Stripe Tax, free trial, self-serve portal, next invoice details, billing webhooks, pricing models
billing, about-billing, faq, stripe
Here are short answers to the most common billing questions. Click any question to expand the answer. ## Core billing functionality in Kinde How do I choose the right Kinde billing pricing model for my SaaS customers? Choose a model based on how users receive value from your product. If usage varies significantly (for example API calls or storage), usage-based pricing is often appropriate. If value is tied to access, fixed subscription pricing is often clearer. Kinde supports combining both within the same plan, such as a base subscription plus metered usage. Start with a simple model and add complexity only when it is needed. [Explore pricing models](/billing/pricing/pricing-models/) | [About billing concepts](/billing/about-billing/billing-concepts-terms/) What is the difference between Kinde metered and unmetered features in plans? Metered features are measured quantities, such as monthly active users, API calls, storage, or support hours. They can be chargeable (priced per unit) or included up to a defined limit. Unmetered features are access controls that are either enabled or disabled for a plan. Most products use a combination of both to define clear upgrade paths. [About plans and features](/billing/manage-plans/about-plans/) | [Billing concepts guide](/billing/about-billing/billing-concepts-terms/) How do Kinde plan groups help me organize billing for different customer types? Plan groups help separate B2B and B2C offerings in a structured way. Each group is tied to either individuals or organizations, not both. For example, you can have one group for individual plans and another for organization-based plans. You can create multiple pricing tables from one group, but each table can only include plans from that same group. [Plan groups management](/billing/manage-plans/about-plans/) | [Billing concepts](/billing/about-billing/billing-concepts-terms/) Why should I use Kinde billing features instead of building a custom payment system? Kinde billing reduces implementation overhead for subscription management, dunning, proration, and billing integration. It includes Stripe integration, plan upgrades, usage tracking, invoice support, and a self-serve portal. This lets your team focus on product development rather than billing infrastructure. [About billing plans](/billing/manage-plans/about-plans/) | [Self-serve portal setup](/build/self-service-portal/self-serve-portal-for-orgs/) How does Kinde handle the technical complexity of subscription billing? Kinde abstracts key subscription-billing operations. After Stripe setup, plan changes, usage tracking, proration behavior, and invoice events are synchronized through the platform. You can also configure webhooks for important billing events so your application remains in sync. [Stripe integration guide](/billing/get-started/connect-to-stripe/) | [About billing plans](/billing/manage-plans/about-plans/) What happens when I publish a plan versus keeping it in draft, in Kinde? Draft plans can be updated freely without affecting subscribers. When a plan is published, it syncs to Stripe and becomes available for subscriptions. After users subscribe, core plan settings should be treated as stable. This helps prevent unexpected pricing changes for existing subscribers. [About plans lifecycle](/billing/manage-plans/about-plans/) | [Billing concepts](/billing/about-billing/billing-concepts-terms/) Can I offer a free plan without requiring credit card details? Yes, when creating or editing a plan, you'll find an **Ask for credit card** toggle in the Plan settings section. For plans with no charges, you can disable this toggle so users can subscribe without entering payment information. This is great for reducing friction on free tiers. However, if your plan includes any fixed charges or metered/usage-based billing, credit card collection is always required regardless of this setting. [Create and configure plans](/billing/manage-plans/create-plans/) | [About plans](/billing/manage-plans/about-plans/) How do I offer a free trial period on a Kinde billing plan? To set up a trial, turn on the trial period toggle in plan settings when creating or editing a plan. Set the trial length in days and configure how many days before the trial ends to prompt for payment details. When a trial is enabled, customers can use the plan without being charged until the trial ends, at which point their subscription automatically converts to a paid subscription via Stripe. Trial plans require the **Ask for credit card** option to be enabled. Plans with an active trial display a "Free trial for N day(s)" badge on the pricing table. [Configure trial periods](/billing/manage-plans/create-plans/#configure-trial-period) | [About plans](/billing/manage-plans/about-plans/) ## Stripe integration How is tax handled for Kinde billing subscriptions? Enable **Collect tax automatically** in **Settings > Environment > Billing** to turn on Stripe Tax for new subscriptions (off by default). Plans can inherit that setting via **Use account setting**, or override it with **Collect** or **Don’t collect**. Stripe Tax calculates tax; Stripe Billing presents it on invoices. Set up tax registrations and related options in the Stripe Dashboard. Until a customer has a billing country, tax may temporarily use your Stripe account’s registered address. If you need guidance for your use case, contact [support@kinde.com](mailto:support@kinde.com). [About billing](/billing/about-billing/about-billing/#how-is-sales-tax-or-vat-handled-in-kinde-billing) | [Create plans](/billing/manage-plans/create-plans/#collect-tax-automatically) | [Manage Stripe connection](/billing/payment-management/manage-stripe-connection/) Why does Kinde create a new Stripe account instead of connecting to my existing one? This behavior is required by Stripe for third-party integrations. Stripe controls how connected accounts are provisioned for security and compliance. During onboarding, you can transfer existing business details, so setup does not need to start from zero. [Stripe connection setup](/billing/get-started/connect-to-stripe/) | [Manage Stripe connection](/billing/payment-management/manage-stripe-connection/) What should I tell customers when my Kinde–Stripe connection shows "In progress" status? "In progress" usually means Stripe requires additional information to complete setup, such as business details, tax information, or identity verification. Live payments are not available until setup is completed. Use the "Update Stripe information" action in Kinde to review and complete required details. When completed, the status changes to "Connected". [Stripe connection troubleshooting](/billing/payment-management/manage-stripe-connection/) | [Connect to Stripe guide](/billing/get-started/connect-to-stripe/) How do I test Kinde billing without charging real money? Switch to a non-production environment in Kinde to use a Stripe test account that does not process real payments. You can validate plans, checkout behavior, and failure scenarios without charging real cards. Move back to production only when testing is complete. [Stripe integration setup](/billing/get-started/connect-to-stripe/) | [About billing plans](/billing/manage-plans/about-plans/) ## Plan management How should I structure Kinde billing plans to make upgrading feel natural for customers? Create a clear progression where each plan builds on the previous tier. Start with a useful entry tier, then increase limits and add features at higher tiers. Metered limits can help users understand upgrade value. Use simple, descriptive plan names that communicate audience or scale clearly. [About pricing models](/billing/pricing/pricing-models/) | [Plan management guide](/billing/manage-plans/about-plans/) How should I handle Kinde plan features that only some users need? Use unmetered features to gate premium capabilities by plan, and use metered features when usage varies by customer. This keeps lower tiers focused while providing a clear upgrade path for advanced needs. [Feature planning strategy](/billing/manage-plans/about-plans/) | [Billing concepts](/billing/about-billing/billing-concepts-terms/) How do I explain Kinde's tiered pricing to customers who are confused about usage charges? Explain tiered pricing with clear formulas and concrete examples. For example, if pricing changes after a usage threshold, show a full sample calculation in the pricing table. Use clear limits in lower tiers to make budgeting and upgrade decisions easier. [Pricing models explained](/billing/pricing/pricing-models/) | [Build a pricing table](/billing/billing-user-experience/plan-selection/) What should I consider when setting Kinde plan upgrade and downgrade policies? Define upgrade and downgrade policies that are predictable for both your team and your users. By default, Kinde can apply standard policy behavior for downgrades and subscription timing. If needed, customize policies to match your business model and communicate them clearly. [Plan policies configuration](/billing/manage-plans/upgrade-downgrade-plans/) | [Billing setup guide](/billing/get-started/connect-to-stripe/) ## User experience Can customers choose annual pricing when they change plans in the self-serve portal? Yes. If at least one plan card on the pricing table offers annual pricing, customers see **Pay annually** on plan selection. Turning it on shows annual prices and any mixed-interval amounts, then continues the plan change with those prices selected. Customers cannot use this toggle to switch from monthly to annual on their **current** plan. They can switch to annual pricing only when they move to a different plan. [Offer annual pricing](/billing/manage-plans/create-plans/#offer-annual-pricing) | [Build a pricing table](/billing/billing-user-experience/plan-selection/#how-customers-choose-annual-pricing) | [Upgrade and downgrade methods](/billing/manage-subscribers/upgrade-downgrade-methods/) Can plans have mixed-interval charges? Yes. Each plan can include multiple fixed charges, each on a daily, weekly, monthly, or yearly interval. Plan pricing can combine those charges — for example a platform fee of $100/year and a usage fee of $3/month, shown as `$100 / year + $3 / month`. That is the plan’s recurring prices, not a representation of every invoice. Each charge renews independently, so a given invoice’s fixed-charge line items depend on which charge is due on that date. **Next invoice** reflects the next charge date for those items, not a monthly-normalized average of the whole plan. [Mixed-interval pricing](/billing/manage-plans/create-plans/#mixed-interval-pricing) | [The Kinde billing model](/billing/about-billing/kinde-billing-model/#billing-and-invoice-cycles) How do I create effective Kinde pricing tables for conversion? Keep pricing tables concise. In most cases, 3-4 tiers are enough. Highlight a recommended plan, emphasize user outcomes, and clearly distinguish feature and usage limits by tier. For complex products, consider a custom pricing-table design with clearer grouping and language. [Build effective pricing tables](/billing/billing-user-experience/plan-selection/) | [Pricing table customization](/billing/billing-user-experience/plan-selection/) Should I show Kinde pricing tables during the signup flow or after users experience my product? It depends on your product complexity and buying motion. For straightforward products, showing pricing during signup can work well. For products with a longer value-discovery cycle, showing pricing after initial product experience may perform better. Kinde supports both patterns through pricing-table display settings. [Pricing table display options](/billing/billing-user-experience/pricing-table-display/) | [Billing integration guide](/billing/billing-user-experience/plan-selection/) How do I handle customers who need custom pricing that doesn't fit Kinde's standard plans? Start by mapping those customers to existing plans with adjusted feature limits where possible. If a fully custom model is required, you can apply targeted metered-usage adjustments through the Kinde API. For enterprise contract scenarios, coordinate with Kinde enterprise support. [API billing management](/billing/manage-plans/about-plans/) | [Enterprise billing options](/manage-your-account/profile-and-plan/change-kinde-plan/) ## Self-serve portal How does Kinde's self-serve portal reduce my customer support workload? The self-serve portal lets customers update payment details, view billing history, manage plans, and handle organization billing actions without opening support tickets. You control which actions are self-managed through permissions. Portal links are secure and one-time use, so they can be embedded in your application safely. [Self-serve portal setup](/build/self-service-portal/self-serve-portal-for-orgs/) | [Portal configuration options](/build/self-service-portal/self-serve-portal-for-orgs/) What permissions should I give organization members via Kinde's self-serve portal feature? Start with restricted permissions and expand access as needed. In most cases, billing administrators should manage payment methods and billing history, while broader teams should have limited billing controls. Kinde maps portal capabilities to system permissions such as `org:write:billing` for granular access control. [Portal permissions setup](/build/self-service-portal/self-serve-portal-for-orgs/). How do I generate Kinde self-serve portal links for use in my app? There are two common options. If you use Kinde authentication, generate portal links through the SDK. For server-side flows, use the Kinde Management API with an M2M token. You can specify the portal section and post-portal redirect target. Because links are one-time use, generate a fresh link per request. [Portal link generation](/build/self-service-portal/self-serve-portal-for-orgs/) | [Management API integration](/build/self-service-portal/self-serve-portal-for-orgs/) ## Integration and development How do I sync Kinde billing data with my application's feature access controls? Use the Account API to read feature entitlements and usage limits for signed-in users. For organization-level billing data, use the Management API. Configure billing webhooks for plan and usage updates so feature access stays synchronized. Keep cache durations short for entitlement-sensitive decisions. [Account API for billing](/developer-tools/account-api/about-account-api/) | [Billing webhooks](/integrate/webhooks/about-webhooks/) How should I handle Kinde billing webhook events in my application? Set up dedicated endpoints for billing webhooks and verify JWT signatures on incoming requests. Handle key events such as subscription changes, payment failures, and usage updates. Return HTTP 200 for successfully processed events so retries stop. Use webhook request IDs as idempotency keys to prevent duplicate processing. [Webhook implementation](/integrate/webhooks/about-webhooks/) | [Webhook setup guide](/integrate/webhooks/add-manage-webhooks/) How do I implement Kinde billing URLs and parameters for seamless user experiences? Use URL parameters to direct users to specific plans or pricing tables, such as `?plan=pro_monthly`. This is useful for campaigns, in-app upgrade prompts, and targeted landing pages. You can also override table display behavior through parameters, while still using SDK helpers where appropriate. [Billing URL integration](/billing/billing-user-experience/plan-selection/) | [Pricing table configuration](/billing/billing-user-experience/pricing-table-display/) ## Troubleshooting and support Why are plan prices not syncing from Kinde to Stripe? If "price not synced" appears, confirm the plan is published because only published plans sync to Stripe. Mixed sync states can occur when some features are already published and others are newly added. Re-publish the plan to trigger synchronization, then verify Stripe connection status is "Connected". [Plan publishing process](/billing/manage-plans/about-plans/) | [Stripe connection status](/billing/payment-management/manage-stripe-connection/) What should I do when customers report billing discrepancies? Start by reviewing billing history in the organization portal to verify charge timing and amounts. Check for plan changes, proration events, metered overages, and payment retries. Many discrepancy reports are timing-related invoice expectations rather than calculation errors — for example, on mixed annual + monthly plans, **Next invoice** often shows only the sooner charge, not a monthly-normalized average of the whole plan. If an error remains, escalate with detailed billing context. [Billing and invoice cycles](/billing/about-billing/kinde-billing-model/#billing-and-invoice-cycles) | [Billing history access](/manage-your-account/profile-and-plan/view-kinde-plan/) | [Support resources](/build/self-service-portal/self-serve-portal-for-orgs/) What are current Kinde billing limitations? Current limitations include custom billing period support (fortnightly, etc.) and limited plan-versioning options. Share product feedback through support channels to help prioritize roadmap improvements. [Current billing limitations](/billing/manage-plans/about-plans/) | [Alternative approaches](/billing/pricing/pricing-models/) ## Best practices What is the recommended way to launch Kinde billing for an existing SaaS product? Set up plans and pricing tables in a non-production environment first. Define a migration strategy for existing users, including any grandfathering policy. Communicate pricing changes in advance. A phased rollout (new signups first, then existing users in cohorts) reduces operational risk. [Billing setup strategy](/billing/get-started/connect-to-stripe/) | [Plan management](/billing/manage-plans/about-plans/) How should I price Kinde metered features to encourage growth while staying profitable? Start with a tier structure that demonstrates value early, then use usage thresholds to create clear upgrade points. Price metered features to support adoption while preserving margin. Track unit economics by feature so pricing reflects delivery cost and customer value. [Metered pricing strategies](/billing/pricing/pricing-models/) | [Feature management](/billing/manage-plans/about-plans/) How can I use Kinde billing data to reduce customer churn? Set up webhooks for payment failures and usage changes, then trigger proactive outreach before disruption occurs. If users approach limits, provide contextual upgrade prompts. Use billing patterns to identify at-risk accounts and high-value accounts, and tailor retention workflows accordingly. [Billing webhooks setup](/integrate/webhooks/about-webhooks/) | [Usage tracking](/billing/manage-plans/about-plans/) How do I structure Kinde plans to minimize customer confusion while maximizing revenue? Keep tier differences clear and limited in number. In many cases, three to four plans are sufficient. Present a clear recommended plan and make value progression explicit between tiers. Validate table clarity with usability testing before launch. [Pricing table best practices](/billing/billing-user-experience/plan-selection/) | [Plan strategy guide](/billing/pricing/pricing-models/)
# Billing - About billing - The Kinde billing model
> See how Kinde billing works with Stripe - B2B and B2C, mixed-interval charges, and Next invoice timing
Last updated: 2026-08-30
billing cycles, next invoice, mixed-interval pricing, Stripe integration, B2B, B2C, B2B2C, multi-currency
billing, about-billing, stripe
In the Kinde model, we handle everything except the payment processing part of billing. Kinde integrates with a third-party payment processor (Stripe) for secure payment processing. This involves a continuous sync between Kinde and Stripe, to ensure that products, prices, subscription information, invoices and payments, are accurate in both systems. Kinde does not store payment details, such as credit card information. This is exclusively managed by Stripe. ## Billing for B2B, B2C and B2B2C Kinde supports billing models for B2B, B2C and even B2B2C. Depending which you are setting up, you may need to do a few different tasks. Most of the setup is common, but we will call out tasks that are only relevant to one or the other. - B2B - customers are companies, organizations, or groups. - B2C - customers are individual users. - B2B2C - the platform model, where you have a customer who is an organization, and then users who are customers of that organization. ## Kinde and Stripe Kinde integrates a single payment processor (only Stripe Billing for now) to handle the financial and payment management side of things. Stripe uses the plan data and the customer info to create an agreement in Stripe. The customer is invoiced based on this agreement. Stripe securely stores your customer’s payment details and Kinde never sees credit card or other bank information. Here’s what the billing feature looks like as a workflow. 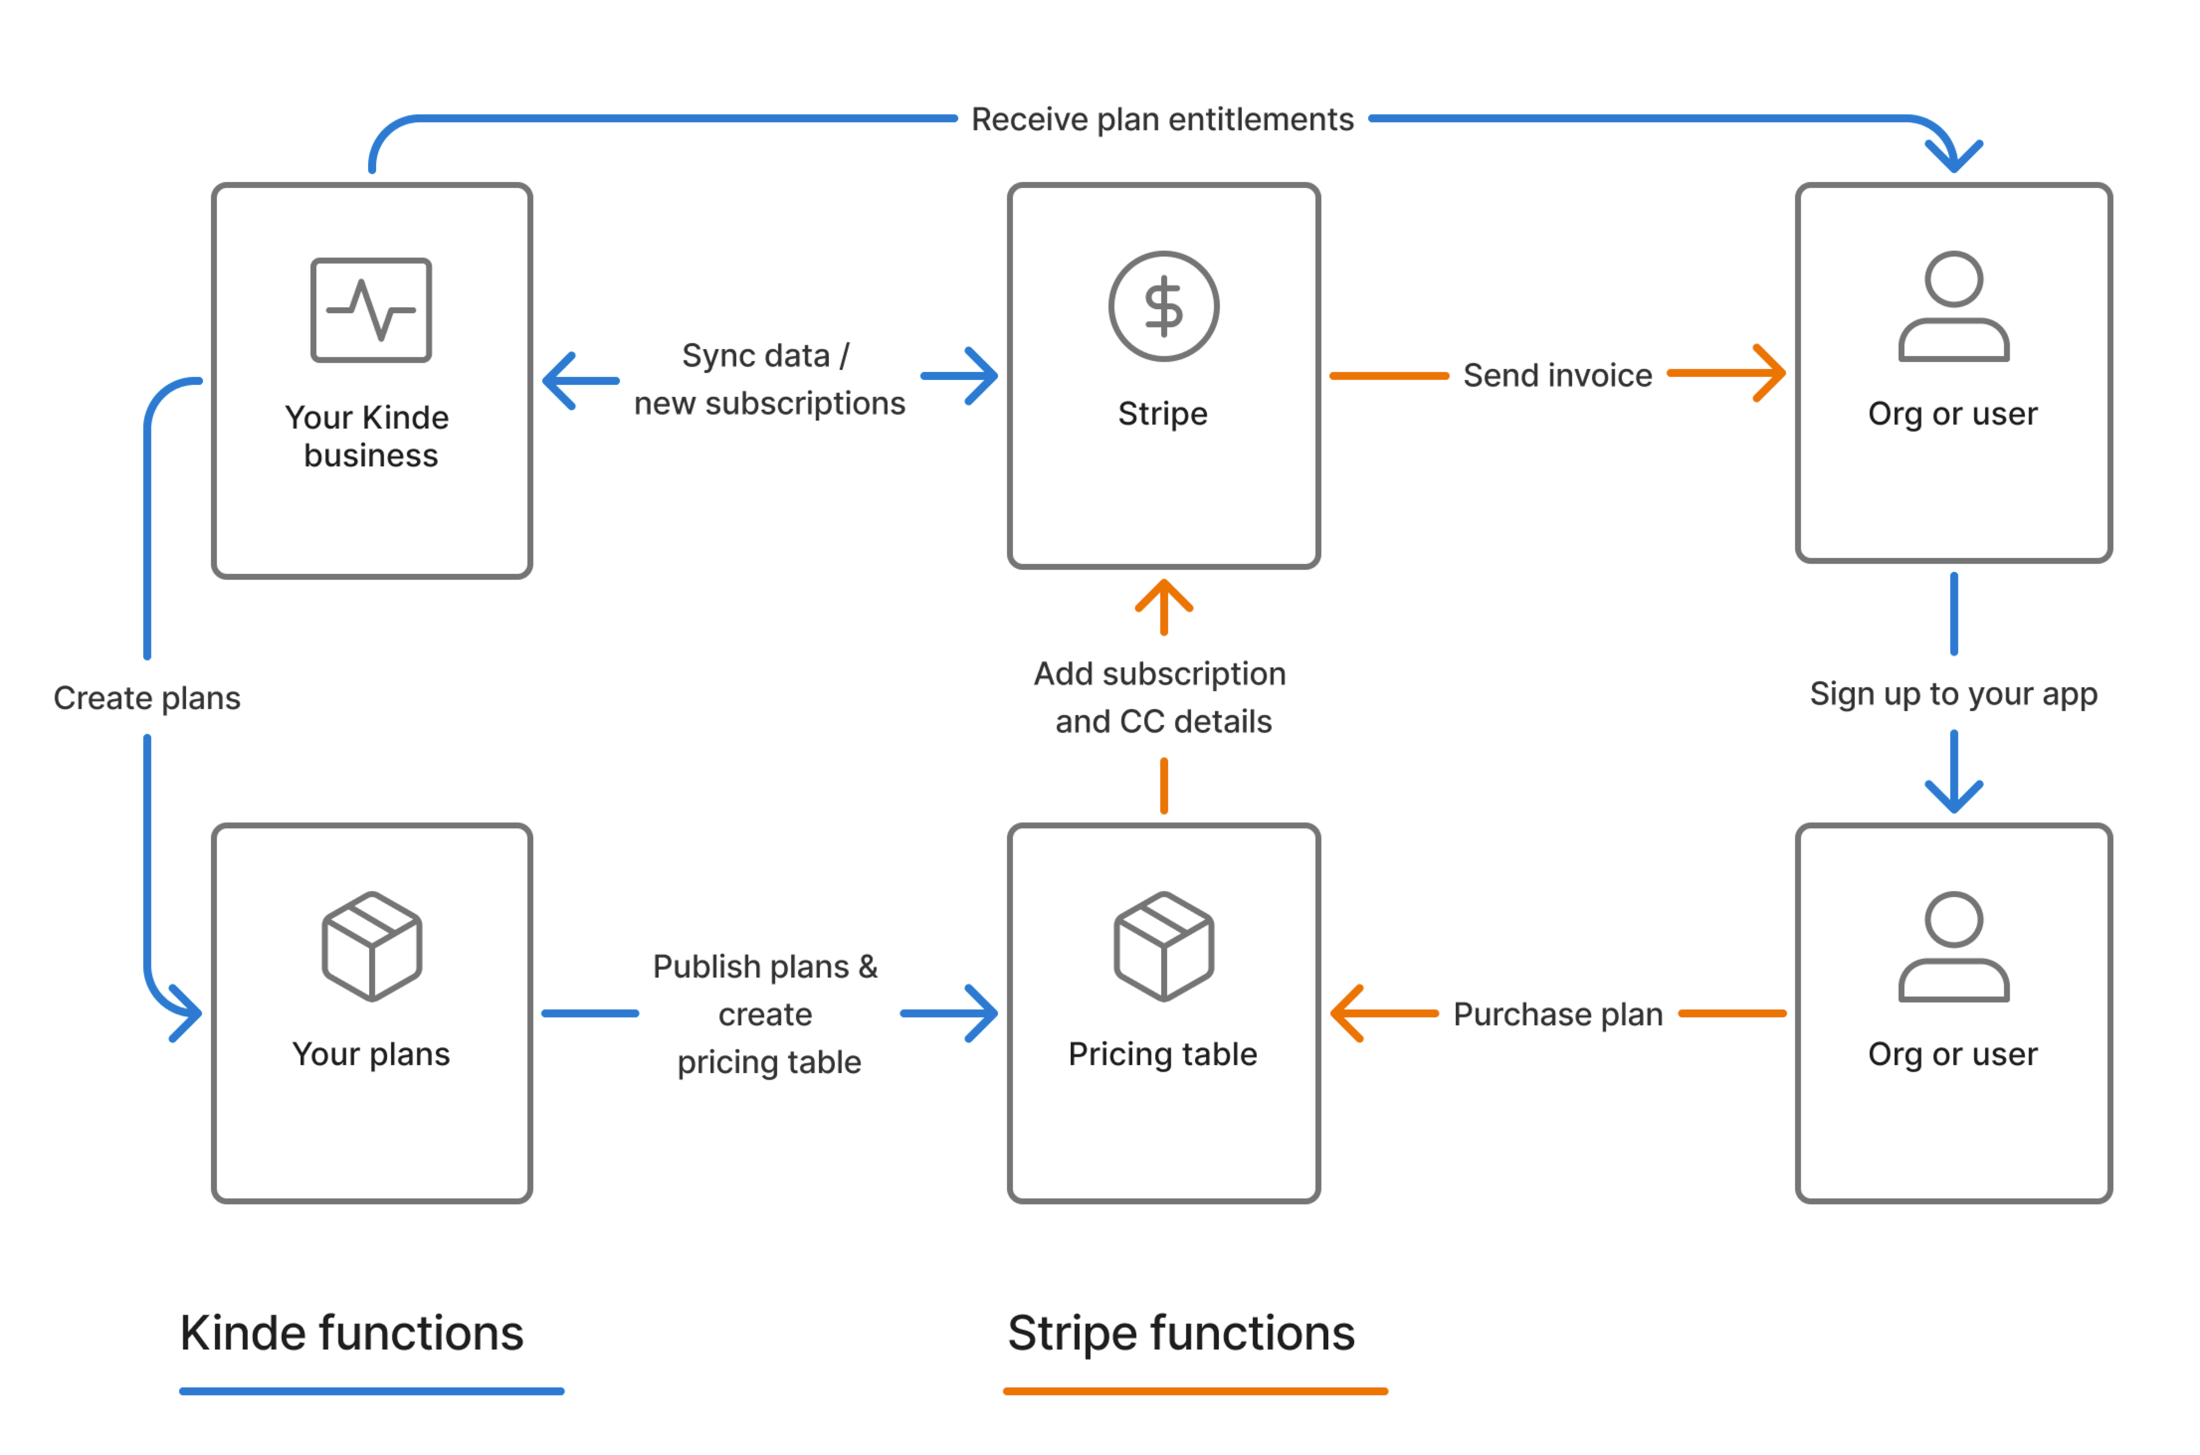 Stripe is currently the only payment provider supported with Kinde. But we plan to expand to other providers in the near future. ## Multi-currency support Kinde has customers everywhere and almost every global currency is supported. ## Transaction data and Stripe region - When you connect your Stripe account to Kinde, you connect to our Stripe US account. We do this because Stripe US more widely supports global functionality. - Regardless of your own Stripe account region, you can still select any currency for your plans in Kinde, and Stripe will do the hard part of exchange rate conversion, tax calculations, etc. - Any fees you incur in Stripe for international transactions are your sole responsibility. ## Billing and invoice cycles By default, Kinde uses the following billing behavior. You set each fixed charge’s billing interval when you add the charge to a plan. - Fixed charges (for example, subscription fees) are billed in advance. Customers pay at the start of each billing period, at the interval you choose. You can also offer annual pricing on one fixed charge per plan, at a custom yearly price. - Each fixed charge has a billing cycle of daily, weekly, monthly, or yearly, based on the customer’s original sign-up date. - A single plan can have multiple fixed charges with different intervals. For example, a monthly fee of $10 and a weekly fee of $3 (`$10 / month + $3 / week`). Each charge renews on its own schedule. - Metered (usage-based) charges are billed in arrears. Usage is tracked throughout the billing period and appears on the next invoice. ### Next invoice in the portal and admin On plan details in the self-serve portal (and on the admin organization or user billing subscription card), **Next invoice** shows: - A bare amount and due date - Licensed fixed charges that renew on that next charge date - Plus metered usage cost recorded so far in the current billing cycle If the agreement includes metered features, Kinde shows the caption **May change with usage before the invoice is issued**. For mixed annual + monthly plans, the next invoice is often only the sooner charge (for example the monthly item a month later) — not a monthly-normalized average of the whole plan. Fixed charges on the subscription are listed with their own intervals (for example `$100 AUD / year` and `$3 AUD / month`). Recurring feature rates show the interval after the unit label (for example `$5 AUD per unit / month`); usage totals so far do not include an interval. You can also [set policies](/billing/get-started/setup-overview/) to control what happens when a customer cancels or changes their plan.
# Billing - Billing user experience - Update code and URLs for billing
> Guide to integrating billing into your application using URL parameters, React SDK components, and authentication flows.
Last updated: 2025-01-16
billing integration, URL parameters, React SDK, plan selection, pricing table, org signup, B2B
billing
This topic explains how to customize billing flows with Kinde, including URL parameters, direct auth URLs, and SDK usage in React. Examples are given in React, but can be adapted for most frameworks. ## Edit the auth URL parameters directly Here’s a standard Kinde auth URL: ``` https://.kinde.com/oauth2/auth ?response_type=code &client_id= &redirect_uri= &scope=openid%20profile%20email &state=abc ``` Add these parameters as needed: | Parameter | Description | | --- | --- | | `plan_interest` | Pre-selects a plan (skips plan selection) | | `pricing_table_key` | Displays a specific pricing table | | `is_create_org` | Triggers org sign-up flow | ### Examples - Pre-select a plan: ``` ...&plan_interest=pro_monthly ``` - Show specific pricing: ``` ...&pricing_table_key=spring_promo ``` - Org sign-up: ``` ...&is_create_org=true ``` ## Integrate billing using the React SDK You can avoid manual URL construction by using our SDK components. Here's how. **User sign-up (default):** ```jsx Sign up ``` **Org sign-up (B2B):** ```jsx Sign up your organization ``` **Pre-select a user plan:** ```jsx Sign up with Pro plan ``` **Show a specific pricing table:** ```jsx Spring Promo Sign up ``` **Combine for B2B + pricing table:** ```jsx Sign up your company ```
# Billing - Billing user experience - Customize the plan sign-up experience
> Guide to customizing the plan sign-up experience including three different approaches and billing screen customization options.
Last updated: 2026-04-07
plan sign-up, billing customization, plan selection, payment flow, billing screens, HTML CSS customization, trial, free trial
billing
There are three ways you can allow customers to sign up to a plan. ## Option 1: Use your own plan selection screen Display a plan selection screen in your own app or website. Once the user selects a plan, redirect them to Kinde to complete the payment flow. To pre-select a plan, pass the `plan_interest` query parameter in the Kinde authentication URL. ## Option 2: Use Kinde’s built-in plan selection Let Kinde handle plan selection as part of the authentication flow. To enable this: - [Create a pricing table](/billing/billing-user-experience/plan-selection/) in Kinde - [Add and publish plans](/billing/manage-plans/create-plans/) - Set the table to **Live** Once this is done, use the relevant pricing table key in the authentcation URL and Kinde will display the plan selection screen during signup. ## Option 3: Assign a plan via the Kinde Management API Use the [Kinde Management API](https://docs.kinde.com/kinde-apis/management/#tag/billing-agreements/get/api/v1/billing/agreements) to assign a customer to a specific plan. The next time the customer signs in, Kinde will automatically prompt them for payment details. This is ideal for: - Migrating customers from another system - Assigning a plan without user input ## Customize billing screens in the authentication flow Depending on how you choose to onboard customers, users will see up to three different billing screens during the authentication flow. These screens can be customized: 1. **Plan selection** - Displayed when a user signs up for the first time and multiple plans are available. Plans with a trial enabled show a "Free trial for N day(s)" badge. 2. **Payment details** - Shown after a user selects a plan—or if a plan was pre-selected before redirecting to Kinde. This screen only appears if the plan requires credit card details. Plans with no charges can optionally skip this screen if "Ask for credit card" is disabled in the [plan settings](/billing/manage-plans/create-plans/#configure-plan-settings). For trial plans, this screen may appear later — when prompted for payment details before the trial ends — and includes a message explaining the trial window. This skip behavior does not apply to trial-enabled paid plans. 3. **Success** - Shown when sign up and payment are successfully completed (or when a free plan subscription is confirmed). By default, all screens will inherit branding and styling from the global Kinde [Design](/design/brand/global-brand-defaults/) settings. If you want more control, you can [fully customize these screens using your own **HTML, CSS, and JavaScript**](/design/customize-with-code/customize-with-css-html/).
# Billing - Billing user experience - Offer a free trial
> How to offer free trials on paid plans with Kinde Billing, what customers see in the auth and pricing flow, and how trials convert to paid subscriptions via Stripe.
Last updated: 2026-04-07
free trial, trial period, SaaS billing, Stripe trial, pricing table, subscription conversion
billing
You can offer a free trial to your customers with Kinde Billing. Free trials let customers use a **paid** plan for a limited time before they are charged. They are a common way to reduce signup friction while still moving toward a paid subscription. With Kinde Billing, trials are implemented using **Stripe** subscription trials: the customer gets plan entitlements during the trial window, and the subscription can convert to paid automatically when the trial ends. This page describes the **end-to-end experience** and points to detailed plan settings in [Create plans](/billing/manage-plans/create-plans/). ## Configure free trials Go to **Billing > Plans** and edit the plan you want to configure: 1. Turn on **Trial period**. 2. Set **Trial length in days** (default 30, minimum 1). 3. Set **Days before trial end to prompt for credit card** (default 3; must be less than the trial length). For step-by-step instructions, see [Create plans — Configure trial period](/billing/manage-plans/create-plans/#configure-trial-period). ## What do customers get during a trial? When someone subscribes to a plan that has a trial enabled: - They receive **full access** to the plan’s features for the **trial length** you configure (in days). - **No charge** is made while the trial is active. - Near the end of the trial, they are **prompted for payment details** (if your plan is set up to collect a card before conversion). The timing of that prompt is configurable. - When the trial ends, Stripe **converts the subscription to paid** according to your plan’s pricing, provided payment details are in place. To see how this maps to billing screens (plan selection, payment details, and trial messaging), see [Customize the plan sign-up experience](/billing/billing-user-experience/customize-billing-pages/). ## What do I need before offering a trial? - **Stripe** must be connected and working for Kinde Billing, because trials are created as Stripe subscriptions with a trial period. - **Ask for credit card** must be **on** for the plan. Trials cannot be enabled on plans where credit card collection is turned off. You can still use a **No credit card required** message in your own marketing; see below. ## Can I advertise "No credit card required" for a trial? Yes. You can show a **No credit card required** message on your landing page or elsewhere in your product. In Kinde, **Ask for credit card** must still be **on** so that trials are allowed, but customers are **not** asked for payment details at signup. They are prompted later, based on **Days before trial end to prompt for credit card** (by default, **3** days before the trial ends). ## What will customers see on the pricing table? Plans with a trial show a **"Free trial for N day(s)"** badge on the plan card. You do not configure the badge separately; it appears when the plan’s trial period is enabled. For when pricing tables appear (B2C vs B2B), see [Pricing table display defaults](/billing/billing-user-experience/pricing-table-display/). ## Can I use trial information in my application? Yes. Billing-related access tokens can include trial fields (for example, whether the subscriber is in a trial and when it ends). See [What trial-related claims appear in access tokens?](/billing/about-billing/billing-concepts-terms/#what-trial-related-claims-appear-in-access-tokens) in [Billing concepts and terms](/billing/about-billing/billing-concepts-terms/).
# Billing - Billing user experience - Build a pricing table
> Build Kinde pricing tables with Pay annually, plan highlights, translations, and live signup or self-serve display
Last updated: 2026-08-22
pricing table, Pay annually, annual pricing, plan selection, multi-language, plan highlighting, live pricing
billing, billing-user-experience, pricing-table
You can build pricing tables to enable your customers to select plans and go through a payment flow as part of signing up to your app or site. Kinde's pricing table builder can generate a pricing table from published plans, or you can start with a blank one. You can also add and edit information and content in your preferred languages. You can create as many pricing tables as you want. 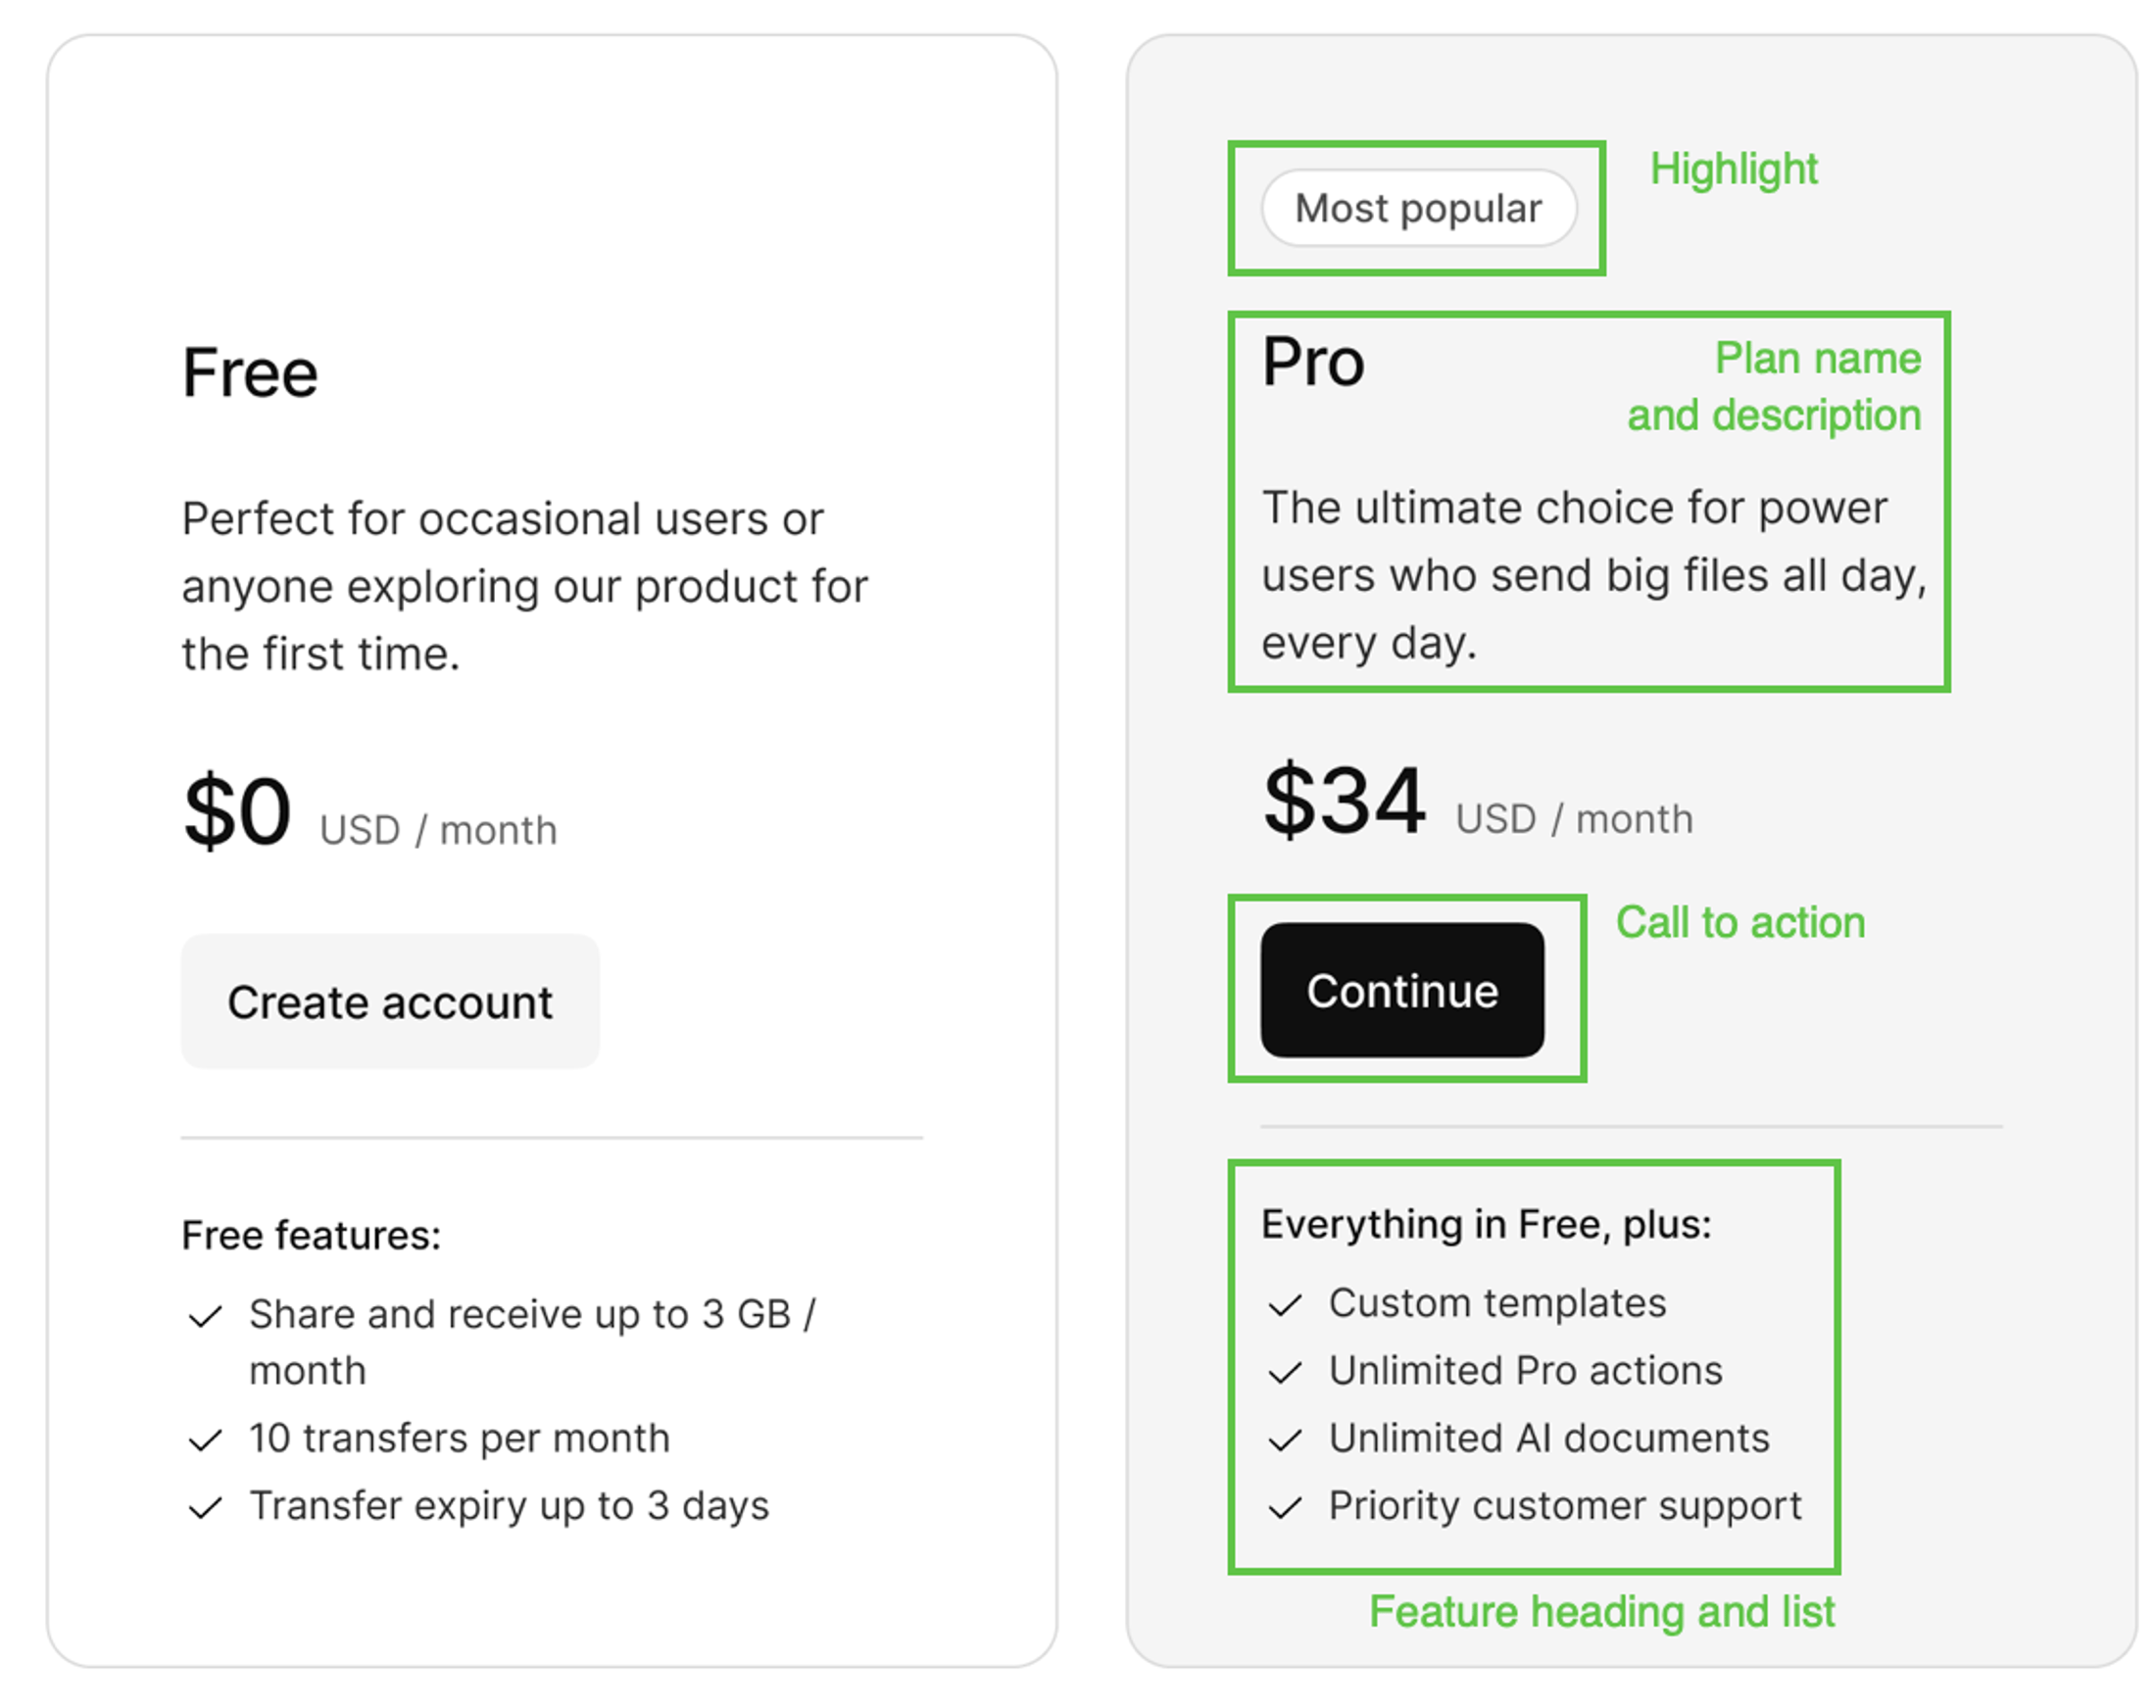 ## Create a pricing table A pricing table can only have 4 plans. 1. Go to **Billing > Pricing tables**. 2. Select **Add pricing table**. 3. Choose an option: 1. **Generate** a pricing table from a [plan group](/billing/manage-plans/add-manage-plan-groups/) - this pre-populates the pricing table with basic details and the plans based on the plan group you select. Up to 4 plans can be included on a pricing table. If your plan group contains more, you may want to create a new pricing table. 2. **Create new** pricing table. Manually build the pricing table and add plans from a plan group. This gives you a blank slate to start in. 4. Select **Next**. 1. **Generated** - select the group and then **Save**. 2. **New** - complete the details in the window and **Save**. ## Edit the pricing table You can edit a pricing table, but they are not versioned. Whatever content you override, it cannot be reverted or recovered. You cannot edit a plan price. This is inherited from the plan itself. ## How customers choose annual pricing If any plan on the pricing table offers annual pricing (via **Offer as annual** on a fixed charge), customers see a **Pay annually** toggle on the plan selection screen. See [Offer annual pricing](/billing/manage-plans/create-plans/#offer-annual-pricing) for how to set this up on a plan. This applies to: - Sign-up when the pricing table is shown in the registration flow - Self-serve portal plan changes (upgrade / downgrade) ### Default and visibility - **Pay annually** starts **off**. Customers see monthly (or standard-interval) prices and CTAs until they turn it on. - The toggle appears only when at least one **displayed** plan card offers annual pricing. - A pricing table shows up to **4** plans. If only a plan that is not on the table offers annual pricing, **Pay annually** does not appear. ### What customers see when Pay annually is on - Plan cards switch to annual amounts (and mixed amounts when the plan has both yearly and monthly fixed charges)—for example `$100 AUD / year + $3 AUD / month`. - Choosing a plan continues with annual prices selected for that subscription. ### Amount due at payment (sign-up) On collect payment details: - **Mixed annual offer:** the headline is the amount due now (for example `$103 AUD`) with a recurring breakdown underneath (for example `$100 AUD / year + $3 AUD / month`). The total is not labeled `/ year`. - **Pure annual:** the total still shows with `/ year`. - **Monthly:** unchanged (`/ month`). ## Change what plans show on a pricing table You can add and remove plans from the pricing table when it is being worked on. 1. Open the pricing table. 2. Scroll to the **Plans** section. 3. To remove a plan: 1. Select the three dots on the plan card and select **Remove from pricing table**. 2. Confirm you want to remove the plan. This removes all custom content you have added, in all languages you have added content in, on the pricing table. The plan is removed. 3. Select **Save**. 4. To add a plan, select **Add plan**. 1. In the window that opens, select an available plan. Only plans from the same plan group are shown. 2. Complete the details in the window for this plan. At minimum, you must enter a **Display name** and the **CTA button** content. This will be displayed in the pricing table. 3. Select **Save**. The plan is added to the pricing table. ## Change the order of plans on a pricing table 1. Open the pricing table. 2. Scroll to the **Plans** section. 3. Select the three dots menu on the plan you want to move. 4. Select **Move up** or **Move down**, depending on the plan position. 5. Select **Save**. This is the order plans will be displayed left to right on the pricing table. ## Add a features list to a plan on the pricing table To promote the top features in a plan, add them manually to the pricing table. These features don't need to correspond exactly to your plan configuration, this is an opportunity to sell the most appealing product features and make plan choices easy for customers. 1. Open the pricing table. 2. Scroll to the **Plans** section. 3. Select the three dots menu on the plan and select **Edit content**. 4. In the top of the window, select the language you want to add features in. 5. Add a **Features list heading**. This sits directly above the list. 6. Add a list of features in the large text **Features list** field. Features will appear in the order they are listed. 7. Select **Save**. ## Highlight a plan on a pricing table It’s common to want to call out or highlight something about a plan on the pricing table, for example, to highlight which plan is most popular. 1. Open the pricing table. 2. Scroll to the **Plans** section. 3. Select the three dots menu on the plan and select **Edit content.** 4. In the top of the window, select the language you want to add highlight content. 5. Add a **Highlight label** and select **Save**. ## Edit and translate pricing table content If you want to display pricing tables in multiple languages, you can change add content translations to the plans on the pricing table. 1. Open the pricing table. 2. Scroll to the **Plans** section. 3. Select the three dots menu on the plan and select **Edit content.** 4. In the top of the window, select the language you want to add or edit content for. 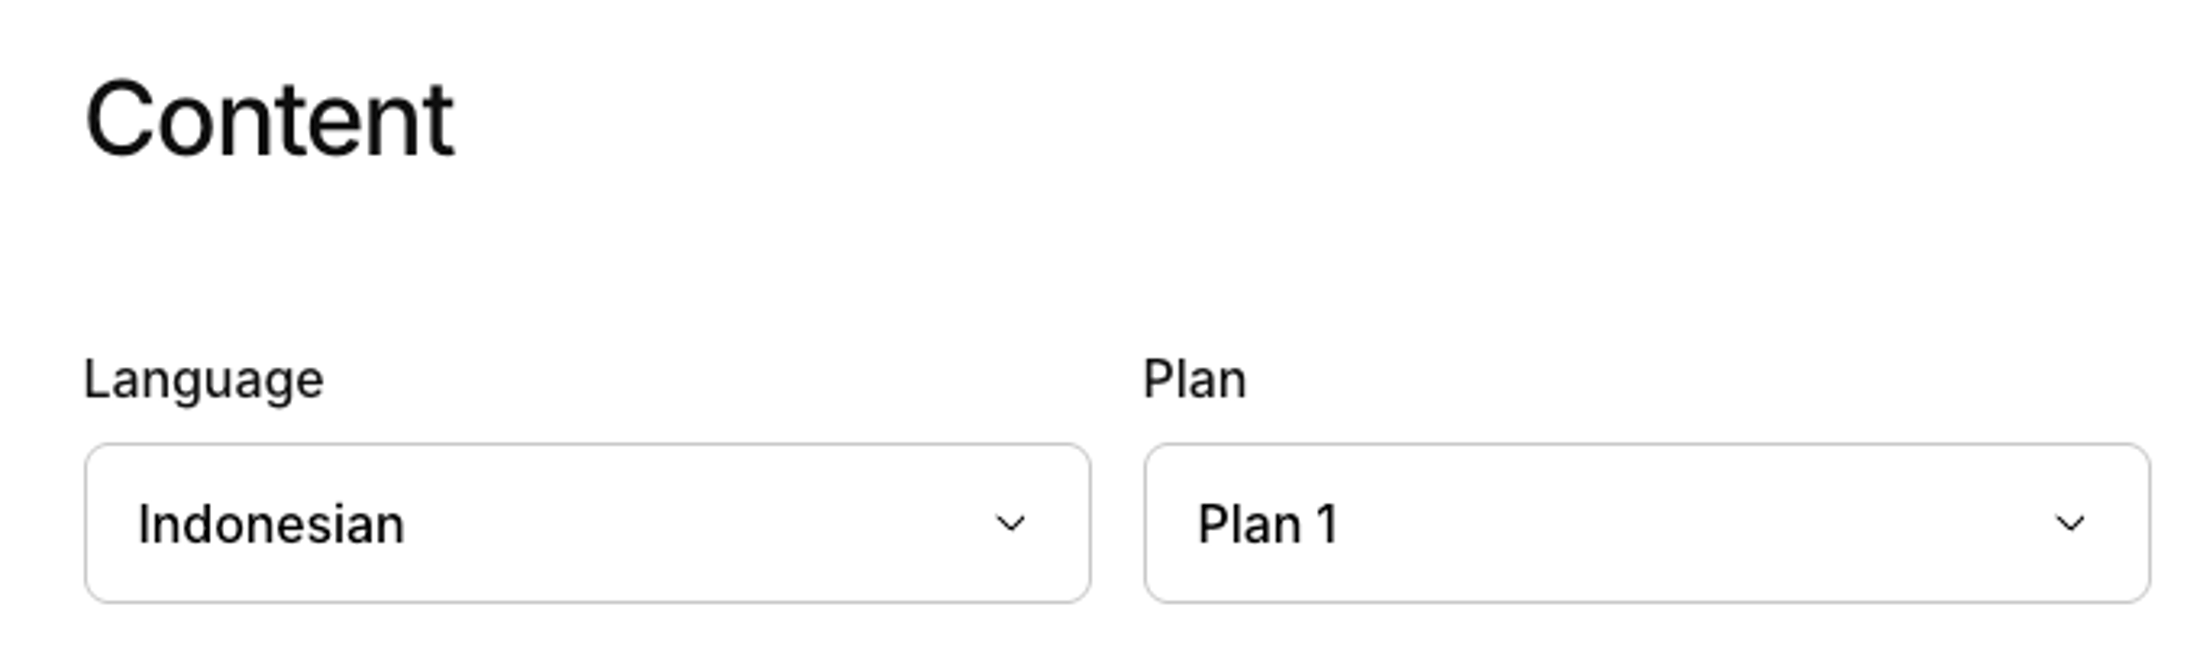 5. Enter or edit all the content you want in the chosen language. 6. Select **Save**. ## Make the pricing table live to customers We recommend only doing this after your plans are finalized and published. 1. Open the pricing table. 2. Select **Make live**. 3. Select **Save**. If a user passes the pricing table code in a URL, they will be able to sign up using it. Here's how to [add the pricing table params to URLs](/billing/billing-user-experience/add-billing-to-url-sdk/). ## Set pricing table to show as default in register flow You can set a pricing table to show by default, even if the code key is not passed in the URL during the normal sign up flow. 1. Open the pricing table. 2. Select **Show by default**. 3. Select **Save**. If a user goes through the registration flow without a pricing table code key in the URL, this is the pricing table they will see. ## Switch the pricing table off for the register flow You can configure Kinde to hide pricing tables in the sign up flow, but still show them in the self-serve portal. You'd do this if you have designed your own pricing pages and you only want to show Kinde's pricing table for the self-serve upgrade or downgrade experience. 1. Go to **Settings > Environment > Billing**. 2. Switch off the **Show the pricing table when customers sign up** option. 3. Select **Save**. ## Add plan selector to registration URL Use your SDK or manually change URL params to incorporate billing. See [Add billing to URl or SDK](/billing/billing-user-experience/add-billing-to-url-sdk/)
# Billing - Billing user experience - Pricing table display defaults
> Guide to understanding pricing table display defaults for B2C, B2B, and B2B2C models including when pricing tables are shown.
Last updated: 2026-04-07
pricing table display, B2C, B2B, B2B2C, plan groups, default display, URL parameters, trial, free trial
billing
The pricing table that is displayed in a particular flow depends on the [default plan groups and pricing table order](/billing/manage-plans/add-manage-plan-groups/). ## B2C (User-based) A pricing table is shown when: - A new user registers - An existing user, marked as a billing customer, signs in but isn’t on a plan yet ## B2B (Org-based) A pricing table is shown when: - A new organization registers (`is_create_org` parameter) - An org member with `org:write:billing` permission signs in and the org is a billing customer but not on a plan yet ## B2B2C (Platforms - uses both) - Organization plan selection = B2B logic - User plan selection = B2C logic ## Here's a video showing the user experience for billing ## Trial period badges Plans that have a trial period enabled display a **"Free trial for N day(s)"** badge on the plan card in the pricing table. This badge is shown automatically — no additional configuration is needed. It helps customers identify which plans offer a risk-free trial before committing to a paid subscription. ## Override the default plan display You can override which plan or pricing table is shown using URL parameters. See: [Update code and URLs for billing](/billing/billing-user-experience/add-billing-to-url-sdk/). ## Summary of display for plan groups | Model | Plan group | Pricing table is shown when | | --- | --- | --- | | B2C | User plan group | New user registers / logs in | | B2B | Org plan group | New org registers / billing admin | | B2B2C | Both | Depends on flow context |
# Billing - Get started - Step 1 Add billing role (B2B)
> Guide to creating a billing role for B2B organizations including permissions setup and role assignment for billing management.
Last updated: 2025-01-16
billing role, B2B, organization billing, billing admin, permissions, org:write:billing
billing
Skip this step if you sell your services to individuals (B2C). If you are a B2B business, your customers in Kinde are referred to as organizations. These can be created: * via API * manually in the Kinde admin area * via the auth flow if you have enabled the relevant settings and pass `is_create_org` as a query parameter in the authentication URL. In order to manage billing for the organization, create a default billing role (with relevant permissions) to assign to a user in the organization. 1. Go to **Settings > Roles** and select **Add role**. The **Add role** window opens.  2. Name the role, for example, `Billing Admin` , and enter a description and **Key**. 3. If you allow organizations to self-sign up, select the **Assign to the creator** option. 4. In the **System permissions** section, ensure the **org:write:billing** system permission is selected. 5. Select **Save**. ## Assigning the role If you have configured Kinde to allow organizations to self-sign up, and selected to apply this role to the "Creator", then this role will now be automatically assigned to users who create an organization as part of the authentication flow. Alternatively, you can assign the billing admin role to organization members via API or in the Kinde dashboard. You can add the permissions to any of your custom roles and mix and match the system permissions to work for your needs. **Next:** [Step 2 Connect to Stripe and set policies](/billing/get-started/connect-to-stripe/)
# Billing - Get started - Step 6 Create pricing table (optional)
> Guide to creating pricing tables in Kinde for plan selection during registration and self-serve portal plan changes.
Last updated: 2025-01-16
pricing table, plan selection, registration flow, self-serve portal, plan upgrade, plan downgrade
billing
Kinde lets you create pricing tables based on your plans. The tables can be integrated into the auth flow so that plan selection becomes part of registration. It might look something like this.  Pricing tables are also used in the plan upgrade and downgrade flows available in the self-serve portal. So when a customer changes their plan, the pricing table appears for them to select the new plan option. To create your own, go to [Build a pricing table](/billing/billing-user-experience/plan-selection/). If you have your own screen flows for plan display and selection, you do not have to use Kinde’s pricing tables. **Next:** [Step 7 Set up the self-serve portal (optional)](/billing/get-started/self-serve-portal-setup/)
# Billing - Get started - Step 4 Build plans
> Guide to developing a plan strategy and building plans in Kinde including B2B/B2C considerations, feature planning, and pricing models.
Last updated: 2026-04-07
plan strategy, B2B, B2C, B2B2C, plan features, pricing models, plan limits, feature planning, trial, free trial
billing
Whether you currently charge for services or are just starting out, building plans is the more complex part of the billing setup process. We recommend you define a strategy before adding plans in Kinde. - [Learn more about how plans work in Kinde](/billing/manage-plans/about-plans/) - [Skip to creating plans](/billing/manage-plans/create-plans) ## Develop a plan strategy If you have not created plans before, here’s a list of tasks to help you prepare. These will give you a strategy for creating the plans you need in Kinde. 1. Are you creating B2B or B2C or B2B2C plans? B2B plan types are for business customers (organizations), B2C plan types are for individual users, B2B2C is a platform model, where you have a customer who is an organization, and then users who are customers of that organization. 2. Decide how many plans you want and the name of each plan. E.g. `Free, Pro, Plus` or `Solo, Team, Enterprise`. 3. Decide if any paid plans should offer a [free trial period](/billing/manage-plans/create-plans/#configure-trial-period). If so, decide the trial length and how many days before the trial ends to prompt for payment details. 4. Make a list of each [plan’s features](/billing/manage-plans/create-plans). For each feature, decide on: - the [pricing model](/billing/pricing/pricing-models/) that applies - limits and inclusions for a feature Anything you ‘gate’ access to, or put limits on in your product, should be on this list. Tip: Create a spreadsheet to keep track of everything.  5. Identify which features are common across plans. You don’t need to add a new feature every time, you can [re-use features](/billing/manage-plans/about-plans/) across plans and change the details. **See [Create plans](/billing/manage-plans/create-plans)** for step-by-step instructions. **Next:** [Step 5 Publish plans](/billing/get-started/publish-plans/)
# Billing - Get started - Step 2 Connect to Stripe and set policies
> Connect Kinde to Stripe, finish onboarding, enable automatic tax, and set cancellation and plan-change billing policies
Last updated: 2026-08-10
connect Stripe, Stripe onboarding, Collect tax automatically, Stripe Tax, billing policies, cancellation policy, connection status, test Stripe account
billing, stripe, get-started
Kinde’s billing feature comes with a dependency on [Stripe](https://stripe.com), which is a globally known and reliable payments processing platform. A new Stripe account is automatically created for you when you set up billing in Kinde. ## Watch a quick video about how to connect to Stripe ## Connect to Stripe 1. If you are testing billing, switch to your non-production environment. This will automatically trigger the use of a test Stripe account as well. 2. Go to **Settings > Environment > Billing**. 3. Select **Connect Stripe account**. Kinde initiates the connection and adds the connection card.  4. Select **Update Stripe information**. This kicks off a Stripe onboarding flow. You will see a Stripe-generated screen to enter details.  5. Enter the email that will be associated with the Stripe account and select **Submit**. Here’s what happens next, depending if you have a Stripe account already associated with your email address. 1. **If you are in the test environment**, you’ll be prompted through a flow. You can continue or select **Return to Kinde**. 2. **If you are in a production environment,** you will be asked if you want to use details from an existing Stripe account or make a new one: 1. If you select existing, account details from the existing account will be used, but no other data will come across. 2. If you select to make a new one, you will be prompted to enter all your business details. This can take a while. 3. Follow the prompts as far as you want. Select **Return to Kinde**. 6. When you complete the Stripe onboarding, or opt out by selecting **Return to Kinde**, the connection card on the Kinde **Billing** page shows the connection status. 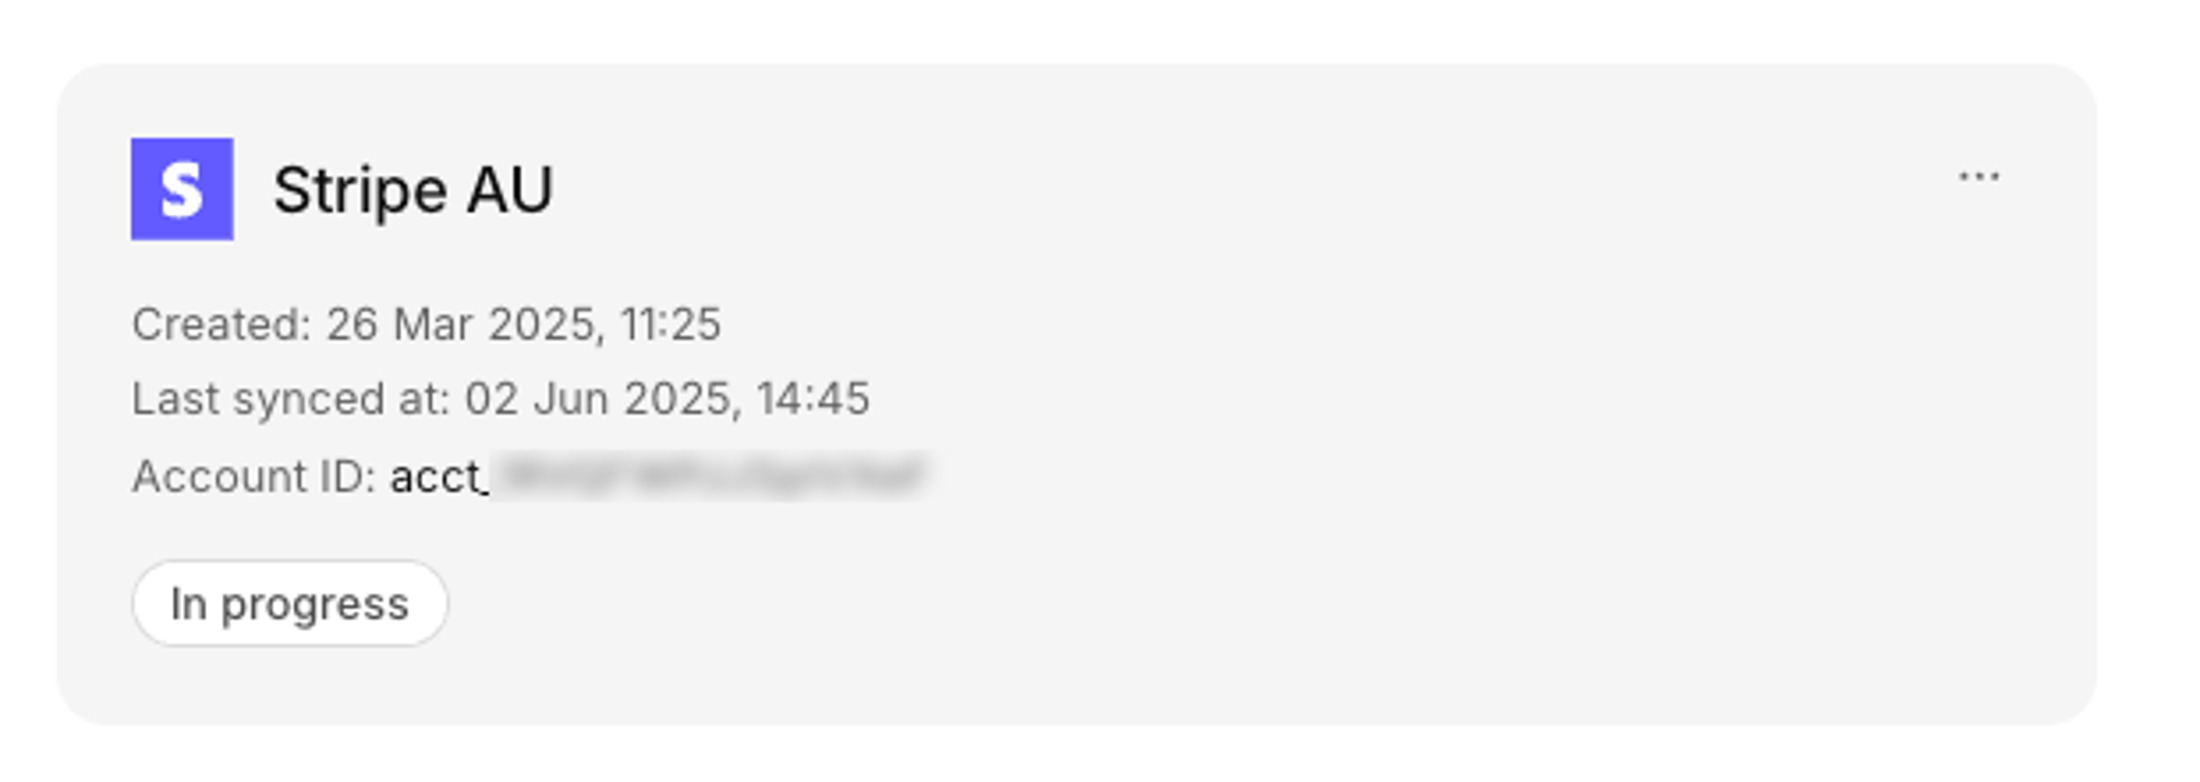 - `Connecting` means Stripe is still sending information to Kinde about the account status. It should not take long to sync. - `In progress` indicates that Stripe has connected to Kinde, but still requires some additional details from you in order to fully set up the account. Select **Update Stripe information** to complete the Stripe onboarding. You need to do this before plans can be made available to your customers. - `Connected` means Stripe is successfully syncing data with Kinde and you’re ready to publish plans. ## Collect tax automatically After Stripe is connected, you can turn on automatic tax for new subscriptions. 1. Go to **Settings > Environment > Billing**. 2. In the **Settings** section (alongside **Default currency**), turn on **Collect tax automatically**. 3. Select **Save**. 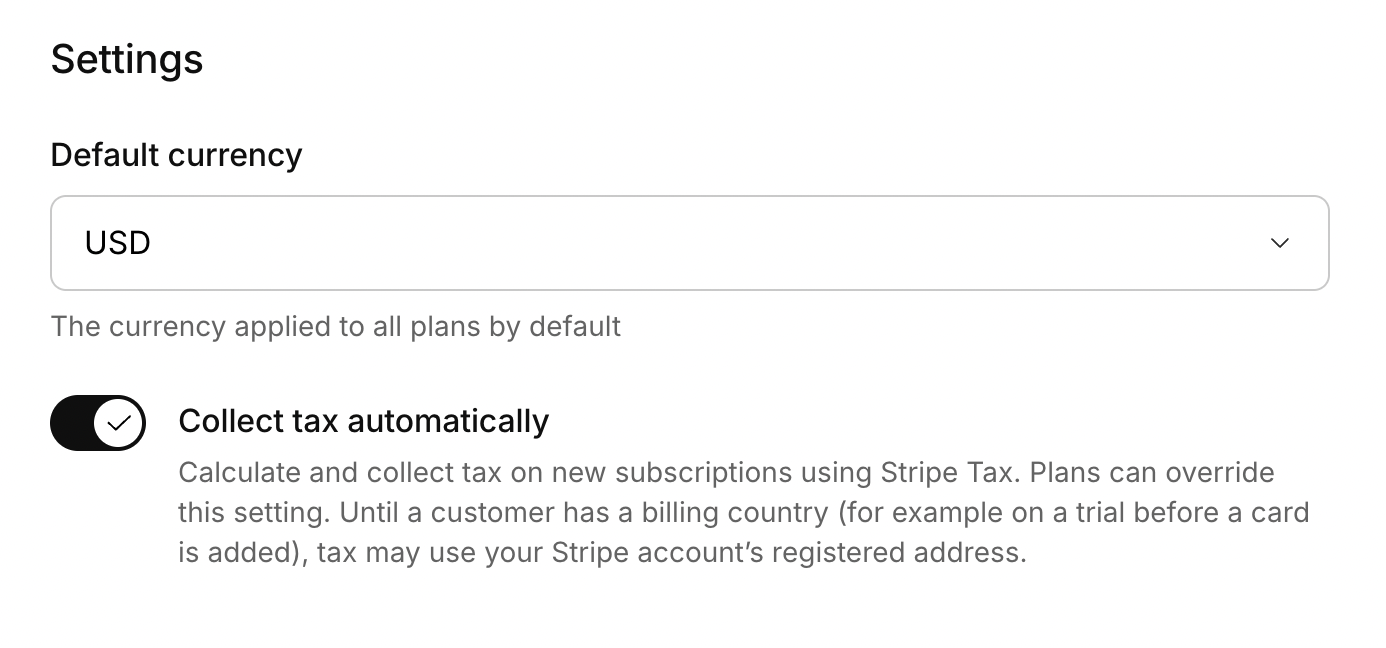 This setting is off by default. When it is on, Kinde enables Stripe Tax on new subscriptions unless a plan overrides it with **Collect** or **Don’t collect** in plan settings. You still need to complete Stripe Tax setup in the Stripe Dashboard (for example tax registrations for the regions where you sell). Until a customer has a billing country—such as during a trial before a card is added—tax may temporarily use your Stripe account’s registered address. ## Set billing policies for cancellation and plan changes After you have connected to Stripe, you can set policies to control what happens when a customer cancels or changes their plan. The policies are for deciding if you charge or forgive unpaid usage of metered features, or if you refund or retain unused, paid subscription days. 1. In the **Policies** section, choose the settings. 2. Select **Save**. **Next:** [Step 3 Set default billing currency](/billing/get-started/default-billing-currency/)
# Billing - Get started - Step 3 Set default billing currency
> Guide to setting the default billing currency for all Kinde plans including important considerations about currency selection.
Last updated: 2025-01-16
default currency, billing currency, currency selection, multi-currency, Stripe transactions
billing
You need to set a default billing currency for all your Kinde plans, before you create them. This is the currency that purchase transactions will be processed in Stripe. The currency you select cannot be changed after your first plan is published. For now, the default billing currency will be used in all plans and plan groups you create. 1. Go to **Settings > Environment > Billing**. 2. Select a default currency. 3. Select **Save**. Next: [Step 4 Build plans](/billing/get-started/build-plans/)
# Billing - Get started - Step 5 Publish plans
> Guide to publishing plans in Kinde including Stripe synchronization and best practices for testing before publication.
Last updated: 2025-01-16
publish plans, Stripe sync, draft plans, published plans, plan testing
billing
When you publish a plan, all of the plan features and charges are synced to Stripe where they are transformed into products that users can buy. We recommend testing, reviewing, and making all changes before publishing plans. When you are ready, open the plan and select **Publish plan** in the top right of the plan window. Do this for each plan you want users to subscribe to. Learn more about [draft and published plans](/billing/manage-plans/about-plans/) **Next:** [Step 6 Create pricing tables](/billing/get-started/add-pricing-table/)
# Billing - Get started - Step 7 Set up self-serve portal (optional)
> Guide to setting up the self-serve portal for customers to manage their own plans, payment information, and account details.
Last updated: 2025-01-16
self-serve portal, customer management, plan upgrades, plan downgrades, payment management, account management
billing
If you want your customers (organizations or individual users) to manage their own plans, including upgrades and downgrades, payment information, team members, etc., set up the self-service portal to allow this. Aside from account management, the self-serve portal is for orgs to self-manage teams and business information, and individuals to manage their user profile. - [Self-serve portal for orgs](/build/self-service-portal/self-serve-portal-for-orgs/) - [Self-serve portal for users](/build/self-service-portal/self-serve-portal-for-users/)
# Billing - Get started - Setup overview
> Step-by-step overview of the billing setup process including Stripe connection, plan creation, and self-serve portal configuration.
Last updated: 2025-01-16
billing setup, Stripe connection, plan creation, self-serve portal, billing roles, pricing tables
billing
Billing is big step for a business, so it’s a good idea to review the process before you start. ## Overview of billing setup 1. [Set up billing roles and permissions (B2B)](/billing/get-started/add-billing-role/) 2. [Connect to Stripe and set billing policies](/billing/get-started/connect-to-stripe/) 3 [Set currency](/billing/get-started/default-billing-currency/) - you can’t change this once your first plan is published 4. [Build plans](/billing/manage-plans/create-plans/) 5. [Publish plans](/billing/get-started/publish-plans/) 6. Enable subscription self-serve (optional) 1. [Create a plan selector](/billing/billing-user-experience/plan-selection/) 2. [Enable self-serve portal](/build/self-service-portal/self-serve-portal-for-orgs/) 7. [Update your code and registration URLs](/billing/billing-user-experience/add-billing-to-url-sdk/) 8. Test the setup and get your first subscriber! ## ⚠️ Test in a non-production environment If you are using billing for the first time, make sure you use a Kinde non-production environment to test out the billing features. When you use a non-production environment, Stripe automatically creates a test Stripe environment. This test environment allows you to create customers and billing subscriptions without actually charging customers. You can also use Stripe’s test credit card details. When using a Kinde test environment and a test Stripe account, you will not incur any billing-related fees from Stripe or Kinde. ## Watch a video about creating and publishing plans, and building pricing tables ## Tip: Before setting up billing - Make a list of all your app’s features - with names, descriptions, prices, metered rates, limits, inclusions, etc. You might consider doing this in a spreadsheet to make it easier and faster to add features in the Kinde plan builder. Include plan variations for prices, limits, etc.  - (B2B) make sure your Kinde business is set up to [create an organization on sign up](https://docs.kinde.com/build/organizations/orgs-for-developers/#new-organization-self-sign-up). Follow the numbered steps in this section to set up billing in your business.
# Billing - Manage plans - About plans
> Design Kinde billing plans, plan groups, mixed-interval charges, one-time charges, trials, tax, and draft vs published
Last updated: 2026-09-07
plan groups, fixed charges, mixed-interval pricing, annual pricing, metered features, free trial, collect tax automatically, draft plans, one-time charges
billing, manage-plans, plans, pricing-models
Plans enable you to structure your app features and charge your customers for using your services. Kinde supports both basic and more advanced plans for SaaS services. Here’s some examples: - A simple subscription plan: $10 per month for x features - A more complex plan: $20 per month for x features, plus x amount per GB storage, plus MAU charges (up to x free per month). We recommend creating your basic or simplest plan first (e.g. your Free plan), then work through to more complex plans. ## Current limitations These are known limitations that we are actively working on to add. - No alterations to billing cycle or invoice methods. - Add-ons and discounts that can be applied to individual subscriptions. - One-time charge purchase by subscribers, and applying one-time charges to existing subscriptions, are not available yet (plan configuration is available now). ## About plan groups Plan groups are a collection of related plans, tied to either users or organizations. - You can create as many plan groups as you need. - Each group can only contain plans for users OR plans for orgs. - You can create multiple pricing tables for one plan group (but only one is the default). - Only one plan group can be included in a pricing table. For more information see [add and manage plan groups](/billing/manage-plans/add-manage-plan-groups/) ## Parts of a plan There are a number of concepts and elements involved in building a plan. ### Plan profile This is the name of the plan, description, code key, etc. You need to enter these details and save them before you move on to adding charges and features. The plan name appears on the pricing table that you can generate to share with customers. We recommend keeping it short. Use the description fields to explain differences in plans for internal use. ### Plan settings Plan settings control additional subscription behavior beyond pricing. - **Ask for credit card:** Determines whether users must provide payment details when subscribing. This can be disabled for free plans with no charges, allowing frictionless signups. For plans with any positive-price fixed charge or chargeable metered billing, credit card collection is always required. Priced one-time charges alone do not require a card at signup. - **Collect tax automatically:** Controls whether Stripe Tax is applied for subscriptions to this plan. Choose **Use account setting** (default), **Collect**, or **Don’t collect**. The account default lives under **Settings > Environment > Billing**. See [Create plans — Collect tax automatically](/billing/manage-plans/create-plans/#collect-tax-automatically) for details. - **Trial period:** When enabled, lets customers try the plan for a set number of days before being charged. You can configure the trial length and how many days before the trial ends to prompt for payment details. Plans with a trial enabled show a “Free trial for N day(s)” badge on the pricing table. See [Create plans — Configure trial period](/billing/manage-plans/create-plans/#configure-trial-period) for configuration details. ### Plan feature pricing Depending how you manage plans and feature provisioning in your application, plan pricing might be simple or complex in your business. When you set up a plan, you can include a mixture of any of these options: #### Fixed charges A recurring charge that does not change and is invoiced in advance. You can set the billing interval to daily, weekly, monthly, or yearly (the default is monthly). - **Mixed-interval pricing:** Each plan can have more than one fixed charge, billed at different intervals. Customers are charged at mixed intervals, such as `$100 / year + $3 / month`. See [Mixed-interval pricing](/billing/manage-plans/create-plans/#mixed-interval-pricing). - **Annual pricing:** You can offer annual pricing on one fixed charge per plan, at a custom yearly price. For example, a platform fee of $10/month, or $100/year if paid annually (a $20 saving per year). See [Offer annual pricing](/billing/manage-plans/create-plans/#offer-annual-pricing). #### Features Bill customers for additional features they can access. Features can be: - **Metered:** Users pay based on the usage limits you set. Pricing can be per unit, per tier, or non-chargeable. For example, $10 per 1 million API calls, then $25 for up to the next 5 million API calls, and so on. - **Unmetered:** The user either has access to the feature or not. There is no usage limit. Unmetered features are typically used to gate feature access. For example, custom domain support or custom themes. #### One-time charges Single-purchase items subscribers can buy in addition to their subscription—for example credit top-ups or add-on unlocks. You configure them on the plan under **One-time charges**, with: - **Flat** or **Package** pricing - Optional metering and unit limits - An expiry policy (**Never expires** or **Expires with the billing cycle**) See [Create billing plans — Add one-time charges to a plan](/billing/manage-plans/create-plans/#add-one-time-charges-to-a-plan). ## Example plan features | Feature | Price | Pricing model | | ------------------- | ---------------------------- | ------------------------- | | Access to x feature | N/A | Unmetered | | Subscription | $20 / month, or yearly (optional annual offer); can combine with other fixed charges on different intervals | Fixed charge | | Interaction | $x per interaction | Metered / tiered | | Storage/Usage | $x per GB | Metered / units or tiered | | MAU | x included | Metered / non-chargeable | | MAU | Additional $x per MAU over n | Metered / tiered | | Credit top-up | $x one-time (for example per package of credits) | One-time / flat or package | A plan is complete when it includes all the features needed to provide the access and charge the right price. ## How to use and re-use features and charges Kinde structures plans so that they can share a pool of features, fixed charges, and one-time charges that you define at a high level. When you add the item to a plan, you set the price, limits, and other differences uniquely in each plan. This makes building and managing plan items easier, because the item shares the same key (e.g. `base_price` or `credit_top_up`), making it easier to manage in your code and for gating. For example, you only need to define the item ‘Base price’ once, and then you define the price when you add it to each individual plan. Similarly, features that are inclusions, such as support hours included, just create one metered feature. Then set the limits of the feature differently for each plan level. E.g. Free plan one hour, Pro plan gets 2 hours, etc. The same reuse pattern applies to one-time charges: define a top-up once, then attach it to each plan with the amount, package size, and expiry you want for that plan. 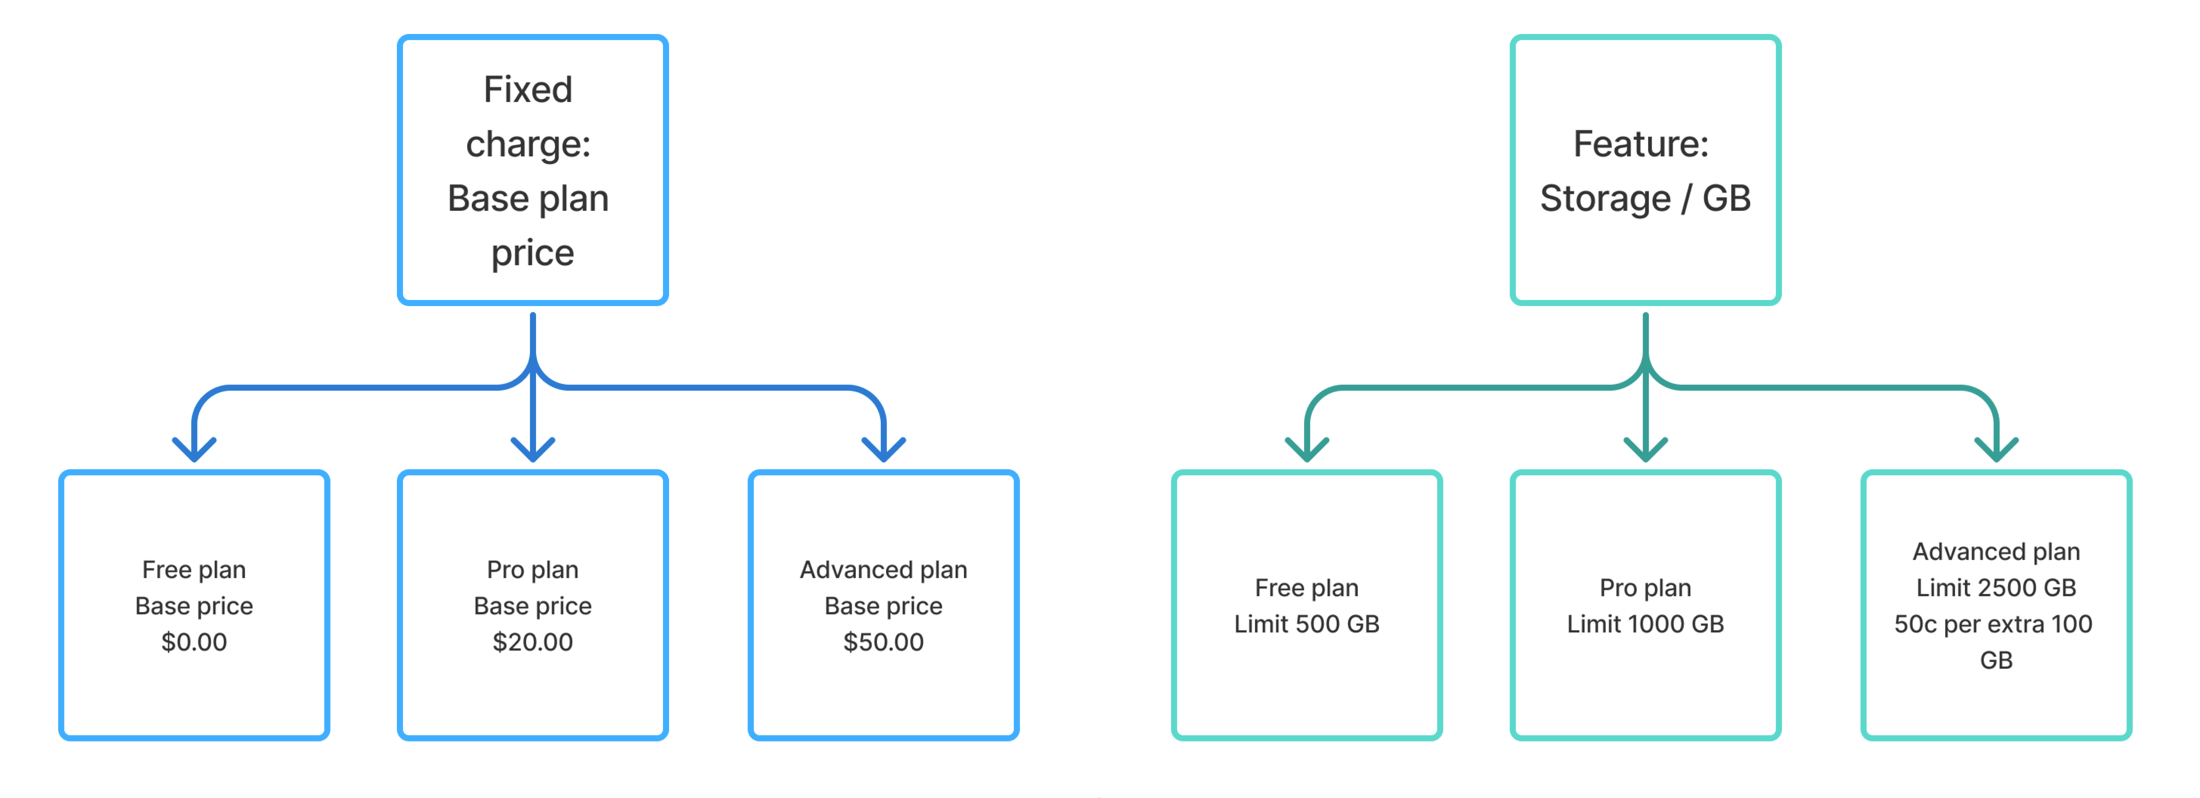 ## Draft and published plans, and plan versioning Plans can be in two states: **Draft** - these plans are being developed and are not available for subscribers yet. **Published** - products and prices are synced to Stripe and the plan can be signed up to manually, or via API. - Once a plan has a subscriber, the plan cannot be changed, only versioned. - Published plans must be included in a pricing table for self-sign ups. Plan versioning is being worked on, but is not currently available. ## When a plan feature price syncs to Stripe Feature prices sync to Stripe when you are successfully connected to Strip and you publish the plan containing that feature. When you are creating a plan, you may notice that some features show `price synced` or `price not synced`. - Price synced - The price in Kinde and Stripe are the same. A plan with this feature is published. - Price not synced - The price in Kinde has not yet synced to Stripe. When you publish or re-publish the plan, this will change. If you see a mix of synced and not synced feature prices on a plan, this might be because the synced ones are in a plan that is published. Unmetered (non-chargeable) features do not have a price sync status badge.
# Billing - Manage plans - Add and manage plan groups
> Guide to creating and managing plan groups in Kinde including B2B/B2C organization, default groups, and plan ordering.
Last updated: 2025-01-16
plan groups, B2B, B2C, B2B2C, default groups, plan organization, pricing tables
billing
Plan groups are a way of organizing sets of related plans together. A plan group can be defined as an 'organization' or 'user' type, depending who you are selling to. For (B2B) businesses, use the organization type. For (B2C) individual customers, use the 'user' type. If you are a B2B2C business, create one group of each type. How you set up plans in the group impacts how you present feature bundles on a pricing table. ## Default plan groups When you first add a plan in Kinde, you select the plan type and a plan group will be automatically created for you. You can later change the name of the group, or make a different group the default group. There can only be one default group for organizations and one for users. The default group is what is displayed by default on a pricing table. ## Add a plan group 1. Go to **Billing > Plans**. 2. Select **Add group**. 3. Enter a **Name** and select the type of plan the group contains. 4. Choose a colour. This only applies to how the group appears on the **Plans** page. 5. Select **Save**. 6. Repeat for all the groups you want to add. ## Organize plans within a group The order of plans within a group represents the order they are shown in the Kinde Admin. This does not impact the order they are shown on the pricing table. To move a plan up or down in a group, select the three dots menu and select a moving option: 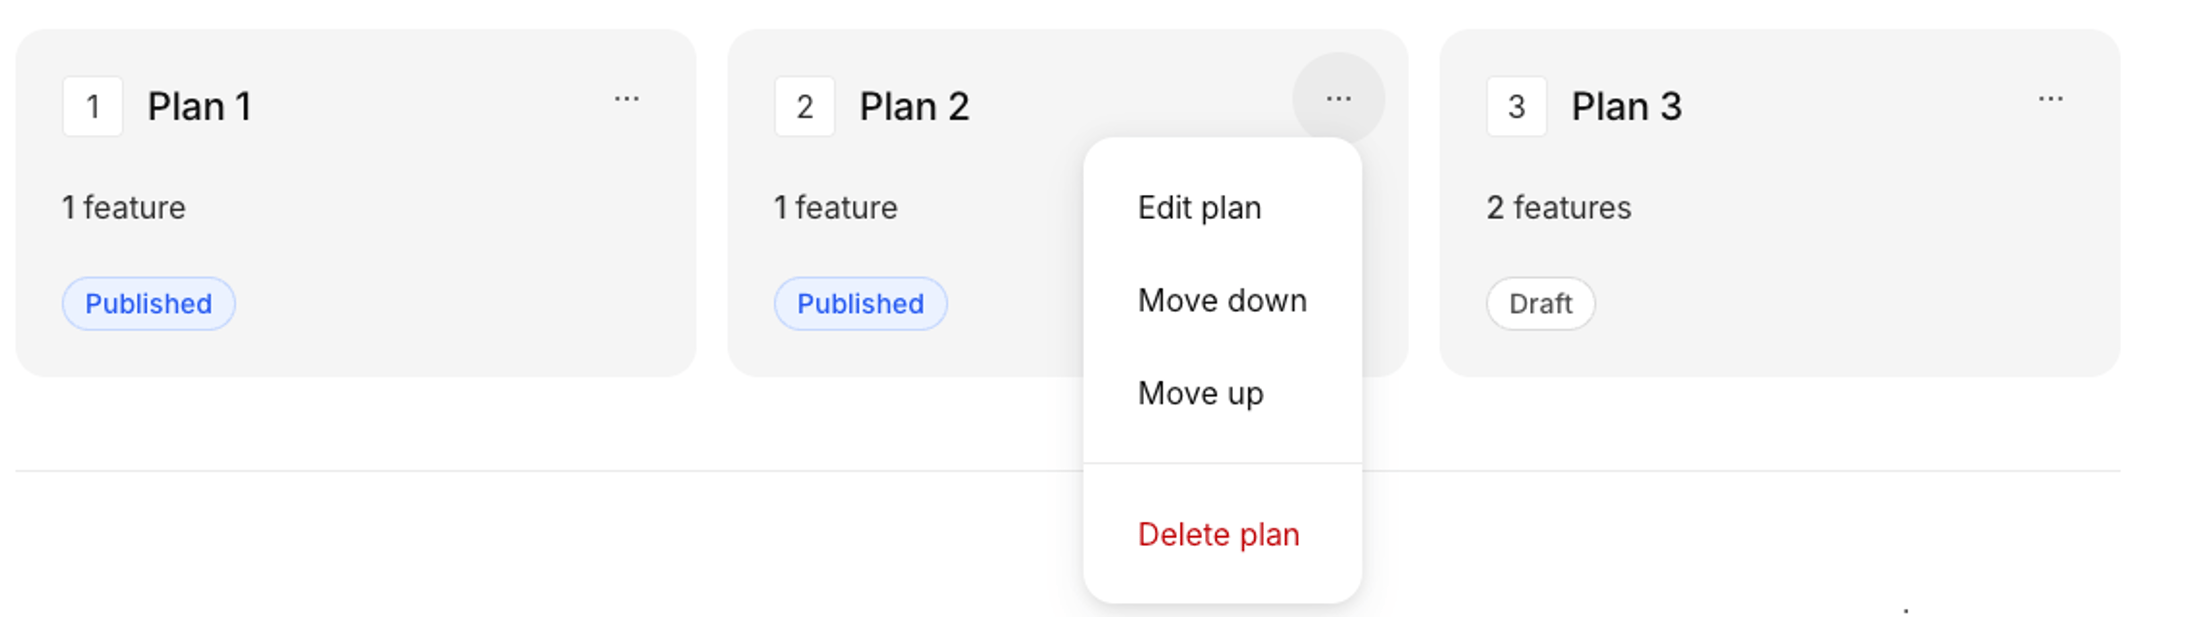 ## Delete a plan group 1. Go to **Billing > Plans**. 2. Select the three dots menu near the plan group name. 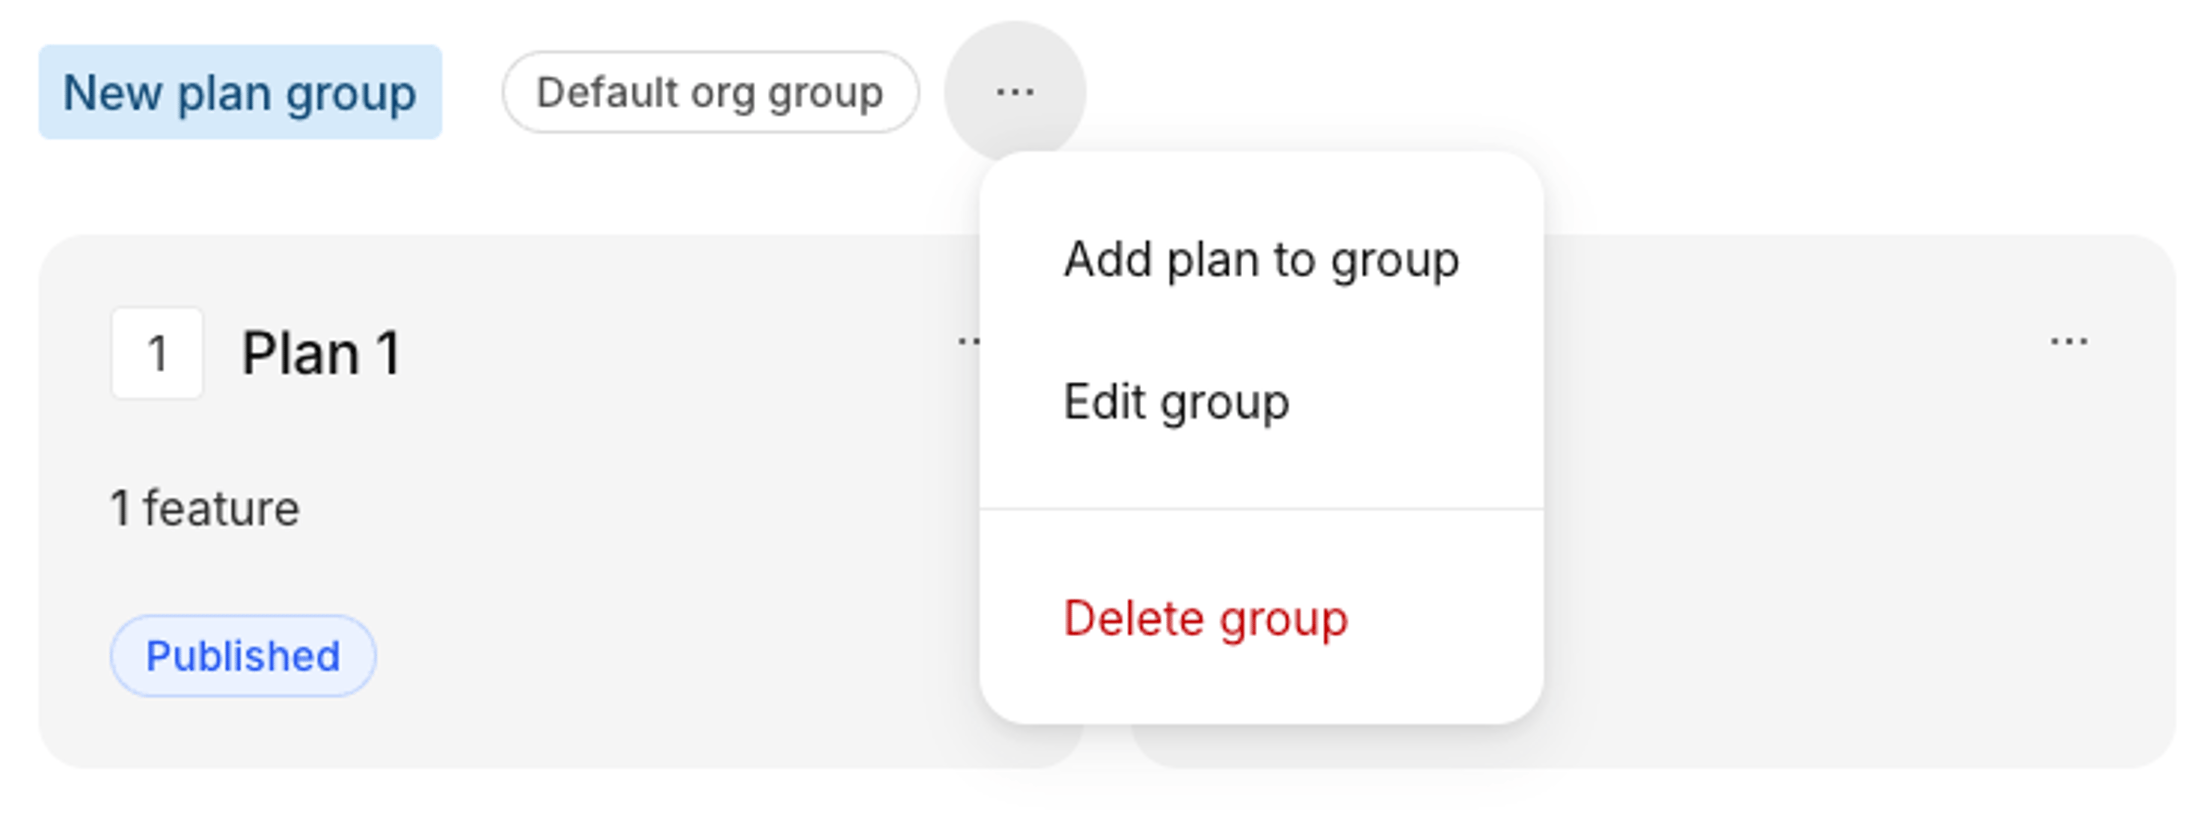 3. Select **Delete**. 4. In the confirmation window that appears, confirm you want to delete.
# Billing - Manage plans - Cancel a subscription
> Guide to canceling subscriptions including customer self-service cancellation and API-based cancellation methods.
Last updated: 2025-01-16
cancel subscription, self-serve portal, API cancellation, agreement ID, billing role, cancellation workflow
billing
While we would rather customers didn't cancel their subscription to your services, they do need to be able to. There's two ways to do this. - The customer can cancel via the self-serve portal - You can cancel on behalf of a customer via API ## How a customer can cancel their own plan Customers can only do this if you have enabled plan management in the [self-serve portal](/build/self-service-portal/self-serve-portal-for-orgs/) and the B2B customer has a [billing role](/billing/get-started/add-billing-role/) that allows them to make changes. 1. In your app or product, they open the self-serve portal for managing their account. Here's an example of where users (B2C) and organizations (B2B) can manage plans.  2. On the **Plan** page, they can scroll to the bottom and select **Cancel plan**. 3. They follow the prompts to cancel. This information is synced to Stripe. Depending on the [billing policies](/billing/manage-plans/upgrade-downgrade-plans/) you have set, they might receive a bill for unpaid usage, or be credited for unused subscription days. ## Cancel a plan via API 1. Get the customer's Agreement ID. This is the unique ID associated with their subscription in Stripe. You can find it in their Kinde record under Billing. 2. Using a DELETE request, hit the delete/api/v1/billing/agreements endpoint and include the `agreement_id` value in the call.  ## Receive an alert when a customer cancels their plan You can set up a workflow that enables you to check and approve cancellations. You might want to do this, for example, to be alerted when high value customers cancel. For details, refer to the [Plan cancellation request workflow](/workflows/example-workflows/plan-cancellation-request-workflow/).
# Billing - Manage plans - Create billing plans in Kinde
> Set up Kinde plans — fixed charges, mixed intervals, annual pricing, trials, tax, usage-based features, and one-time charges
Last updated: 2026-09-07
fixed charges, mixed-interval pricing, offer as annual, billing interval, metered features, tiered pricing, free trial, Stripe Tax, one-time charges
billing, manage-plans, plans, mixed-interval-pricing
Once you’ve got a plan strategy along with a plan feature list, prices, and details, you’re ready to create plans in Kinde. All plans must belong to a plan group. A plan group can contain only user plans or only organization plans—not both. When you create your first plan, Kinde automatically creates a default group based on the plan type you select and adds the plan to it. You can define a charge, feature, or one-time charge once and reuse it across plans. For example, a **Base price** charge can be set to `0.00` in a **free plan**, `10.00` in a **Plus plan**, and `25.00` in a **Pro plan**. ## Add a plan 1. Go to **Billing > Plans** 2. Select **Add plan**, a window opens 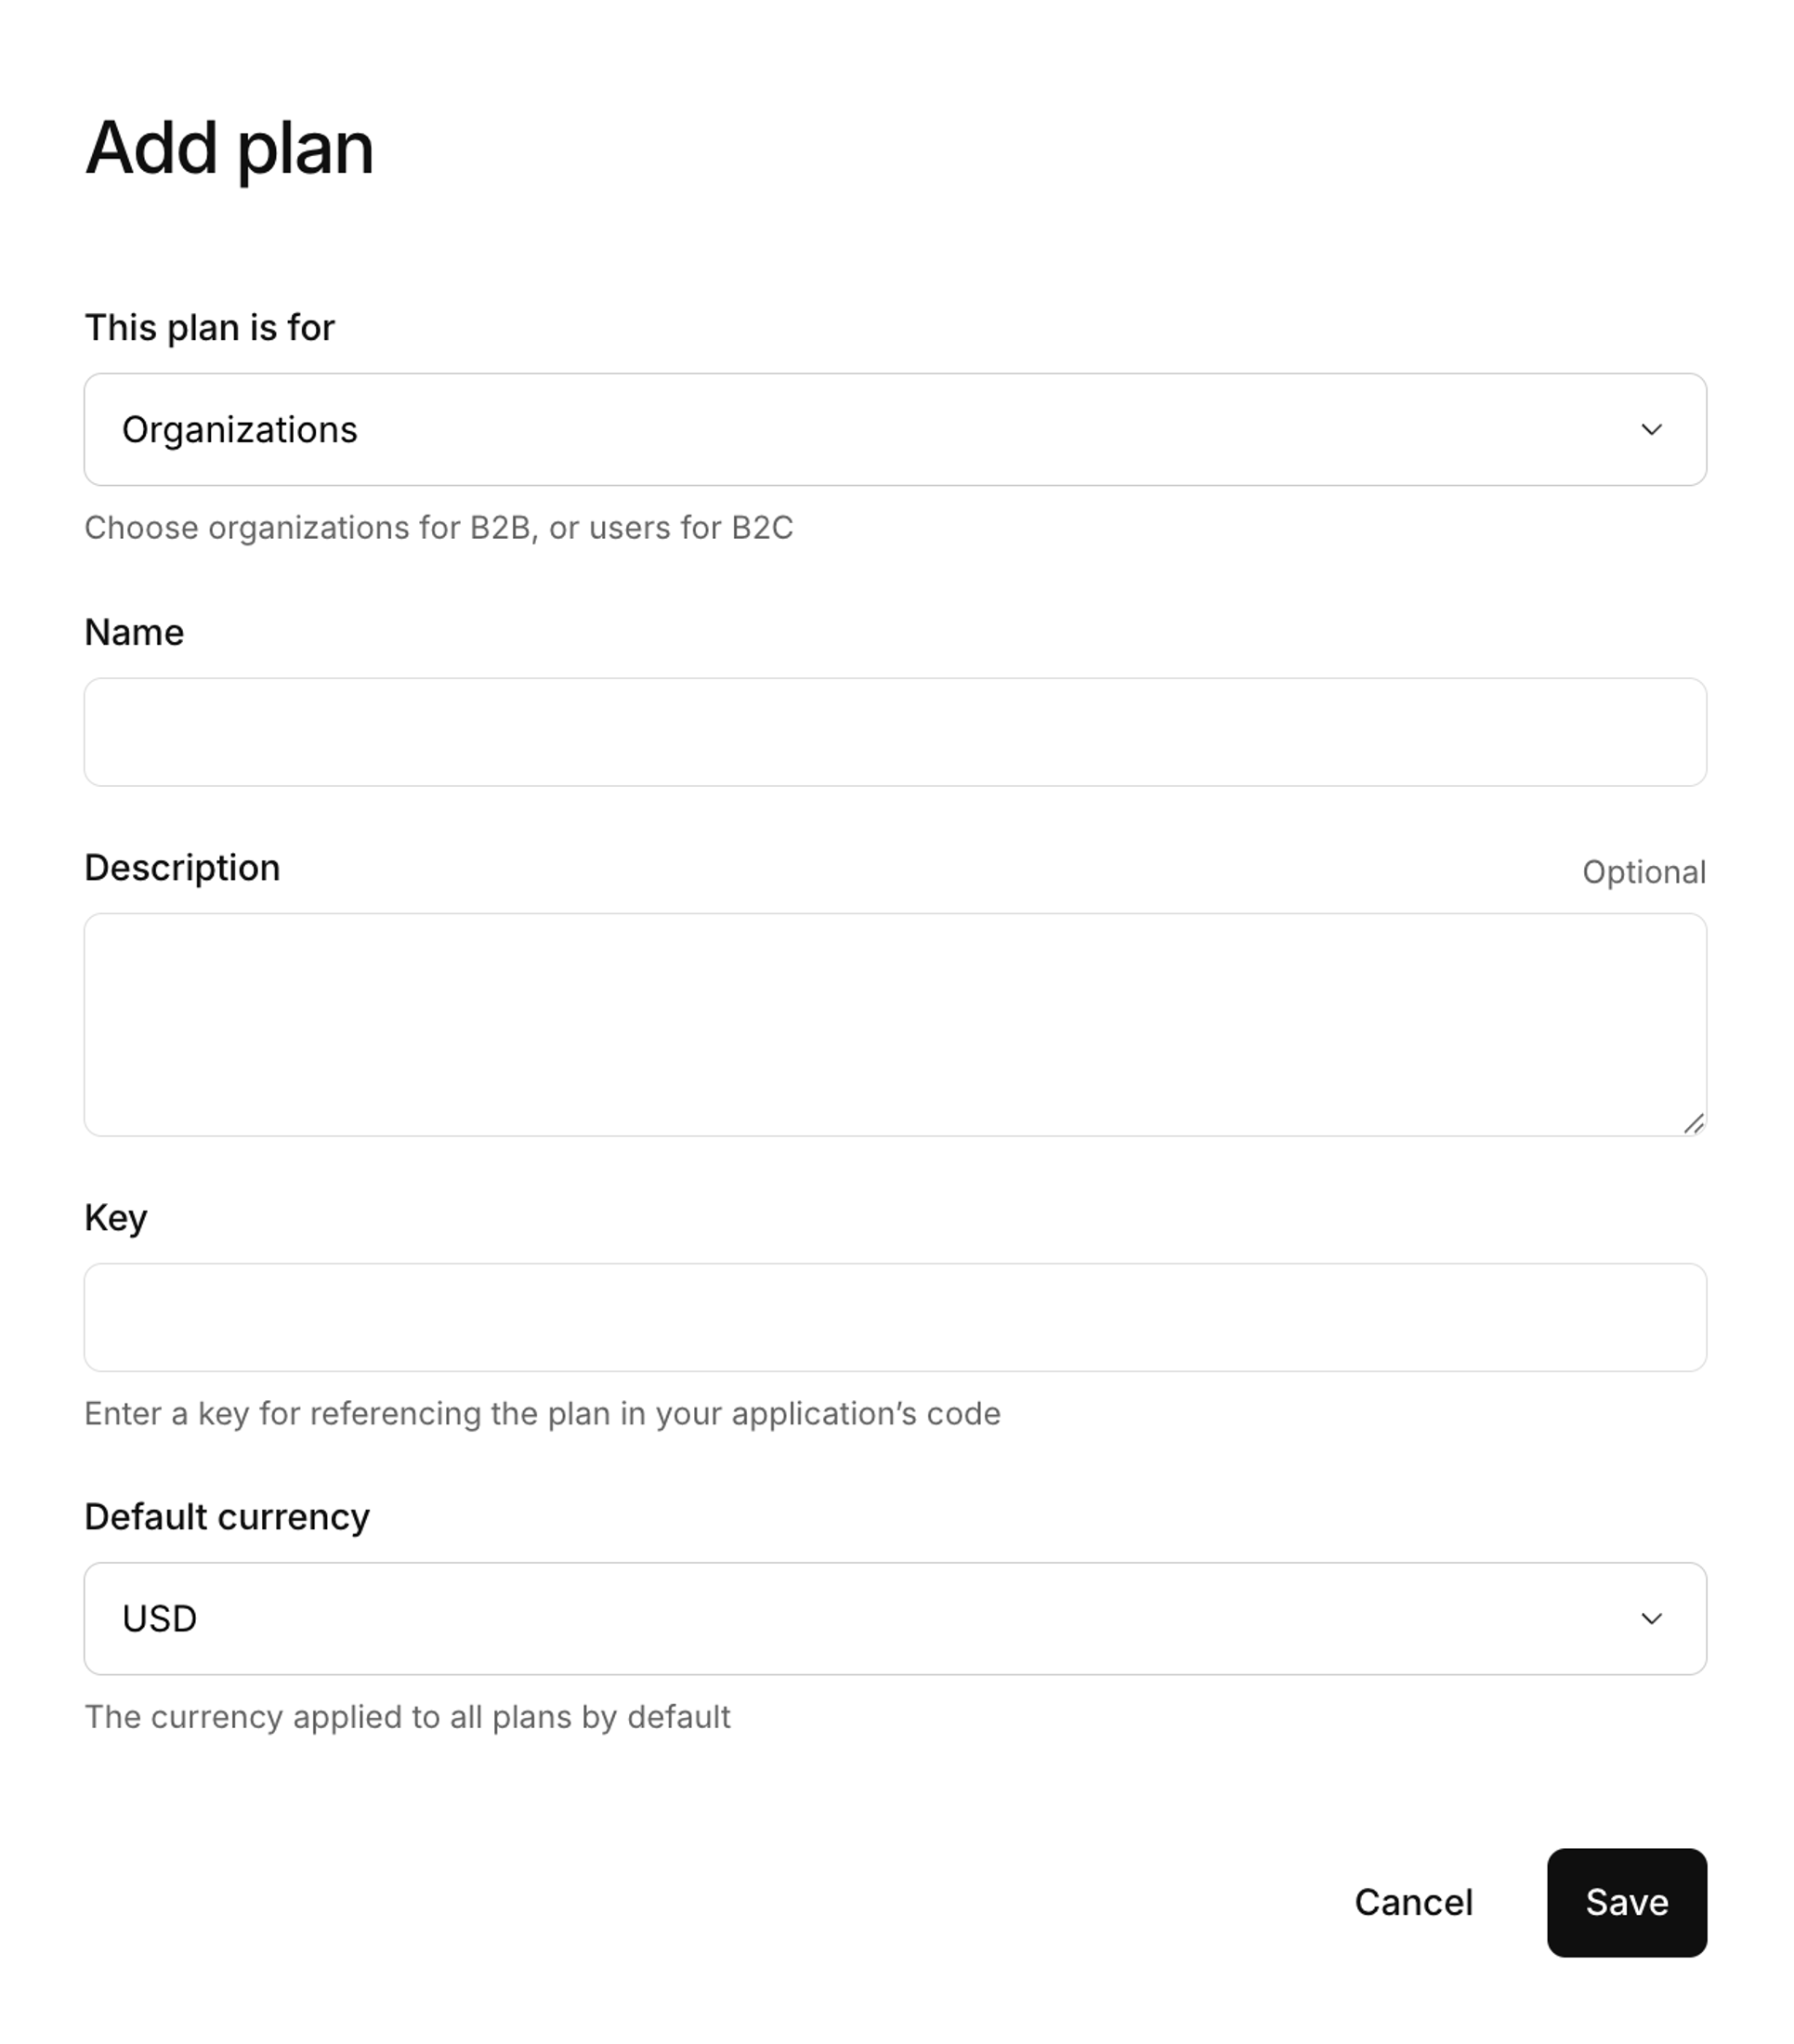 3. Choose whether the plan is for **Organizations** or **Users**, or select the **Group** the plan belongs to. Only one of these options will appear. You cannot change these selections later. 4. Give the plan a **Name** (e.g., `Free`) and a **Description**. This is the name that will also appear in the pricing table (if you use one). 5. Give your plan a **Key** (e.g., `free_plan`) for referencing in your code. This cannot be changed after a plan is published. 6. Select a **Default currency**. This field only appears if one has not been set. You can change this later in **Settings > Environment > Billing**, but only before any of your plans are published. 7. Select **Save** ## Configure plan settings After creating a plan, you can configure additional settings that control the subscription experience. 1. Open the plan you want to configure. 2. Scroll to the **Plan settings** section. 3. Configure the available options: ### Collect tax automatically This setting controls whether Stripe Tax with automatic collection is applied when customers subscribe to the plan. 1. Open the plan you want to configure. 2. Scroll to the **Plan settings** section. 3. Under **Collect tax automatically**, choose an option. 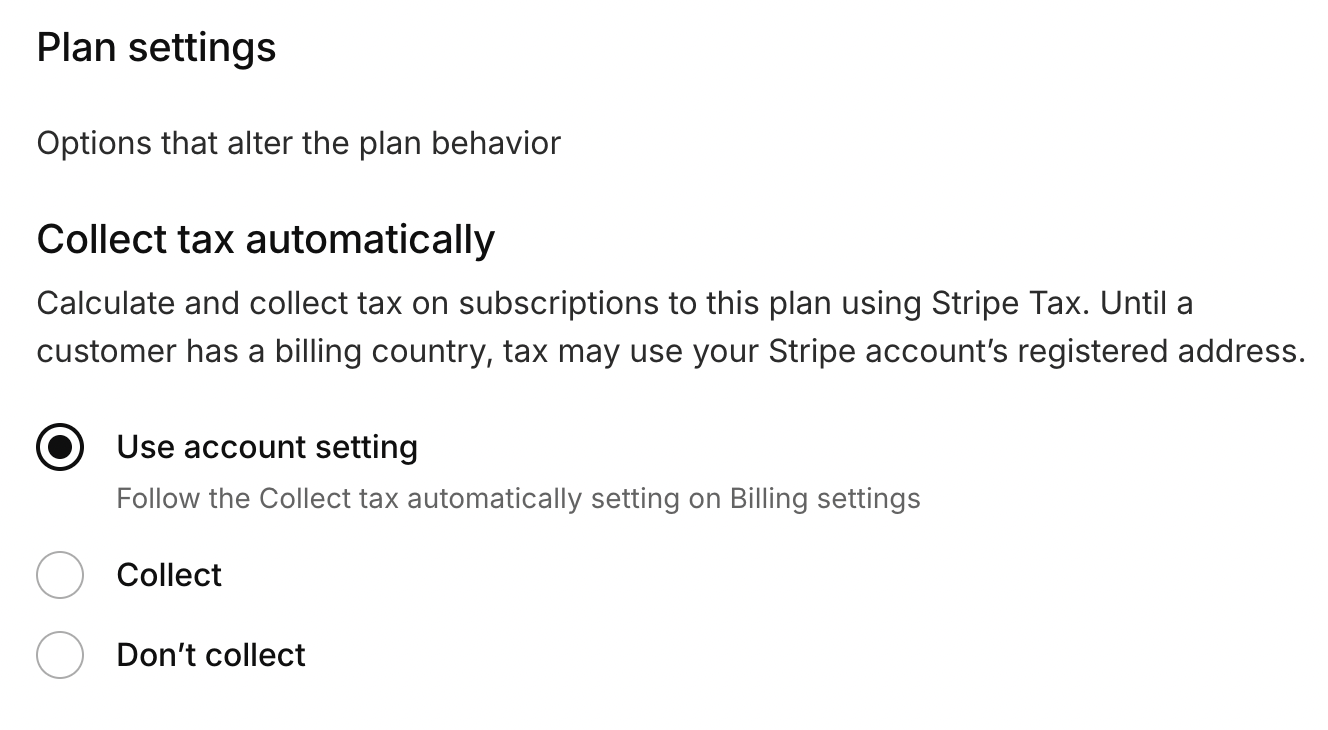 #### Tax collection options reference | Option | Behavior | | --- | --- | | **Use account setting** (default) | Follows **Collect tax automatically** on **Settings > Environment > Billing** | | **Collect** | Always enable Stripe Tax for subscriptions to this plan | | **Don’t collect** | Never enable Stripe Tax for subscriptions to this plan | The account setting is off by default. Turn it on in **Settings > Environment > Billing** if most plans should collect tax, then override only the plans that differ. Stripe still needs Stripe Tax configured (for example tax registrations) in the Stripe Dashboard. Until a customer has a billing country—such as during a trial before a card is added—tax may temporarily use your Stripe account’s registered address. Select **Save draft** or **Publish** to apply your changes. ### Ask for credit card This toggle controls whether users must enter credit card details when subscribing to the plan. - **Enabled (default)**: Users will be prompted to enter their payment details during signup via a secure Stripe payment form. - **Disabled**: Users can subscribe without providing payment information and proceed directly to your application.  ### When to use each setting | Your Goal | Recommended Setting | |-----------|---------------------| | Reduce signup friction for a free tier | Disable—let users try your product without entering payment details | | Capture payment info for easier upgrades | Enable—collect card details upfront for seamless plan transitions | | Offer a free trial that converts to paid | Enable—required when trial period is enabled; payment details are collected before the trial ends | ### Configure trial period Trial periods let customers try a paid plan before being charged. When a trial is active, the customer's Stripe subscription is created with a trial window — no charges are made until the trial expires. In the **Trials** section: 1. Enable **Trial period**. 2. Set the **Trial length (days)** (default: 30, minimum: 1). This is how many days the customer can use the plan for free. 3. Set **Ask for credit card before trial ends (days)** (default: 3, minimum: 0). This must be less than the trial length. This controls when the customer is asked to provide payment details before the trial expires. 4. Select **Save draft** or **Publish** to apply your changes. 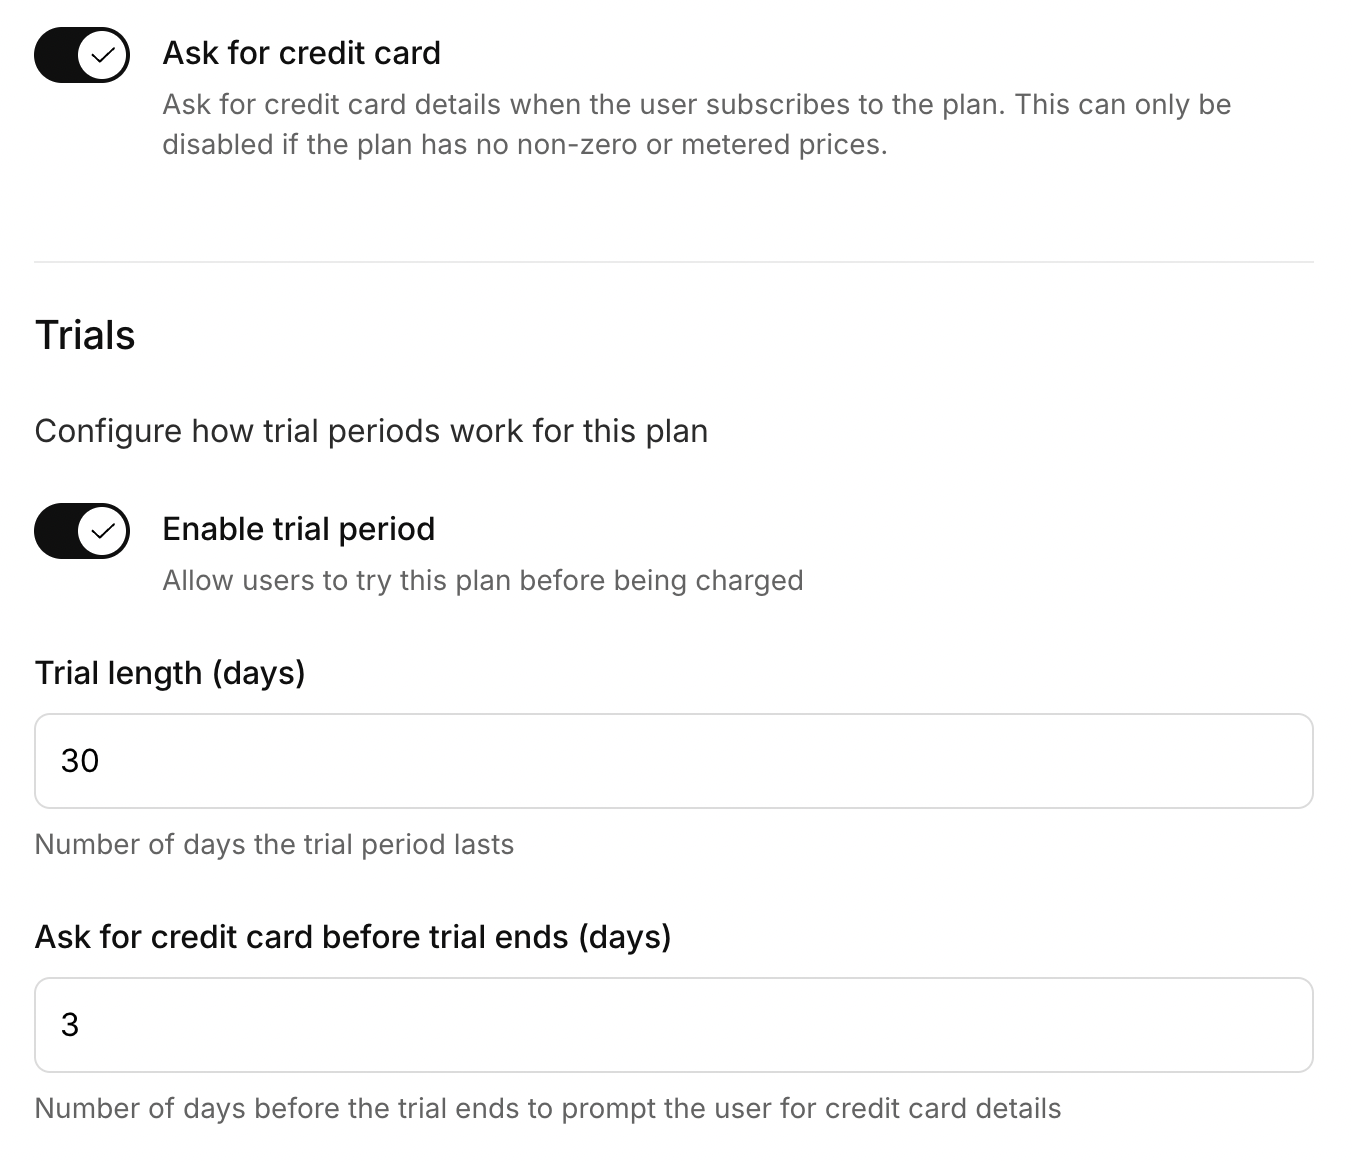 #### How trials work at runtime - When a customer subscribes to a trial plan, they get full access to the plan features immediately — no payment is collected upfront. - The pricing table shows a **"Free trial for N day(s)"** badge on plans with a trial enabled. - A background process automatically prompts the customer to verify or update their payment details the configured number of days before the trial ends. - When the trial period ends, Stripe attempts to convert the subscription to paid according to your plan pricing, provided valid payment details are in place. #### Trial period configuration reference | Setting | Description | Default | Constraints | |---------|-------------|---------|-------------| | Trial period | Enable or disable the trial for this plan | Off | Requires "Ask for credit card" to be on | | Trial length in days | Number of days the customer can use the plan for free | 30 | Must be ≥ 1 | | Days before trial end to prompt for credit card | How many days before trial expiry the customer is prompted for payment details | 3 | Must be ≥ 0 and less than the trial length | ## Add fixed charge (subscription fee) to a plan A fixed charge is a recurring amount that does not change with usage and is billed in advance. You can pick a billing interval of **daily, weekly, monthly**, or **yearly**. 1. In **Fixed charges**, select **Add charge**. 1. If the charge already exists, select **Use existing feature**, then select it from the list. 2. If this is a new charge, give it a name (e.g., `Platform fee`). If you’ll reuse this charge across plans, choose a generic name. This cannot be changed later. 2. Add a **Line item description**. This appears on the customer invoice, so it might be more specific than the name, e.g. `Acme platform subscription, starter plan`. 3. Set the **Price**. You may be asked to set a default currency if you haven’t already. You can add more than one fixed charge per plan, each with a different interval (monthly, daily, and so on). See [Mixed-interval pricing](#mixed-interval-pricing) for details. ### Set the billing interval After entering the charge name and price, configure how often the fixed charge is billed: 1. Open the **Billing interval** dropdown. 2. Choose **Day**, **Week**, **Month**, or **Year**. The default is **Month**.  - The interval you select determines how often Stripe bills the customer for this fixed charge. - The **Offer as annual** toggle is only available for non-yearly intervals (**Day**, **Week**, **Month**). If you select **Year**, the **Offer as annual** toggle does not apply. Selecting **Year** already bills annually. See [Offer annual pricing](#offer-annual-pricing) below for details.  3. Select **Save** or **Save draft**. Repeat for each fixed charge you want to add, or start adding features. ### Offer annual pricing To give customers a yearly option at a fixed annual price: 1. Set a **Price** (e.g., `10`). 2. Select a non-yearly **Billing interval** (**Day**, **Week**, or **Month**). 3. Turn on **Offer as annual**. 4. Set the **Annual price** (e.g., `100`). 5. Select **Save**.  When a customer turns on **Pay annually** during sign-up or a self-serve plan change: - The charge with **Offer as annual** bills at the annual price once per year. - Any other fixed charges continue on their own interval. ### Mixed-interval pricing You can add more than one fixed charge on a plan with different intervals. For example, a license fee of $100/year, a platform fee of $10/month, and a support fee of $3/week. The combination is a **mixed-interval** plan. Each charge is billed and displayed with its own interval — for example `$100 AUD / year + $10 AUD / month + $3 AUD / week`—instead of a single collapsed total. ### Preview annual pricing on the plan On the plan details page, the **Pricing** sidebar shows how the plan will look to customers. 1. Open the plan. 2. In the **Pricing** sidebar, if at least one fixed charge offers annual pricing, turn on **Preview annual pricing**. The toggle is off by default. 3. Review the standard total versus the annual total (including any monthly remainder for mixed plans). This toggle is preview-only. It does not change the draft, and it does not affect **Save draft** or **Publish**. Fixed charge cards also show: - The standard amount with its interval (for example `$10 AUD / month`). - An **Annual option** line when **Offer as annual** is set (for example `$100 AUD / year`). Recurring metered feature rates show the interval after the unit label (for example `$5 AUD per unit / month`). Period-to-date usage totals on subscription views do not include an interval. They are amounts so far in the cycle, not rates. ### Create a free plan To create a free plan, add a fixed charge with a **Price** of `0`. Do not add any positive-price fixed charges or chargeable metered features. The `0` price ensures the plan is added to Stripe and included on the pricing table as a free plan. It does not require card collection: disable **Ask for credit card** if you want users to subscribe without payment details. See [Ask for credit card](#ask-for-credit-card). Priced one-time charges on a plan do not by themselves require customers to enter payment details when they subscribe. Payment collection for signup still follows your fixed charges and chargeable recurring metered features, plus the **Ask for credit card** setting in **Plan settings**. ## Add features (entitlements) to a plan Features describe the individual functions or entitlements that users get with their plan. These can be of the type metered (chargeable) or unmetered (included). 1. Select **Add feature**. 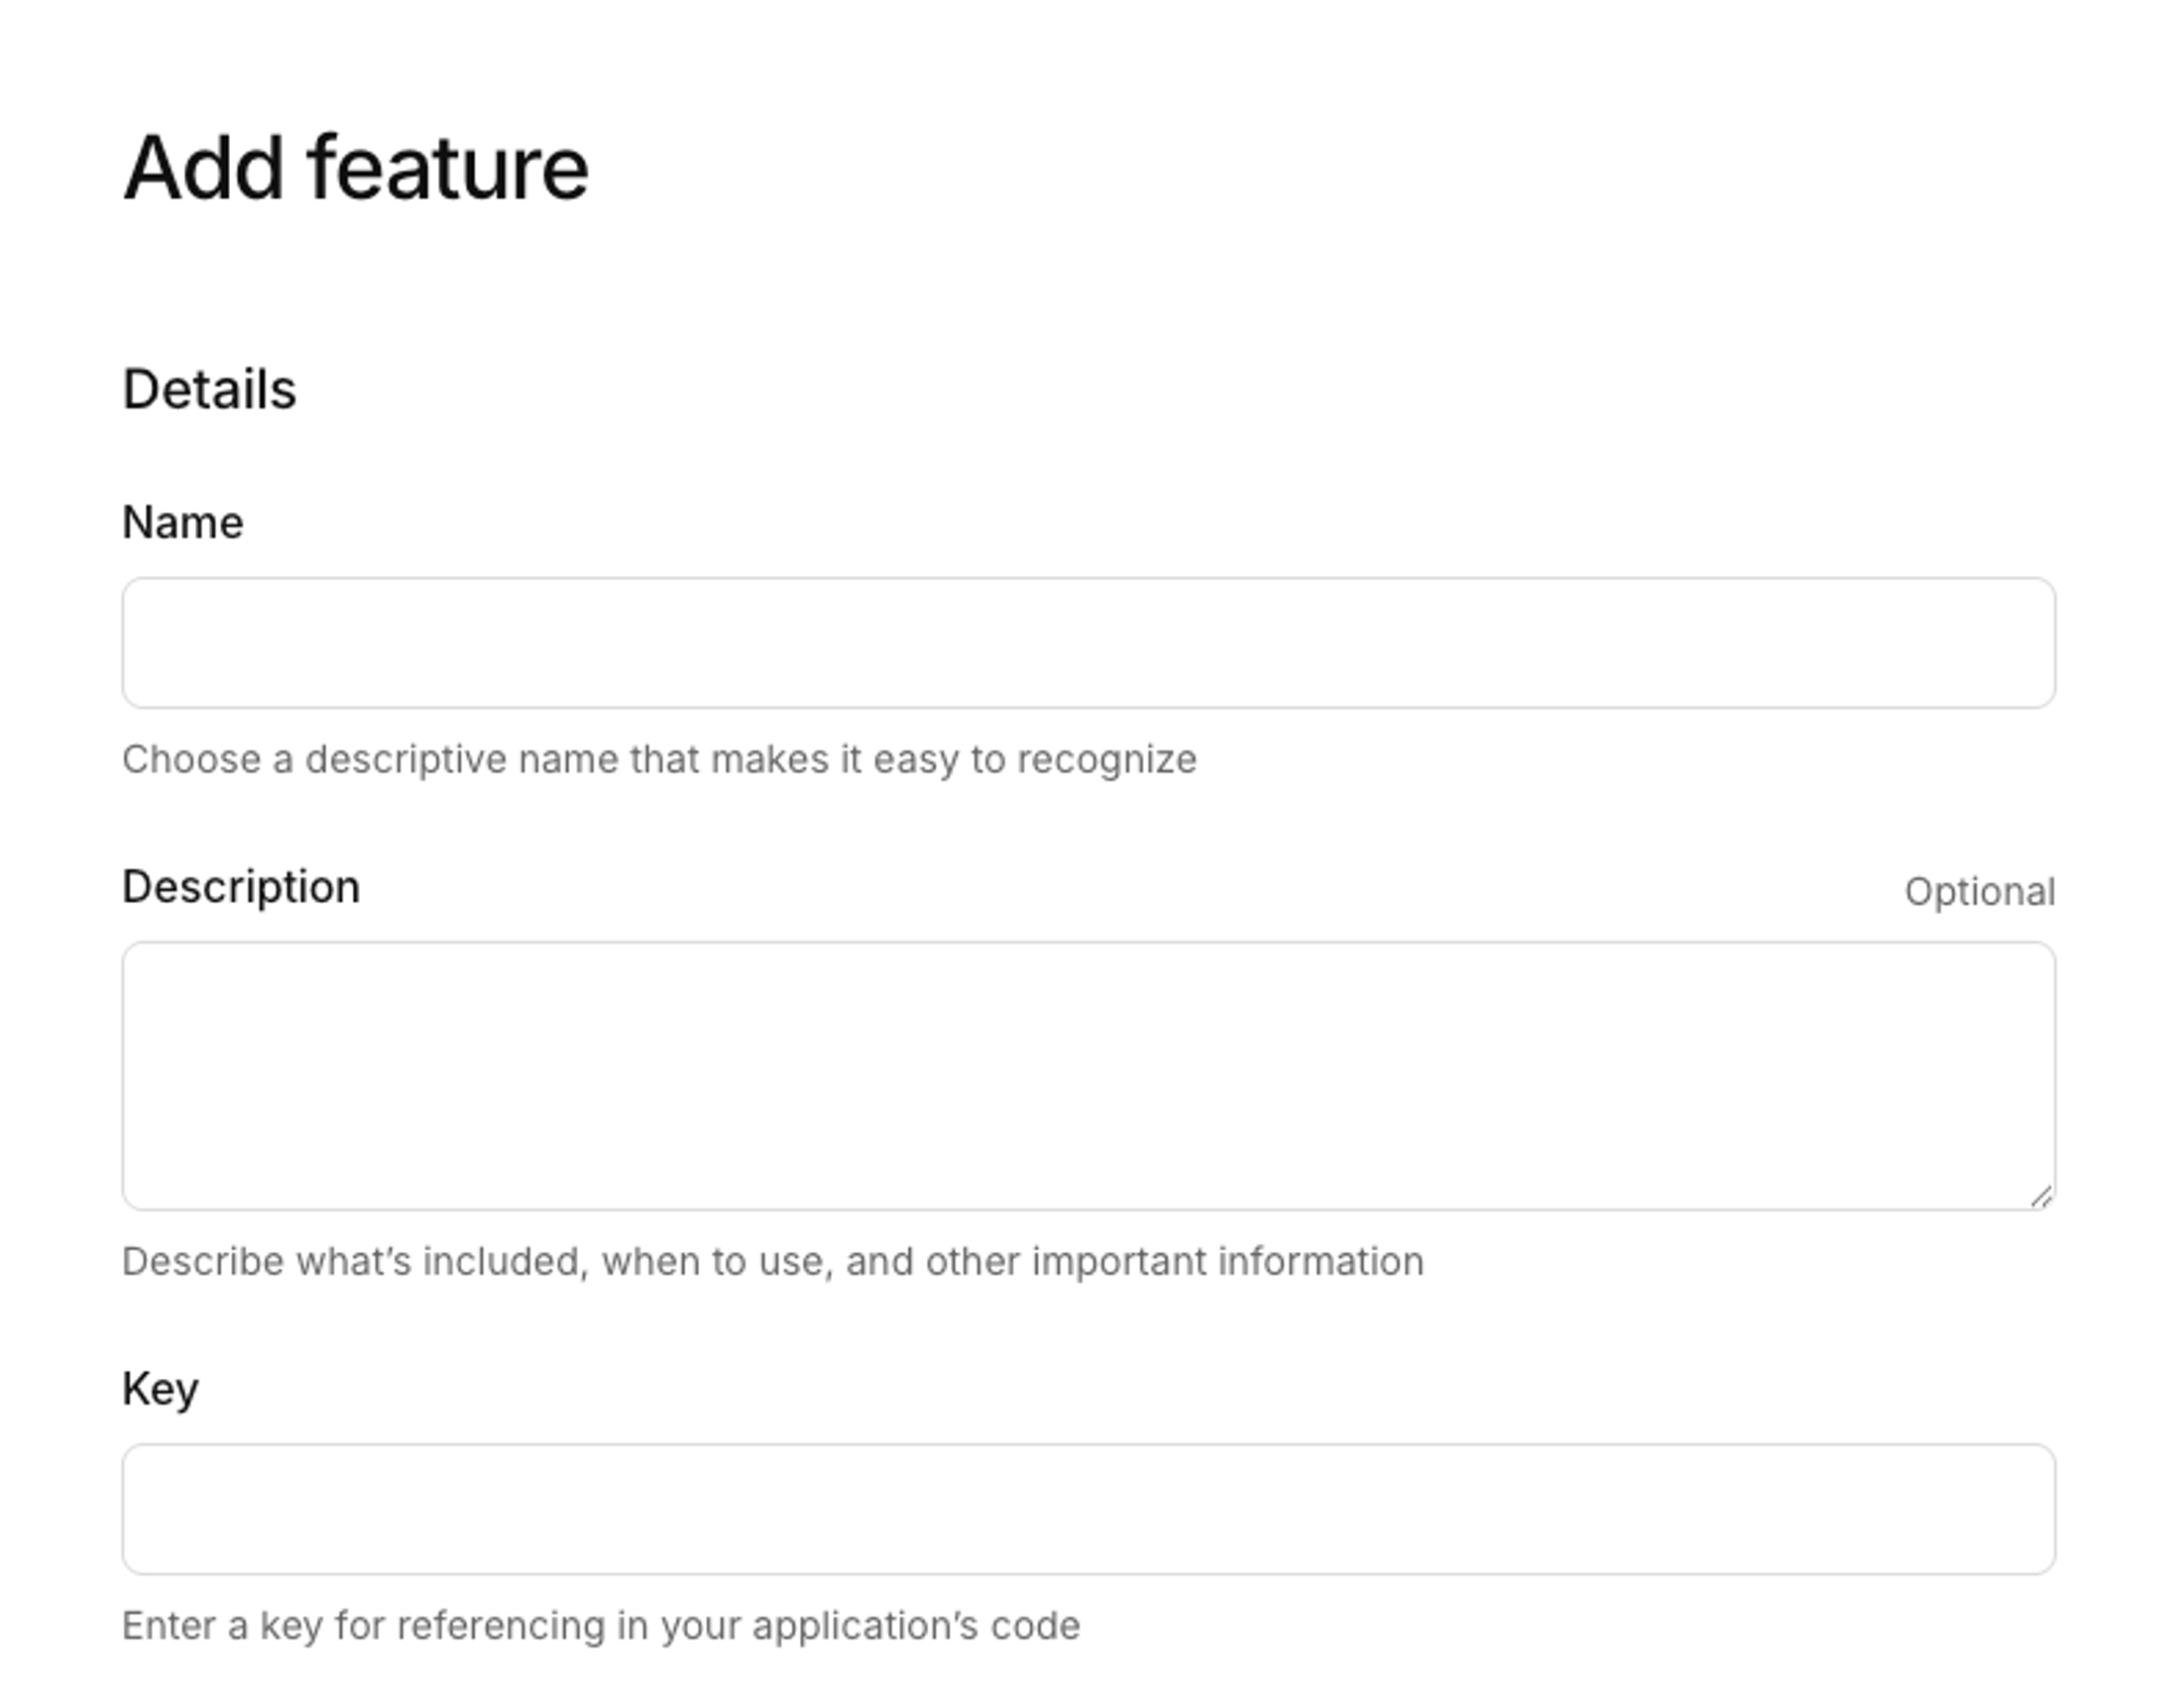 2. To add a new feature, select **New unmetered** or **New metered**, then select **Next**. The **Add feature** window opens. 3. Enter a **Feature name**. Be sure to use something generic if you plan to use this feature again, e.g. `Included seats`. 4. Enter a **Description**. 5. Enter a **Key** for referencing the feature. 6. If you selected an unmetered feature, select **Save**. You’re done. Repeat from step 1 to add more features. 7. If you selected a metered feature, complete the rest of the details: 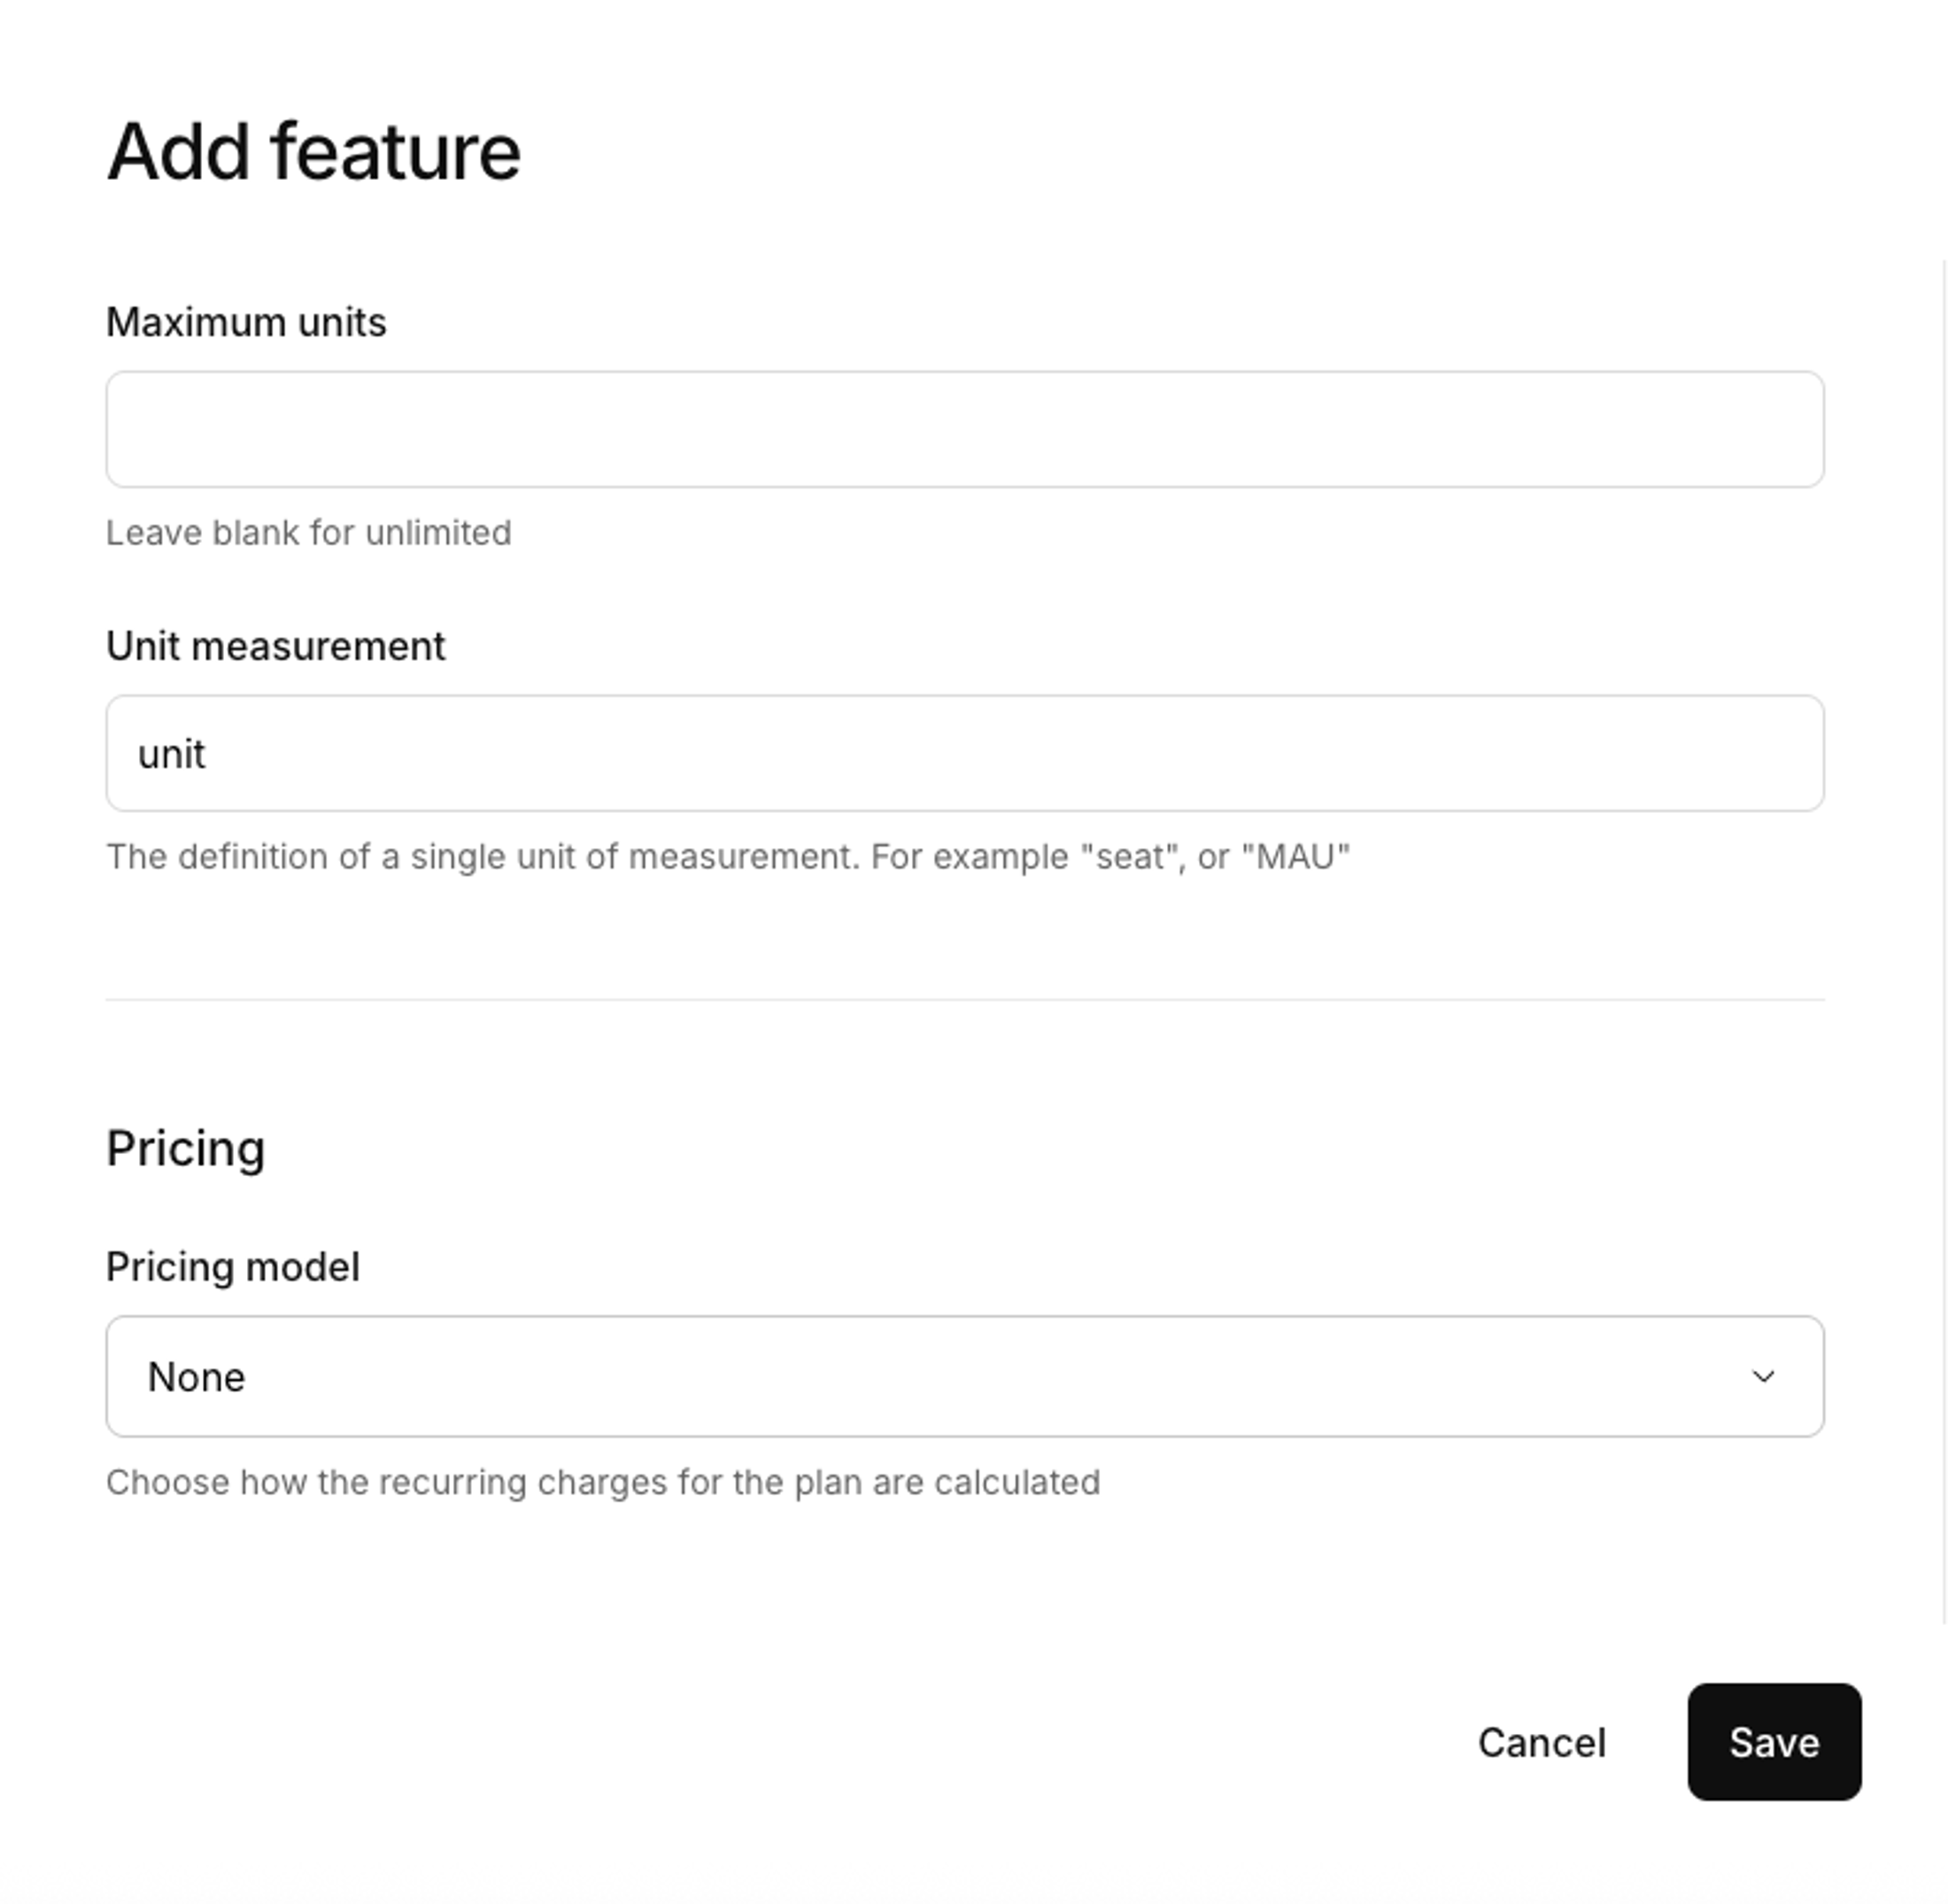 8. Enter the **Maximum units** allowed on the plan. Leave blank if there is no limit. 9. Enter the **Unit measurement** name, e.g. `license`, `MAU` 10. If the item is separately chargeable, select a **Pricing model**. 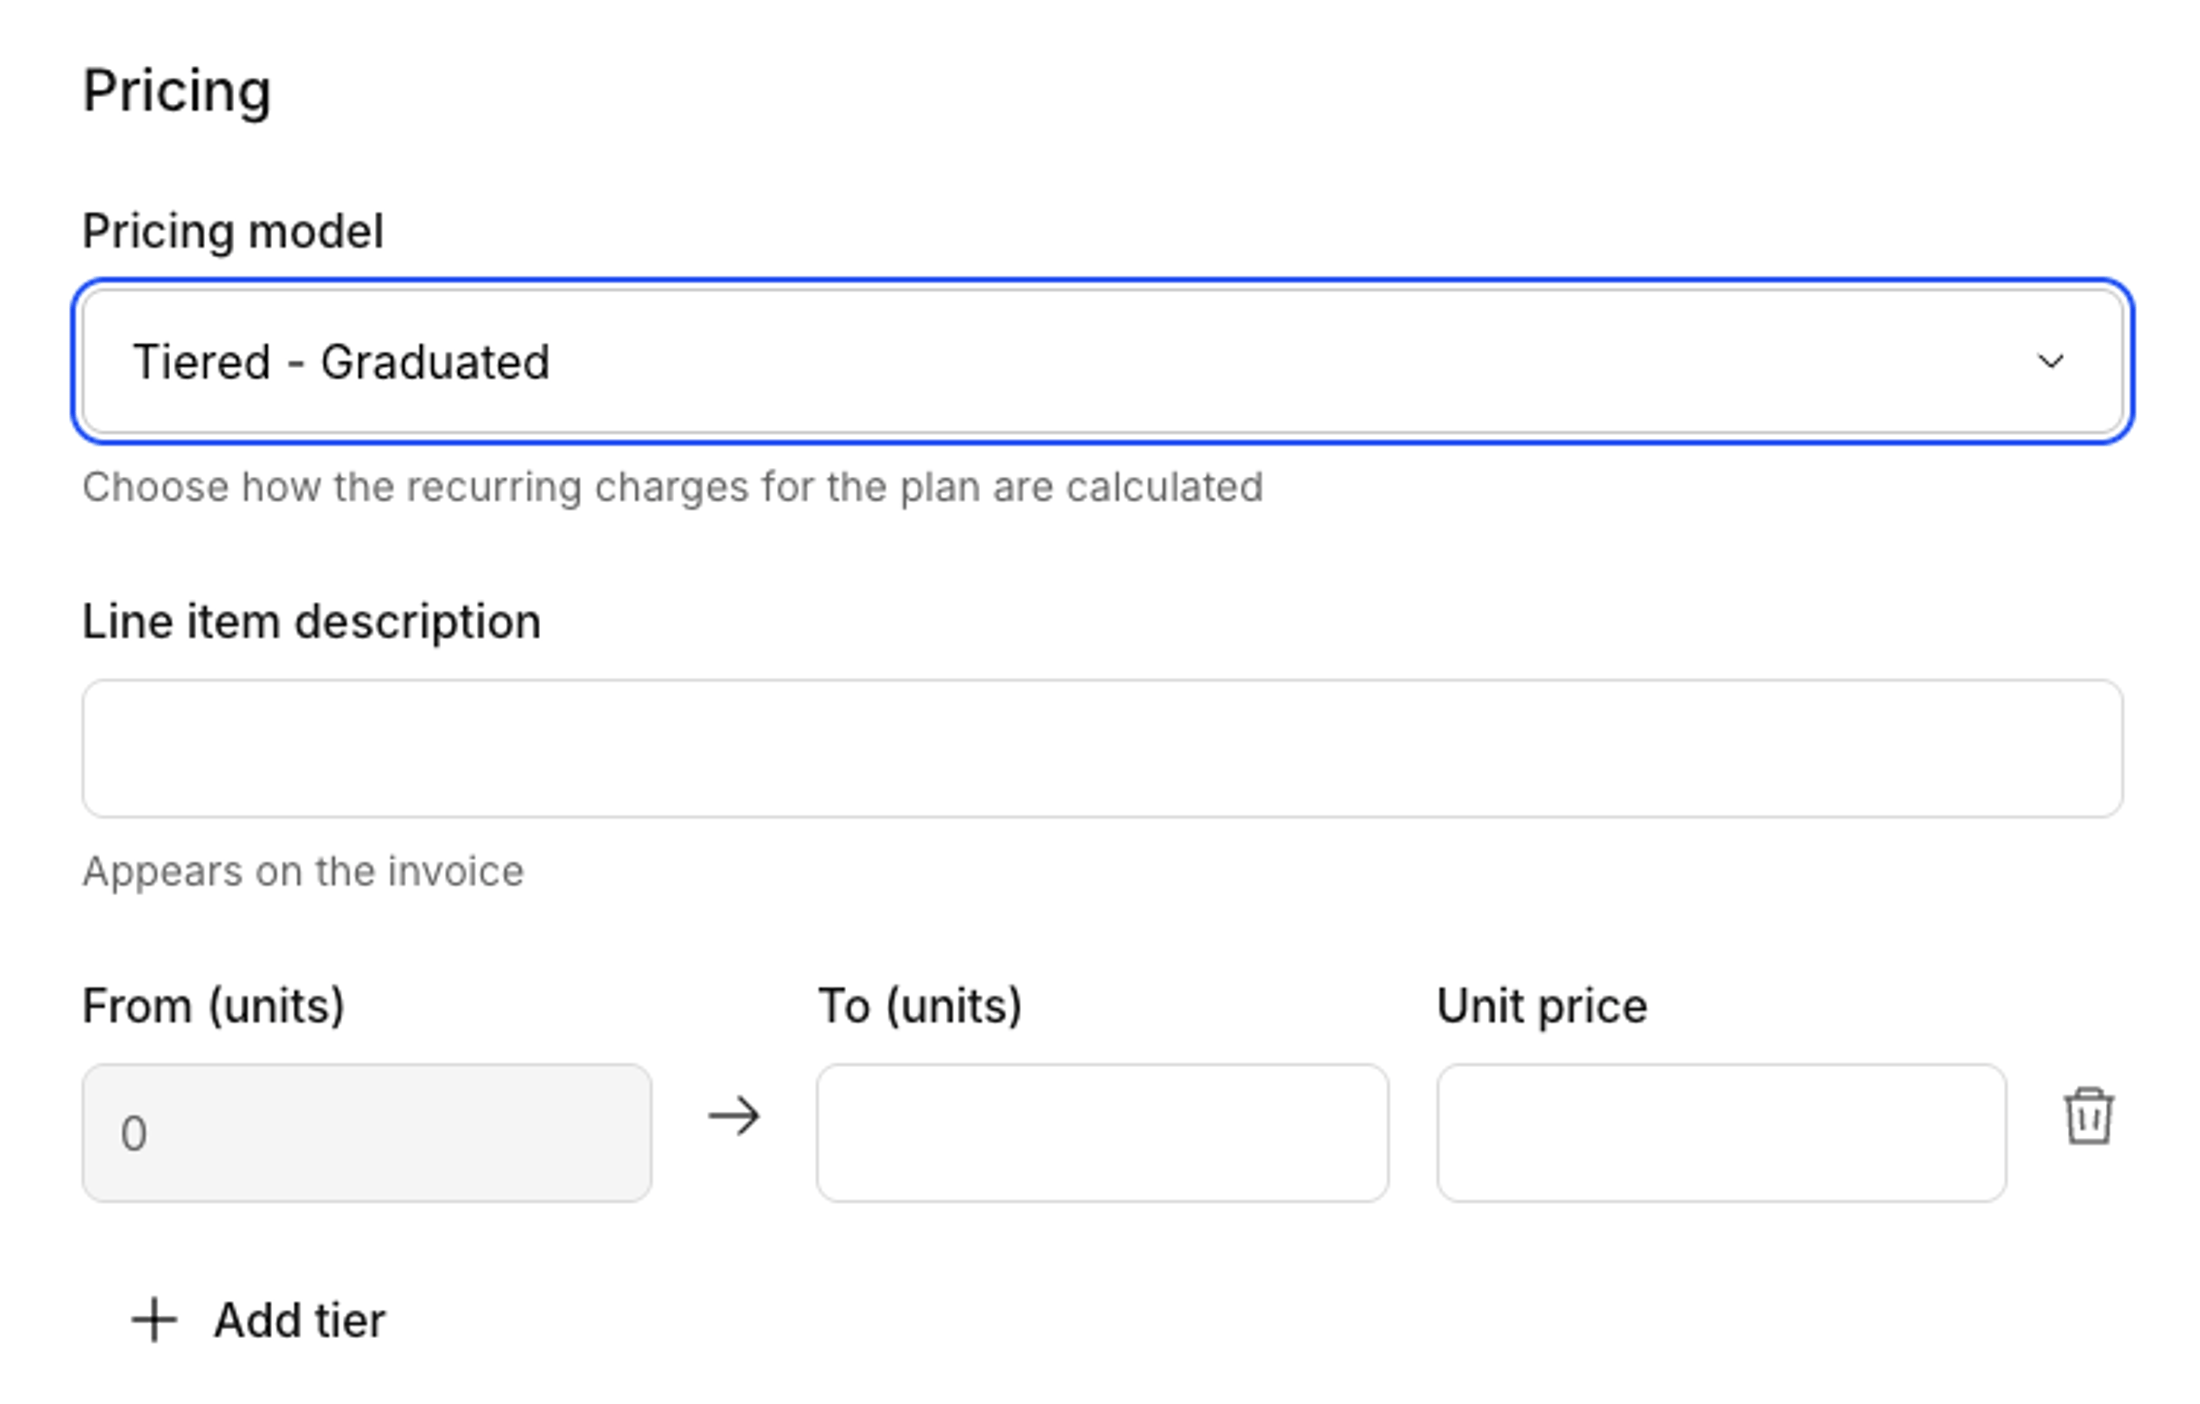 11. Add a **Line item description**. This appears on the customer invoice, so might be more specific than the name, e.g. `Additional licenses for Pro (5)`. 12. For a flat unit price, enter the price and select **Save**. You’re finished. 13. For tiered pricing, select **Tiered - Graduated** and define each tier with unit numbers and add the price per unit. 14. Select **Add tier** to add a different price for higher unit tiers. For example, units might cost $10 each for quantities 1–10, and $9 per unit for 11 or more. Ensure the tiered unit amounts don’t overlap—for example, 1–10, 11–20, 21–30. To set a limitless upper tier (e.g., 11+), use a very high number such as 1–10, 11–1,000,000. Graduated unit fields can’t be left blank. 15. Select **Save.** 16. In the **Plan** window, select **Save** to commit your changes. 17. Repeat for each feature you want to add to the plan. Then repeat this procedure for each plan. ## Add one-time charges to a plan One-time charges are single-purchase items on a plan—for example credit top-ups or add-on unlocks. They appear in their own **One-time charges** section on the plan, separate from **Fixed charges** and **Features**. See [One-time (flat or package) pricing](/billing/pricing/pricing-models/#one-time-flat-or-package-pricing) for pricing-model examples. ### Add a one-time charge 1. Open the plan you want to edit. 2. In **One-time charges**, select **Add one-time charge**.  3. If you have previously created a one-time charge, you will see an extra option: **Use an existing one-time charge**:  1. Turn this option **on** to reuse a charge already defined for another plan. 2. Leave this option **off** to create a new charge. 4. For a new charge, complete **Details**: - **Name** — use a reusable name if you’ll share the charge across plans. - **Description** (optional) — what’s included and when to use it. - **Key** — for referencing in your application’s code. - **Line item description** — appears on the customer invoice.  5. Under **Usage** select one of the following: - **Unmetered** — When you don't track usage for this charge - **Metered** — Track the usage for this charge 6. Set **Unit of measurement** (optional): for example `credits` and **Maximum units**. 7. Under **Pricing**, select a **Pricing model**: - **Flat** — set the **Amount** for each purchase. - **Package** — set the **Amount** and **Number of units** 8. Under **Expiry**, select: - **Never expires** (default) — Remains available across billing cycles - **Expires with the billing cycle** — Ends with the current billing cycle 9. Select **Save**. The charge appears on the plan under **One-time charges**. Cards show metering, pricing model, limits, expiry, and price sync status when connected to Stripe. ### Edit or remove a one-time charge Use the actions on the one-time charge card to edit or remove it from the plan. - **Edit** updates the charge for this plan (and shared catalog fields when they are still editable). If the charge is used on other plans, Kinde shows which plans share it—same pattern as shared features. - **Remove** detaches the charge from this plan. It does not delete a shared catalog charge that other plans still use. You need permission to update plans to add or edit one-time charges, and permission to delete plans to remove them. ### One-time charges vs features and fixed charges | Plan item | Purpose | | --- | --- | | Fixed charges | Recurring subscription fees billed in advance | | Features | Entitlements included with the subscription (metered or unmetered) | | One-time charges | Optional single purchases subscribers can buy (when purchase is live) | ## Price sync status If you are connected to Stripe and the plan or feature is part of a published plan, it will show as `price synced`. Otherwise, it will show as `price not synced`. 
# Billing - Manage plans - Plan upgrade and downgrade policies
> Guide to setting billing policies for plan upgrades, downgrades, and cancellations including usage billing and refund policies.
Last updated: 2025-01-16
plan upgrade, plan downgrade, billing policies, usage billing, refund policies, cancellation policies
billing
If you offer different levels of paid plans, then you will need to facilitate plan upgrade or downgrade. Before you make plan changes, make sure you have set the policies. ## Set billing policies for cancellation and plan changes You can also set policies to control what happens when a customer cancels or changes their plan. The policies are for deciding if you charge or forgive unpaid usage of metered features, and if you refund or retain unused, paid subscription days. By default, unpaid usage is forgiven and you don't refund or credit for unused subscription days. 1. Go to **Settings > Environment > Billing** to set these policy defaults. 2. In the **Policies** section, choose the settings. 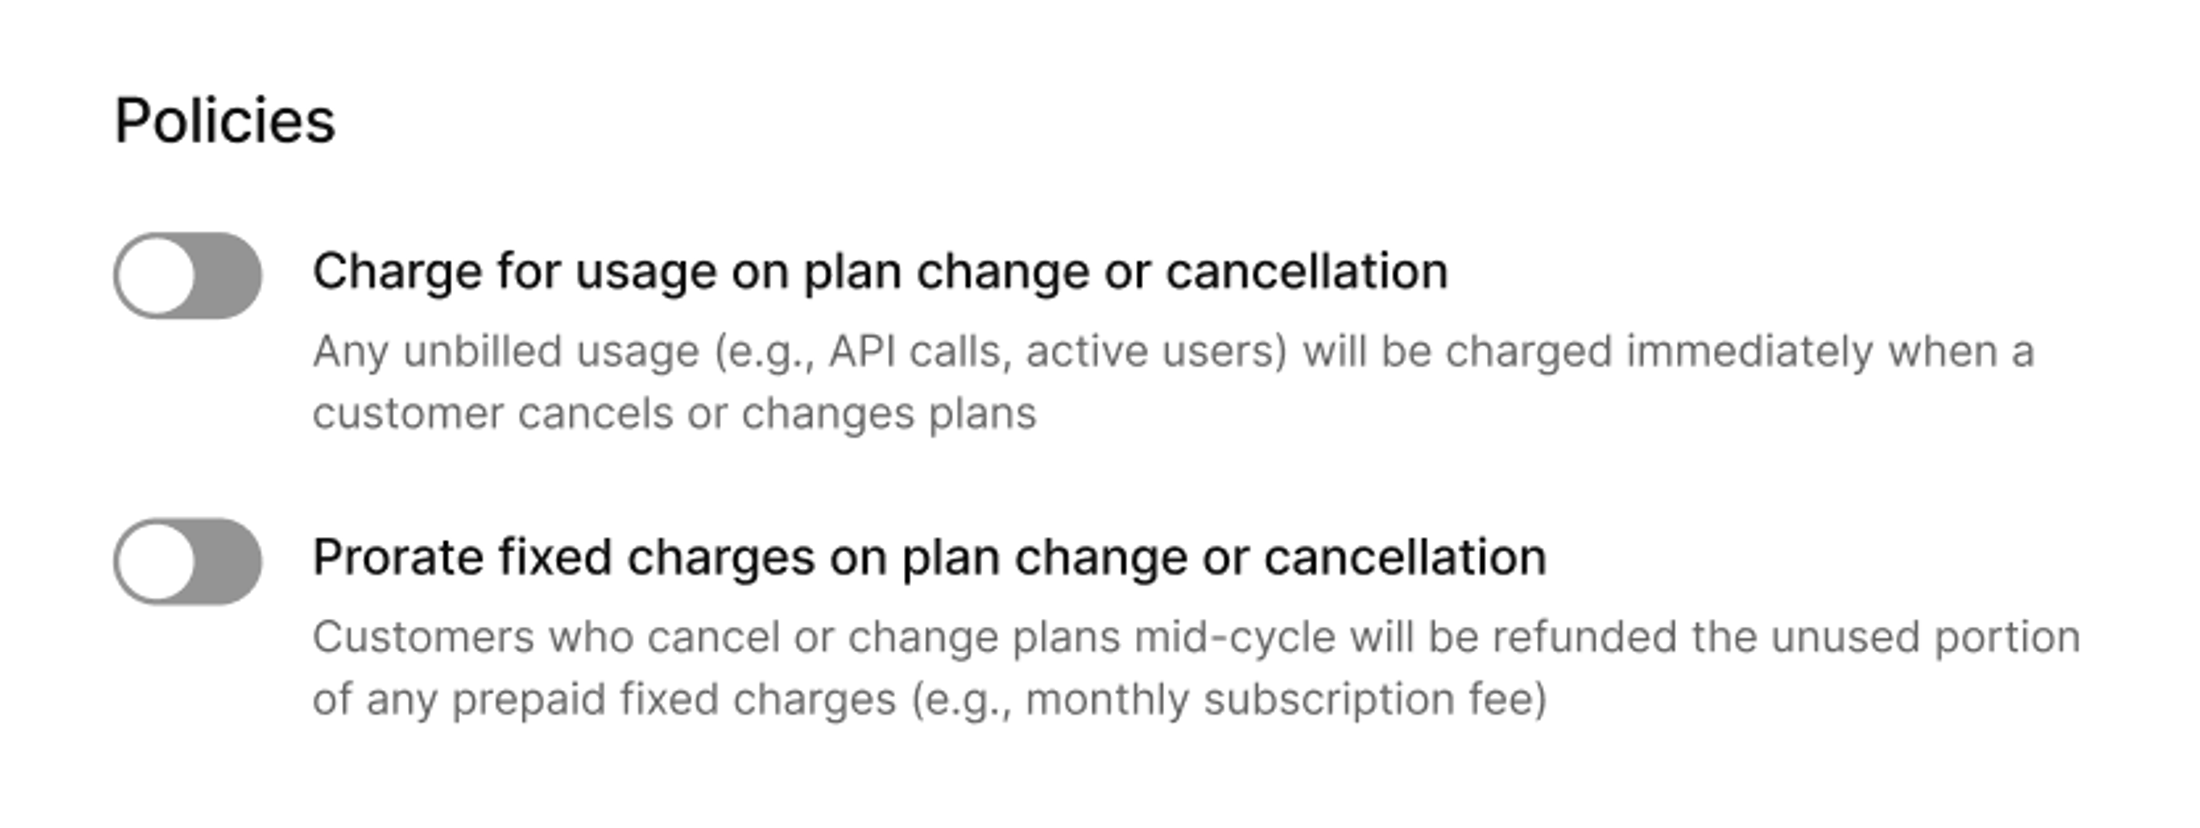 3. Select **Save**.
# Billing - Manage subscribers - Add metered usage for a customer via API
> Guide to manually adding metered usage for customers via the Kinde API including agreement ID and feature code requirements.
Last updated: 2025-01-16
metered usage, API, agreement ID, feature code, usage data, billing cycle
billing
From time to time, you may need to manually add metered usage for an individual customer. You can do this via the Kinde API. Adding usage values requires two key pieces of information: - your customer's agreement ID - the feature code you want to record usage against ## Get the agreement ID - [Via API](https://docs.kinde.com/kinde-apis/management/#tag/billing-agreements/get/api/v1/billing/agreements/). Include the `billing` expand parameter in your request to access the agreement ID. - Via the Kinde UI - Open the user or organization record in Kinde and select **Billing** in the menu. The customer agreement shows as part of the subscription details. 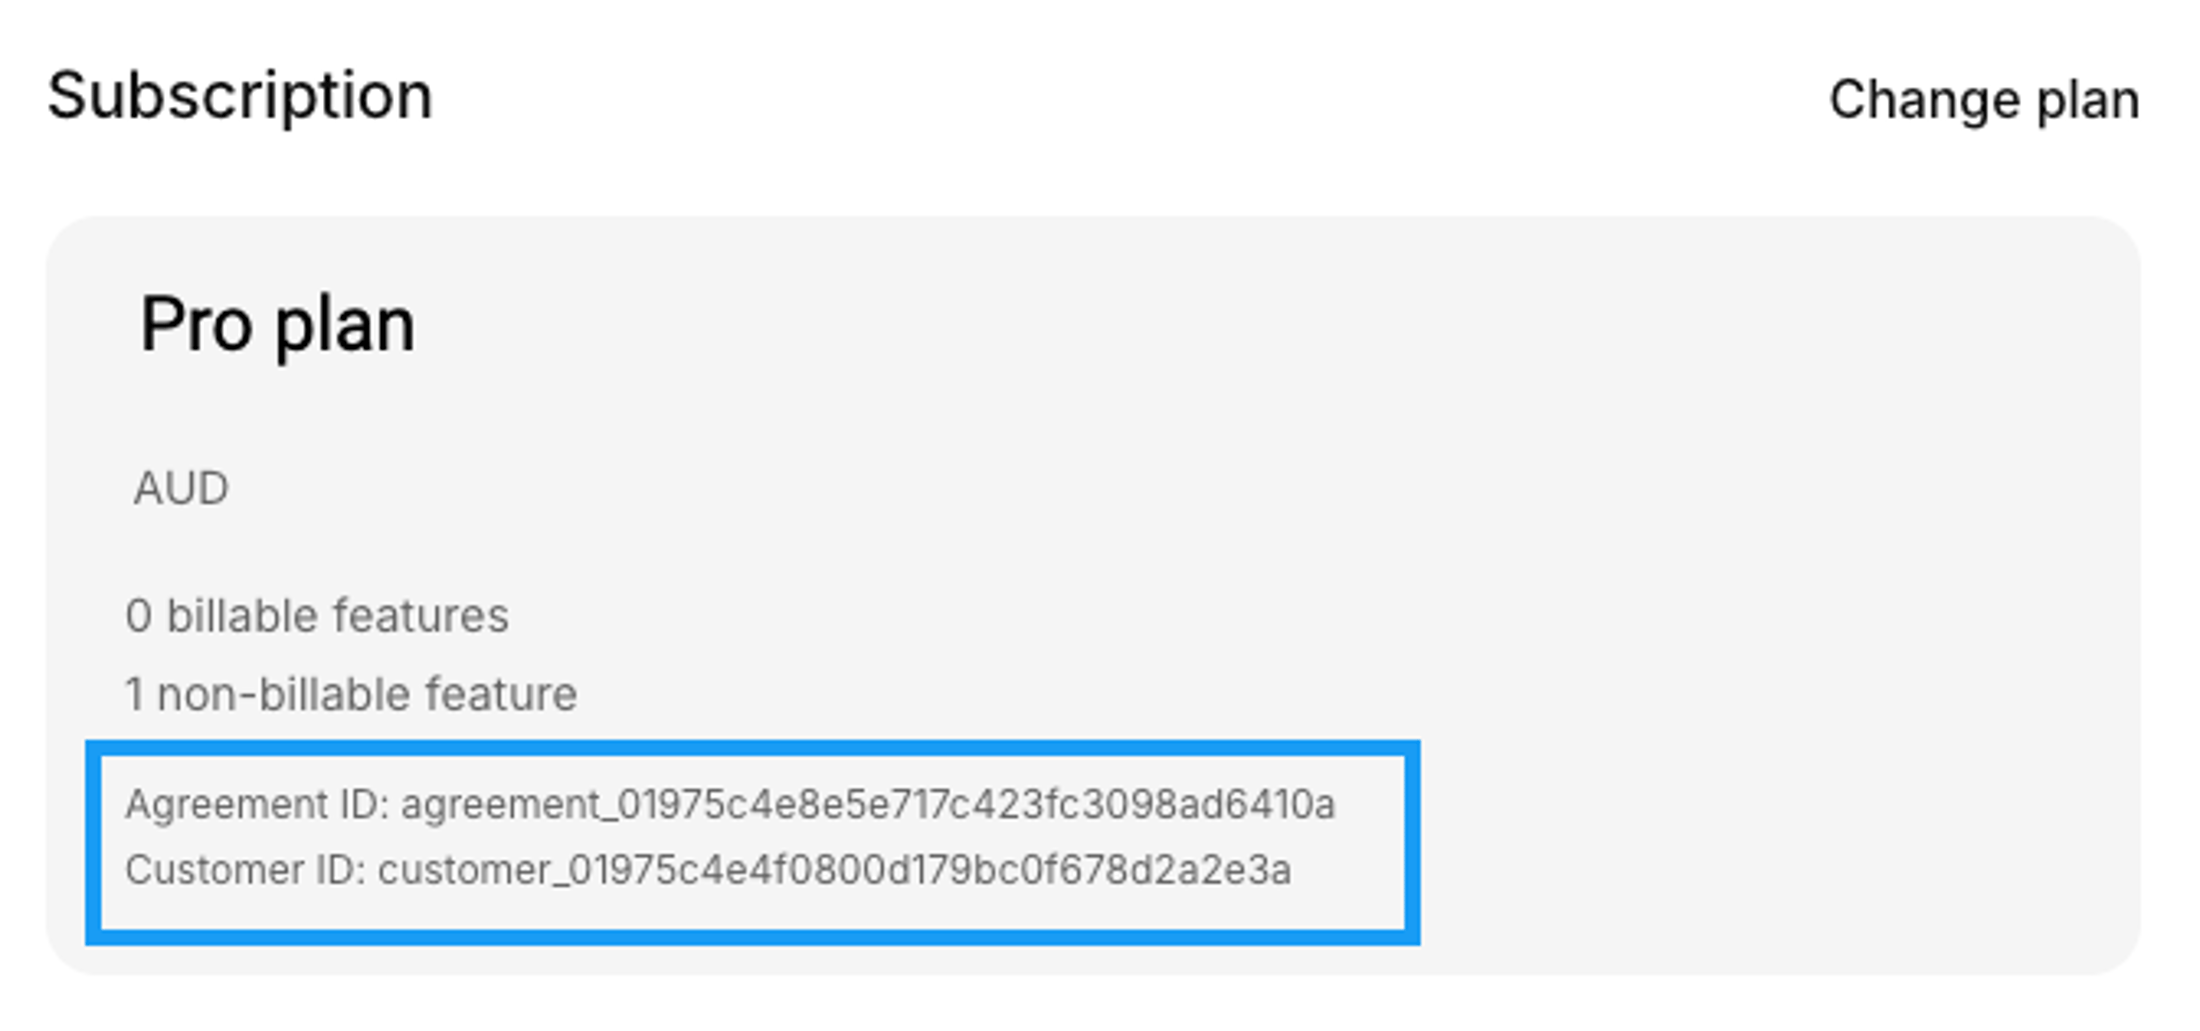 ## Get the feature ID 1. Open the plan the feature belongs to. 2. Edit the feature (to view it) in the plan. 3. Take note of the **Key**. ## Submit usage data POST the usage to the [meter usage record API](https://docs.kinde.com/kinde-apis/management/#tag/billing-meter-usage/post/api/v1/billing/meter_usage/) including the feature code and agreement ID to record a usage value.
# Billing - Manage subscribers - Respond to customer activity using webhooks
> Comprehensive guide to using Kinde billing webhooks to respond to customer activity including event triggers and automation examples.
Last updated: 2025-01-16
billing webhooks, customer activity, JWT, event triggers, automation, subscription events, payment events
billing
Kinde's billing webhooks are outbound calls Kinde makes to your specified endpoint when particular billing events occur. You can use them to keep your application synchronized with Kinde's billing events, trigger automated actions to provide a seamless experience for your customers, and reduce the load on your support team. ## How Kinde webhooks work Kinde webhooks use HTTPS REST to send information about events to a verified external URL that you provide. When an event is triggered, Kinde dispatches a JSON Web Token (JWT) containing relevant data to your registered endpoint. It's essential to verify the authenticity of this JWT to confirm the request originated from Kinde and then decode it to access the event data. If your endpoint doesn't return a 200 OK response, Kinde will retry the webhook call using a back-off policy. More about webhooks: Manage [Kinde webhooks](/integrate/webhooks/about-webhooks/) via the Kinde interface, or via the [Kinde Management API](https://docs.kinde.com/kinde-apis/management/#tag/webhooks). ## Billing webhook triggers and examples ### A customer cancels their subscription * **Trigger**:`customer.agreement_cancelled` * **Description**: Triggered when a customer subscription is cancelled, this might be by the customer or by an admin * **Example**: Automatically deactivate premium features for a user in your application, initiate an offboarding sequence, or update their status in your CRM to "cancelled. ### A new agreement is created for a customer - **Trigger:** `customer.agreement_created` - **Description**: Triggered when a customer signs up to a plan or changes plans, and an agreement is created for the customer. - **Example**: Provision new services for the customer, send a welcome email confirming their subscription, or grant access to exclusive content. ### A customer's invoice becomes overdue * **Trigger:** `customer.invoice_overdue` * **Description**: Triggered when a customer's invoice becomes overdue. Usually only triggered in cases where payment is not automated. * **Example**: Send automated reminders to the customer about their outstanding payment, trigger a temporary suspension of services, or notify your accounts receivable team for follow-up. ### Metered usaage is recorded against a plan feature * **Trigger:** `customer.meter_usage_updated` * **Description**: Triggered when a customer's metered usage data is updated. * **Example**: Ideal for displaying real-time usage statistics to the customer within your app, calculating potential overage charges, or sending notifications if their usage approaches a predefined limit. ### A payment from a customer fails * **Trigger:** `customer.payment_failed` * **Description**: Triggered when a customer's payment attempt fails, for example due to insufficient funds or incorrect credit card details. * **Example**: Initiate a dunning process, prompt the customer to update their payment method, or temporarily restrict access to features until payment is resolved. ### A payment from a customer succeeds * **Trigger:** `customer.payment_succeeded` * **Description**: Triggered when a customer's payment is successfully processed. * **Example**: Confirm a payment receipt to the customer, unlock paid features, or record the successful transaction in your accounting system. ### A plan is associated with a customer in Kinde * **Trigger:** `customer.plan_assigned` * **Description**: Triggered when a customer is associated with a plan in Kinde. * **Example**: Activate the features associated with the newly assigned plan in your application, send a plan activation email, or update the customer's profile with their new plan details. ### A customer's plan changes (upgrade or downgrade) * **Trigger:** `customer.plan_changed` * **Description**: Triggered when a customer's billing plan is changed (e.g., upgraded or downgraded). * **Example**: Adjust the customer's feature access based on the new plan, update their billing cycle information, or notify relevant internal teams about the plan changes.
# Billing - Manage subscribers - Subscription upgrade and downgrade methods
> Upgrade or downgrade subscriptions via self-serve Pay annually, admin Change plan, or API, and review Next invoice
Last updated: 2026-08-22
subscription upgrade, Pay annually, self-serve portal, Change plan, next invoice, billing policies, subscription downgrade
billing, manage-subscribers, subscriptions
Customers will eventually want to change the plan they are on and you need a way to alter their subscription. ## How to upgrade or downgrade a plan subscription - Set up the self-serve portal and allow customers to manage their own subscriptions. See [self-serve portal for orgs](/build/self-service-portal/self-serve-portal-for-orgs/) and [self-serve portal for users](/build/self-service-portal/self-serve-portal-for-users/). In this scenario, the user selects the new plan from the pricing table. If any displayed plan offers annual pricing, they can turn on **Pay annually** to see and select yearly (or mixed yearly + monthly) prices — the same toggle used at sign-up. See [How customers choose annual pricing](/billing/billing-user-experience/plan-selection/#how-customers-choose-annual-pricing). - Manually upgrade or downgrade via the Kinde UI (see below). Choosing annual pricing when an admin assigns or changes a plan is not available in this flow yet. - Overwrite the current agreement (subscription) by [creating a new one via API](/kinde-apis/management/#tag/billing-agreements/post/api/v1/billing/agreements/) ## Change a plan subscription for an organization (B2B) or user (B2C) 1. Open the organization or user record in Kinde. 2. Go to **Organizations** and locate the org, or go to **Users** and locate the user. 3. Select **Billing** in the side menu. Details of the org’s or user’s plan are shown. 4. Select **Change plan**. 5. In the dialog that appears, select the new plan. 6. Select **Save**. The customer’s plan is now updated. Depending on the [billing policies](/billing/manage-plans/upgrade-downgrade-plans/) you have set, this information will be synced to Stripe and an invoice credit or bill will be issued. On the billing details page, the subscription card shows **Plan** and **Next invoice** in the same way as the customer portal (amount and date, including usage recorded so far when the plan has metered features). Agreement ID, Customer ID, and feature counts remain admin-only. See [Billing and invoice cycles](/billing/about-billing/kinde-billing-model/#billing-and-invoice-cycles).
# Billing - Payment management - Manage Stripe connection
> Guide to managing the Stripe connection in Kinde including connection status monitoring, troubleshooting, and disconnection procedures.
Last updated: 2025-01-16
Stripe connection, connection status, troubleshooting, business information, identity verification, disconnect
billing
When you connect to Stripe as part of Kinde's billing feature, a new Stripe account is created for you. You cannot connect an existing Stripe account. When you first connect Stripe as part of the setup flow, you need to set up the new Stripe account with all your business and other details to make the connection active. To connect, follow [this process](/billing/get-started/connect-to-stripe/). You can then manage the connection in **Settings > Billing**. 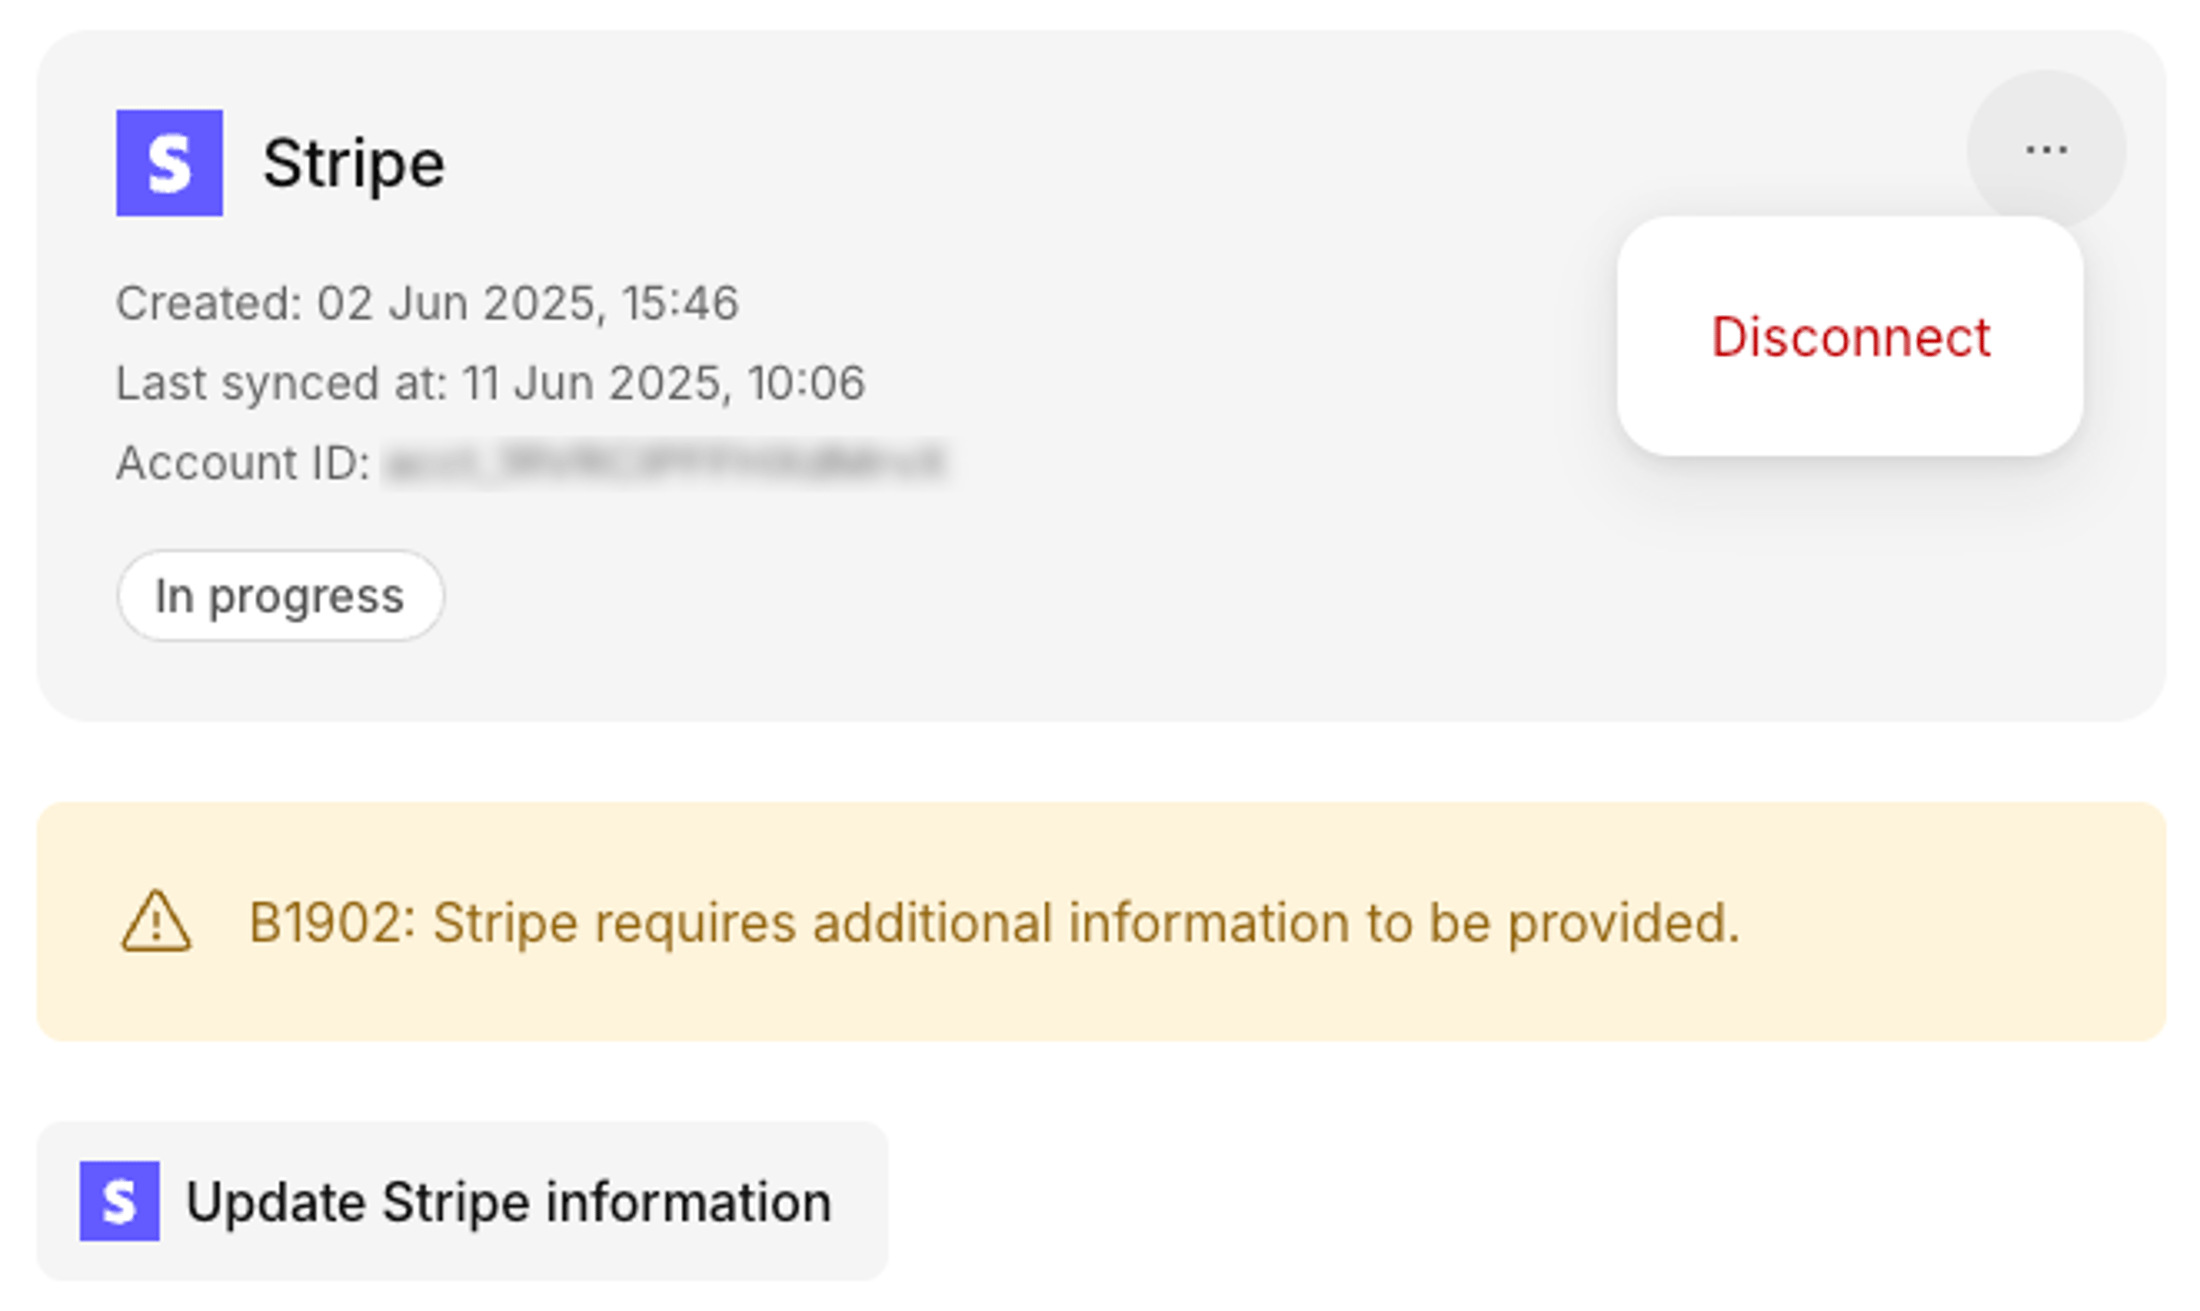 ## Manage the Stripe connection The Stripe connection status (see below) lets you know if Stripe is connected or if you need to take action. Statuses include: - `Connecting` means Stripe is still sending information to Kinde about the account status. It should not take long to sync. - `In progress` indicates that Stripe has connected to Kinde, but still requires some additional details from you in order to fully set up the account. Select **Update Stripe information** to complete the Stripe onboarding. You need to do this before plans can be made available to your customers. - `Connected` means Stripe is successfully syncing data with Kinde and you’re ready to publish plans. You may also see an error and message, letting you know what action is needed. To add and edit Stripe business information, select **Update Stripe information**. ## Disconnect Stripe This action is not reversible. 1. Go to **Settings > Environment > Billing**. 2. On the Stripe connection card, select the three dots, then select **Disconnect**. 3. In the confirmation window, select **Disconnect billing connection**. ## Troubleshoot Stripe issues Stripe requires that your account is set up properly before connecting successfully. Here's some common reasons why the Stripe connection status remains **In progress**. - Incomplete business information - contact, tax, or other business details - Identity verification - where you need to upload a copy of your ID To add details in Stripe, select the **Update Stripe information** option.
# Billing - Payment management - Connect payment processor (Stripe)
> Step-by-step guide to connecting Stripe payment gateway to Kinde including onboarding flow and connection status management.
Last updated: 2025-01-16
payment gateway, Stripe connection, onboarding flow, business information, connection status, test environment
billing
Kinde’s billing feature comes with a dependency on third party payment processor, specifically [Stripe Billing](https://stripe.com/au/billing). A payment processor holds credit card details, processes payments, applies tax, and generally handles all the financial side of billing. For now, only [Stripe](https://stripe.com), a known and reliable payments processing platform, is supported. A new Stripe account is automatically created for you when you set up billing in Kinde. 1. If you are testing billing, switch to your non-production environment. 2. Go to **Settings > Environment > Billing**. 3. Select **Connect Stripe account**. Kinde initiates the connection and adds the connection card.  4. Select **Update Stripe information**. This kicks off a Stripe onboarding flow. You will see a Stripe-generated screen to enter details.  5. Enter the email that will be associated with the Stripe account and select **Submit**. The next step depends if you have a Stripe account already associated with your email address. 1. **If you are in the test environment**, you’ll be prompted through a flow. You can continue or select **Return to Kinde**. 2. **If you are in a production environment,** you will be asked if you want to use details from an existing Stripe account or make a new one: 1. If you select existing, account details from the existing account will be used, but no other data will come across. 2. If you select to make a new one, you will be prompted to enter all your business details. This can take a while. 3. Follow the prompts as far as you want. Select **Return to Kinde**. 6. When you complete the Stripe onboarding, or opt out by selecting **Return to Kinde**, the connection card on the Kinde **Billing** page shows the connection status.  - `Connecting` means Stripe is still sending information to Kinde about the account status. It should not take long to sync. - `In progress` indicates that Stripe has connected to Kinde, but still requires some additional details from you in order to fully set up the account. Select **Update Stripe information** to complete the Stripe onboarding. You need to do this before plans can be made available to your customers. - `Connected` means Stripe is successfully syncing data with Kinde and you’re ready to publish plans.
# Billing - Pricing - Pricing models
> Choose Kinde pricing models — flat rate with annual or mixed intervals, usage-based, one-time flat or package, tiered, and per-feature strategies
Last updated: 2026-09-07
pricing models, flat rate pricing, mixed-interval pricing, Pay annually, usage-based pricing, tiered pricing, per-feature pricing, one-time charges, package pricing
billing, pricing, pricing-models
A pricing model refers to the structured approach businesses use to charge customers for products and services, often based on factors like usage, feature access, or licensing. In Kinde, each feature you include in a plan has a pricing model attached. This topic describes some examples of pricing models you can apply in Kinde, when you might want to use them, and how to [set them up in your Kinde plans](/billing/manage-plans/create-plans/). ## Pricing decisions There's a lot of information available about SaaS pricing strategy, and many things to consider. Research the market and map out an approach that works for your business now and as you grow, before setting up plans for the first time. We will also add more flexibility and variation for pricing models in Kinde, as our billing feature develops. ## Flat rate pricing (e.g. subscription pricing) Where you want to charge a periodic flat fee for access to your product or services. Higher plans may include access to more features, or have higher access limits. In Kinde, create a **Fixed charge** and call it something like `Subscription fee`. Choose a **billing interval** (daily, weekly, monthly, or yearly) and set the price. You can optionally [offer as annual](/billing/manage-plans/create-plans/#offer-annual-pricing) — bill the charge once per year at a custom yearly price when the customer selects yearly billing (only one fixed charge per plan can be offered as annual). Re-use the charge in each plan and change the price and line item description as needed. - Example - Basic plan 5.00, Team plan 20.00, Business plan 75.00. You can also add more than one fixed charge on a plan with different intervals. For example, offer the base fee as annual while a smaller add-on stays monthly. When the customer turns on **Pay annually**, they see both amounts — for example `$100 / year + $3 / month` — and are billed on each charge’s schedule. See [How customers choose annual pricing](/billing/billing-user-experience/plan-selection/#how-customers-choose-annual-pricing). ## Usage-based (metered or tiered) pricing Where you charge customers for what they use. For example, monthly active users, data storage, transactions, etc. For each individual plan you can treat this as fully pay-as-you-go, or charge volume prices so the price goes down the more units are used. You can set limits for usage based pricing or leave as limitless. Limits can make plan upgrade more attractive. ### Usage pricing - per unit In Kinde, add a **New metered feature**, e.g. `Data storage`. Leave **Maximum units** blank for limitless, or set a limit. Select a **per unit** pricing model. Set a price for each unit. E.g. - Example - Basic plan is 00.30 per unit, Team plan is 00.20 per unit, Business plan is 00.10 per unit. ### Usage pricing - volume pricing In Kinde, add a **New metered feature**, e.g. `Token generation`. Leave **Maximum units** blank for limitless (you might do this for the highest plan only), or set a limit per plan. Select the **Tiered graduated** pricing model. Set the price for each unit tier for each plan. E.g. - Basic plan (100 unit limit) 0-10 tokens / 0.50 per token, 11-20 tokens / 0.35 per token, 21-100 tokens / 0.20 per token. - Team plan (250 unit limit) 0-10 tokens / 0.40 per token, 11-20 tokens / 0.30 per token, 21-100 tokens / 0.15 per token. - Business plan (No unit limit) 0-100 tokens / 0.15 per token, 101-250 tokens / 0.10 per token, 251-1,000,000,000 tokens / 0.05 per token. (Note you need to include an upper tier limit even if you offer limitless, just use a really high number.) ## One-time (flat or package) pricing Where you want customers to buy a single purchase on top of (or alongside) a subscription—for example a credit pack or a one-off unlock. In Kinde, open a plan and use **One-time charges** (not **Fixed charges** and not **New metered** under Features). 1. Select **Add one-time charge**. 2. Choose **Flat** or **Package** as the pricing model. 3. For **Flat**, set the **Amount**. 4. For **Package**, set the **Amount** and **Number of units** (for example `20.00` per `100` credits). 5. Optionally mark the charge as metered, set a unit of measurement and maximum units, and choose whether access **Never expires** or **Expires with the billing cycle**. - Example (flat) — Pro plan offers a `$49` one-time “Priority onboarding” unlock that never expires. - Example (package) — All plans offer `$20` per `100` AI credits; credits expire with the billing cycle. For field-by-field setup, see [Create billing plans — Add one-time charges to a plan](/billing/manage-plans/create-plans/#add-one-time-charges-to-a-plan). ## Per feature pricing Where you charge per feature or module in your SaaS model. This approach can make plan pricing transparent and make it easy for customers to choose the right plan. It can also help you group "expensive" or more "enterprise" features for inclusion in higher plans. However, it can also be challenging to decide what features should be in or out of specific plans, and to provision and gate each feature in-product. If you want to charge based on features, we recommend using a subscription model, and then including/excluding features for your plan levels. - Example - Basic plan 10.00 for features A-E. Team plan 20.00 for features A-N. Business plan 75.00 for features A-Z. Another way to approach this is to included limited metered features per plan, so that all customers get a "taste" of features, but to get more of one you need to upgrade. - Example - Basic plan 10.00 for features A-E (plus one each of F & G). Team plan 20.00 for features A-N (Plus two of U & V). Business plan 75.00 for features A-Z. ## Support and feedback Email support@kinde.com if you need a different pricing model than those listed above, or if you need help setting up your plan pricing.
# Build - Applications - Applications in Kinde
> Comprehensive overview of Kinde applications including backend, frontend, and machine-to-machine applications with OAuth 2.0 flows and security considerations.
Last updated: 2024-01-15
applications, OAuth 2.0, authorization flows, backend apps, frontend apps, M2M apps, client credentials
applications, oauth, authentication
Applications in Kinde facilitate the receipt of access tokens in your application’s code. Kinde applications use OAuth 2.0 flows to securely pass tokens. See [Section 4 of the OAuth 2.0 Authorization Framework](https://datatracker.ietf.org/doc/html/rfc6749#section-4) for details on Authorization flows. We support the following applications and flows. ## Customer identity and workforce identity **Settings > Environment > Applications** is split into two sub-pages. **Customer identity** holds the OAuth applications that make up your own product, which are the front-end, back-end and machine-to-machine apps described on this page. These use OAuth 2.0 to issue tokens to your code. **Workforce identity** holds SAML applications, which are the third-party tools your own team signs in to, such as Google Workspace, Microsoft 365 or Slack. For these, Kinde acts as a SAML identity provider rather than issuing tokens to your product. See [Workforce identity in Kinde](/workforce-identity/). The rest of this page describes customer identity applications. ## Back-end / server-side apps Use for server-rendered web applications. Suitable for confidential applications (such as Regular Web Applications) because the application's authentication methods are included in the exchange and must be kept secure. ### Secured with Authorization Code Flow This application uses the Authorization Code Flow to exchange an authorization code for a token. For security, a client secret is required to request an access token. The client secret is known only to the application and the authorization server. So when the application makes a request for an access token, it includes the client secret as a form of authentication. This ensures that the authorization server can verify the identity of the client application. The use of client secrets protects sensitive data from being accessed by unauthorized users and systems. ### SDKs and compatible frameworks Apollo GraphQL, Elixir, ExpressJS, Express GraphQL, Java, .NET, Next.js, NodeJS, Nuxt, PHP, Python, Ruby, TypeScript. [View Kinde SDKs](/developer-tools/about/our-sdks/) ## Front-end / client-side apps Use for client-side web applications, single page web applications, and mobile applications. Authentication methods are different for these apps because they run in unsecured systems, such as web browsers. ### Secured with Authorization Code Flow and PKCE This application uses the Authorization Code Flow with Proof Key for Code Exchange (PKCE). Client-side applications, such as single-page web apps, are typically unable to securely store a client secret due to the inherent exposure of client-side code. That’s why OAuth 2.0 recommends the Implicit Flow or PKCE (Proof Key for Code Exchange) to provide security without relying on a client secret. ### SDKs and compatible frameworks JavaScript, React, TypeScript, Android, iOS, React Native, Expo, Flutter, Node/Apollo GraphQL, Node/Express GraphQL. [View Kinde SDKs](/developer-tools/about/our-sdks/) ## Machine to machine (M2M) apps Use for your backend services that require access to an API. This includes accessing the Kinde management API. Other use cases include CLIs, daemons and IoT devices. You can create as many M2M apps as you require. See [Add a machine to machine application for API access](/developer-tools/kinde-api/connect-to-kinde-api/). ### Secured with Client Credentials M2M applications are secured through an initial exchange of each application’s Client ID and Client Secret. This identifies each application as authorized for token exchange. Each access token request must include the `Client Credentials` grant type. Typically, a request includes scopes, which define the type of information that can be requested in the exchange. ### Access to Kinde's Management API is managed via scopes When you set up an M2M application that you will use with Kinde's Management API, you need to select the scopes that your application will need to access. For example, you'll select `read`, `create`, `update`, and `delete` actions. ### Add properties to M2M tokens If you want, you can [add custom properties to an M2M application](/properties/work-with-properties/manage-properties/) and then [include these properties in M2M tokens](/properties/work-with-properties/properties-in-tokens/). This is helpful if you want to include special information when you pass M2M tokens between systems.
# Build - Applications - Add and manage applications
> Step-by-step guide for adding and managing applications in Kinde including configuration tasks, application deletion, and integration setup requirements.
Last updated: 2024-01-15
add applications, manage applications, application configuration, delete applications, application keys, callback URLs
applications, configuration
Applications are how you make your product or service available to your users, such as through a mobile app, a web app, or a website. If you plan to manage authentication for each of your applications using Kinde, you will need to add and configure each application. [Kinde provides several application types](/build/applications/about-applications/), including a regular web app (for execution on a server), single page web app (for browsers and mobile), and machine to machine applications (for backend services that require access to an API, including the [Kinde management API](/developer-tools/kinde-api/connect-to-kinde-api/)). Applications are organized into two sub-pages. **Customer identity** holds the OAuth applications that make up your product, which is what this page covers. **Workforce identity** holds SAML applications that let your own team sign in to third-party tools, with Kinde acting as the identity provider. To add one of those, see [Add and configure a SAML application](/workforce-identity/add-saml-application/). ## Add an application 1. Go to **Settings > Environment > Applications** and select the **Customer identity** tab. 2. Select **Add application**. 3. Enter a name and select the type of application. 4. Select **Save**. A tile appears for the application. 5. Configure the application by selecting **View details** on the application tile. Some of the main tasks are listed below. ## Application configuration tasks - [Get application keys](/get-started/connect/getting-app-keys/) to connect your apps - Set callback URLs using the [relevant SDK](/developer-tools/about/our-sdks/) - [Set up authentication](/authenticate/authentication-methods/set-up-user-authentication/) - [Configure tokens](/build/tokens/configure-tokens/) ## Delete an application You can now delete applications in Kinde. You need to be an owner or an admin to do this. When an application is deleted, all application-related authentication settings, token settings, session information, and API links are also deleted. 1. Go to **Settings > Environment >** **Applications**. 2. Select the three dots next to the application you want to delete and select **Delete application**. A confirmation window appears. 3. Follow the prompts in the window and select **Delete application**.
# Build - Applications - Authenticating single-page apps (SPAs) with Kinde
> Comprehensive guide for authenticating single-page applications with Kinde including client-side and server-side authentication approaches with React and Node.js examples.
Last updated: 2026-03-03
SPA authentication, single-page apps, client-side auth, server-side auth, PKCE, JWT validation, API routes
applications, authentication, spa
A very common architecture is to use a decoupled front-end / back-end with a standalone front-end and separate REST API for the back end. This topic runs through a scenario for authenticating a SPA. In our scenario, you have a React front-end and a NodeJS based API. This is a pretty common set up we see at Kinde, however, the guiding principles are the same regardless of the technologies you use. There are a couple of ways you can use Kinde to authenticate this style of application. ## Option 1: Client side authentication This authentication option takes place in the browser and when you want to call your API, you send the access token you received from Kinde to your API in the **Bearer header**. ### Front end setup 1. In Kinde, go to **Settings > Applications > Add application** and choose **Front-end and mobile** application. 2. Follow the **Quick Start** guide for your chosen technology to get set up. This can be found in the menu when you view details of the application in Kinde. 3. Once you are up and running, call your API with code similar to the below - replacing `` with the API you are trying to call. 4. This sample is from a React application, but it will be very similar for any frontend technology. ```jsx const { getAccessToken } = useKindeAuth(); const fetchData = async () => { try { const accessToken = await getAccessToken(); const res = await fetch(``, { headers: { Authorization: `Bearer ${accessToken}` } }); const {data} = await res.json(); console.log({data}); } catch (err) { console.error(err); } }; ``` ### Back end setup You do not need to set up a back-end application in Kinde. The request sent to your API will include the access token, which gets validated when you receive it on your back end. Validation checks the token has not expired and that the token has originated from Kinde, as well as various other checks. While it is possible to write code to check this yourself, it can be easy to miss something and accidentally introduce serious security vulnerabilities. Here's our recommendations: - Use the Kinde JWT verifier for your chosen technology (if available). Our Node package is available [here](https://www.npmjs.com/package/@kinde/jwt-validator). OR - Use any existing middleware for your web framework OR - Choose a third-party library, for example the OpenID Foundation has [a list of libraries for working with JWT tokens](https://openid.net/developers/jwt/). #### Audience To further protect your project, we recommend you [register your API](/developer-tools/your-apis/register-manage-apis/) in Kinde and make sure it is enabled for your front end application. You will then need to [request the audience](/developer-tools/your-apis/register-manage-apis/#request-an-audience-be-added-to-a-token) from your front end to make sure it is included in the `access_token` when your user authenticates with Kinde. This is an additional check in the JWT validation above, which should be handled by the verifier you are using. ## Option 2 - Server side authentication with API routes In this approach your API deals with the authentication side and shares a session cookie with your front end. It is important to note that in order for this to work securely, both your API and front-end need to be hosted on the same domain. 1. In Kinde, go to **Settings > Applications > Add application** and choose **Back-end web** application. 2. Follow the **Quick start** guide for your respective technology to initiate the Kinde client. This can be found in the menu when you view details of the application in Kinde. 3. Implement `/login` and `/register` and `/callback` routes on your API. For example in Express this might look something like: ```typescript const app = express(); app.get("/login", async (req, res) => { const loginUrl = await kindeClient.login(sessionManager); return res.redirect(loginUrl.toString()); }); app.get("/register", async (req, res) => { const registerUrl = await kindeClient.register(sessionManager); return res.redirect(registerUrl.toString()); }); ``` 4. In your front-end SPA, your login and register buttons will point to the API endpoints you set up above - e.g `[api.myapp.com/login]()` ```jsx Sign in ``` This will handle the redirect to Kinde where your user will authenticate. 5. You will also need an API route to handle the callback - again using Express as an example: ```jsx app.get("/callback", async (req, res) => { const url = new URL(`${req.protocol}://${req.get("host")}${req.url}`); await kindeClient.handleRedirectToApp(sessionManager, url); // Code to creates a stateful session goes here return res.redirect("/"); }); ``` Your API should create a stateful session which is shared with your front end via a `secure`, `same-site`, `httpOnly` cookie. As previously mentioned, for this to be secure it should be on the same domain. In this architecture the user is only authenticated with your API which means your frontend SPA doesn't know their identity. For this reason it is a good idea to create a `/profile` route on your API to fetch the identity of the user after authentication. ### Client-specific refresh token cookies for SPAs When multiple SPAs share the same custom domain, they can end up sharing a single refresh token cookie, so one SPA's refresh token may overwrite another's. Kinde supports **client-specific refresh token cookies**: when you enable **Use client-specific refresh token cookies** in the application's **Tokens** settings, each app's refresh token is stored in a unique cookie (for example, `refresh_token_abc123`), so each SPA keeps its own refresh token. This option is available only when a custom domain is configured. For more detail, see [Refresh tokens](/build/tokens/refresh-tokens/).
# Build - Applications - Set a default login route for an application
> Guide for setting default login routes to handle session issues and provide fallback authentication endpoints for applications with expired or problematic sessions.
Last updated: 2024-01-15
default login route, login URI, session management, authentication loop, callback URLs, safety net redirect
applications, authentication, routing
A default login route provides a kind of ‘safety net’ redirect for users who encounter issues with authenticated sessions in your application. This route provides the login endpoint for the application, so users can navigate back to the sign in screen to restart an authentication session. There are a number of reasons that default login routes are useful. - A bookmarked link to an application tries to access an expired session - A user hits ‘back’ in their browser while authenticating and the session cannot resume - A user has cookies disabled and the redirect URI sends them into an authentication loop - A link in an invitation or verification email fails when a past session has not closed properly ## To set default login routes We recommend setting a default login route for all your front-and back-end applications. 1. In Kinde, go to **Setting > Applications**. 2. Select **Configure** on the relevant application. 3. In the left menu, select **Authentication**. 4. Scroll to the **Callback URLs** section. 5. Add the **Application login URI.** This is the default login route for resolving session issues. Hits the /auth endpoint to redirect back to your application sign in page. E.g. `https://app.yourapp.com/api/auth/login` 6. Select **Save**. 7. Repeat for each relevant application.
# Build - Applications - Rotate client secret for your application
> Security guide for rotating client secrets in backend and machine-to-machine applications including step-by-step rotation process and dependency management.
Last updated: 2026-05-13
client secret rotation, rotate client secret, backend application security, M2M application security, machine to machine apps, secret management, Kinde client secret, credential rotation, application security
applications, security, authentication
To ensure your applications remain secure, you can periodically rotate the client secret generated by Kinde. You can only rotate client secrets for: - Back-end applications - Machine to Machine (M2M) applications ## Rotate client secret in Kinde 1. Go to your Kinde dashboard and select **View details** on the application you want to rotate the client secret for. 2. Go to **Details** > scroll to the **Admin actions** section. 3. Select **Rotate**. A confirmation window opens. If you want to retain the previous client secret, enable the **Maintain previous secret** toggle. 4. Select **Rotate client secret**. ## Maintaining the previous client secret If you kept the previous client secret, you will have options to **copy** or **delete** the previous client secret. 1. Select **Delete previous client secret** before you can rotate to a new client secret. 
# Build - Domains - Add a custom domain for an organization
> Comprehensive guide for adding custom domains to organizations including DNS configuration, SSL certificate provisioning, verification monitoring, and troubleshooting steps.
Last updated: 2024-01-15
custom domain, organization domain, DNS records, SSL certificate, subdomain, domain verification, social auth callback
domains, organizations, ssl
When you add a custom domain to an organization, it sets the domain URL for authentication to the custom domain, instead of a Kinde domain address. For example `account.domain.com` instead of `domain.kinde.com`. It's important to include a subdomain for this procedure to work. Common subdomain names include `account` , `id` , or `auth`, e.g. `account.domain.com`. Kinde currently supports a single custom domain per organization. ## Step 1: Add the custom domain to the organization 1. In Kinde, go to **Organizations**. 2. Browse or search for the organization. 3. In the list, select the organization to open the **Details** page. 4. Select **Custom domain** in the menu. 5. Select **Add custom domain** and enter the custom domain you want. Be sure to include the subdomain, e.g. `account.domain.com`. 6. Select **Save**. The DNS details are generated. Use them to add DNS records to your domain provider site. ## Step 2: Add DNS records to your domain provider site Instructions will vary depending on your domain provider. Here’s the general process. 1. Sign in to your domain provider admin portal. 2. Navigate to the page where you can add DNS records. 3. Use the details provided by Kinde to add CNAME DNS records. If your domain has **CAA (Certificate Authority Authorization)** records, you must allow both **ZeroSSL** (`sectigo.com`) and **Let's Encrypt** (`letsencrypt.org`), which Kinde uses to provision and renew SSL certificates. See [CAA records (if you use them)](/build/domains/pointing-your-domain/#caa-records-if-you-use-them) in the main custom domain guide for details and sample records. ## Step 3: Monitor for verification and SSL certificate provisioning 1. Open the individual organization record. 2. Select **Custom domains**. 3. The custom domain panel DNS records shows the current verification status. The verification process can take anywhere from a few minutes to a couple of hours. When it completes, the verification statuses will change. Here are the possible statuses you will see: - Unverified - Verification in progress - Verified - Verification failed (check that DNS records are correct on your domain provider site and try again). - Unprovisioned - Provisioning in progress - Provisioned (SSL certificate issued) - Provisioning failed Once successfully provisioned, your custom domain will then be used for this organization. You will also receive email confirmation. ## Step 4: Update provider social auth apps and codebase If the organization's users will use social authentication to sign in, update the provider apps such as Google or GitHub to include the custom domain callback (e.g. `account.example.com/login/callback`) as an authorized redirect URI. How you do this will be different for each provider you use. Remember to also update your application's codebase to reference the custom domain. ## Troubleshoot custom domain issues If you encounter any errors, such as the verification taking too long, re-check the DNS records you created on your provider site, to ensure the details are correct. If Chrome shows a **Dangerous site** warning on the custom domain, see [Troubleshoot Chrome ‘Dangerous site’ warning](/build/domains/pointing-your-domain/#troubleshoot-chrome-dangerous-site-warning). ### No subdomain It's important to include a subdomain for the procedure to work, e.g. `account.domain.com`. If you left out the subdomain, delete the custom domain in Kinde, re-add it using the subdomain, and add the newly generated DNS details to your provider records. ### Tips for the DNS set up When you create the DNS records be sure to match the format and details provided in Kinde. For example, if your custom domain is `account.example.com`, then: Host = `account` Record type = `CNAME` Value = `account.example.com` TTL = Leave as default Routing policy = Leave as default ### Using multi-level subdomains If you are using a multi-level subdomain, like `multi.subdomain.example.com`, how you set up DNS records will depend on how your zones are set up. The details provided in the admin console assumes the domain entered is adding a single level to your DNS zone, but if you are adding more than one level you’ll need to create others. So if your business is `multi.subdomain.example.com` and your zone is `example.com`, you need to create a DNS entry for `multi.subdomain`, as well as for `_acme-challenge.multi.subdomain`. ## Remove a custom domain for an organization 1. Open the **Organization** record in Kinde. 2. Select **Custom domain** in the menu. 3. In the custom domain details area, select the three dots menu and then select **Remove custom domain**. Respond to the confirmation message.
# Build - Domains - Use your own custom domain
> Complete guide for setting up custom domains in Kinde including DNS configuration, verification process, SSL certificate provisioning, and integration with social authentication providers.
Last updated: 2024-01-15
custom domain, DNS records, CNAME, SSL certificate, subdomain, social auth, domain verification, multi-level subdomains, Chrome, Safe Browsing, Dangerous site
domains, custom-domain, dns
By default, Kinde issues a Kinde subdomain when you first register. But for your production environment you can use your own custom domain instead of Kinde’s as your URL. For example, `account.example.com` instead of `mydomain.kinde.com`. There are a few reasons you may wish to do this. - It will give your users the impression they have never left your application to authenticate, creating a seamless user experience. - For Single Page Applications (SPAs) it means we can securely set a first party cookie meaning authentication state persists for full-page refreshes and new tabs. - If you also register the domain in the configuration for any social providers you are using, the social providers auth screen will be customized with your app details. ## Before you begin - Name your custom domain. It needs to include a subdomain for this procedure to work. Common subdomain names include `account` , `id` , or `auth`, e.g. `account.example.com`. - Make sure your application is configured to use the exact custom domain. This includes updating the environment variables and any relevant configuration files. For example, the KINDE_ISSUER_URL needs to be updated to the custom domain. - Ensure that the callback and logout redirect URLs in your Kinde settings are updated with the custom domain. This can be done in the Kinde dashboard under Settings > Applications > [your app] > View details. ## Set up in Kinde Note that the verification process can take anywhere from 5 minutes to a few hours, depending on who your domain provider is. See [tips for the DNS set up](/build/domains/pointing-your-domain/#tips-for-the-dns-set-up) below. 1. Go to **Settings > Environment > Custom domain**. 2. Select **Add custom domain** 3. In the dialog, enter your custom domain. Be sure to include the subdomain, for example `account.example.com`. 4. Select **Save**. DNS details appear. You need to add these to your domain provider site. ## Add CNAME DNS records 1. Go to your domain provider website. 2. Create CNAME DNS records using the DNS details generated above. Apologies that we can’t offer instructions for all situations, as this will be different depending on your provider. But here are the setup steps for [Godaddy](https://au.godaddy.com/help/add-a-cname-record-19236), [Cloudflare](https://community.cloudflare.com/t/adding-dns-records/52718), and [NameCheap](https://www.namecheap.com/support/knowledgebase/article.aspx/9646/2237/how-to-create-a-cname-record-for-your-domain/). ## CAA records (if you use them) If your domain has **CAA (Certificate Authority Authorization)** records, they restrict which certificate authorities can issue SSL certificates for your domain. Kinde provisions and renews certificates using **ZeroSSL** and **Let's Encrypt**, so you must allow both in your CAA records or certificate issuance will fail. Add CAA records that authorize both providers. For your custom domain (or the subdomain you use, e.g. `account`), add two CAA records like this: | Host | Record type | Value | |------|-------------|--------| | `account` (or your subdomain) | CAA | `0 issue "sectigo.com"` | | `account` (or your subdomain) | CAA | `0 issue "letsencrypt.org"` | - **ZeroSSL** uses the CA domain **sectigo.com** - **Let's Encrypt** uses the CA domain **letsencrypt.org** If you only list one CA in your CAA records, add the other. If you have no CAA records, you don't need to add any; certificate issuance will work as normal. ## Check verification status in Kinde Once you have created the DNS entries, Kinde will start the verification process. This can take anywhere from a few minutes to a couple of hours. When it completes, the verification status will change to 'Provisioned' and an SSL certificate will be provisioned. Your domain will then be used instead of Kinde’s. You will also receive an email notification when the process is complete. If you encounter any errors, such as the verification taking too long, re-check the DNS records you created on your provider site, to ensure the details are correct. ## Update your code - Update your code to use the custom domain. ## Add the custom domain to social sign in When you use social connections to authenticate users, you need to add the callback URL to the provider app so that the custom domain shows on the sign in form, instead of kinde.com. If you haven't set this up, follow these instructions for the [relevant social provider](/authenticate/social-sign-in/add-social-sign-in/). If you already have social auth set up, make sure you add the custom domain callback (e.g. `account.example.com/login/callback` as an authorized redirect URI in the provider app. ## Domains and auth end points Auth endpoints are available for both custom domains and your Kinde subdomain. You can get tokens from either end point, but they are not interchangeable. For example, if you get an ID and access token from `account.example.com`, it cannot be used with `mydomain.kinde.com`. ## Local domain Currently, Kinde only supports `*.localhost` for non-https traffic. ## Tips for the DNS set up When you create the DNS records for linking your own domain to Kinde, be sure to match the format you have used above. For example, if your custom domain is `account.example.com`, then: Host = `account` Record type = `CNAME` Value = `account.example.com` TTL = Leave as default Routing policy = Leave as default ## Using multi-level subdomains If you are using a multi-level subdomain, like `multi.subdomain.example.com`, how you set up DNS records will depend on how your zones are set up. The details provided in the admin console assumes the domain entered is adding a single level to your DNS zone, but if you are adding more than one level you’ll need to create others. So if your business is `multi.subdomain.example.com` and your zone is `example.com`, you need to create a DNS entry for `multi.subdomain`, as well as for `_acme-challenge.multi.subdomain`. There are many different ways people manage multi-level domains and zones, and unfortunately we can’t cover all variations in these instructions. ## Troubleshoot Chrome ‘Dangerous site’ warning Google Chrome can sometimes show a **Dangerous site** warning, or a red **Dangerous** label, when users visit your Kinde custom domain. This is generated by Google Safe Browsing, not by Kinde. If you see this warning, first confirm that the custom domain is set up correctly in Kinde and that its SSL certificate is valid. See [Check verification status in Kinde](/build/domains/pointing-your-domain/#check-verification-status-in-kinde). If the domain is provisioned and the certificate is valid, there is generally no Kinde setting that needs to be changed to clear the warning. You can check the domain in Google’s [Safe Browsing Transparency Report](https://transparencyreport.google.com/safe-browsing/search). If Google reports no unsafe content but Chrome still shows a warning, it may be a false positive. This can sometimes happen with relatively new custom domains while Google’s systems establish reputation for the domain. Because you own the custom domain, you need to request a review with Google: - Submit a [false-positive report](https://safebrowsing.google.com/safebrowsing/report_error/) to Google Safe Browsing. - Use [Google Search Console](https://support.google.com/webmasters/answer/9044101) to check for security issues and request a review, where applicable. Kinde cannot request a review or remove the warning with Google on your behalf. Make sure your authentication pages have consistent, recognizable branding, including your page title, [favicon](/design/brand/global-brand-defaults/#add-favicons-for-web-browsers), and business or domain identity.
# Build - Domains - Org handles and dynamic callbacks for subdomains
> Guide for implementing organization handles and dynamic callbacks to route users to correct subdomains in multi-tenant applications with authentication flow examples.
Last updated: 2024-01-15
organization handles, dynamic callbacks, subdomains, multi-tenant, callback URLs, organization routing
domains, organizations, callbacks
If you use [organizations in Kinde](/build/organizations/multi-tenancy-using-organizations/), you probably build and maintain multi-tenant software. And if you manage multiple subdomains for those tenants, you'll need to make sure they are redirected to the right subdomain when they authenticate. The most effective way to do this is via ‘organization handles’ supported by a dynamic callback URL. ## How it works For every organization that has its own subdomain, you will add an organization handle. The handle and the subdomain need to match exactly. Here's an example. | Organization | Handle | Subdomain | | --- | --- | --- | | Red | red | red.everycolor.com | | Green | green | green.everycolor.com | | Blue | blue | blue.everycolor.com | Then you add one dynamic callback URL to your application that routes all the users to the correct subdomain via the organization handle: `{organization.handle}.everycolor.com`. The result is that users of the **Red** org will be automatically redirected to `red.everycolor.com` when they authenticate, and so on. ## Example authentication flow  ## Requirements - This feature works for top level subdomains only - Handles must exactly match subdomain names - Handles must be unique for each organization ## Add the dynamic callback URL to your application 1. In Kinde, go to **Settings > Applications > [your application] > Details.** 2. Scroll to the **Callback URLs** section and in the **Allowed callback URLs** field, add `https://{organization.handle}..com.`, and replace `` with your primary domain. For example, `https://{organization.handle}.everycolor.com` 3. Select **Save**. 4. Repeat from step 1 for each app you want to enable this for. ## Add handles to your organizations You can do this [via API](/kinde-apis/management#tag/organizations/patch/api/v1/organization/{org_code}) using the `handle` parameter, or manually in Kinde (see below). 1. In Kinde, go to **Organizations > [your organization] > Details.** 2. Enter the subdomain name for this organization in the **Handle** field, without the added URL information. For example, enter `blue` for the subdomain `https://blue.everycolor.com`. Ensure the subdomain name and the handle match exactly. The handle must also be unique within your Kinde business. 3. Select **Save**.
# Build - Env variables - Add and update environment variables
> Step-by-step guide for adding, updating, and deleting environment variables in Kinde including naming conventions and sensitive variable management.
Last updated: 2024-01-15
add environment variables, update environment variables, delete environment variables, sensitive variables, variable naming, environment configuration
env-variables, configuration
Environment variables are key-value pairs configured outside your source code so that each value can change depending on the [Environment](/build/environments/environments/). Common use cases are for API keys, and URLs or IDs which change per environment, as they can be more easily updated wherever the key is referenced. You can store as many environment variables in Kinde as you want. ## Recommendations for variables - Choose a key name that helps you easily recognize what the variable is for. - Use descriptive, purpose-indicating names (e.g., `DATABASE_URL`, `API_KEY_STRIPE`). - Use a consistent case, such as CamelCase, snake_case, kebab-case, etc. We recommend using UPPER_SNAKE_CASE for environment variables as this is a widely adopted convention. - Mark a variable as sensitive if the value should be kept secret. For example an API key or password. - Consider adding a prefix for different environments (e.g., `PROD_`, `DEV_`). - Document the purpose and format of each variable for team reference. ## Add an environment variable 1. Go to **Settings > Data management > Env variables**. 2. Select **Add environment variable**. 3. In the dialog that opens, enter the **Key** and the **Value**. 4. Select if the key is **Sensitive**. 5. Select **Save**. ## Update an environment variable value You can only update the value of non-sensitive variables. If you need to update a sensitive variable value, you’ll need to delete and then create a new variable. 1. Go to **Settings > Data management > Env variables**. A list of all your variables is shown. 2. Select **Edit variable** in the … three dots menu next to the relevant non-sensitive variable. The **Edit variable** dialog opens. 3. Change the **Value**. You cannot change the `key`. 4. Select **Save**. ## Delete an environment variable 1. Go to **Settings > Data management > Env variables**. A list of all your variables is shown. 2. Select **Delete variable** in the … three dots menu next to the relevant variable. A confirmation window appears. 3. Confirm the variable deletion.
# Build - Env variables - Store environment variables in Kinde
> Guide for storing environment variables in Kinde including sensitive and non-sensitive variable types, environment-specific configuration, and security best practices.
Last updated: 2024-01-15
environment variables, sensitive variables, secret management, key-value pairs, workflow variables
env-variables, security, workflows
Environment variables are key-value pairs that enable access to applications across different environments and systems. Once you can bring your code into Kinde via workflows, it’s important to be able to reference environment variables using a key, instead of hardcoding these values into your code. Kinde allows you to create and store sensitive (secret) and non-sensitive key-value pairs. ## Store variables for each environment You need to set environment variables separately, in each of your Kinde environments. You can’t share keys across development, testing, staging, and production, etc. ## Sensitive and non-sensitive environment variables The environment variables you store in Kinde can be sensitive or non-sensitive. - **Sensitive environment variables** contain confidential data (e.g., passwords, API keys, credentials) that must be handled with care to avoid security risks and data breaches. When you mark an existing environment variable as sensitive, Kinde converts it to a non-readable format and the value can no longer be read by you or your team. It can only be read by Kinde workflows at runtime. The value will also be redacted in any logs. - **Non-sensitive environment variables** handle non-confidential settings (e.g., language, application name, etc.) that don’t pose a risk if exposed. ## Examples of environment variables | Variable Name | Type | Description | Example Value | | --- | --- | --- | --- | | API_KEY | Sensitive | Authentication key for external services | `********` | | CLIENT_SECRET | Sensitive | OAuth client secret | `********` | | APP_NAME | Non-sensitive | Application identifier | `my-kinde-app` | | LOG_LEVEL | Non-sensitive | Application logging configuration | `debug` |
# Build - Environments - Manage Kinde environments
> Create, switch, and manage Kinde production and non-production environments, plus an environment bar to stay oriented
Last updated: 2026-09-14
environment switcher, non-production environment, create environment, delete environment, environment settings, environment bar, production environment, copy configuration
build, environments, environment-bar
Kinde allows you to run multiple environments to support your software development cycle. Kinde environments at a glance: - All Kinde businesses come with one production environment. - You can create additional non-production environments (e.g., dev, test, staging, etc.) - Free plans are limited to one extra non-production environment. - You will need a paid plan to create multiple non-production environments. - You cannot delete the production environment. You can see the environment you are working in at the top left of the home page when signed in. To make the production environment live, [follow the go-live checklist](/build/environments/production-to-live/). ## Manage environments ### Environment switcher 1. Sign in to your Kinde dashboard. 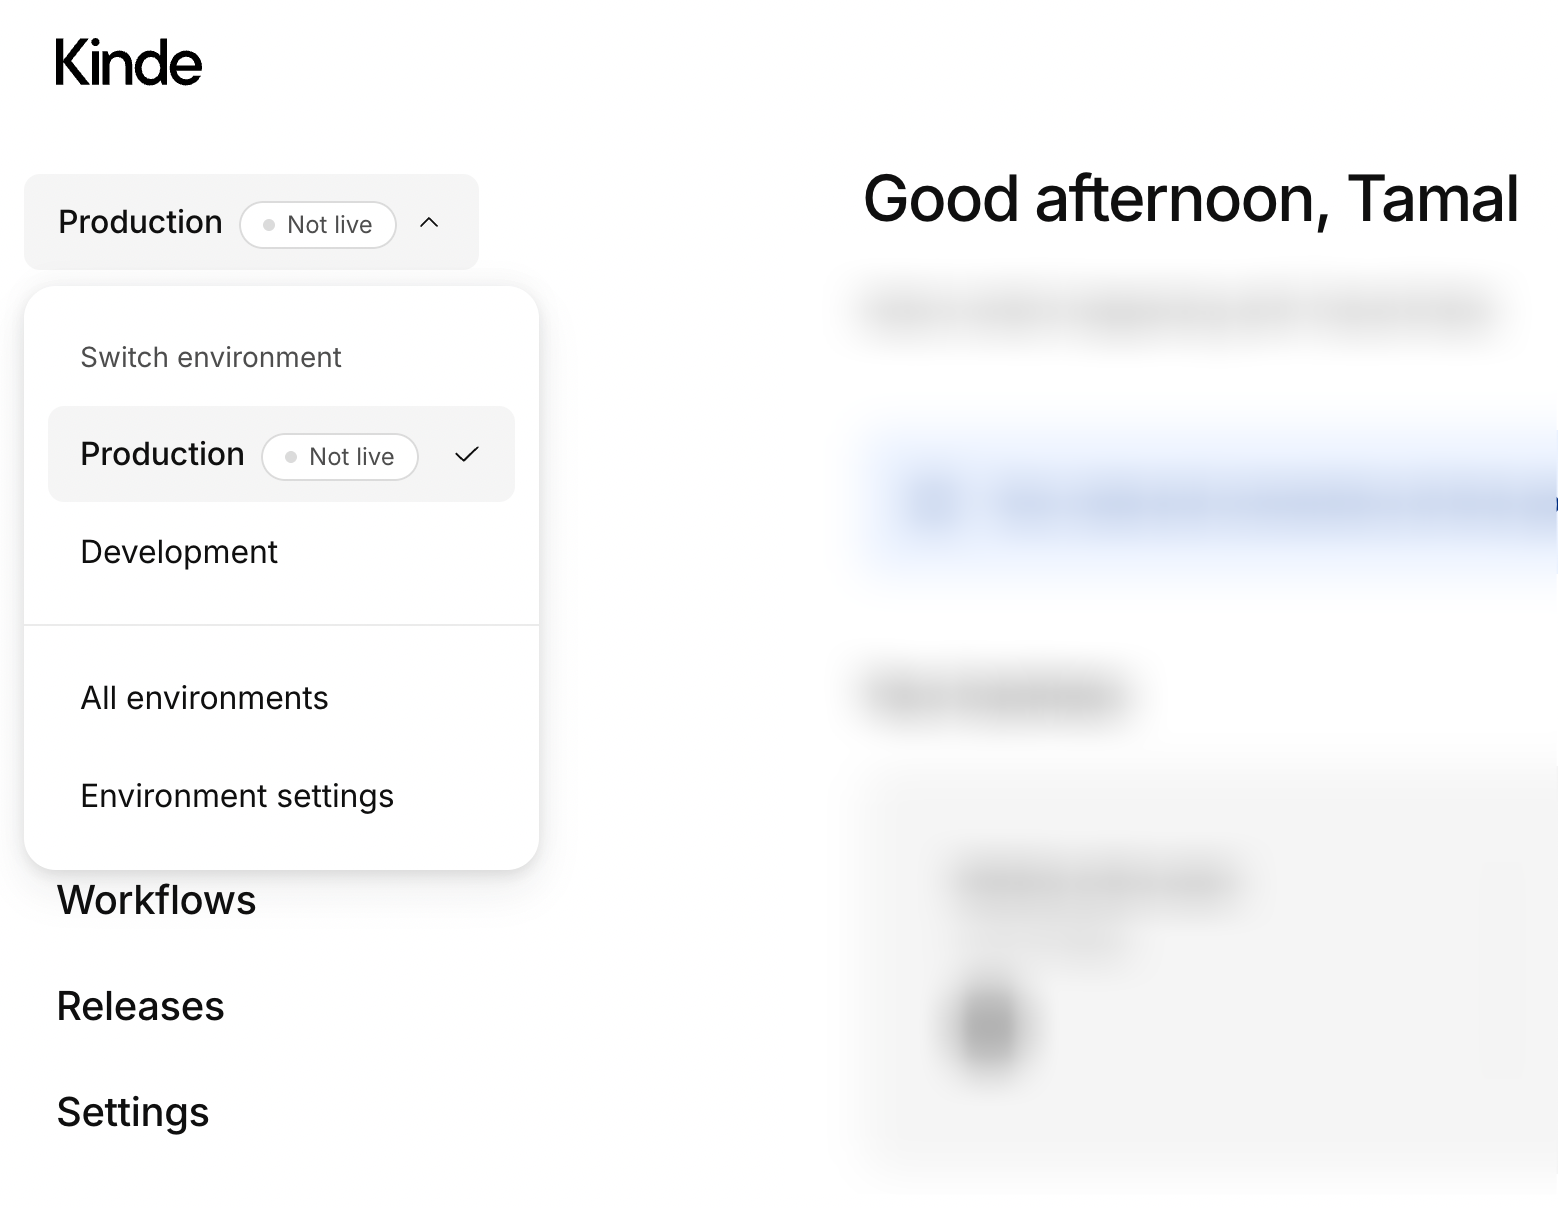 2. On the top left of the screen, you will see the environment you are currently in. 3. Select the environment drop-down to: - Switch to another environment - View all your environments (and create additional ones) - View and edit the current environment settings ### Create a new environment 1. From the environment drop-down, select **All environments**. 2. In the **Environments** page, select **Add environment**. 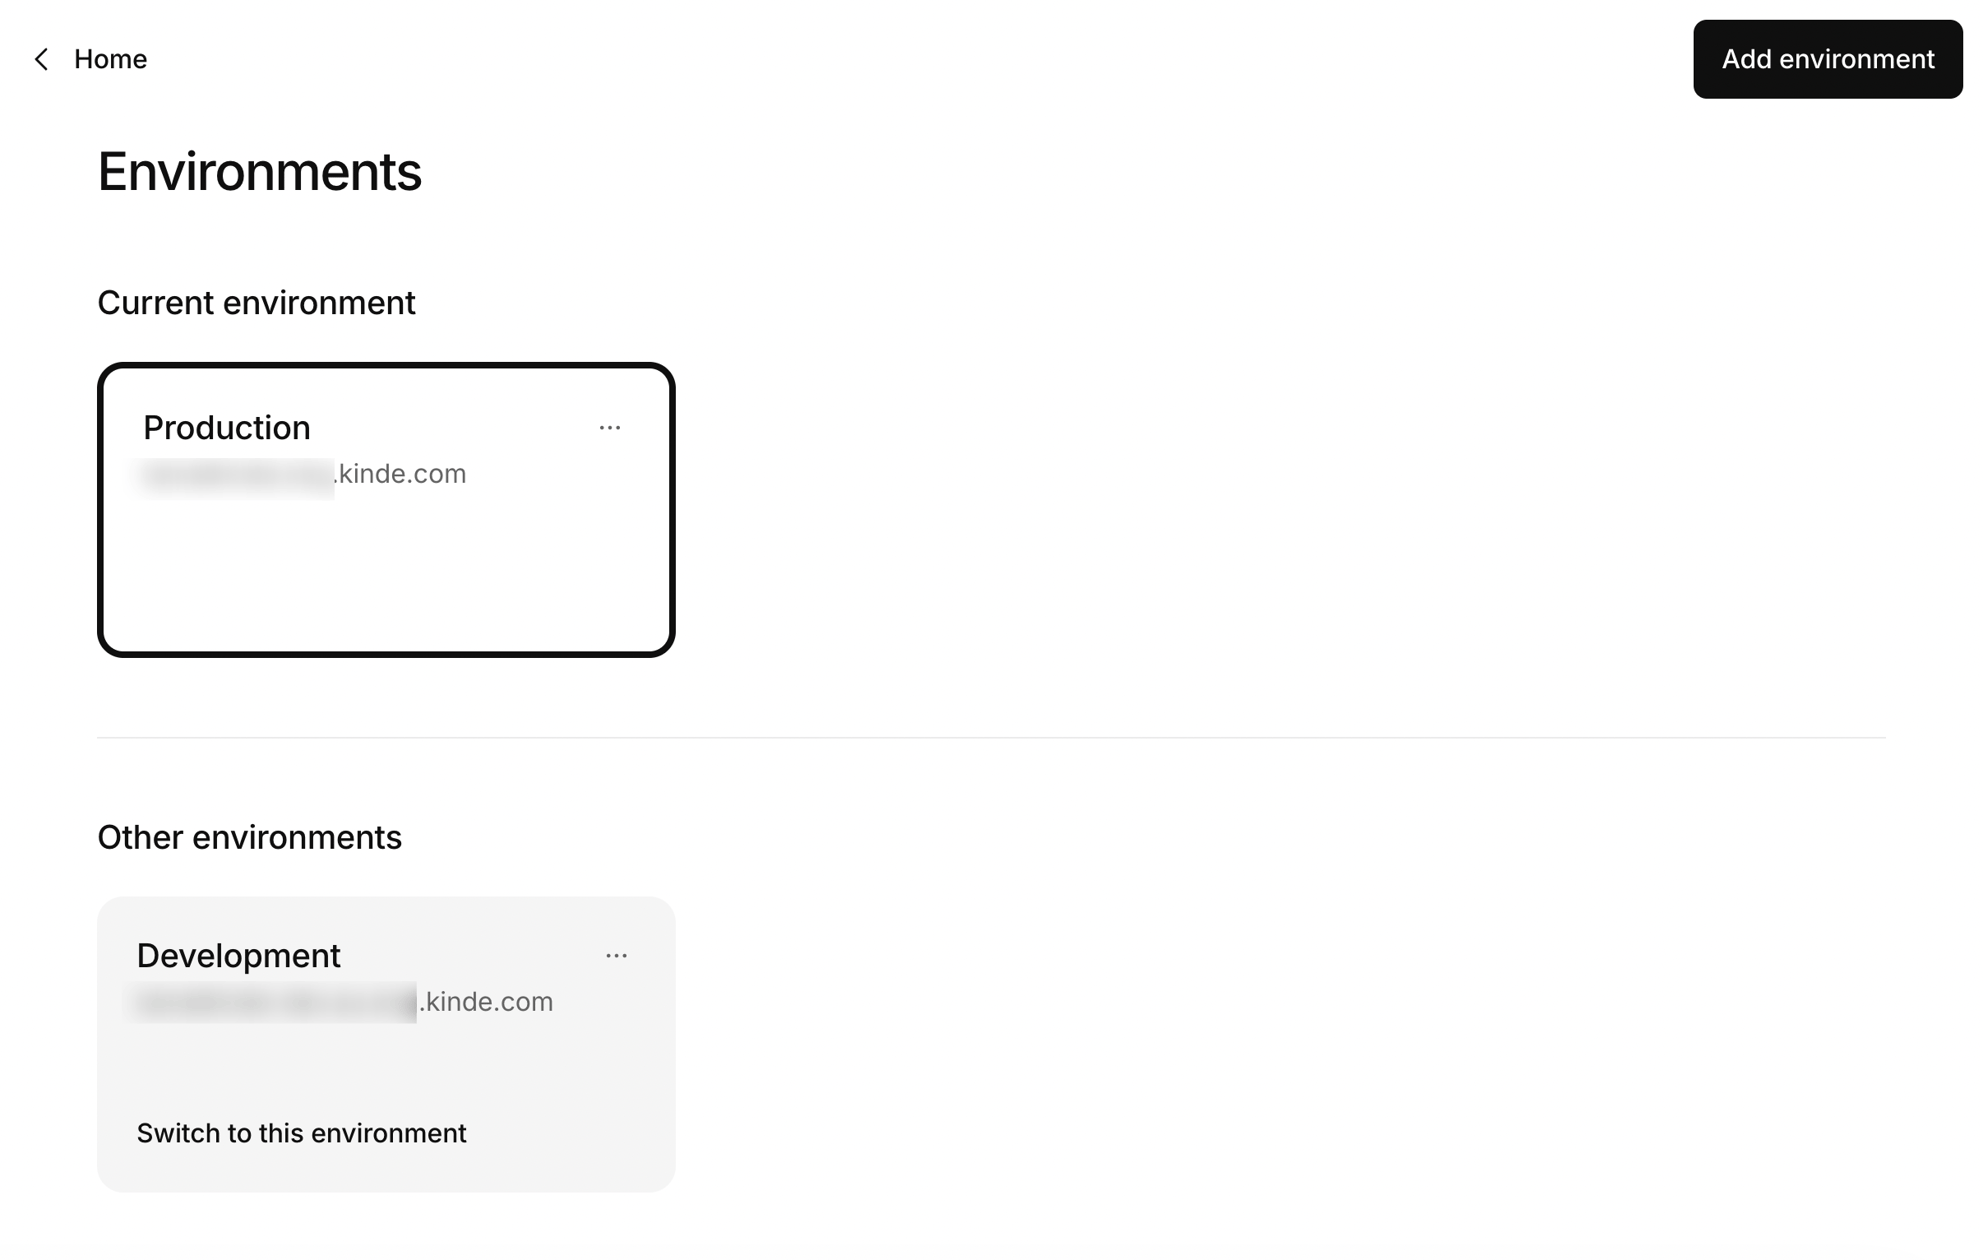 3. Enter a name for the environment (e.g., "Staging"). 4. Enter a dev-friendly code for the environment (e.g., `staging`). 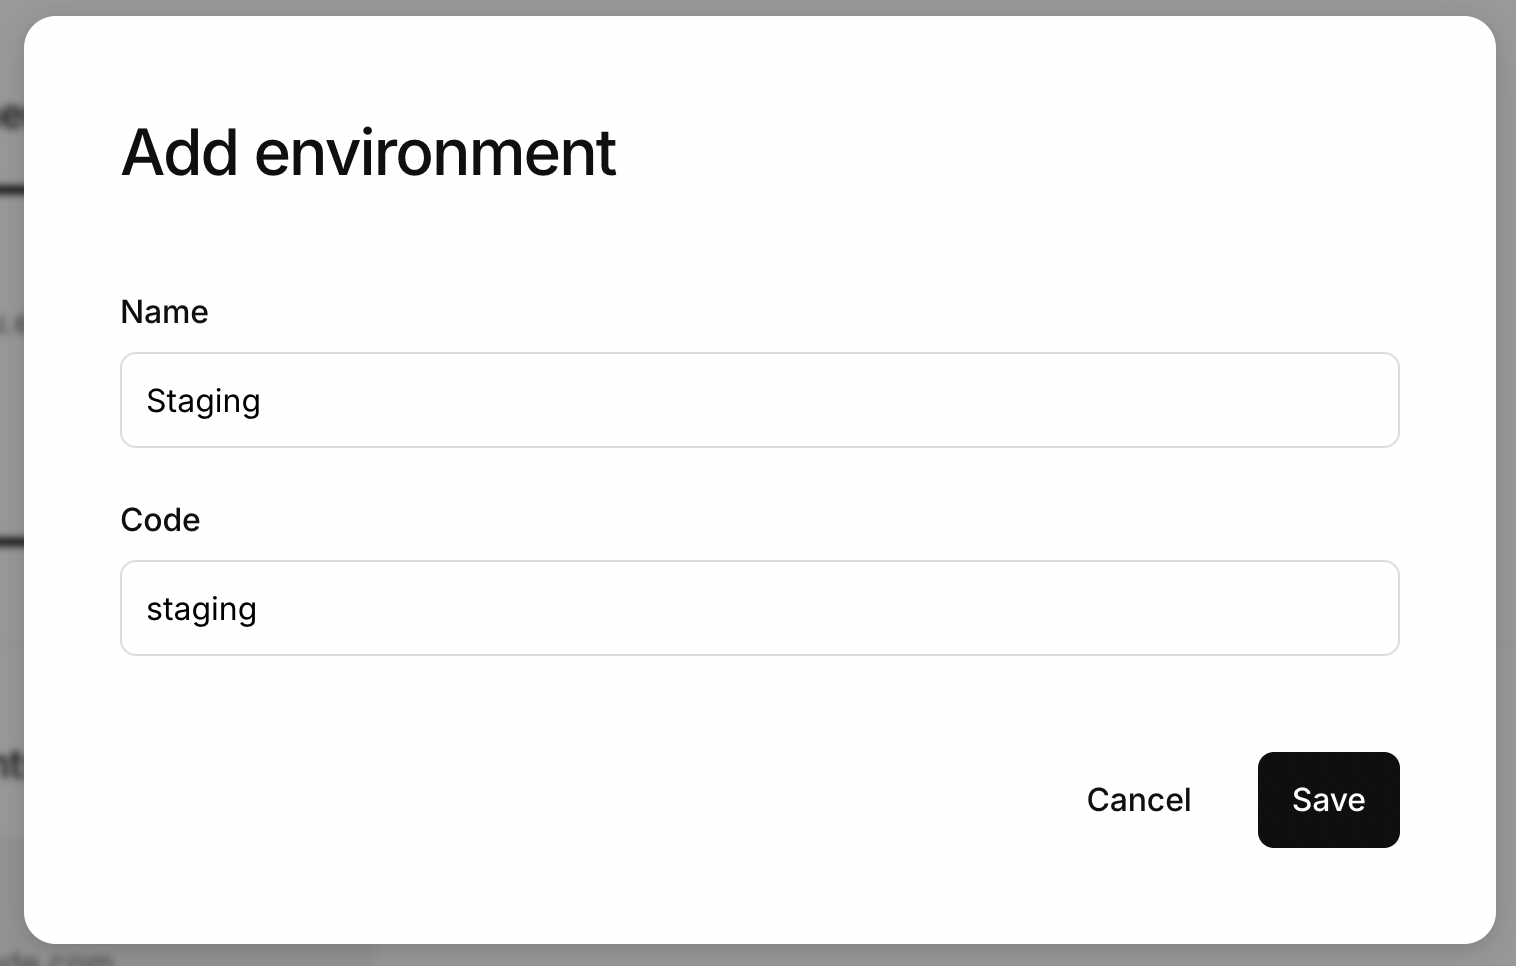 5. Select **Save**. You will see the new environment in the list. 6. Select **Switch to this environment** on the environment card to start working in the new environment. ### Rename an environment 1. From the environment drop-down, select **All environments**. 2. On the environment you want to rename, select the **three dots menu** (...). 3. Select **Edit environment**. 4. Update the environment name and select **Save**. ### Delete a non-production environment 1. From the environment drop-down, select **All environments**. 2. On the environment you want to delete, select the **three dots menu** (...). 3. Select **Delete environment**. 4. Confirm you want to delete the environment. This action is irreversible. ### Update environment settings 1. From the environment drop-down, select **Environment settings**. 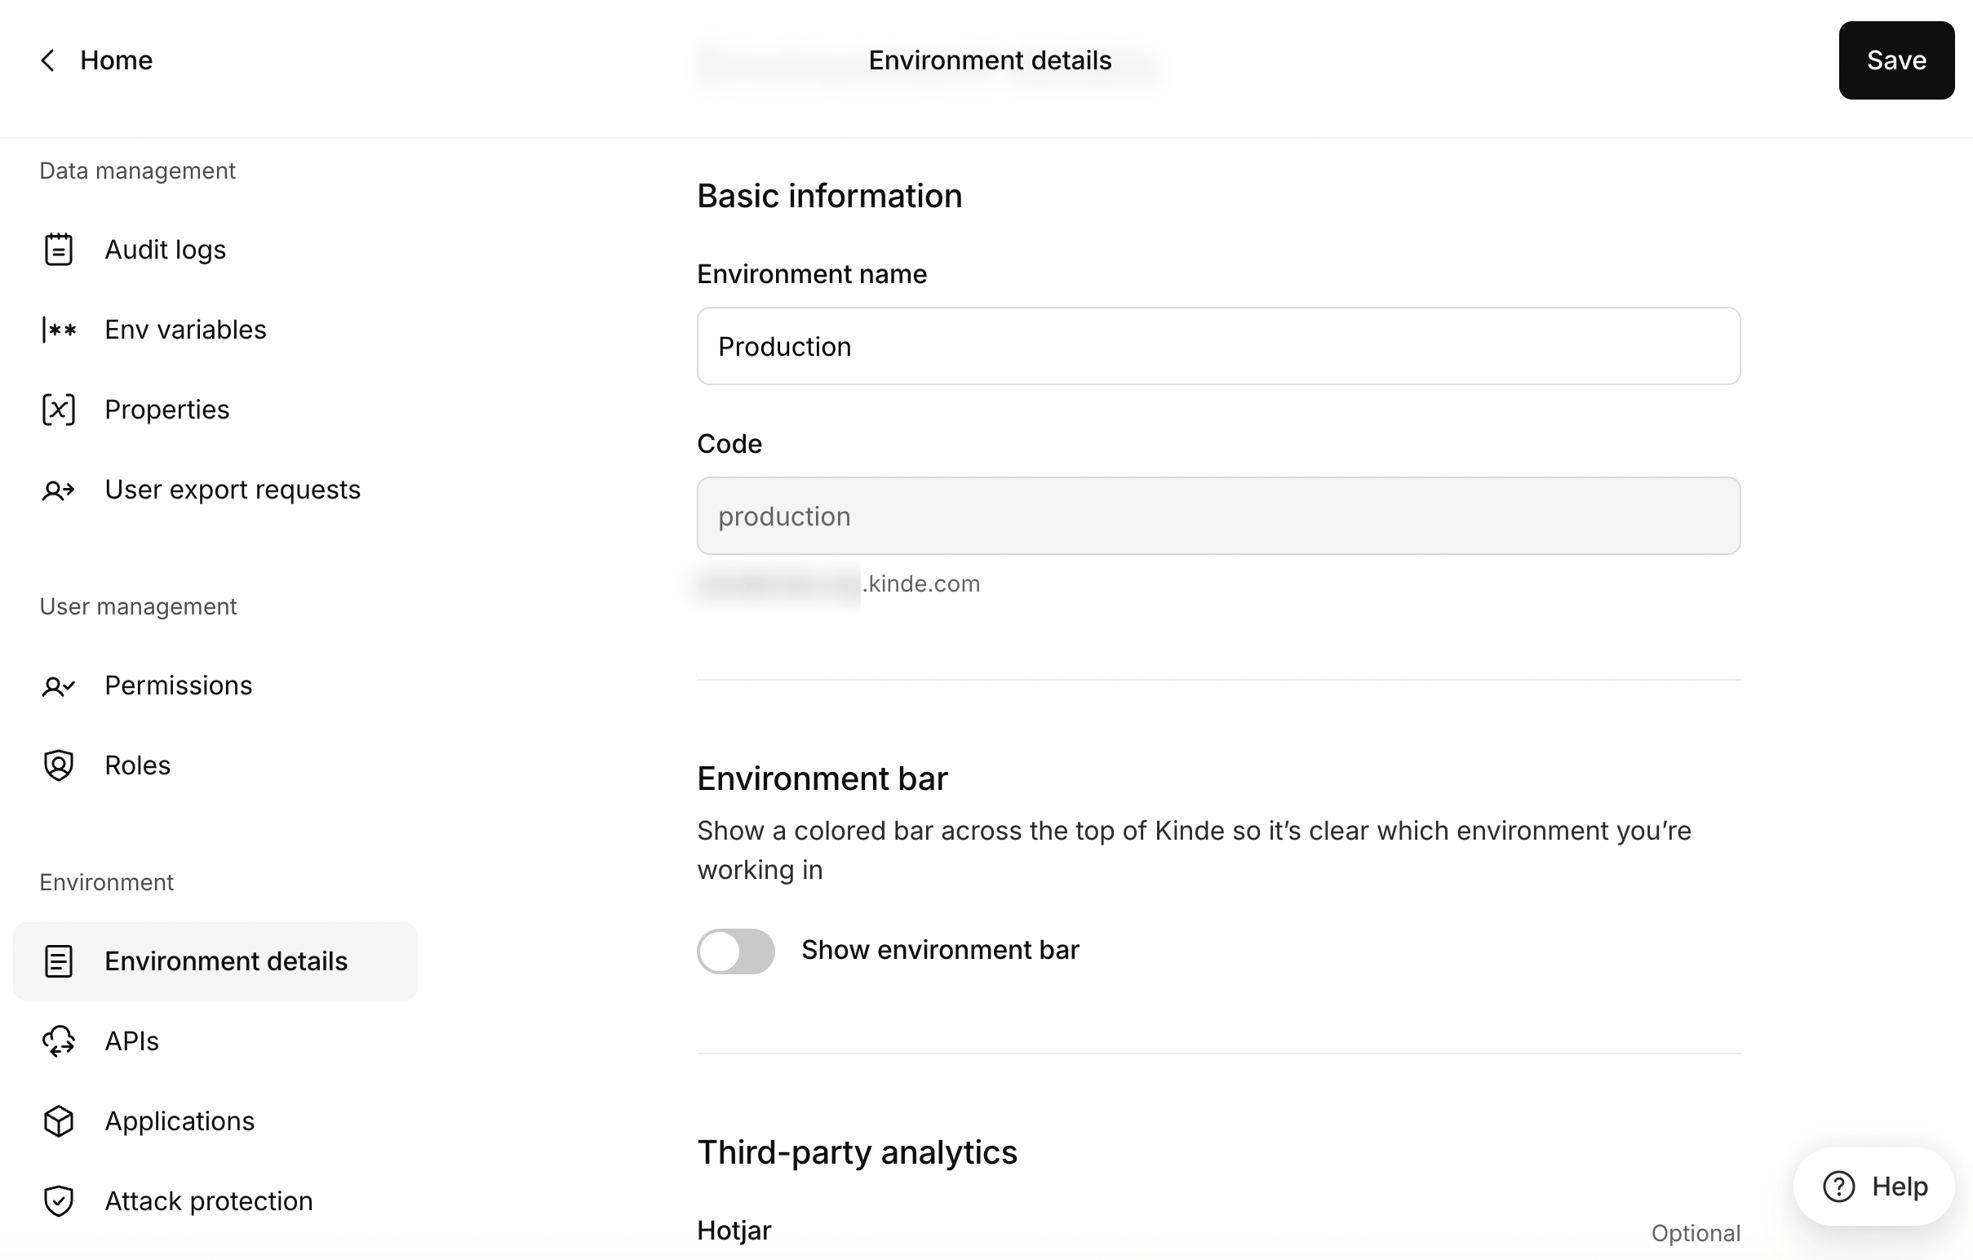 2. Update the environment name as needed. 3. Toggle [the environment bar](#show-an-environment-bar) (see below for more details). 4. Add third-party analytics tracking codes such as Google Analytics, Hotjar, and Contentsquare. Learn more about [third-party analytics tracking codes](/manage-users/view-activity/third-party-tracking/). 5. If you are editing the production environment, you can also update the environment status to **Live**. See the [go live checklist](/build/environments/production-to-live/) for more details. 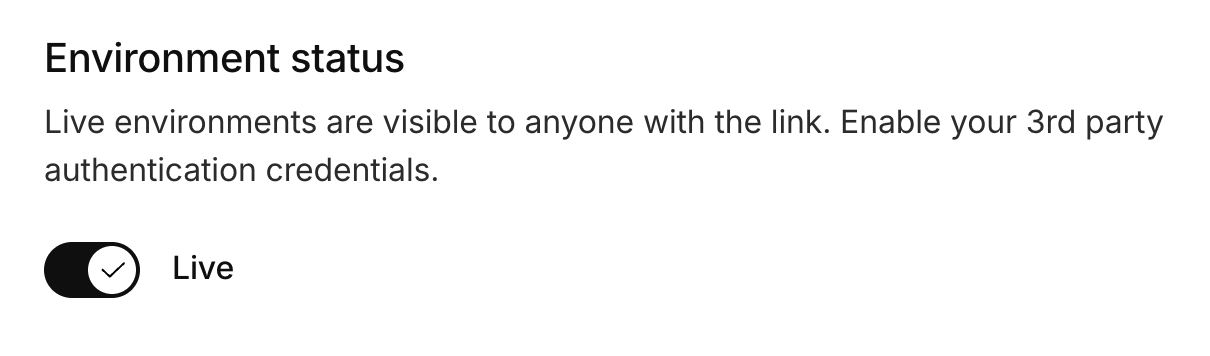 ## Show an environment bar Show a colored bar across the top of your Kinde dashboard so it’s clear which environment you’re working in. 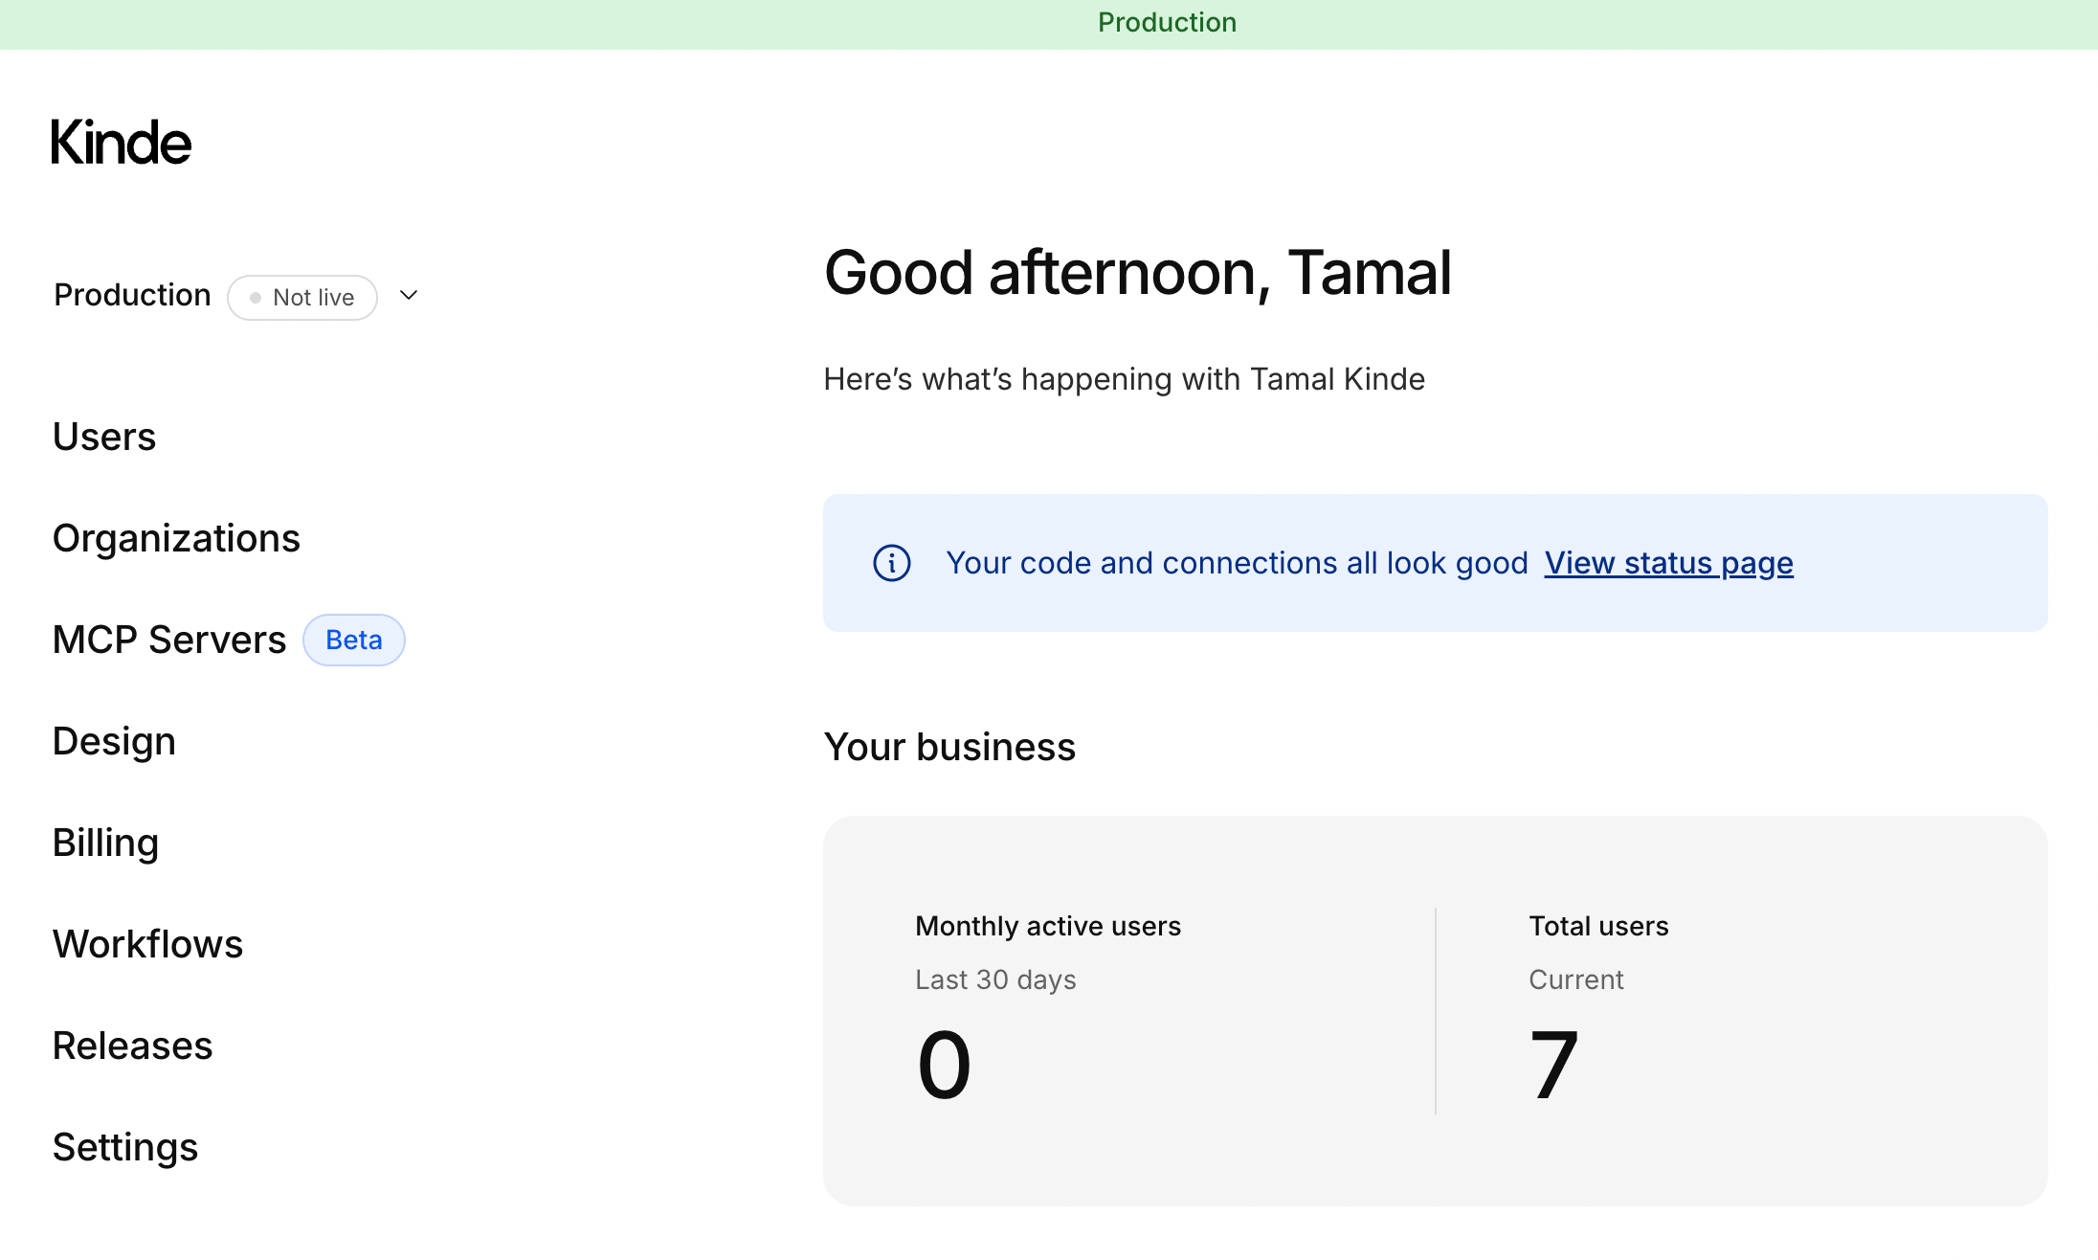 1. From the environment drop-down, select **Environment settings**. 2. Scroll down to the **Environment bar** section. 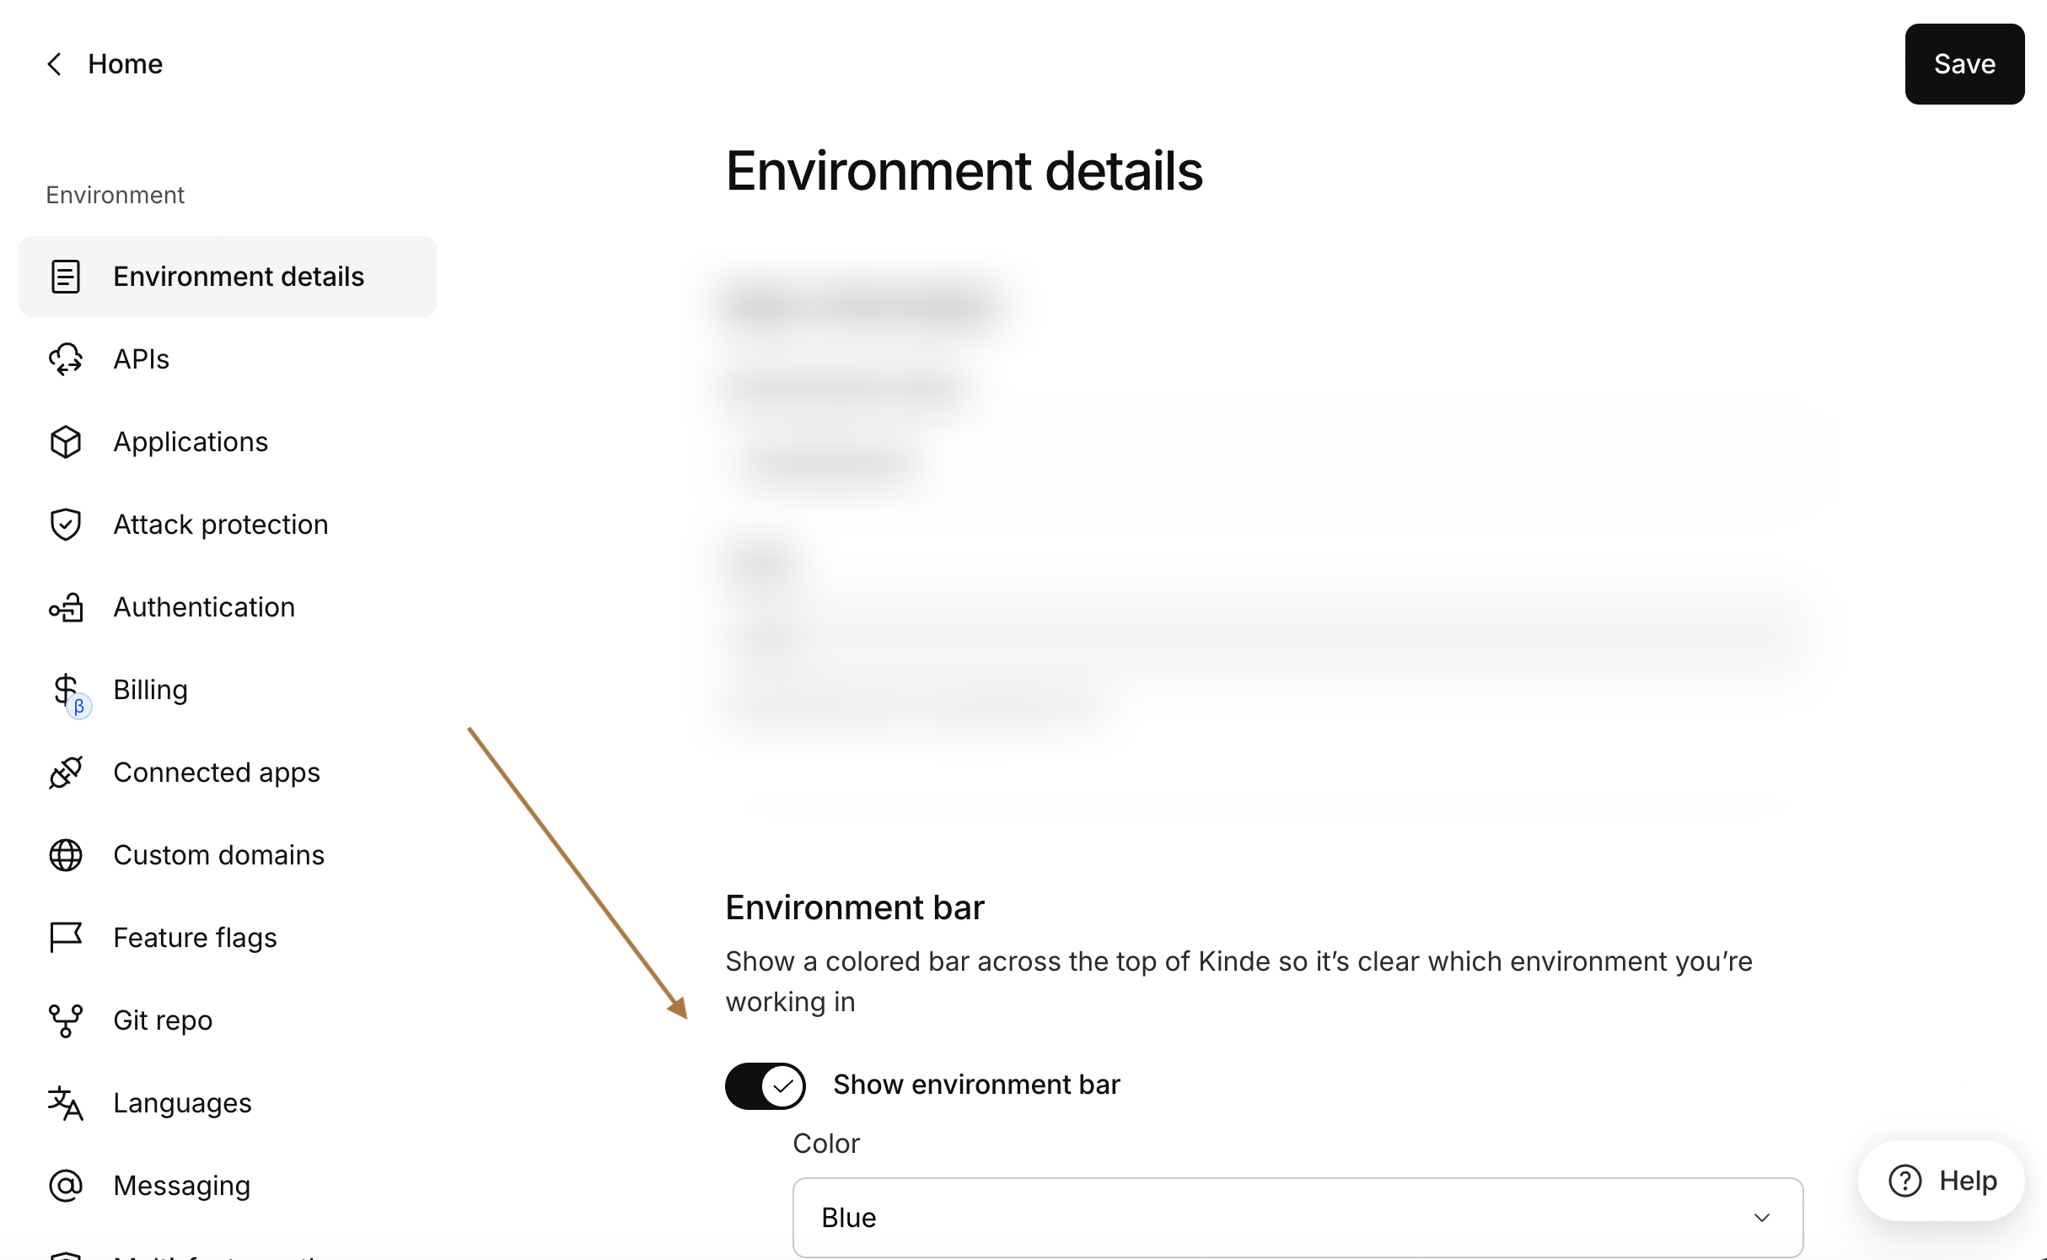 3. Enable the **Show environment bar** toggle. The ribbon will be immediately visible in the dashboard. 4. Select the color of the bar from the dropdown (e.g., Blue, Cyan, Green, etc.). 5. Select **Save**. 6. Repeat the process for each environment you want to show a bar for. You can see the bar in every page of your Kinde dashboard with the name of the environment. 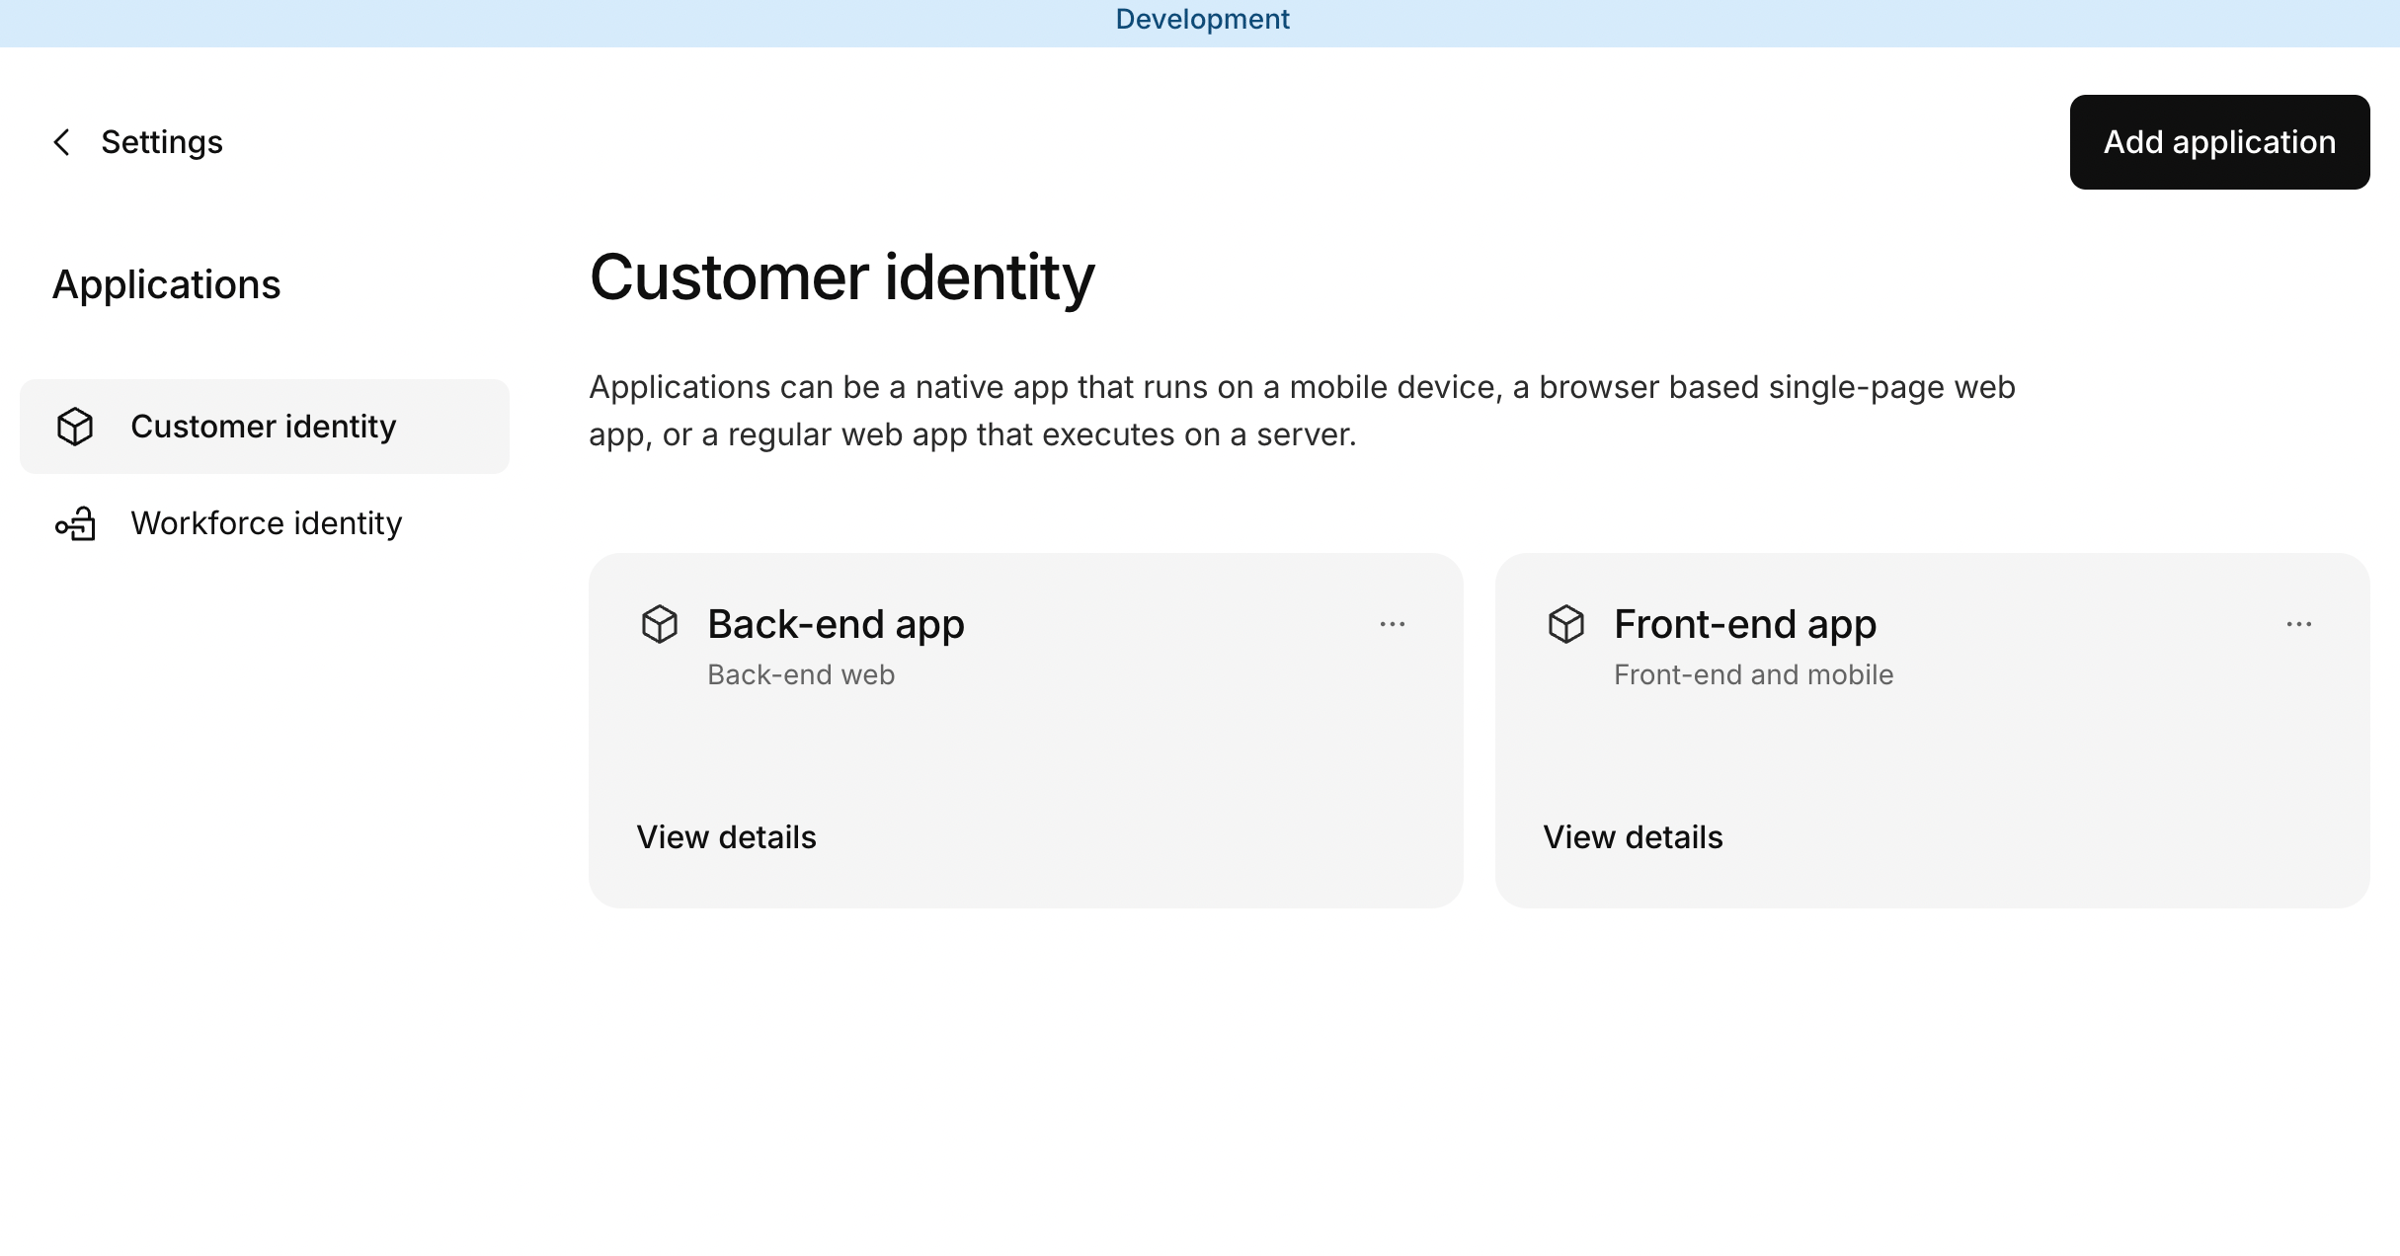 ## Kinde environment FAQs ### Who should use multiple environments? If you want to test new user configurations or make other changes, do so in a non-production environment (e.g., testing or staging) first, then replicate the changes in production. Unless you are a developer, we recommend you stay in the production environment for viewing and working with your Kinde account. ### Can I copy configuration between environments? No. You cannot copy configuration settings between environments using the Kinde dashboard. However, you can use the Kinde Management API to achieve this — [follow this guide](/developer-tools/guides/manage-kinde-configuration/).
# Build - Environments - Prepare your production environment to go live
> Checklist for preparing your Kinde production environment before marking it as Live, including required setup, security controls, branding, and analytics.
Last updated: 2026-05-27
production environment, go live, live checklist, third-party authentication, custom domain, multi-factor authentication, terms of use and privacy policy, default roles, twilio sms authentication, custom email sender, google analytics
environments, production, go-live, security
Use this checklist to prepare your Kinde production environment before you mark it as `Live`.  Completing these steps helps reduce launch risk and gives your team a clear signal that the environment is production-ready. ## Required steps to go live ### Set up third-party app credentials Enter a `Client ID` and `Client secret` in all your third-party authentication connections (such as social connections or enterprise connections). Here are the general steps to update your credentials: 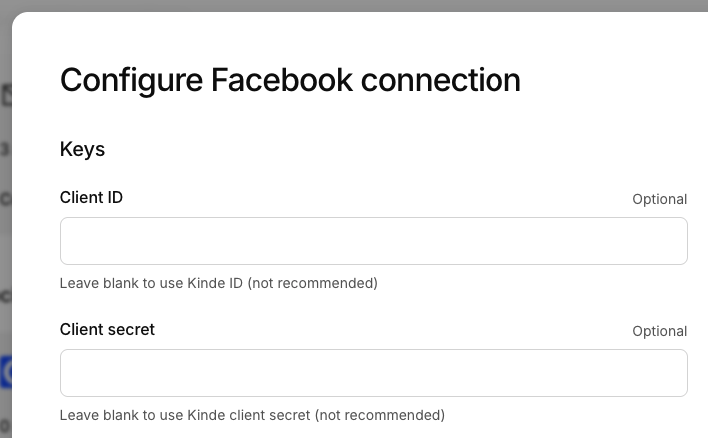 1. Create or register an app with your third-party provider and get the app keys. 2. In Kinde, go to **Settings > Environment > Authentication**. 3. Select **Configure** for the connection you want to update (e.g., Google, Facebook, etc.). 4. Enter the `Client ID` and `Client secret` values. 5. Select **Save**. Check out the specific connection page for steps for each provider in the [third-party authentication](/authenticate/authentication-methods/set-up-user-authentication/) section. ### Add Twilio details If you are using phone or SMS authentication, configure your Twilio details. Kinde provides 10 SMS messages per month for free to test this feature. To use the full feature set, enter your Twilio credentials: 1. Go to **Settings > Environment > Messaging > SMS**. 2. Select the **Default country** that you want to show on the authentication screen when users sign in. 3. Enter the Twilio details from your Twilio account in the relevant fields. 4. Select **Save**. Learn more about [phone or SMS authentication](/authenticate/authentication-methods/phone-authentication/). ## Recommended steps ### Add terms and policy URLs Add your terms and policy URLs so users can access and agree to them during sign-up. 1. Go to **Settings > Business > Details**. You can also find this menu item under the bottom left corner of the screen by selecting your avatar. 2. Scroll down to the **Terms of use and privacy** section. 3. Enter the relevant URL(s) for your policies. You can add the **Terms of use URL**, the **Privacy policy URL**, or both. 4. Select **Save**. Learn more about [adding policies, terms, and explicit acceptance](/manage-your-account/business-information/policies-terms/). ### Set up multi-factor authentication Set up multi-factor authentication (MFA) to add an extra layer of security for user sign-in. 1. Go to **Settings > Environment > Multi-factor auth**. 2. Toggle the switch to **Yes**, **Optional**, or **No**. Selecting **No** disables the environment-level MFA requirement. 3. Select the authentication methods you want to use (for example, SMS or Email). 4. Select **Save**. Learn more about [multi-factor authentication](/authenticate/multi-factor-auth/enable-multi-factor-authentication/). ### Set up default roles Set up default roles so new users get the right access level when they sign up. 1. Go to **Settings > User management > Roles**. 2. Add your roles (for example, User or Admin). Learn more about [default roles](/manage-users/roles-and-permissions/default-user-roles/). ### Connect your custom domain Connect your custom domain to provide a branded sign-in experience. 1. Go to **Settings > Environment > Custom domain**. 2. Select **Add custom domain**. 3. In the dialog, enter your custom domain. 4. Select **Save**. Learn more about [using a custom domain](/build/domains/pointing-your-domain/) and [customizing sign-in screens](/design/brand/global-brand-defaults/). ### Configure custom email sender details Configure a custom email sender to give your users a branded email experience. 1. Go to **Settings > Environment > Messaging > Email Sender**. 2. Enter a **Sender name**. 3. Select **Save**. To control the full email experience, learn how to [configure a custom SMTP provider with Kinde](/get-started/connect/customize-email-sender/). ### Add tracking scripts Add tracking scripts like [Google Analytics](/manage-users/view-activity/track-user-sign-in-with-google-analytics/), [Hotjar](/manage-users/view-activity/hotjar/), or [Contentsquare](/manage-users/view-activity/contentsquare/) to track user activity and behavior. 1. Go to **Settings > Environment > Environment details**. 2. Scroll down to the **Third-party analytics** section. 3. Add your tracking ID(s). 4. Select **Save**. ### Add a development environment Add additional Kinde environments to support a safer development workflow. 1. From the environment drop-down, select **All environments**. 2. In the **Environments** page, select **Add environment**. 3. Enter a name for the environment (e.g., Development). 4. Enter a dev-friendly code for the environment (e.g., dev). 5. Select **Save**. Learn more about [creating and managing environments](/build/environments/environments/). ## Switch production environment to appear live When you are ready, turn on the `Live` indicator. 1. Switch to your production environment. 2. Go to **Settings > Environment > Environment details**. 3. Scroll to the **Environment status** section and toggle the switch to **Live**. 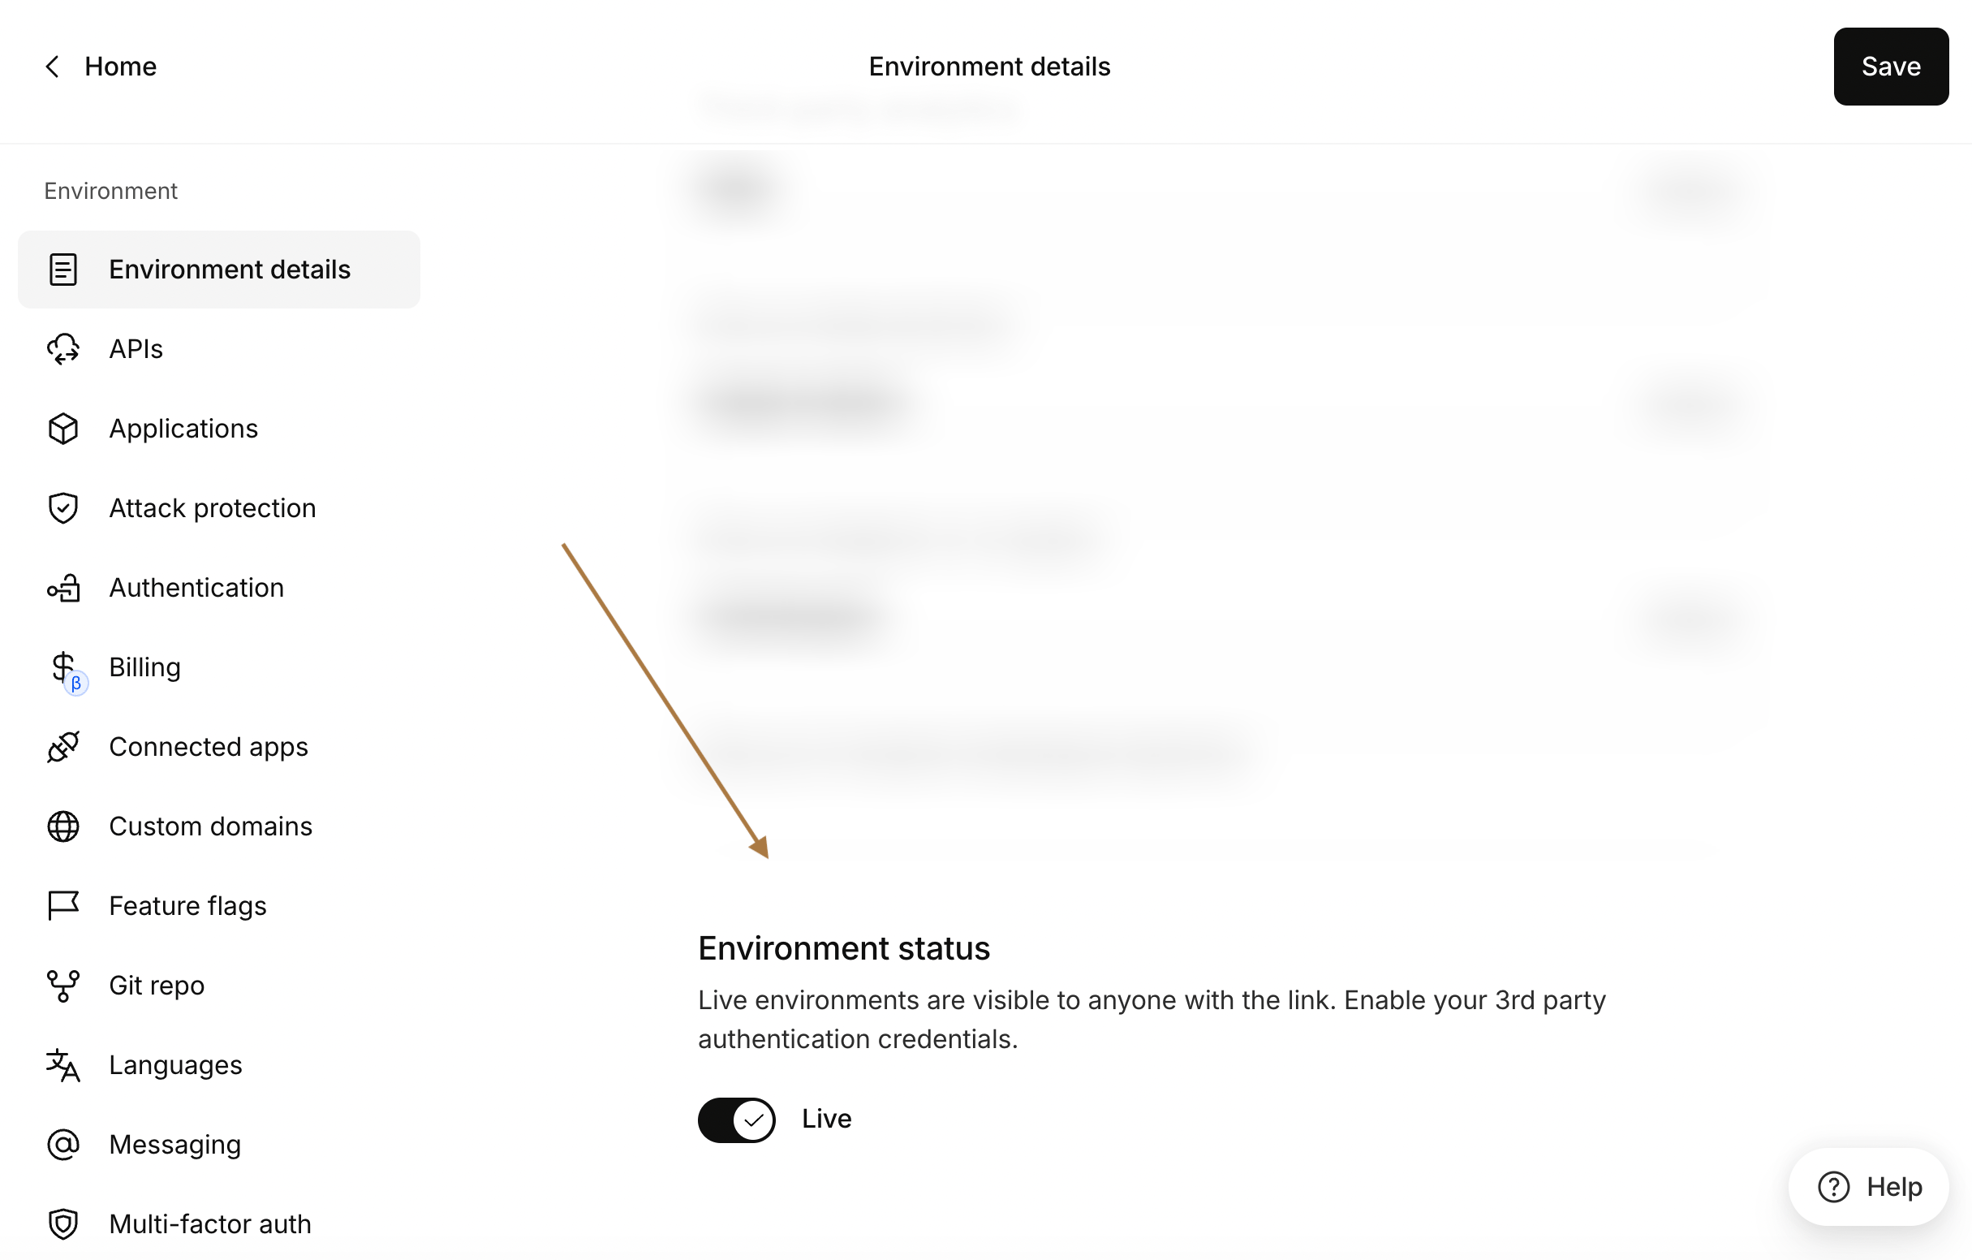 4. Select **Save**. If there are any issues, an error message will appear. If there are no errors, your Kinde production environment will now show as `Live`. 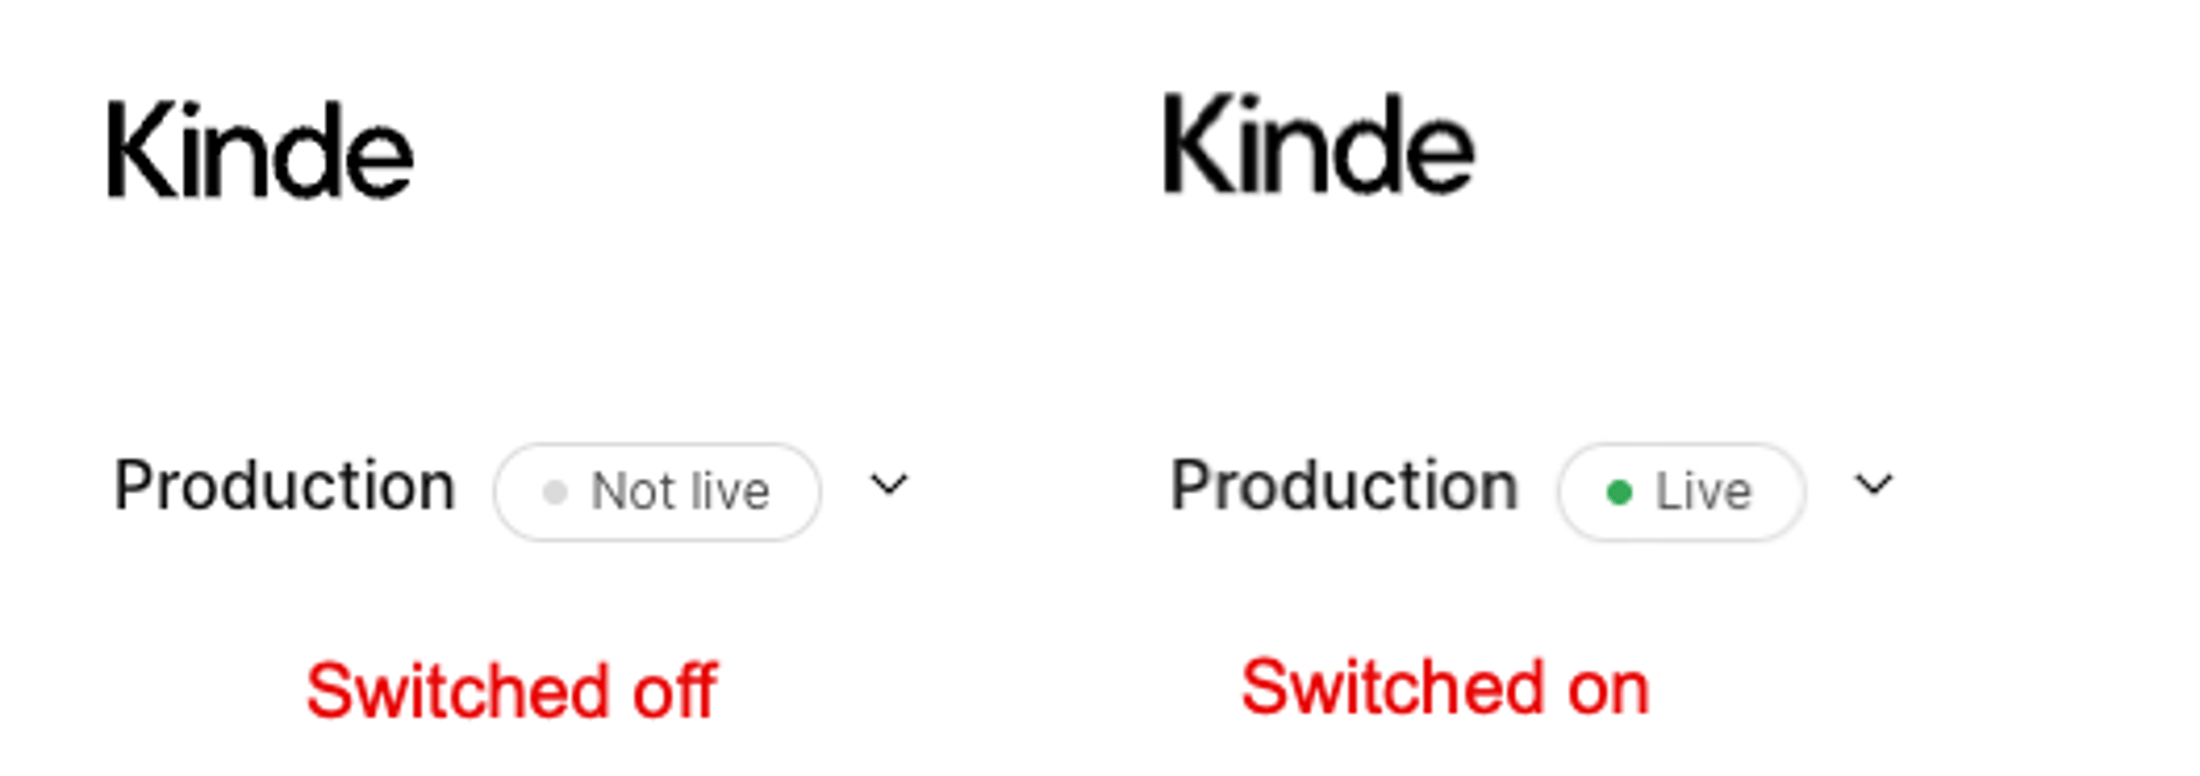
# Build - Organizations - Add and manage organizations
> Step-by-step guide for adding and managing organizations in Kinde, including creating new organizations, modifying the default organization, and understanding organization codes.
Last updated: 2026-03-03
add organizations, manage organizations, default organization, organization code, external organization ID
organizations, multi-tenancy
All Kinde businesses come with one default organization. Some businesses will create more organizations to support a multi-tenancy business model. [Learn more about organizations](/build/organizations/multi-tenancy-using-organizations/). - To add organizations manually, follow the procedure below. - To add multiple organizations, we recommend importing them. See [Import organizations](/build/organizations/import-organizations/). - You can also [add and manage organizations via API](https://docs.kinde.com/kinde-apis/management/#tag/organizations/get/api/v1/organization/). ## Add an organization 1. In the main menu, select **Organizations.** The **Organizations** page opens. 2. Select **Add organization**. 3. Enter the name of the organization. 4. If you want, add an **External organization ID**. This is the ID you use to identify the organization, and enables you to import users and assign them to organizations by matching to this ID. 5. Select **Save**. The organization now appears on the **Organization** page, and is assigned a unique code. Developers need this code for using the Kinde API and SDKs. 6. To view the details or get the code again, select the three dots and then select **View details**. ## Change the name of the default organization When you first sign up to Kinde, you have one organization already created for you. This is the default organization that all users will be added to, until you create other organizations. You can change the name of this organization, but not the unique code. 1. In the main menu, select **Organizations.** The **Organizations** page opens. 2. Select the three dots next to the default organization, and select **View details**. 3. Edit the organization name and select **Save**. ## Suspend an organization Admins can temporarily suspend an organization to prevent all users from logging in. When an organization is suspended: - All active sessions for users in that organization are ended - All refresh tokens and access tokens scoped to the organization are revoked - Users attempting to log in to the organization will see an error - A red **Suspended** badge appears next to the organization name in the organization list and user detail pages - A warning banner appears on the organization details page reading "This organization is suspended. Users cannot log in to this organization." ### To suspend an organization 1. Go to **Organizations** and select the organization 2. Scroll down to the **Organization status** section 3. Select **Suspend organization** 4. Confirm in the dialog ### To unsuspend an organization 1. Go to the suspended organization's details page 2. In the **Organization status** section, select **Unsuspend organization** 3. Confirm in the dialog — users will be able to log in again ### Suspend an organization via the Management API This feature can also be managed via the Kinde Management API using the `PATCH /api/v1/organization/{org_code}` endpoint with the `is_suspended` field.
# Build - Organizations - Allow organization creation on sign up
> Guide for controlling organization creation during user signup, including how to disable automatic organization creation for new registrations.
Last updated: 2024-01-15
organization creation, signup, self-signup, is_create_org
organizations, signup
By default, Kinde allows organizations to be created when a user signs up if the `is_create_org` param is passed. This is helpful if your customers are organizations and you want them to be able to self-sign up. If you want to, you can disable organization creation for new sign ups. ## Switch off organization creation on sign up You can switch this option off at any time. 1. Go to **Settings > Environment > Policies**. 2. Switch off the **Allow organization creation on sign up** option. 3. Select **Save**.
# Build - Organizations - Manage user sign up to organizations
> Comprehensive guide for managing user signup to organizations, including allowing specific organization registrations, default organization settings, and disabling self-signup with security considerations.
Last updated: 2024-01-15
user signup, organization registration, default organization, user policies, registration management
organizations, user-management, signup
Kinde lets you easily manage which organizations users can sign up to. For example, you can: - allow or disable users from signing up to specific organizations (if you manage multiple organizations) - allow or disable automatic sign up to the default organization (all Kinde businesses have a default) - disable signups completely, and add users manually, via API, or by import. - disable organizations from being created when a user signs up - this is usually only needed by businesses who’s customers are also businesses (B2B). Follow the relevant procedure below to set up your preferences. ## Allow users to register to a specific organization Each organization you set up in Kinde will have a unique `org_code`. If you want users to sign up to a specific organization, the `org_code` must be passed with their registration request. You need to switch this functionality on per organization. 1. Go to **Organizations** and select the organization. 2. On the **Policies** page, switch on the option to **Allow registrations**. 3. Select **Save**. Anyone can now register onto this organization if the `org_code` is passed with the registration request. ## Sign users up to the default organization If the organization being signed up to is not known when a user signs up, the default organization is used. This applies to users created via API and by import as well. If you want, you can switch this off to prevent sign-ups to the default org. 1. Go to **Organizations** and open the default organization. 2. Go to **Policies**, then switch off the **Sign users up to the default organization if one can’t be detected** option. 3. Select **Save**. ## Disable user self-sign up You can disable user self-sign up altogether. You might do this if you want to add and manage users manually, by API, or by import only. 1. Go to **Settings > Environment > Policies**. 2. Switch off the **Allow users to sign up** option. 3. Select **Save**. This setting applies to all apps in your business. ## Sign in experience for users in multiple organizations If a user belongs to multiple organizations, they will be prompted to select an organization when they sign in unless they pass a specific `org_code`. If you use enterprise authentication, users will be recognized by their email domain and will be forwarded to the correct identity provider.
# Build - Organizations - Delete an organization
> Guide for safely deleting organizations including data cleanup considerations, user reassignment, and irreversible deletion process with safety precautions.
Last updated: 2024-01-15
delete organization, organization removal, data cleanup, user reassignment
organizations, data-management
You can delete organizations in Kinde, but doing so removes all users from the organization, and deletes organization settings, feature flags, and data. Users who belong to other organizations remain assigned to those organizations. Users who only belong to the organization you are deleting will be removed, but not deleted from Kinde. ## Caution: Before you delete Deleting an organization cannot be reversed, so we recommend you: - [Reassign users to other organizations](/manage-users/about/manage-users-across-organizations/) (if you need to) - Review [feature flags](/releases/feature-flags/manage-feature-flags/) that might only apply to this organization - [Export any data](/manage-your-account/your-data/exporting-data/) that you want ## Deleting an organization 1. In Kinde, go to **Organizations**. 2. In the list, find the organization you want to delete. 3. Select the three dots menu at the far right and then select **Delete organization**. 4. In the confirmation window that appears, select **Yes, I definitely want to delete**, and then select **Delete organization**.
# Build - Organizations - Customize email sender for an organization
> Guide for customizing email sender settings for organizations including sender name and email address configuration with SMTP requirements.
Last updated: 2024-01-15
email sender, organization branding, custom email, SMTP, email customization
organizations, email, branding
If you want, you can set a unique email address and sender name for each organization you have. Users in the organization will receive emails from the email address and sender name you set, for example one-time passcode emails. You can change the customer sender name any time, but you must have a [custom email sender](/get-started/connect/customize-email-sender/) set up to change the email sender address. ## Change the email sender name for an organization 1. In Kinde, go to **Organizations**, then view an organization. 2. Select **Email**. 3. Add or change the **Sender name**. 4. Select **Save**. 5. To change the sender email, see below. ## Change the email sender address for an organization You must have a [custom SMTP email provider](/get-started/connect/customize-email-sender/) set up in Kinde, and your provider details configured with the address you are sending from. 1. In Kinde, go to **Organizations**, then view an organization. 2. Select **Email**. 3. Add or change the **Sender email**. 4. Select **Save**. 5. If you want, select **Send test email**. This lets you check the changes you made. ## Send a test email 1. In Kinde, go to **Organizations**, then view an organization. 2. Select **Email**. 3. Select **Send test email**. This lets you check the email details that your customer sees.
# Build - Organizations - Import organizations
> Guide for importing multiple organizations via CSV including file format requirements, import process, and integration with user bulk import workflows.
Last updated: 2024-01-15
import organizations, bulk import, CSV import, external organization ID, B2B setup
organizations, bulk-import, csv
All Kinde businesses come with one default organization. For B2B business models, multiple organizations are usually required. [Learn more about organizations](/build/organizations/multi-tenancy-using-organizations/). Use this procedure to import multiple organizations into Kinde via CSV, before you [import users](/manage-users/add-and-edit/import-users-in-bulk/) into those organizations. You can also [add and manage organizations](/build/organizations/add-and-manage-organizations/) manually. ## Set up your CSV file Before importing, you need to set up the CSV file with the organization details: - Organization name - External organization ID The CSV should be set up like this: ```text name, id alpha, a001 beta, b002 charlie, c003 ``` ## Import organizations You can use this procedure to add new organizations or update the details of your existing organizations. 1. In Kinde, go to **Organizations** and then select **Import organizations**. 2. In the window that opens, select **Choose file** and select the CSV file. 3. Select **Import**. The **Organizations** window now shows the imported organizations or changes. Next: [Import users in bulk](/manage-users/add-and-edit/import-users-in-bulk/) and include the **external organization id** to assign users to the imported organizations.
# Build - Organizations - About organizations
> Overview of multi-tenancy using Kinde organizations including business models, tenant isolation, and user management across multiple organizational structures.
Last updated: 2026-03-03
multi-tenancy, organizations, B2B, B2B2B, B2B2C, tenant isolation, business structure
organizations, multi-tenancy, business-models
Kinde is designed to support most business models and structures, from single entities to large enterprises. You can [run multiple businesses](/build/set-up-options/run-multiple-businesses/) on the Kinde platform, and you can also use organizations to separately manage sub-entities and user groups - known as multi-tenanting. ## What is multi-tenancy? Multi-tenancy is where a single instance of software (e.g. a business on Kinde), and its supporting infrastructure, can serve multiple customers. There are a number of ways that multi-tenancy can be done: - A single database with a tenant ID per tenant - A single database with a schema per tenant (how Kinde does it) - A database per tenant At Kinde we use a single database with a schema per tenant, which means each customer shares the application and a single database, but each tenant’s data is isolated and remains invisible to other tenants. ## Who needs to use organizations? If your business services businesses, who in turn service businesses or customers in a B2B2B or B2B2C model, you’ll need to set up organizations. For example, you might be: - a parent company running multiple stores, branches or membership groups. - a service or SaaS company managing access to a platform for different businesses and their customers. - a consultancy managing projects for different clients. ## Sample organization structure The diagram below shows an example of an organization structure. An organizational structure outlines how certain activities are managed, including [user roles and permissions](/manage-users/roles-and-permissions/apply-roles-and-permissions-to-users/). ## User management in organizations Organizations function to separate user groups or members, so you can separately control and manage access for them. Users can also belong to multiple organizations. For example, you may want freelancers or contractors to access all organizations. User management at the organization level lets you: - Control who can access the organization - Set roles and permissions for each user in the organization - Suspend an organization to temporarily prevent all user access (the default organization cannot be suspended; suspended organizations display a **Suspended** badge). See [Add and manage organizations](/build/organizations/add-and-manage-organizations/) for detailed instructions. ## Nested organizational structure not supported Organizations cannot be used to separate multiple distinct projects, where each project would itself use organizations for multi-tenancy. This nested structure (e.g. using a top-level org per “project” and then sub-orgs per tenant within each project) is not supported. Organizations are not partitioned to support multiple independent multi-tenant projects. Use a single flat set of organizations for your multi-tenant model within one Kinde business, or use [multiple Kinde businesses](/build/set-up-options/run-multiple-businesses/) for separate products or projects.
# Build - Organizations - Set access policies for an organization
> Advanced guide for setting organization-specific access policies including domain restrictions, auto-addition rules, and default role assignments for new members.
Last updated: 2026-03-03
organization policies, access control, domain restrictions, default roles, organization security
organizations, access-policies, security
You can set policies for an organization to control access to the organization. When you set policies for an organization, this overrides any [policies set at the environment level](/build/set-up-options/access-policies/). This topic provides instructions for the following tasks: - Allow anyone to join the organization - Only allow users from specific domains to sign in to the organization (i.e. apply domain restrictions for an organization) - When users from specific domains sign up, add them as members to this organization - Assign specific roles to new members of an organization In addition to access policies, organizations can also be [suspended entirely](/build/organizations/add-and-manage-organizations/#suspend-an-organization) to block all user authentication. Suspension is a more drastic measure than configuring access policies and is useful for temporarily disabling an organization. You may need to activate some features as you go. ## Go to the Policies section in your organization 1. In Kinde, go to **Organizations**. 2. Browse or search for the organization. 3. In the list, select the organization to open the details page. 4. Select **Policies** in the menu. 5. Configure policies using the following procedures. ### Configure access 1. If you want users to be able to join this organization if they pass the correct `org_code`, select **Allow org members to be auto-added**. 2. (Only in the default organization) Choose if you want to **Add users to this organization if no organization is specified** on sign up. ### Configure domain restrictions 1. Select **Allow org members to be auto-added** (if not already selected). 2. Select **Auto-add users from allowed domains**. 3. Enter the domains in the **Allowed domains** list. Use the format `domain.com` and not `https://www.domain.com`. This restricts users from joining the organization unless they belong to an allowed domain. If you leave this empty, users from any domain can sign up. 4. Select **Save**. ### Configure default roles for new members 1. In the **Default roles** section, select which roles will be assigned to new members when they sign up. 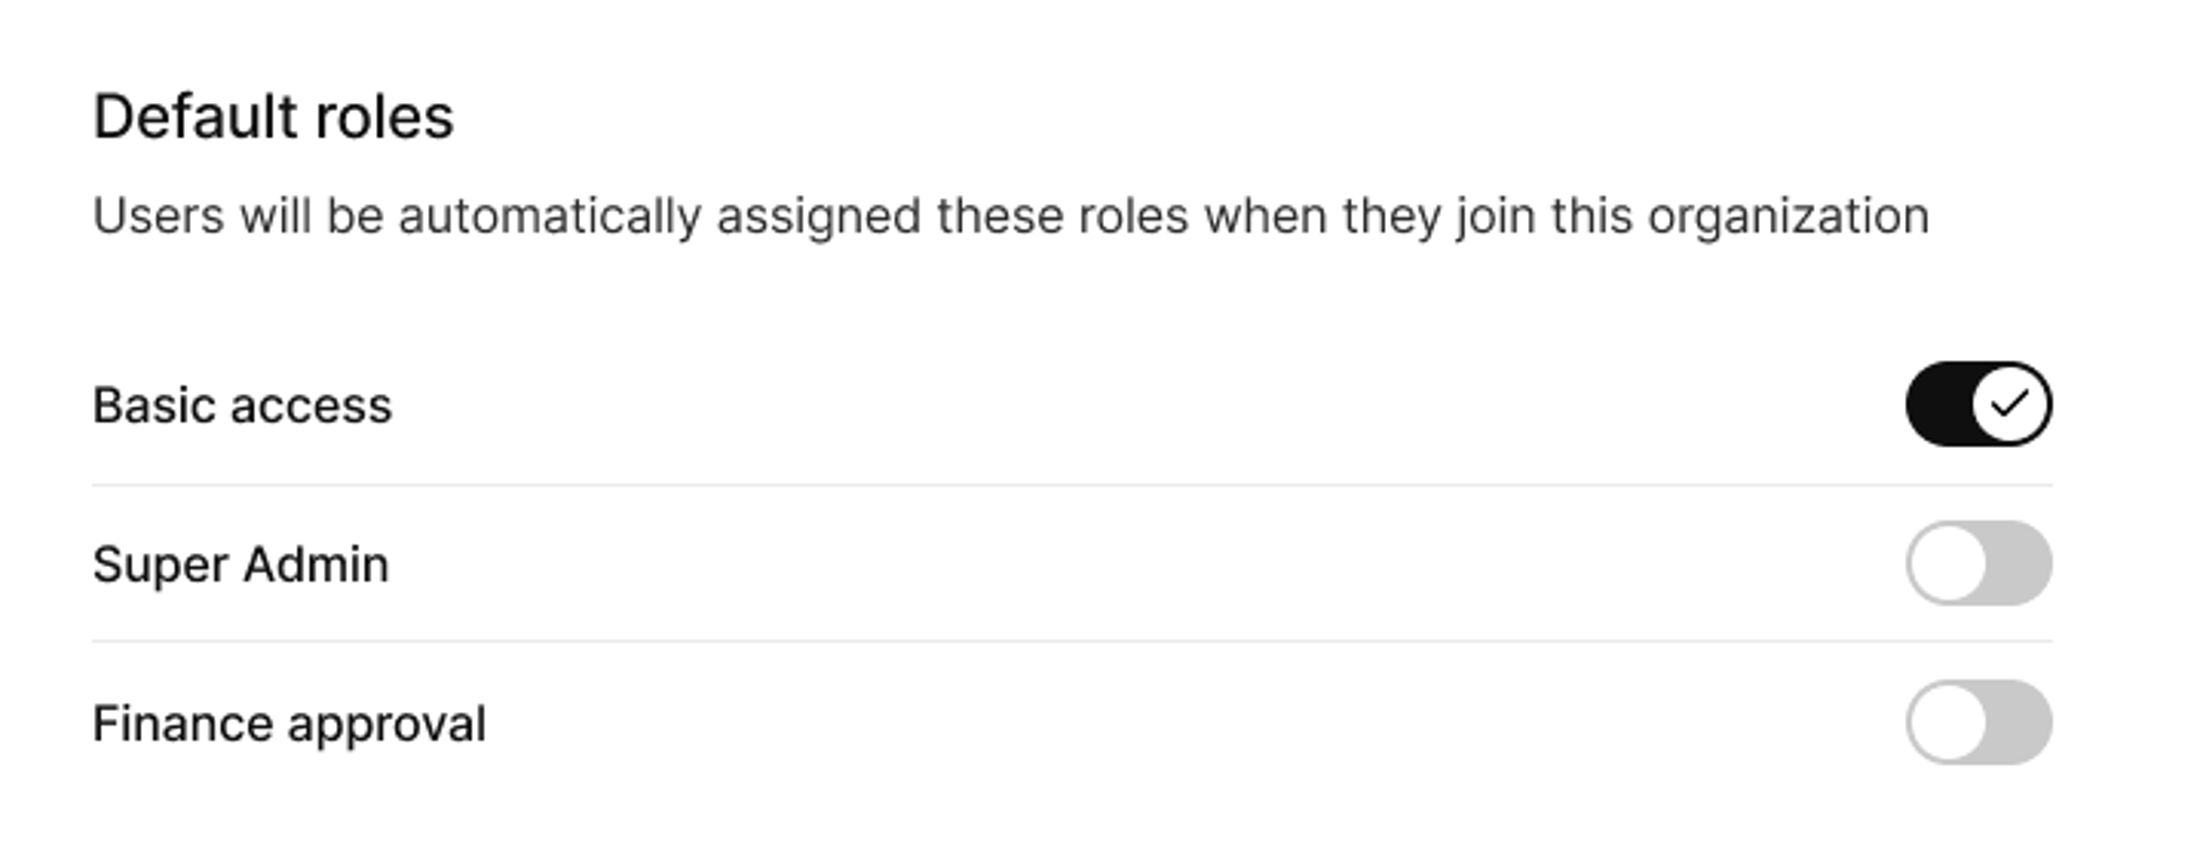 2. Select **Save**. ## Policy setting quick reference Note that your selections for each organization override the [global policy settings](/build/set-up-options/access-policies/). | To… | Do this… | | --------------------------------------------------------------------------------------------------------- | -------------------------------------------------------------------------------------------------------------------------------------------------- | | Allow anyone to join this organization. | Select **Allow org members to be auto-added**. | | Sign up users who are not already associated with an organization, to the default organization. | Select **Add users to this organization if no organization is specified**. | | Allow only people from `specificdomain.com` to sign up to this organization. | Select **Allow self sign-up** and enter the `specificdomain.com` into the **Allowed domains** list. | | Allow only people from `specificdomain.com` to sign up to this organization and auto-add them seamlessly. | Select **Allow self sign-up** and enter the `specificdomain.com` into the **Allowed domains** list and select Auto-add users from allowed domains. | | Assign new members specific roles when they sign up | Select the **Default roles** you want assigned
# Build - Organizations - Give API access to an organization using M2M
> Guide for creating organization-scoped machine-to-machine applications to provide secure API access for automated systems and backend services within specific organizations.
Last updated: 2024-01-15
organization m2m, api access, machine to machine, organization scoped, backend services
organizations, m2m, api-access
If you want to give automated systems, AI agents, or backend services access to data in a specific organization, you can do this securely using an **organization-scoped machine-to-machine (M2M) application**. This type of app is tied to a single organization and can only be used to access resources for that org. To create an org-scoped M2M app: 1. In Kinde, go to **Organizations**, then select the organization. 2. Select **Machine-to-machine apps**. 3. Follow the steps to create the app and assign the appropriate scopes. For full details, see [M2M access scoped to organizations](/machine-to-machine-applications/organization-scoped-m2m-apps/m2m-applications-for-organizations/).
# Build - Organizations - Kinde organizations for developers
> Comprehensive developer guide for working with Kinde organizations including creation, user assignment, self-signup flows, and organization management with code examples.
Last updated: 2026-03-03
organizations, multi-tenancy, organization creation, user assignment, organization management, org_code
organizations, multi-tenancy, user-management
Organizations allow you to group your users into buckets. An organization in Kinde could represent a club, a company, a practice, a department - however you model your business. We’ll refer to them collectively as **organizations** in this topic. ## Important things to know about Kinde organizations - A user can belong to [multiple organizations](/manage-users/about/manage-users-across-organizations/) - The same user can have different [roles and permissions](/manage-users/roles-and-permissions/apply-roles-and-permissions-to-users/) in different organizations - By default they inherit global styles - but you can [brand them individually](/design/brand/apply-branding-for-an-organization/) - There is a **default organization** where new users are placed if we don’t know which organization they belong to. Auto assigning to this organization can be [turned off](/build/organizations/allow-user-signup-org/#sign-users-up-to-the-default-organization). - You can also [turn off](/build/organizations/allow-user-signup-org/#allow-users-to-register-to-a-specific-organization) the ability for users to sign up to specific organizations. ## Creating an organization There are three ways of creating an organization. 1. [Add](/build/organizations/add-and-manage-organizations/) or [import](/build/organizations/import-organizations/) through the Kinde application. 2. Add through the [Kinde management API](/kinde-apis/management#tag/organizations/post/api/v1/organization). 3. Allow organizations to sign themselves up (see below). ## New organization self-sign up By default Kinde allows organizations to self-sign up to your project. You can [turn this off](/build/organizations/allow-org-create-on-signup/) in Kinde if you prefer to handle registration another way. ### Basic implementation To initiate the organization self-sign up flow pass the `is_create_org` parameter in the auth url when redirecting to Kinde. This will prompt the user to register an account and upon successful registration create an organization in the background on Kinde. Our SDKs contain helpers to achieve this. The below example is from the Kinde React SDK, which ships with a `createOrg` method. ```jsx import {useKindeAuth} from "@kinde-oss/kinde-auth-react"; export const RegisterOrgButton = () => { const {createOrg} = useKindeAuth(); return ( ); }; ``` See the [relevant SDK doc](/developer-tools/about/our-sdks/) for your stack, for examples on how to do this. ### Providing an organization name If you want to pass an organization name to Kinde, you can pass it in the auth url with the `org_name` parameter. A common pattern is to provide an input field in your project for the user to type their preferred name. Here’s another example using React. ```jsx import {useKindeAuth} from "@kinde-oss/kinde-auth-react"; import {useState} from "react"; const RegisterOrgForm = () => { const {createOrg} = useKindeAuth(); const [orgName, setOrgName] = useState(""); const handleSubmit = (e) => { e.preventDefault(); // 1. store whatever you need to in your project // 2. redirect to Kinde createOrg({org_name: orgName}); }; return ( ); }; ``` See the [relevant SDK doc](/developer-tools/about/our-sdks/) for your stack, for examples on how to do this. ## Assigning a user to an existing organization There are a few ways of doing this. 1. Go into Kinde and [add](/manage-users/add-and-edit/add-and-edit-users/) or [import](/manage-users/add-and-edit/import-users-in-bulk/) users manually. 2. Add users via the [Kinde management API](/kinde-apis/management#tag/organizations/post/api/v1/organizations/{org_code}/users). 3. Provide a sign up link from your product (see below). ### Signing up new users into an existing organization As noted earlier, Kinde has the notion of a **default organization** where new users are placed if we don’t know which organization they belong to. This can be [switched off](/build/organizations/allow-user-signup-org/#sign-users-up-to-the-default-organization), or you can pass an `org_code` parameter in the auth URL to specify which organization you would like users to sign up to. Our SDKs provide specific helper methods for passing the `org_code` parameter. For example, in React, this can be achieved as follows: ```jsx import {useKindeAuth} from "@kinde-oss/kinde-auth-react"; export const RegisterOrgButton = (orgCode) => { const {register} = useKindeAuth(); return ( ); }; ``` See the [relevant SDK doc](/developer-tools/about/our-sdks/) for your stack, for examples on how to do this. ### Signing users into an existing organization The flows are slightly different depending on whether you supply an organization code to us in the auth url as `org_code` parameter. **No org code provided** If Kinde is not provided with an `org_code`, there are three possible outcomes: 1. If a user only belongs to a single organization they will be automatically signed into this organization. 2. If the user belongs to multiple organizations, after they have authenticated we present them with an organization selector that shows all the organizations they have access to. They can then choose one to continue. 3. If the user belongs to no organizations, they will be signed in without an organization, meaning the `org_code` claim will be omitted from the access token. Code wise there is nothing different to do from a standard sign in. Again, a React example: ```jsx import {useKindeAuth} from "@kinde-oss/kinde-auth-react"; export const LoginButton = () => { const {login} = useKindeAuth(); return ( ); }; ``` See the [relevant SDK doc](/developer-tools/about/our-sdks/) for your stack, for examples on how to do this. **Org code provided** If Kinde receives the `org_code` parameter in the auth url it means two things: 1. If you have set up [branding for the organization](/design/brand/apply-branding-for-an-organization/) we display this to the end user providing a much more customized experience 2. If the user is a member of multiple organizations we can skip the organization switcher step mentioned above and sign them straight into the requested organization. Our SDKs describe how to provide the `org code` in the auth url. Here’s an example from React. ```jsx import {useKindeAuth} from "@kinde-oss/kinde-auth-react"; export const LoginOrgButton = (orgCode) => { const {login} = useKindeAuth(); return ( ); }; ``` See the [relevant SDK doc](/developer-tools/about/our-sdks/) for your stack, for examples on how to do this. ## Getting the organization ID We refer to the organization’s ID as an `org_code` which is unique for each organization. Once a user has authenticated and is returned to your project we expose the `org_code` in their access token. Each SDK has a way of accessing this. For example in React: ```jsx const {getOrganization} = useKindeAuth(); console.log(getOrganization()); //returns {orgCode: "org_xxxxxxxxxx"} ``` See the [relevant SDK doc](/developer-tools/about/our-sdks/) for your stack, for examples on how to do this. ## Getting the list of all organization IDs a user belongs to If a user belongs to multiple organizations, you might find it useful to get a list of them. You could do this in a couple of ways: 1. Via the [Kinde management API](/kinde-apis/management#tag/organizations) 2. Reading the `id_token` (see below). ### Using the id_token to get a list of organization IDs We provide an array of organization codes in the `org_codes` claim of the `id_token`. You can either use a JWT parser to extract these, or use our SDKs provide helper methods. In React you can use the following helper: ```jsx const {getUserOrganizations} = useKindeAuth(); console.log(getUserOrganizations()); //returns {orgCodes: ["org_1234", "org_5678"]} ``` ## Roles and Permissions A user can have different roles and permissions per organization. This means they can have an `admin` role in Organization ABC but a `member` role in Organization XYZ. You can manage these roles and permissions: 1. In the [Kinde admin area](/manage-users/roles-and-permissions/user-permissions/) 2. Via the [Kinde Management API](/kinde-apis/management#tag/permissions) 3. Read them from the `access_token` (see below). Note that only permissions specific to the organization the user is signed into will be returned. ### Using the access_token to get a list of permissions We provide an array of permissions in the `permissions` claim of the `access_token`. You can either use a JWT parser to extract these, or using our SDK helper methods. In React you can use the following helper: ```jsx const {getUserOrganizations} = useKindeAuth(); console.log(getUserOrganizations()); //returns {orgCodes: ["org_1234", "org_5678"]} ``` ### Using an SDK for permission-based access control Our SDKs also ship with helpers for handling permission checks. For example in React you could use: ```jsx const {getPermission} = useKindeAuth(); getPermission("create:todos"); // {orgCode: "org_1234", isGranted: true} ``` Then you could gate the feature as follows: ```jsx { getPermission("create:todos").isGranted ? : null; } ``` See the [relevant SDK doc](/developer-tools/about/our-sdks/) for your stack, for examples on how to do this. ## Release management You can use feature flags to provide different features to different organizations. This is especially helpful if you want to beta test a new feature for your project and only release it to selected organizations. You can manage these feature flags: 1. In the [Kinde admin area](/releases/feature-flags/add-feature-flag/) 2. Via the [Kinde Management API](/kinde-apis/management#tag/feature-flags) 3. Read them from the `access_token` (see below). ### Using the access_token to get a list of feature flags We provide an array of flags in the `feature_flags` claim of the `access_token`. You can use a JWT parser extract these, or use an [appropriate SDK](/developer-tools/about/our-sdks/) for handler examples. Here’s an example from the React SDK. ```jsx feature_flags: { theme: { "t": "s", "v": "pink" }, is_dark_mode: { "t": "b", "v": true }, competitions_limit: { "t": "i", "v": 5 } } ``` ## Organization suspension Organizations can be suspended to temporarily block all user access. Suspension is managed via the Management API. ### Suspending an organization via API Send `PATCH /api/v1/organization/{org_code}` with `{ "is_suspended": true }` to suspend an organization. When suspended: - The OAuth2 authorization flow returns an `organization_suspended` error and redirects users to an auth error page - All refresh tokens and access tokens scoped to the organization are automatically invalidated - Active end-user sessions for that organization are ended ### Checking suspension status The GET organization API endpoint returns `is_suspended` (boolean) and `suspended_on` (ISO 8601 timestamp) fields that you can use to check suspension status. ### Default organization The default organization cannot be suspended. Attempting to suspend it via the API returns a `DEFAULT_ORGANIZATION_CANNOT_BE_SUSPENDED` error. ### Unsuspending an organization To restore access, set `is_suspended` to `false` via `PATCH /api/v1/organization/{org_code}`. Users will be able to log in again. Previously revoked tokens are not restored — users will need to re-authenticate.
# Build - Organizations - Customize the self-serve portal for an organization
> Use advanced organizations to override the self-serve portal setting for individual organizations. For example, make a function available in one organization that is not suitable for another org.
Last updated: 2025-08-11
self-serve, plan, bill, payment method, SSO
self-serve portal, manage organizations, self-manage, SSO, plan management, payment details
If an organization requires a unique setup for the self-service portal, you can do this using an advanced organization function. If you set this up, the authorized members of the organization will be able to perform the selected functions. 1. In Kinde, open the organization you want to customize. 2. In the side menu, select **Self-serve portal**. 3. If you don't have Advanced organizations switched on, enable this now. 4. Switch on the **Override environment settings** option.  5. Select the options you want to be available in the self-serve portal for this org. 6. Select any additional changes you want to make for members of the org (users) to access. Note that individual access is still controlled via system roles. 7. Select **Save**. Learn more about [setting up the self-serve portal for an organization](/build/self-service-portal/self-serve-portal-for-orgs/).
# Build - Self service portal - Customer self-service portal
> Intro to concept of self-service portals in Kinde, including what functions they include, how to use them, and when to set them up.
Last updated: 2024-08-27
organization portal, self-serve portal, user portal, billing portal, portal permissions
self-serve-portal, organizations, users, billing
Customer support is one of the higher overheads for a SaaS business. For paying customers, the expectation is that they get help when needed, for example, to manage their account or get assistance with your app. Kinde lets you configure a self-serve portal so authorized customers can self-manage functions provided by Kinde. This means your customers can make account changes without contacting you for support, saving everyone time and money. There's two types of portal: one for end users (B2C), and one for organizations (B2B). ## Watch Dave's portal demo in 90 seconds ## Self-serve portal for organizations In the organization portal, you can allow org members to manage: - Account details - Payment details (if you have billing set up) - API Keys (Paid plans) - [Members and roles](/build/self-service-portal/self-serve-portal-for-orgs/#invite-members-from-the-portal) (Paid plans only) - SSO enterprise connections (Coming soon - Kinde Scale plan only) You can enable all functions or limit them to what you offer. [Set up a self-serve portal for an org](/build/self-service-portal/self-serve-portal-for-orgs/) ## Self-serve portal for users In the user portal, you can allow users to manage: - Account details - Payment details (if you have billing set up) - Multi-factor auth settings (coming soon) - API Keys [Set up a self-serve portal for users](/build/self-service-portal/self-serve-portal-for-users/) ## Self-serve portal settings These are the self-serve portal settings you can enable. 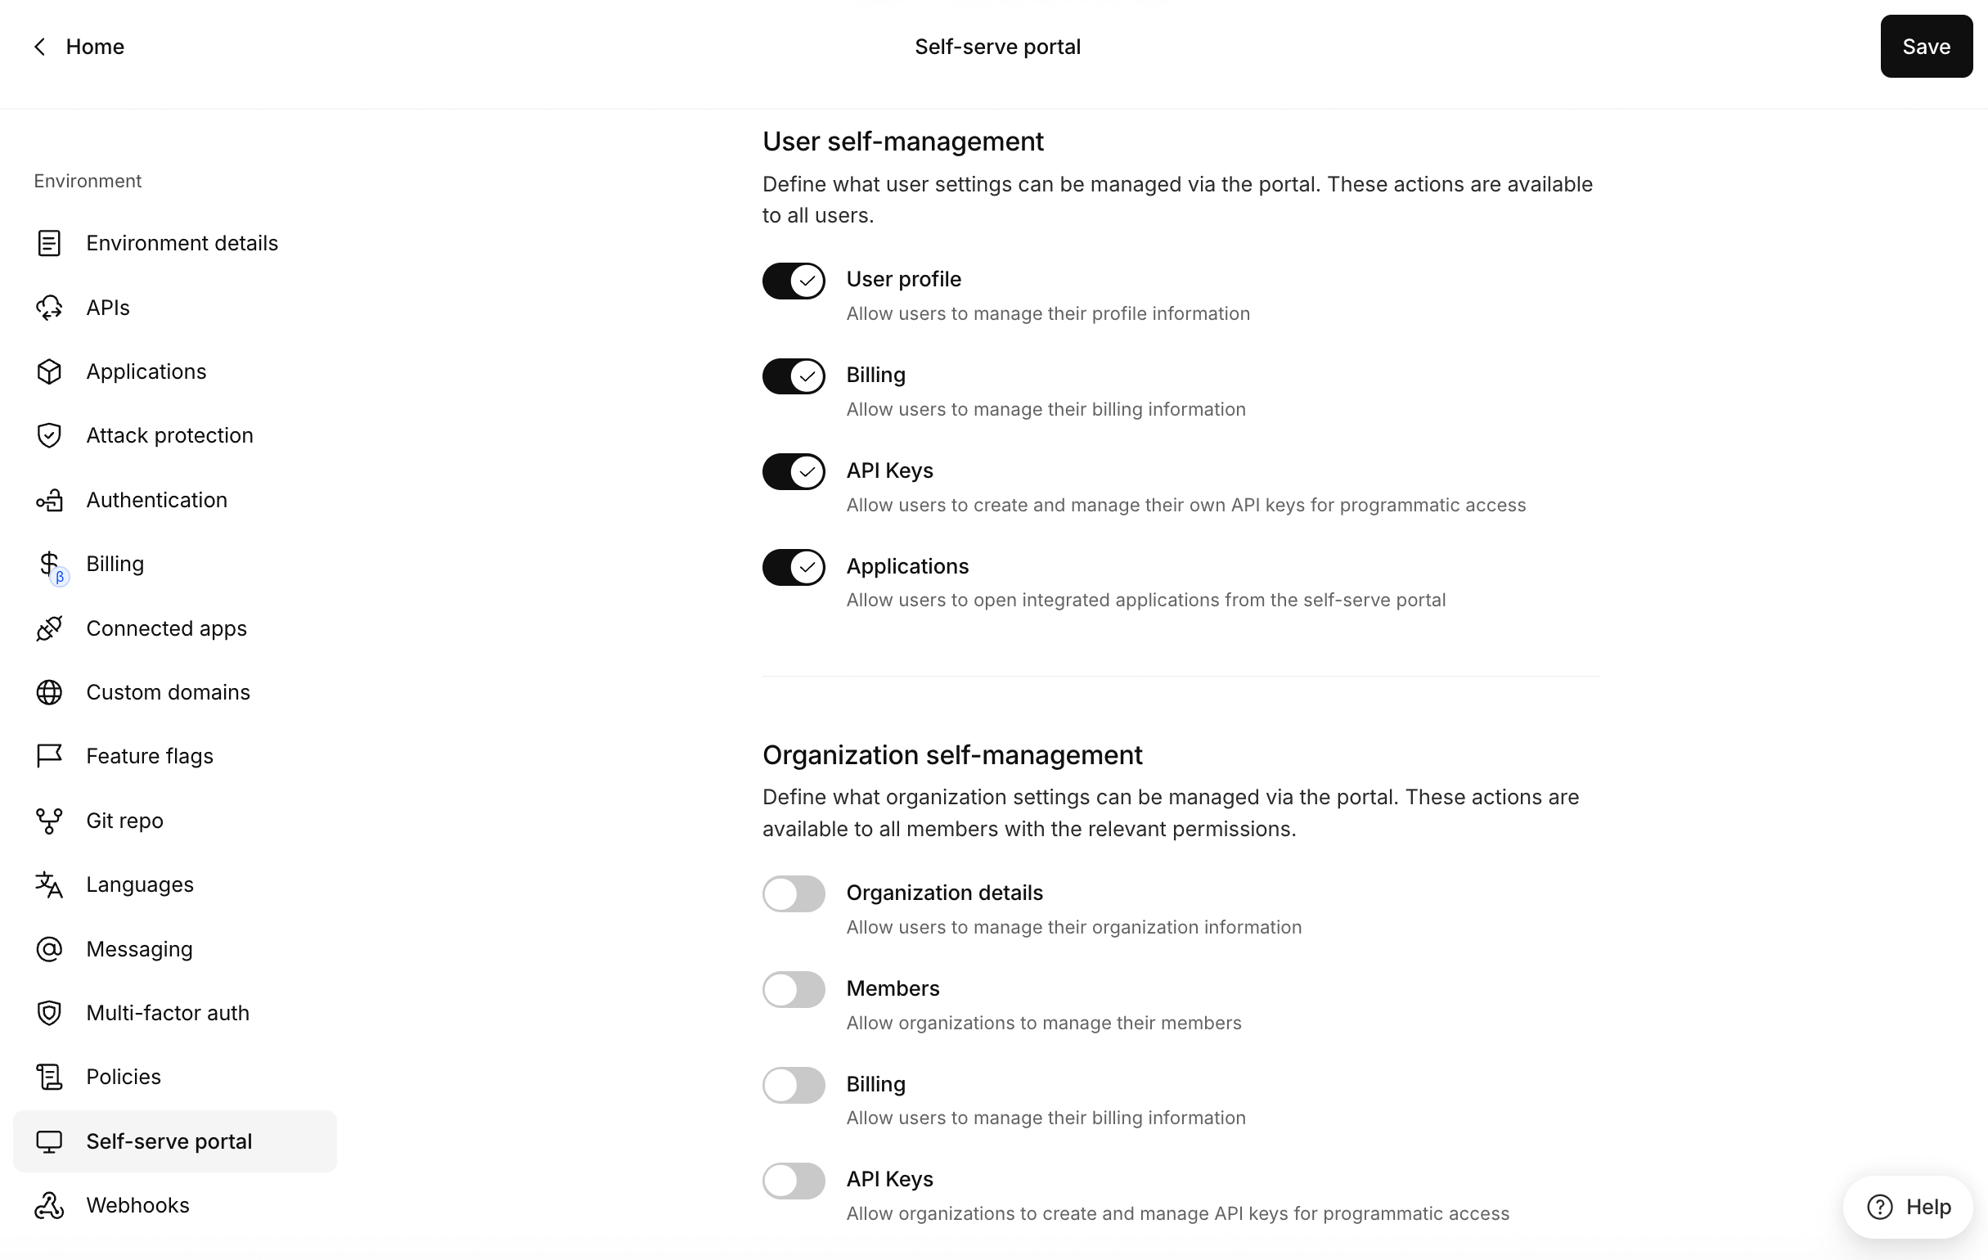 ## Current limitations Currently, we don't support any customer design for the portal appearance. However, you can build your own portal and use the [Kinde API](https://docs.kinde.com/kinde-apis/management/) endpoints to provide the functions.
# Build - Self service portal - Enable self-serve portal for organizations
> Let org admins self-manage billing, members, and settings—configure the portal, invitations, roles, and link generation.
Last updated: 2026-07-01
organization portal, self-serve portal, org management, member invitations, portal permissions, organization alias, portal link, kinde management api
self-serve-portal, organizations, member-invitations, billing
You can configure a self-serve portal to enable authorized organization members to be able to self-manage functions provided by Kinde. Authorized org members can update: - [Business details](/manage-your-account/business-information/update-your-details/) - [Payment details](/manage-your-account/profile-and-plan/update-kinde-payment/) (if you have billing set up) - [API Keys](/manage-your-apis/add-manage-api-keys/self-serve-api-keys/) - [Members and roles](#invite-members-from-the-portal) — invite new members into the organization, assign their roles, and revoke pending invitations - [SSO enterprise connections](/authenticate/self-serve-sso/add-sso-self-serve/) (in beta) - Multi-factor auth settings (coming soon) A self-serve portal means your customers can make account changes without contacting you for support. This can save you both time. If you are on the Kinde Scale plan, you can configure the [portal per organization](/build/organizations/self-serve-portal-per-org/). E.g. allow some functions for some customers and not others. ## Configure the organization self-serve portal 1. Go to **Settings > Environment > Self-serve portal**.  2. Enter the **Return URL** that you want users to land on when they exit the portal, e.g. your app dashboard. 3. Add an **Organization alias** to represent how your customers are referred to in your business, e.g. Account, Partner, Workspace, etc. This will be visible in the interface in the portal. 4. In the **Organization profile** section, select the functions you want organization admins to be able to manage. 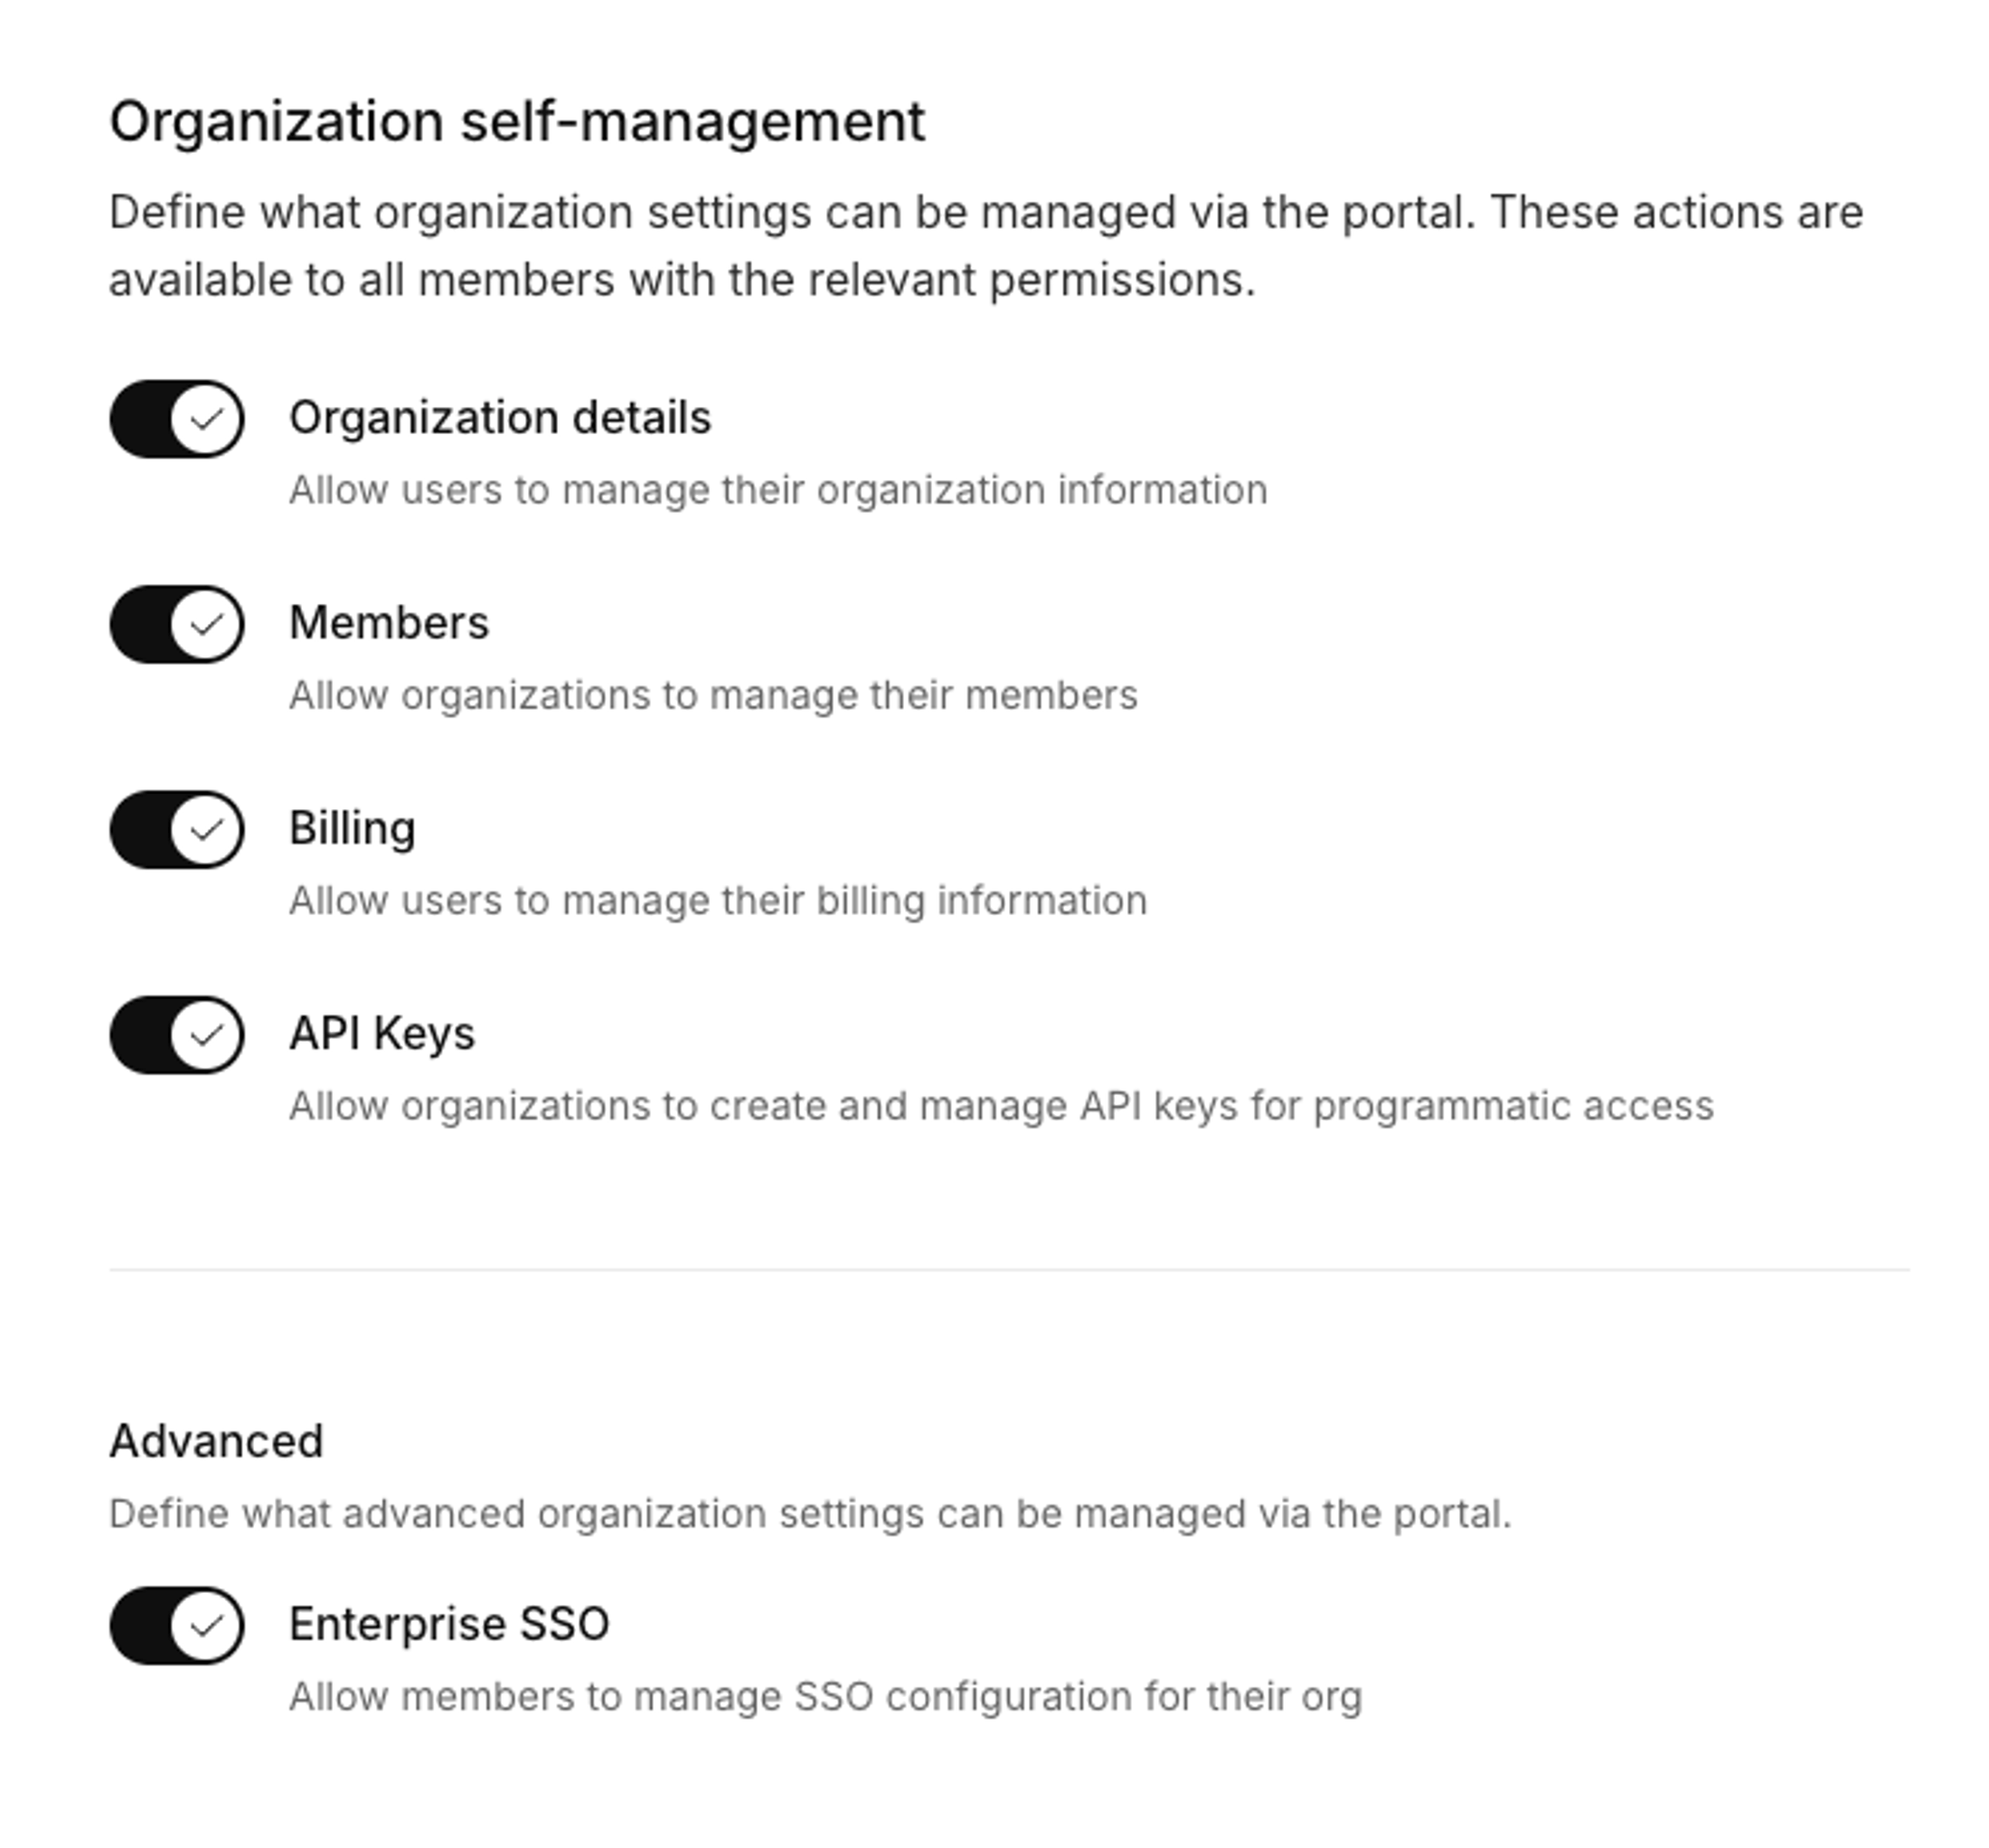 5. Select **Save**. ## Portal access control with system permissions Each core function within the self-serve portal is governed by a corresponding system permission. For example, the `org:write:billing` permission allows users to update billing details. These permissions can be included in your custom roles and assigned to organization members. We recommend creating custom roles with varying levels of portal access, which you can then assign as needed. For instance, you might create a role that allows members to view billing details but not update them. You can select these permissions within your existing roles, or when you create them. 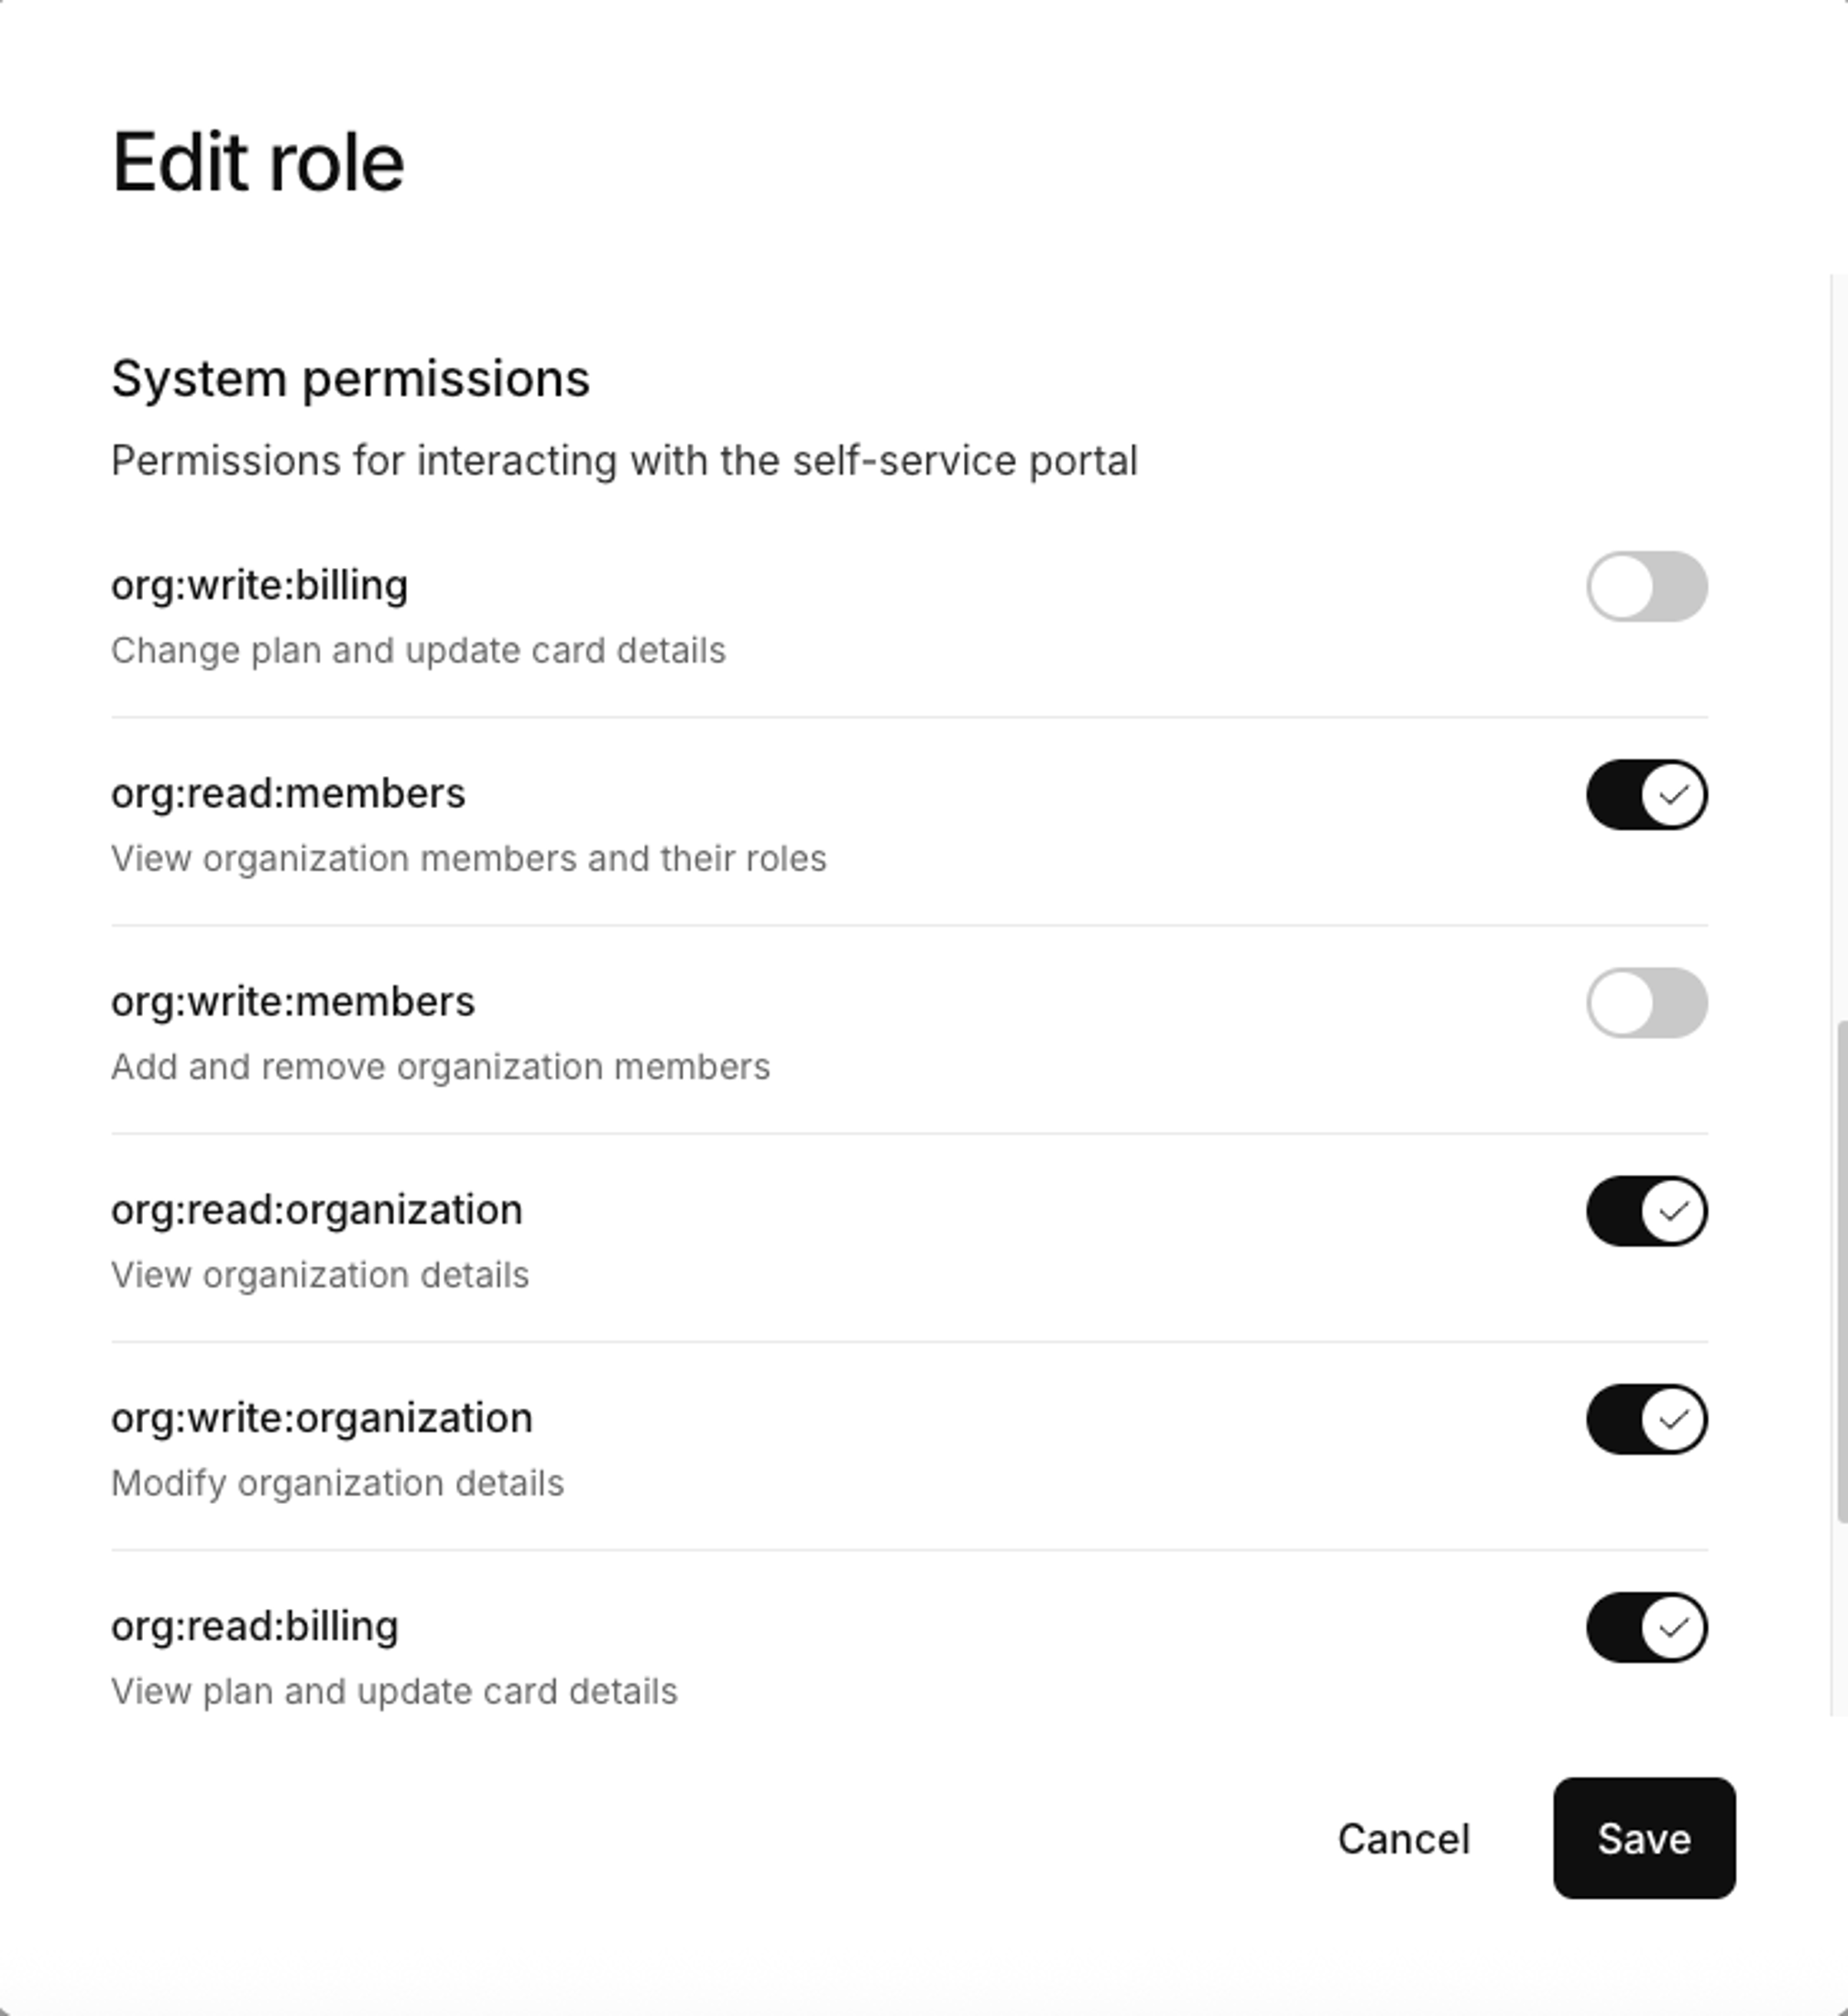 When [configuring org roles](/billing/get-started/add-billing-role/), you can specify whether it should be: - Automatically assigned to all new organization members. - Automatically assigned to the organization creator. ## Invite members from the portal When you enable the **Members and roles** function, authorized members can invite other people into their organization directly from the portal, without you adding users manually or via the API. ### Who can invite members A member can only invite others and assign roles if they have sufficient permission in the organization: - The member needs the `org:write:members` permission to open the **Add member** flow. - Each role in the **Add member** dialog is gated individually—a member can only assign a role if they hold the permission required to grant it. Roles they can't assign appear disabled. This mirrors the role gating used for Kinde team members, so a member can never grant access broader than their own. ### Invite a member 1. Open the organization portal and go to **Members**. 2. Select **Add member**. 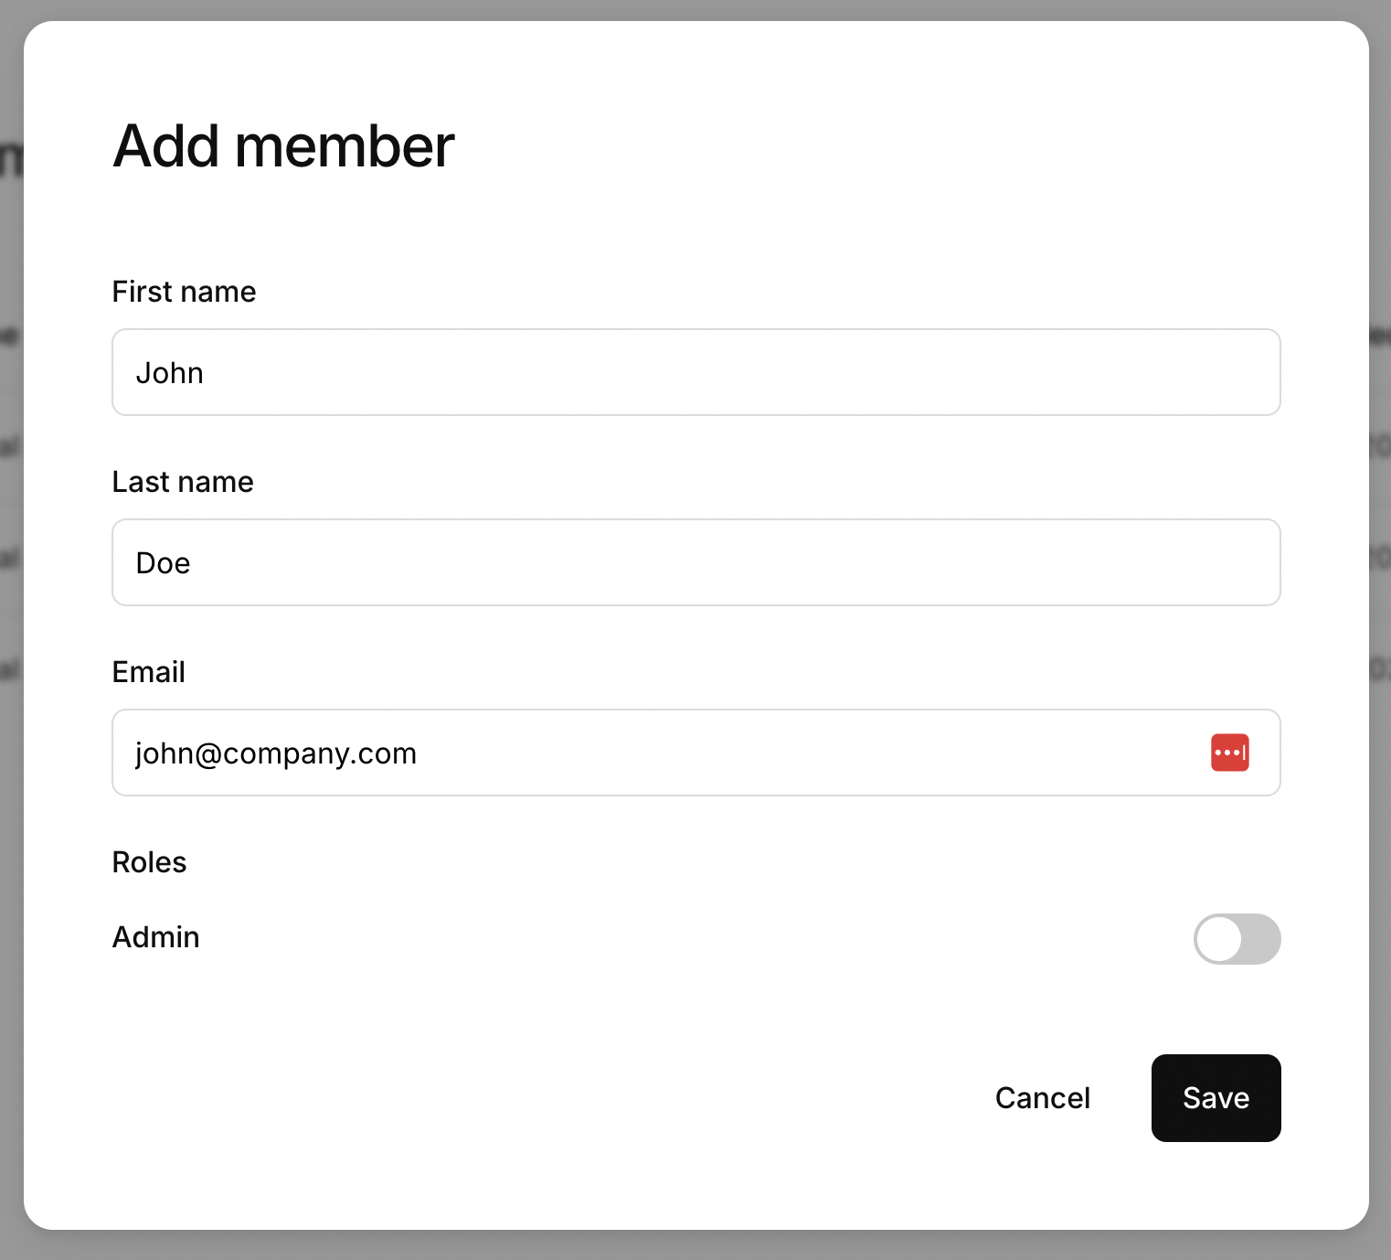 3. Enter the new member's **First name**, **Last name**, and **Email**. 4. Select the **Roles** the member will have in the organization. - You can select more than one. - Unavailable roles are disabled. 5. Select **Save**. The person receives an email invitation to join the organization. They can set up a new account or sign in to an existing one to accept. For more on what the invitee sees, see [Invited user sign-up experience](/authenticate/custom-configurations/invited-user-experience/). ### Revoke a pending invitation Pending invitations appear in an **Invitations** list on the **Members** screen, showing each invitee's name, email, role, and the date invited. 1. Find the invitation in the **Invitations** list. 2. Select the actions menu next to it, then select **Revoke invitation**. ### When invitations are turned off If invitations are disabled for the environment, the **Add member** option and the **Invitations** list are hidden in the portal when members browse **Members** normally. A bookmarked or direct URL to the add-member screen still loads that page and shows an "Invitations are disabled" message instead of the invite form. ## Generate the self-serve portal link Access to the portal is granted via a one-time link. You then use the link on an 'account' or 'profile' button in your app to open the Kinde portal screens. You can generate the link using the user's access token (recommended). ### Include the self-serve portal link in the user's access token This method is ideal when you want to generate the portal link on the fly—for example, when a user clicks an "Account" button in your app. ### Generate a self-serve portal link with a Kinde SDK If you're using the Kinde React SDK, you can use the `` component, which both generates the link and redirects the user: ```jsx import {PortalLink} from "@kinde-oss/kinde-auth-react"; Account; ``` ### Generate a self-serve portal link without a Kinde SDK If you're not using a Kinde SDK, you can manually call the Account API: ```js const response = await fetch("/account_api/v1/portal_link", { headers: { Authorization: `Bearer ${userAccessToken}` } }); const data = await response.json(); window.location = data.url; ``` Optional parameters: - `return_url` – where to redirect the user after exiting the portal. - `subnav` – specify the portal section to open. See [Get self-serve portal link](https://docs.kinde.com/kinde-apis/frontend/#tag/self-serve-portal/get/account_api/v1/portal_link) for the supported values. ## How the self-serve portal looks When the user clicks the link you've added to your app, the portal opens. The default design is shown below, and we are working on allowing you to style this yourself. The options a member sees depends on their role and what you have chosen to display. 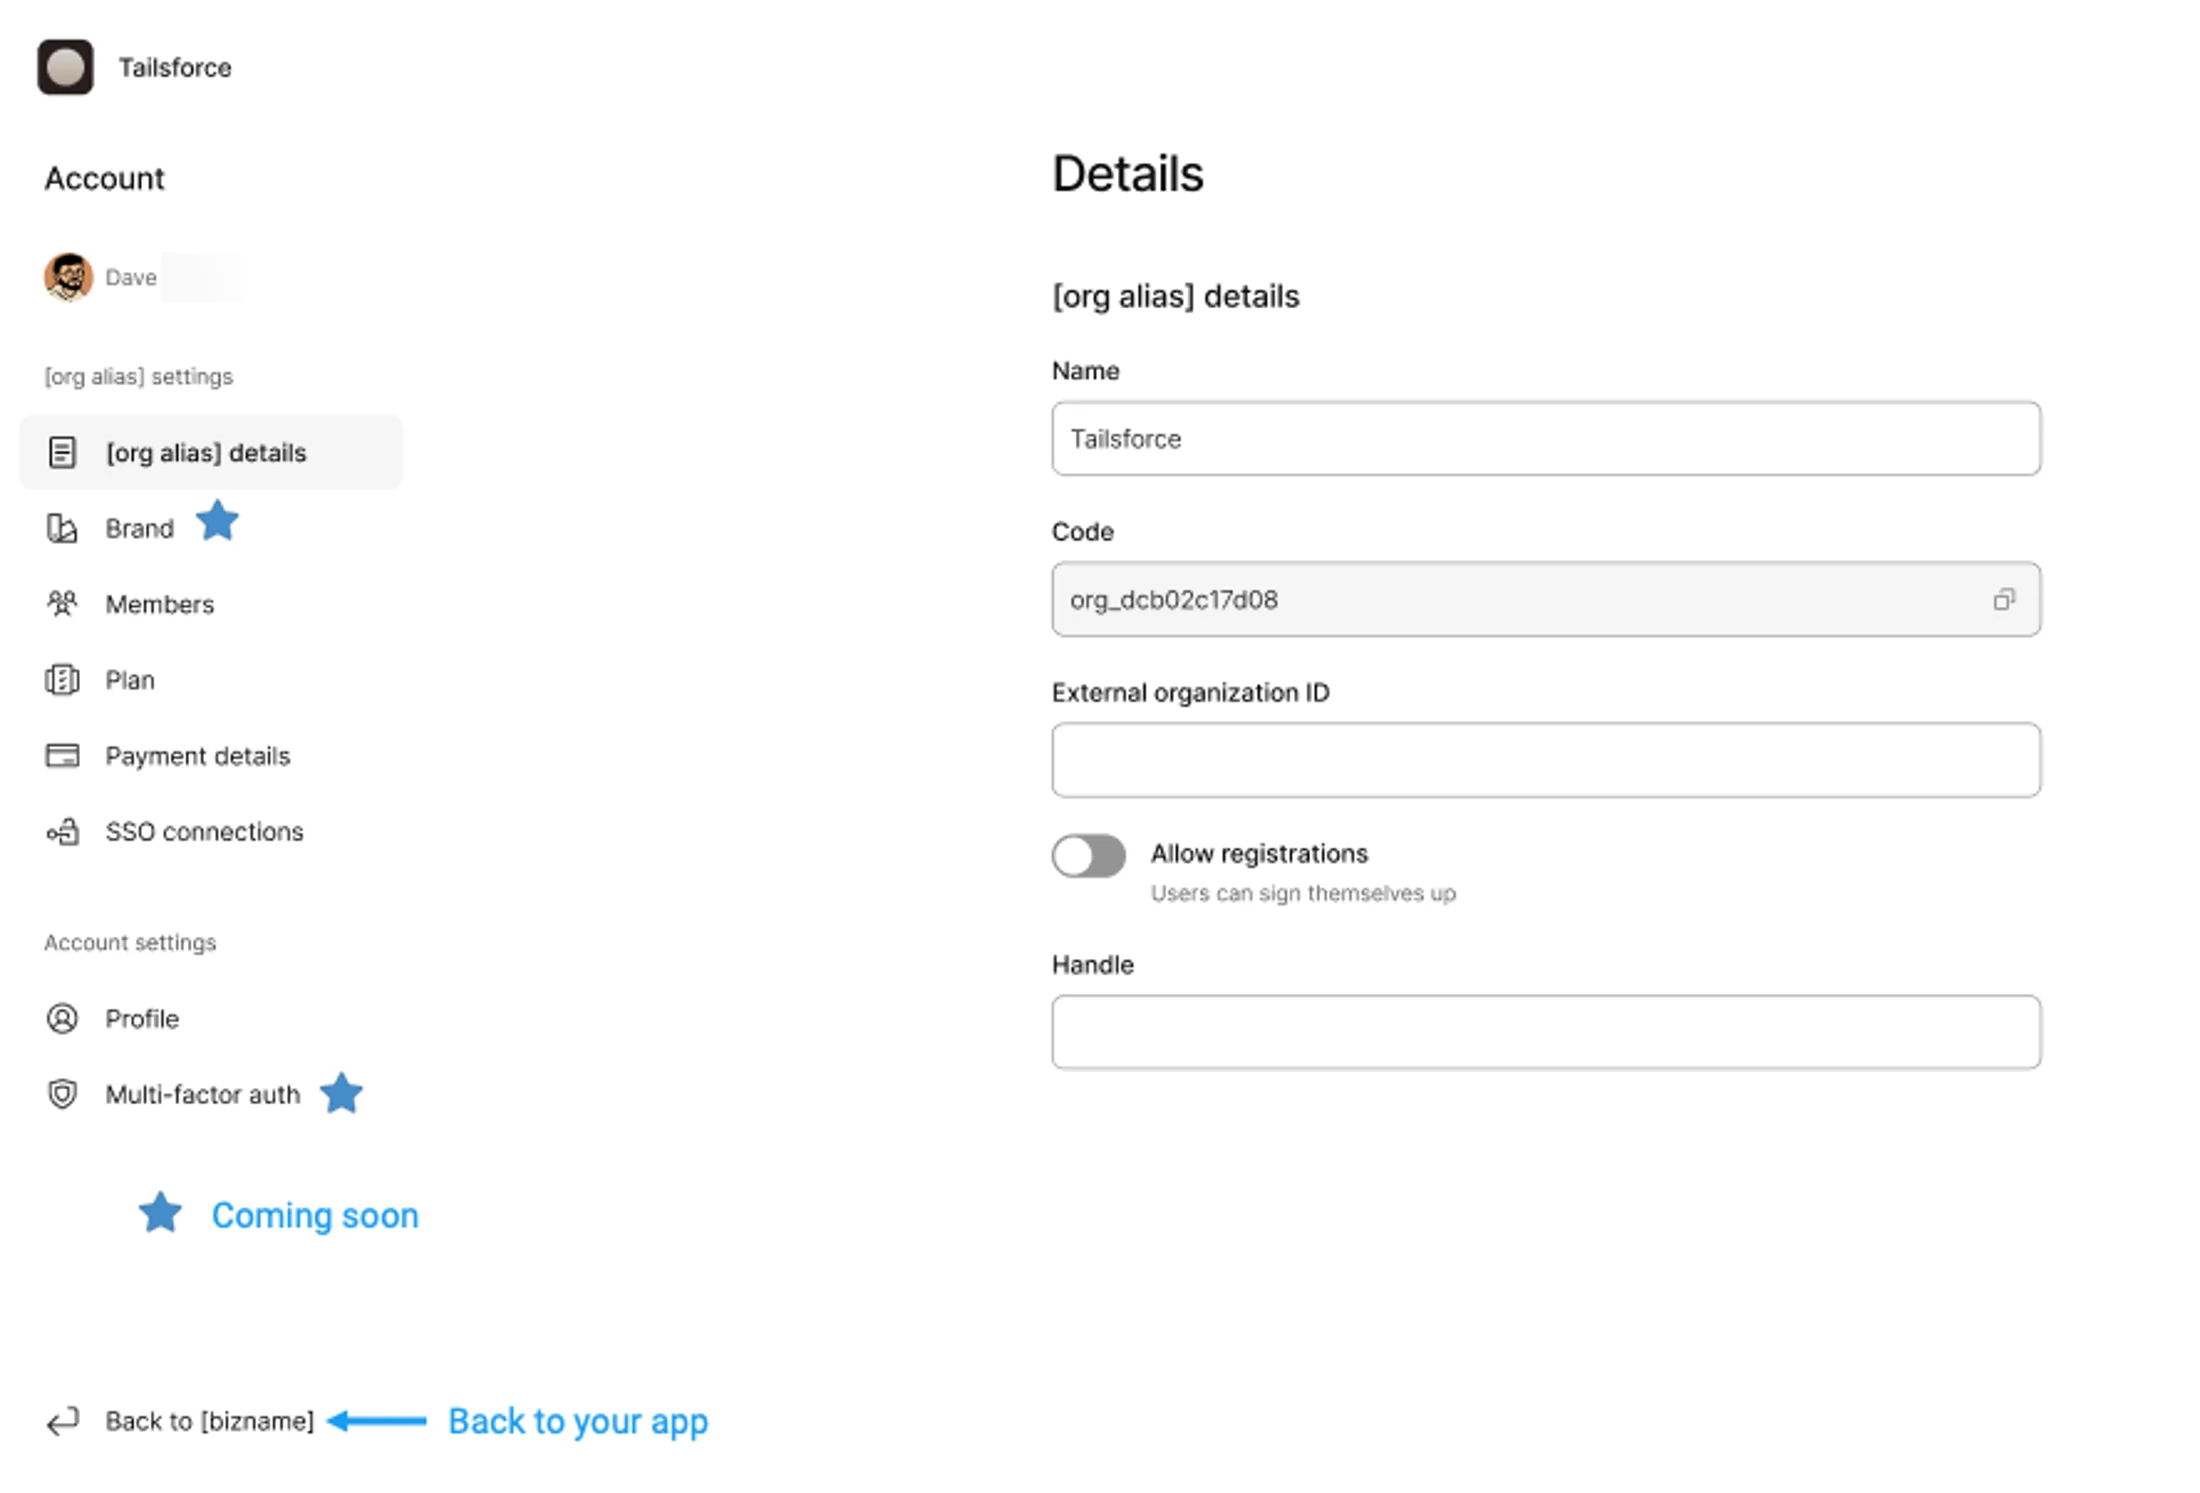
# Build - Self service portal - Enable self-service portal for users
> Guide for enabling and configuring self-service portals for users including profile management, billing access, and generating portal links with SDK and Account API examples.
Last updated: 2026-03-13
self-serve portal, user portal, account management, billing portal, portal link, account API
self-serve-portal, user-management, billing
You can configure a self-serve portal to enable users to be able to self-manage functions provided by Kinde. For example, you can allow users to update their profile, as well as their billing subscription and payment details (if you have billing set up). If you have a B2C business, you might want to set this up. A self-serve portal means your customers can make basic account changes without contacting you for support. This can save time and money. ## Configure the user self-serve portal 1. Go to **Settings > Environment > Self-serve portal**. 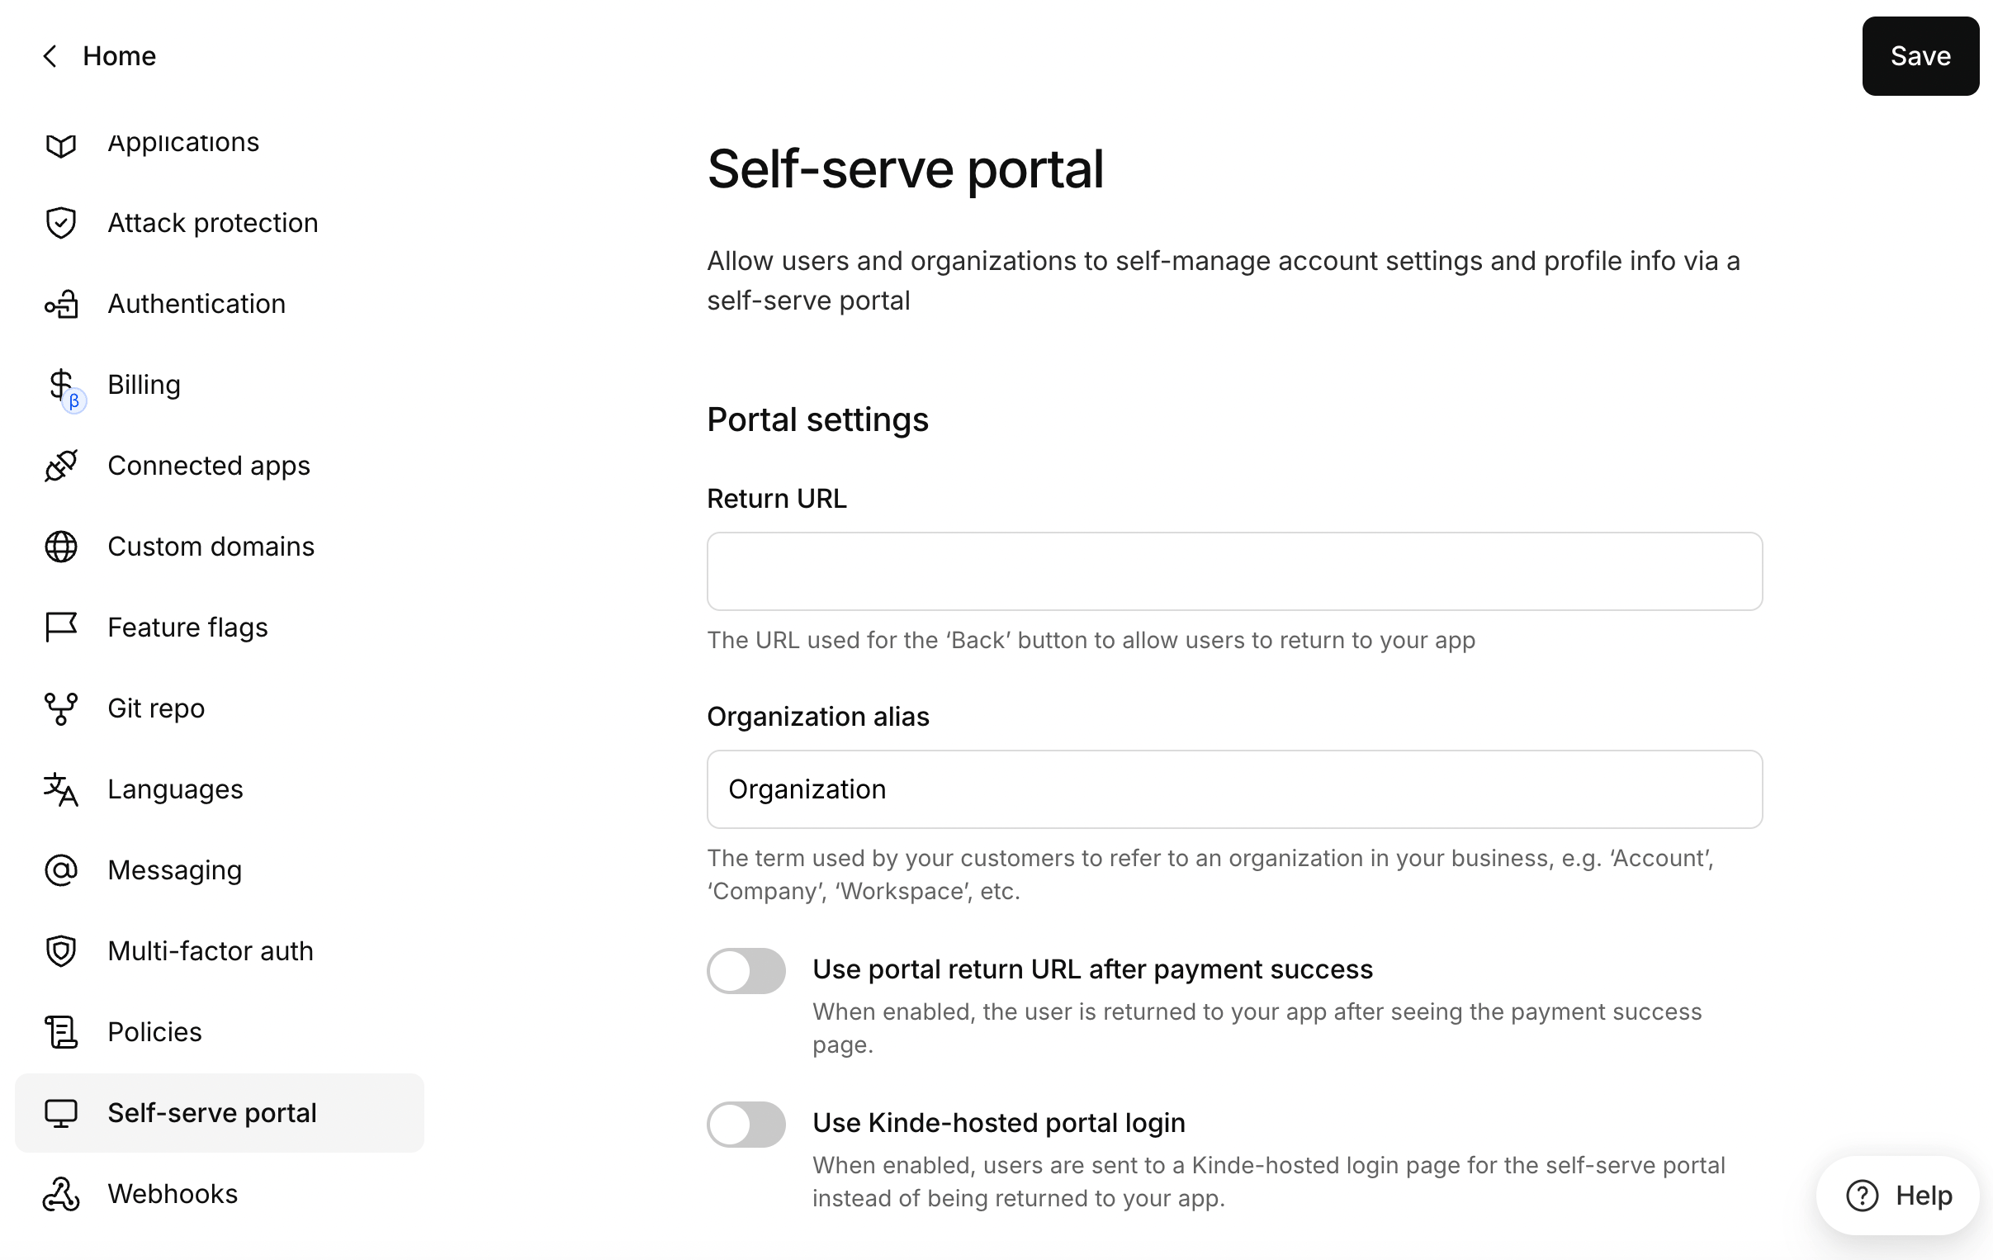 2. Enter the **Return URL** that you want users to land on when they exit the portal, e.g. your app dashboard. This can also be used as a fallback URL if you decide to use the SDK method of dynamically generating the URL (see below). ## User self-management 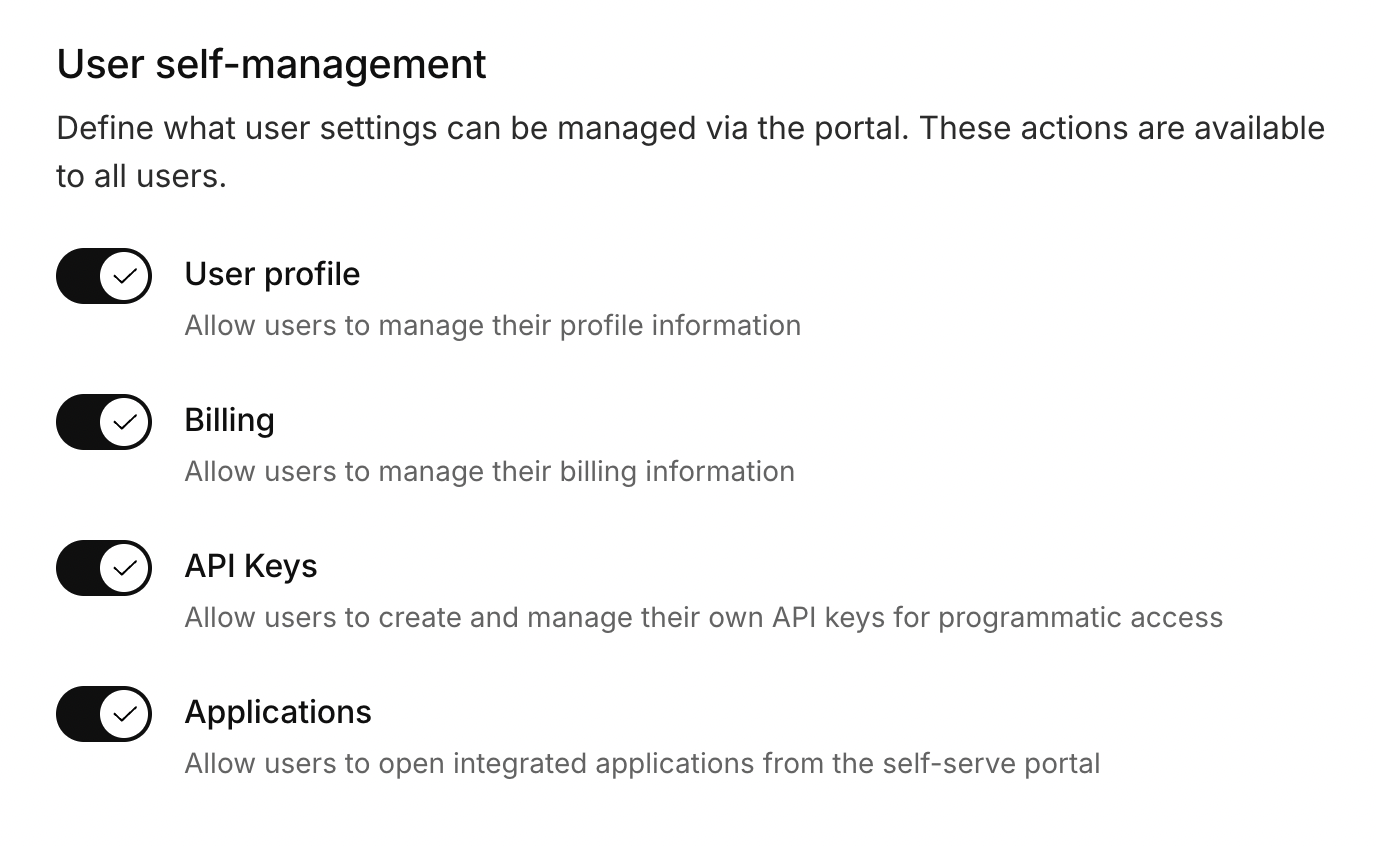 ### User profile Allows users to update their profile information, including first name, and last name. If you do not want users to change these fields, disable **User profile**. When users sign in with a social provider (for example, Google), the social profile can take priority and overwrite name values the next time they sign in. Also, name changes might not appear in your app immediately if an old access token is still being used. Users need to refresh the access token or sign out and sign in again. ### Billing Allows users to manage their billing subscription, change or cancel their plan, and update payment details (if you have billing set up). ### API Keys Allows users to create and manage their API keys. ### Applications Allows organization members to open your connected workforce applications directly from the portal. Each application you have made available appears as a tile, and selecting one signs the person in to that tool using Kinde as the identity provider. This module is off by default. Turn it on in **Settings > Environment > Self-serve portal**. A tile appears only when all of the following are true for that application: - The application is **Enabled**. - **Show on self-serve portal** is turned on for it. - The person's organization is allowed, if you have restricted the application under **Limit to organizations**. - The person holds an allowed role, if role-based access control is turned on for it. To set these up, see [Add and configure a SAML application](/workforce-identity/add-saml-application/). ## Generate the self-serve portal link Access to the portal is granted via a one-time link. You can generate the portal link on the fly when a user clicks an "Account" button in your app. ### Generate using a Kinde SDK If you're using the Kinde React SDK, you can use the `` component, which both generates the link and redirects the user: ```jsx import {PortalLink} from "@kinde-oss/kinde-auth-react/components"; Account; ``` ### Generate without an SDK If you're not using a Kinde SDK, you can manually call the Account API: ```js const response = await fetch("/account_api/v1/portal_link", { headers: { Authorization: `Bearer ${userAccessToken}` } }); const data = await response.json(); window.location = data.url; ``` Optional parameters: - `subnav` – specify the portal section to open (e.g., `organization_details`, `profile`). - `return_url` – where to redirect the user after exiting the portal. See [Get self-serve portal link](https://docs.kinde.com/kinde-apis/frontend/#tag/self-serve-portal/get/account_api/v1/portal_link) for all the supported values. ### Using the Kinde Management API This option is useful for server-side applications or if you're using Kinde billing features without Kinde Authentication. Make a request to the `POST /api/v1/portal/generate_url` endpoint using an M2M token. **Request body** ```js { "user_id": "kp_1234567890", // The ID of the user for whom you want to generate the portal link "organization_code": "org_123456789", // Optional: the organization code for which the portal link is generated "return_url": "https://yourapp.com/dashboard", // Optional: where to redirect the user after exiting the portal "sub_nav": "profile" // Optional: specify the portal section to open (e.g., `organization_billing`, `profile`) } ``` This will return a one-time portal link for the specified user. ## How the self-serve portal looks When the user clicks the link you've added to your app, the portal opens. The default design is shown below, and we are working on allowing you to style this yourself. The options a member sees depends on their role and what you have chosen to display. 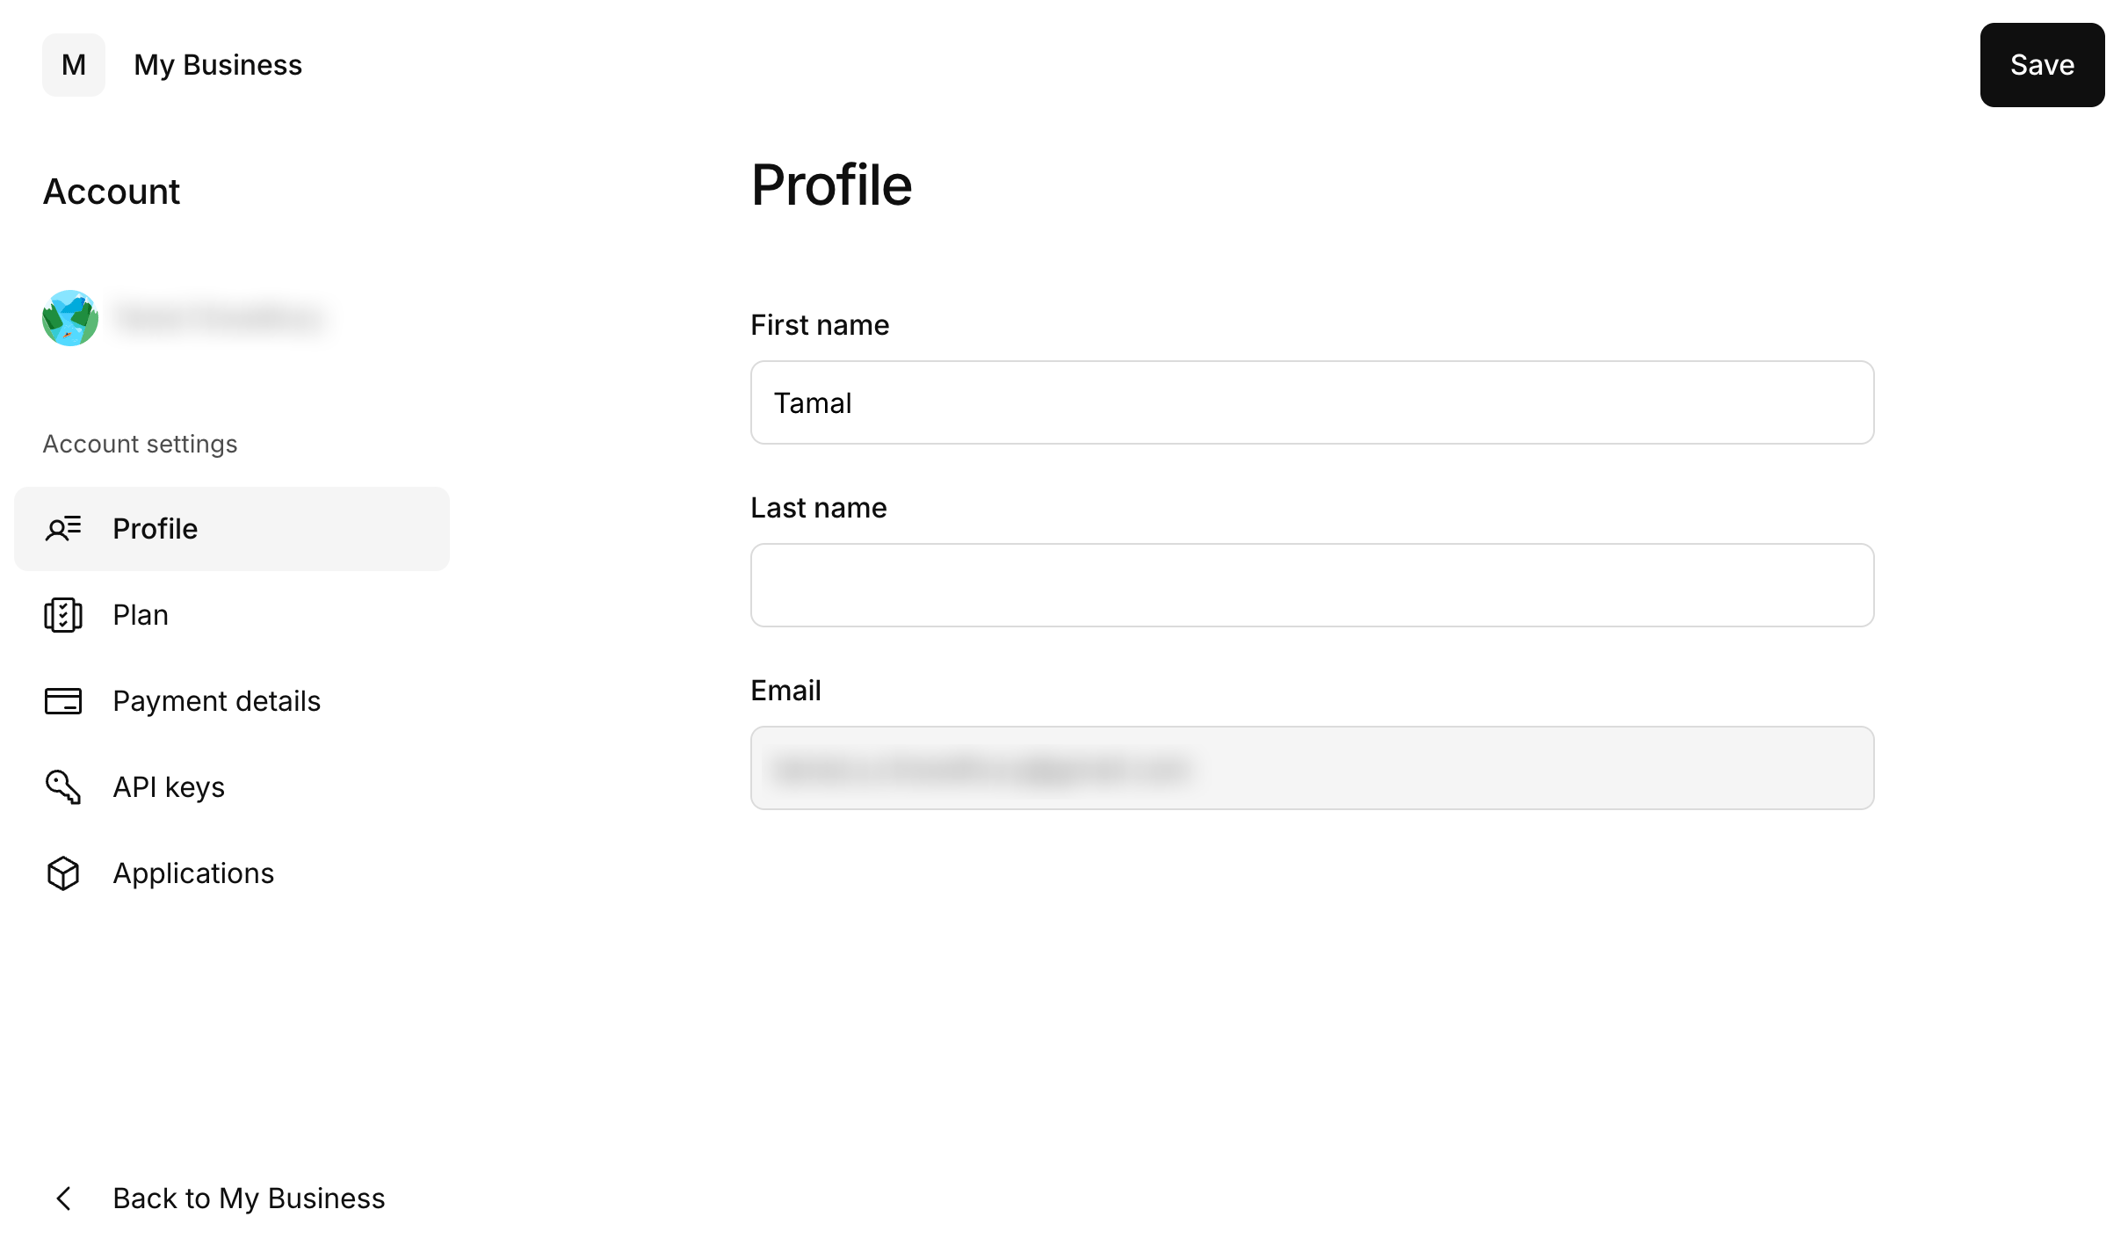
# Build - Set up options - Set global access policies for your business
> Control how users join and sign in—set global policies for sign-up, domains, org creation, invitations, and MFA
Last updated: 2026-07-01
global access policies, self sign-up, domain restrictions, organization creation, member invitations, passkeys, profile sync, MFA OTP expiration
access-policies, organizations, security, user-management
Access policies are the ground rules for who can join your product and how sign-in works across your entire Kinde environment. Settings here apply to every organization by default, so they are the first place to shape onboarding, security, and the experience your customers have when they register or sign in. With access policies, you can: - Allow anyone to sign up for an account - Create an organization when someone signs up (usually for B2B businesses) - Allow only users from specific domains to sign up (e.g., @yourdomain.com only) - Enable profiles from social providers to sync with Kinde profiles (recommended if you allow social sign-in) If you need different rules for specific customers, you can override these defaults per organization on the [Kinde Scale plan](https://kinde.com/pricing/). See [Set access policies for an organization](/build/organizations/organization-access-policies/). ## Set policies for all organizations 1. In Kinde, go to **Settings > Environment > Policies**. 2. Make the required changes and select **Save** when you're done. ### Allow self sign-up Let people create their own accounts without you adding them manually. **Allow self sign-up** is enabled by default. Turn this off if you want an invitation-only or admin-managed model—for example, internal tools, enterprise customers you onboard yourself, or apps where every user must be approved first. You can still add users manually, import them, or send invitations. See [Disable self sign-up](/authenticate/custom-configurations/disable-sign-up/). ### Allowed domains Limit sign-up to specific email domains—for example, only `@yourcompany.com` for an internal app, or `@partner.com` for a partner portal. Enter domains in the **Allowed domains** list. This only applies when **Allow self sign-up** is enabled. - Use the format `domain.com` and not `https://www.domain.com`. - If you leave this empty, users from any domain can sign up. On the [Kinde Scale plan](https://kinde.com/pricing/), you can also set domain restrictions per organization. See [Set access policies for an organization](/build/organizations/organization-access-policies/). ### Allow organization creation on sign up Let new customers create their own organization (workspace, account, team—whatever you call it in your product) when they register. This is the foundation of self-serve B2B onboarding: a company signs up, gets its own organization, and becomes the first admin. Switch this on if you offer a "Start free trial" or "Create your workspace" flow where each customer is a separate business. Switch it off if you create organizations yourself—for example, when you provision accounts for enterprise customers or manage all organizations in the Kinde dashboard. Your application must route users through the organization-creation sign-up flow for this to take effect. If you have developers on your team, see [Allow organization creation on sign up](/build/organizations/allow-org-create-on-signup/) and [Organizations for developers](/build/organizations/orgs-for-developers/). ### Sign users in to most recent org When someone belongs to more than one organization, Kinde normally shows an organization picker at sign-in. Enable **Sign users in to most recent org** to skip that screen and sign them straight into the organization they used last. This works well if your app already has its own organization switcher and you want returning users to land in their last workspace without an extra step. Leave it off if you want users to choose their organization on every sign-in, or if most of your users only belong to one organization. See [Sign users in to last organization](/authenticate/manage-authentication/sign-in-to-last-org/) for more details. ### Passkeys Passkeys let users sign in with biometrics (Face ID, fingerprint) or a device PIN instead of typing a password. They are more secure than passwords alone and faster for users who sign in regularly. ### Sync user profiles on sign in When users sign in through a social provider (Google, GitHub, etc.) or an [enterprise connection](/authenticate/enterprise-connections/about-enterprise-connections/) (Microsoft Entra ID, SAML, and so on), Kinde can refresh their profile details—such as name, email, and picture—from that provider each time they sign in. Switch this on to keep user records accurate when people update their details at their identity provider. This is especially important if you rely on enterprise SSO, where profile data is managed outside Kinde. Leave it on if you use social or enterprise sign-in. You only need to switch it off if you intentionally manage profile data only within Kinde and do not want external updates to overwrite it. Some enterprise connections also have their own profile sync setting—both the global policy here and the connection setting need to be enabled for sync to work. See [About users](/manage-users/about/). ### MFA/OTP Code expiration duration When users receive a one-time code by email or SMS—for multi-factor authentication, passwordless sign-in, or password reset—this setting controls how long the code stays valid. - The default expiry duration is 120 minutes (2 hours). - The expiry duration appears in your email templates automatically. - Set a shorter duration for higher-security environments. - Extend it if users often need more time to check their inbox or phone—for example, in regions with slower SMS delivery. ### Invitations If member invitations are available on your plan, an **Invitations** section appears on the **Policies** page. These settings control whether organization members can invite other people into their organization and which application handles invitation links. Switch on **Allow invitations** to let users invite others into their organization. In **Invite application**, select the application that invitation links should use. The list contains your standard **Front-end and mobile** and **Back-end web** applications. This determines where invited users land when they accept an invitation. When **Allow invitations** is disabled, invitation features are hidden across the organization self-serve portal, and any attempt to accept an existing invitation is blocked. ## Policy setting quick reference Global access policies can be overridden at the individual organization level if you are on a [Kinde Scale plan](https://kinde.com/pricing/) and activate the Advanced organization feature. | To… | Do this… | | ----------------------------------------------------------------------------------------------- | ------------------------------------------------------------------------------------------------- | | Allow anyone to sign up to your applications. | Select **Allow self sign-up**. | | Allow only people from `specificdomain.com` to sign up to your applications. | Select **Allow self sign-up** and enter `specificdomain.com` in the **Allowed domains** list. | | Allow anyone to sign up to your applications and create an organization if they are a business. | Select **Allow self sign-up** and **Allow organization creation on sign up**. | | Let organization members invite other people into their organization. | Select **Allow invitations** and choose an **Invite application**. |
# Build - Set up options - Configure attack protection
> Guide for configuring attack protection including brute force protection settings, credential enumeration protection, and security best practices for account lockouts.
Last updated: 2024-01-15
attack protection, brute force protection, credential enumeration, account lockout, security settings, failed sign-in attempts
security, attack-protection, brute-force
Attack protection is always on, and Kinde ships with sensible defaults to keep your product protected without you lifting a finger. There are some things you can configure. ## Set brute force protection 1. In Kinde, go to **Settings > Attack protection**. 2. Select **Brute force protection**. 3. Set how many sign-in attempts users get before being locked out of their account. You can choose the Kinde default of 5 or set a custom amount. 4. Set how long the account lockout lasts before users can sign in again. You can accept the Kinde default of 5 minutes or set a custom time, up to 60 minutes. 5. Select **Save**. ### What counts as a failed sign-in attempt - incorrect password entered - incorrect OTP code entered - incorrect recovery code entered - incorrect MFA response entered ## Enable credential enumeration protection Enumeration attacks are where an attacker tries to verify if an account exists using your credentials. One of the ways an attacker knows you have an account or not, is if they enter credenitals (e.g. email or phone number) and the screen either progresses to a password/code entry screen, or shows a message that the account does not exist. Once an attacker knows an account exists, they can go about breaking in. To prevent them ever knowing, you can ensure that the sign in experience does not give the answer away. 1. In Kinde, go to **Settings > Attack protection**. 2. Select **Enumeration protection**. 3. Switch on the toggle for **Credential enumeration protection**. 4. Select **Save**. For general information about Kinde security, practices, and policies, see the [Trust Center](/trust-center/security/security-at-kinde/).
# Build - Set up options - Kinde for different business models
> Choose the right Kinde setup for B2C, B2B, B2B2C, marketplace, membership, agency, or multi-brand portfolios
Last updated: 2026-07-20
B2C, B2B, B2B2C, multi-tenancy, marketplace, multi-brand, agency, membership
build, set-up-options, business-models, organizations
Kinde is built to support many types of SaaS models, for apps, sites, and projects. From straightforward models where you provide services directly to individuals, to multi-tenant setups for managing other business’s auth and user needs. This topic explains how to use organizations in Kinde to support your business model. ## You provide services directly to customers (B2C) Users sign up directly to your business and you manage them in one large user group. For this business setup, configure everything at the Business and Environment level in Kinde, including: - [Authentication](/authenticate/about-auth/about-authentication/) (including signing up and in with third party providers like Google) - [Global brand and page design](/design/brand/global-brand-defaults/) - [Defining roles and permissions](/manage-users/roles-and-permissions/user-roles/) Kinde comes with a default organization, so if you only have one user group, they all belong to that default organization. ## You provide services to companies (B2B) Each company your business services has their own organization in Kinde. Each organization can also have it’s own group of users. If you want, you can [allow organizations to be created when a new business signs up](/build/organizations/allow-org-create-on-signup/) to your service. Configure these settings at the Business and Environment level for organizations to inherit: - [Authentication](/authenticate/about-auth/about-authentication/) (including enterprise auth such as [Entra ID](/authenticate/enterprise-connections/azure/) or [SAML](/authenticate/enterprise-connections/custom-saml/)) - [Global brand and page design](/design/brand/global-brand-defaults/) - [Define roles and permissions](/manage-users/roles-and-permissions/user-roles/) Then you’ll set up organizations for each business you service, and in each organization: - [Manage how users sign up to organizations](/build/organizations/allow-user-signup-org/) - (optional) Set up individual [organization brand, including the sign up and sign in experience](/design/brand/apply-branding-for-an-organization/) - Define what [roles and permissions](/manage-users/roles-and-permissions/apply-roles-and-permissions-to-users/) apply for users of each organization - Enable special [feature access](/releases/about/about-feature-flags/#overriding-feature-flags) for individual organizations ## You provide services to companies, and their customers (B2B2C) Each company your business services has their own organization in Kinde. And for each organization, there is a group of users who are managed separate to each other. In tech-speak, this is multi-tenanting. You will want to carefully manage [how users sign up to organizations](/build/organizations/allow-user-signup-org/) for this business model. You will configure most settings at the Business and Environment level, and then you can decide if you customize some settings per organization. You might set up the following for your business and in your applications: - Supported [Authentication](/authenticate/about-auth/about-authentication/) types, including custom auth for [SAML](/authenticate/enterprise-connections/custom-saml/), and [social sign in](/authenticate/social-sign-in/add-social-sign-in/) - [Global brand and page design](/design/brand/global-brand-defaults/) - Define the [roles and permissions](/manage-users/roles-and-permissions/user-roles/) that can be applied to users in each organization For each organization, you will want to: - Assign [user roles and permissions](/manage-users/roles-and-permissions/apply-roles-and-permissions-to-users/), including [default roles](/manage-users/roles-and-permissions/default-user-roles/) that apply when a user signs up - Enable special [feature access](/releases/about/about-feature-flags/#overriding-feature-flags) for individual organizations - (optional) Set up individual [organization brand, including the sign up and sign in experience](/design/brand/apply-branding-for-an-organization/) In this set up, you will likely need to [manage users across organizations](/manage-users/about/manage-users-across-organizations/) as well. ## You’re a membership-type organization You’re a central organization, and you service related businesses, branches, locations, or clubs, who have members. This works a bit like a B2B2C, but the structure is usually more simple. Membership organizations are typically branded at the org level, and authentication is kept fairly simple. You will configure most settings at the Business and Environment level, such as: - [Authentication](/authenticate/about-auth/about-authentication/) (including [passwordless](/authenticate/authentication-methods/passwordless-authentication/) and [social sign up](/authenticate/social-sign-in/add-social-sign-in/) to make things easy) - A base [global brand and page design](/design/brand/global-brand-defaults/) - [Defining simple sets of roles and permissions](/manage-users/roles-and-permissions/user-roles/) For each organization, you will want to: - Spend time setting up [brand and design](/design/brand/apply-branding-for-an-organization/) - Align [roles](/manage-users/roles-and-permissions/user-roles/) and [feature access](/releases/feature-flags/edit-feature-flag/#override-feature-flag-value-for-an-organization) within each organization to ensure different users see the right part of your application - Decide [how user’s are able to sign up to an org](/build/organizations/allow-user-signup-org/) ## You’re a marketplace A marketplace usually combines a bit of B2C and B2B. This kind of business connects buyers with sellers, creators and audiences, businesses and consumers - you get the idea. A marketplace usually separates the different market participants, which can be done through organizations. This enables independent control of the parts of your app each organization can access, and how. Configure most settings at the Business and Environment level, such as: - A base [global brand and page design](/design/brand/global-brand-defaults/) - [Defining simple sets of roles and permissions](/manage-users/roles-and-permissions/user-roles/) For each organization, you will want to: - Set up [Authentication](/authenticate/about-auth/about-authentication/) per organization to enable different sign up and sign in methods, depending on user segment. For example, set password authentication with [multi-factor authentication](/authenticate/multi-factor-auth/enable-multi-factor-authentication/) for your supplier side users, and [easy social sign up](/authenticate/social-sign-in/add-social-sign-in/) for your consumer side users. - Align [roles](/manage-users/roles-and-permissions/user-roles/) and [feature access](/releases/feature-flags/edit-feature-flag/#override-feature-flag-value-for-an-organization) within each organization to ensure different users see the right part of your application - Decide [how user’s are able to sign up to an org](/build/organizations/allow-user-signup-org/) - (optional) Set up individual [organization brand, including the sign up and sign in experience](/design/brand/apply-branding-for-an-organization/) ## You’re an agency This model is for enterprise-sized customers who really love Kinde. For example, an agency who sets up and runs multiple businesses and applications, on behalf of clients, using the Kinde platform. You’ll set up each of your client’s businesses according to what type of business model they are. See above for business structure recommendations. Tip: You could adapt this model if you’re a large multi-location, multi-department, or multi-service enterprise. ## You run a multi-brand consumer portfolio You’re a parent company with several distinct consumer products — each with its own brand, app or site, and user base. This is common for product studios, media groups, and consumer tech companies that launch multiple consumer-facing properties under one umbrella. Unlike the agency model (where you run Kinde for clients), these are your own products. The main decision is whether each property should be its own Kinde business, or live as an environment under one business. ### Separate business vs environment **Use a separate business** for each consumer product when: - Each product has its own brand, domain, and sign-in experience - Users, organizations, and activity should stay isolated per product - Auth methods, roles, or billing differ between products - Teams manage products independently [Run multiple businesses](/build/set-up-options/run-multiple-businesses/) on Kinde so organizations, users, branding, and activity are managed separately for each property. **Use an environment** only for the development lifecycle of a single product — for example production, staging, and testing. Environments are not meant to separate brands or consumer products. See [About environments](/build/environments/environments/). ### Recommended setup For each product business, configure it like a B2C (or B2B / B2B2C if that product sells to companies): - [Authentication](/authenticate/about-auth/about-authentication/) for that product’s users - [Global brand and page design](/design/brand/global-brand-defaults/) matched to the product brand - [Roles and permissions](/manage-users/roles-and-permissions/user-roles/) for that product’s app Keep each product’s production setup in its own business’s production environment, and use non-production environments within that business for testing and staging.
# Build - Set up options - Set up and manage user access requests
> Guide for setting up and managing user access requests including page configuration, contact conversion to users, and access request lifecycle management.
Last updated: 2024-01-15
access requests, user conversion, request access page, contact management, user onboarding
access-requests, user-management, onboarding
In Kinde, you can collect user information before you give people access to your application. This is managed through the **Access requests** user list. You might use this function if you’re not ready to give people product access, but you want them to register their interest. You can also use this if you want to select and control who or how many people can access your application. It’s a good idea to maintain a separate contact list for general communication to customers, and you can do this by [building your subscriber list](/manage-users/add-and-edit/manage-subscribers/). ## Set up the request access page Kinde allows you to design the page where customers can go to register their interest. See [set up your request access page](/design/pages/set-up-the-request-access-page/). ## View access requests list 1. In Kinde, go to **Users > Access requests**. A list of customer contacts is shown. 2. To see when a contact requested access, find them in the list, select the three dots menu and select **View details**. A panel slides out showing added information. ## Convert an access requests contact to a user When you’re ready to give application access to someone on your access requests list, you can convert them to a user and (if applicable) allocate them to an organization. 1. Go to **Users > Access Requests** and find the contact you want to convert to a user. 2. Select the three dots menu and select **Convert to user**. A window appears, prompting you to select the organization the user will belong to. You can only select one. 3. Select **Convert**. The contact will now appear on the **All users** list, but will also remain an **Access requests** contact. See [Manage users across organizations](/manage-users/about/manage-users-across-organizations/) if you want to assign the user to other organizations. ## Delete access request contact 1. Go to **Users > Access Requests** and find the contact you want to delete. 2. Select the three dots menu and select **Delete** **access request**. A confirmation message appears. 3. Select **Delete**. The contact is permanently removed from this list.
# Build - Set up options - Run multiple businesses
> Guide for managing multiple businesses on Kinde including adding new businesses, switching between them, and safely deleting businesses with data export considerations.
Last updated: 2024-01-15
multiple businesses, business management, switch business, delete business, data export
business-management, multi-tenancy
You can run multiple businesses on Kinde. This is helpful if you want to create different businesses with different user groups. For instance if you are a founder working on multiple applications, or you also run a business in a different region. Organizations, users, branding, and activity are all managed separately. ## **Add a new business** 1. Select your business profile in the bottom left of the Kinde home screen. 2. From the menu, select **Switch business**. A screen showing all your businesses opens. 3. Select **Add business**. 4. Complete the form, including your preferred Kinde domain and data storage region. These details cannot be changed later. 5. Select **Save**. 6. To complete the setup, select the business to switch to it. Follow the quickstart prompts. ## **Switch between businesses** 1. Select your business profile in the bottom left of the Kinde home screen. 2. From the menu, select **Switch business*. A screen showing all your businesses opens. 3. Select the one you want to work in. The business loads. ## Delete a business You can only [delete a business](/manage-your-account/your-data/delete-business/) that is on the Kinde free plan. If you have a paid subscription, you need to email [support@kinde.com](mailto:support@kinde.com) to downgrade from a paid account before deleting. Include the Kinde domain and business name in the email, and send it from the owner account email. Deleting a business is a nuclear and irreversible action, so make sure you [export](/manage-your-account/your-data/exporting-data/) all your important data before doing this.
# Build - Set up options - Manage your code in Kinde
> Guide for managing git code in Kinde including repository connection, branch selection, code preview functionality, and workflow deployment management.
Last updated: 2024-01-15
git sync, GitHub, code preview, workflow code, BYO code, repository management
git, workflows, code-management
To use workflows and other BYO code features, you need to sync your git-stored code to Kinde. Currently, Kinde only syncs with Github, but other providers will be added as the feature progresses. ## Change the git repo If you are connecting your repo to Kinde for the first time, see [Connect your workflows repo and branch](/workflows/getting-started/connect-repo-for-workflows/) 1. Go to **Settings > Git repo**. 2. Select **Change repo** 3. Follow the steps to add your repo, select the branch, etc. 4. If you are on an eligible plan, switch on the code preview option in **Advanced settings**. This lets you preview newly deployed code before making it live. 5. Select **Save**. ## Preview workflow code If you are on an eligible plan, we recommend enabling code preview for your workflow. This lets you [test deployed code](/workflows/testing/preview-workflows/) before you make it live for customers. 1. Go to **Settings > Git repo**. 2. Select the **Enable preview mode** option. 5. Select **Save**.
# Build - Tokens - Access tokens
> Inspect Kinde access token claims, lifetimes, and refresh behavior so you can authorize APIs with confidence
Last updated: 2026-08-31
access tokens, JWT claims, OAuth 2.0, feature flags, permissions, token refresh, token expiry, billing trial
build, tokens, oauth
Access tokens are a secure way of authenticating users and passing information about a user to a system. ## Example access token ```jsonc { "aud": [ "myapp:prod-api" ], "azp": "dee7f3c57b3c47e8b96edde2c7ecab7d", "exp": 1693371599, "feature_flags": { "analytics": { "t": "b", "v": true }, "theme": { "t": "s", "v": "pink" } }, "iat": 1693285199, "iss": "https://.kinde.com", "jti": "fbb6bc62-x64e-4256-8ea4-8fb9a645b123", "org_code": "org_xxxxxxxxx", "permissions": [ "create:competitions", "delete:competitions", "view:stats", "invite:users", "view:profile" ], "scp": [ "openid", "profile", "email", "offline" ], "sub": "kp:_xxxxxxxxx" // your user id } ``` ## Access token standard claims - **Token Type** - indicates the type of access token being used. For example, `Bearer` is a common token type used in OAuth 2.0. - **Expiration Time** - `exp` **-** Access tokens come with an expiration time (also known as expiry or lifetime) after which it is no longer valid. The timestamp is usually represented in **seconds** and can be calculated using the [Epoch](https://www.epochconverter.com/) timestamp (UNIX) or other methods. More about [setting token expiry in Kinde](/build/tokens/configure-tokens/). - **Scopes** - `scp` - information about the scopes granted to the token holder. These scopes define what actions or resources the token can access. There can be multiple scope values, so the type of this claim is an `array`. - **Issuer -** the entity that issued the access token. This is often represented as the token's `iss` claim in JWT. Typically your kinde domain e.g. `https://.kinde.com` - **Subject** - subject of the token, i.e., the user or entity for which the token was issued. Represented as the token's `sub` claim in JWT. If this is an access token for a Kinde user this will be their ID e.g. `kp_xxxx`. The `sub` claim is set by Kinde and cannot be overridden. - **Audience** - intended recipient of the access token. Represented as the token's `aud` claim in JWT. There can be multiple audience values, so the type of this claim is an `array`. - **Issued At** - timestamp of when the access token was issued. Represented as the token's `iat` claim in JWT. The timestamp is usually represented in **seconds** and can be calculated using the [Epoch](https://www.epochconverter.com/) timestamp (UNIX) or other methods. - **Token ID** - `jti` - identifier for the access token, useful for tracking and validation purposes. See [this definition](https://www.rfc-editor.org/rfc/rfc7519#section-4.1.7). - **Custom Claims** - Available using the [Kinde Properties feature](/properties/work-with-properties/properties-in-tokens/). ## Kinde additional claims - **Organization** - `org_code` claim for the organization they are accessing. Format is `org_xxxx`. - **Feature flags** - `feature_flags` claim. Access controls for what features the user can see and access. Format is: ```json "feature_flags": { "analytics": { "t": "b", "v": true }, "theme": { "t": "s", "v": "pink" } } ``` We use short codes for the various keys in the feature flags claim such as `t` and `v` to keep the token size down. `t` = `type` `v` = `value` `b` = `boolean` `i`= `integer` `s` = `strong` - **Permissions** - `permissions` claim controls for what the user can do in an app. This is an array. For example: ```json "permissions": [ "create:competitions", "delete:competitions", "view:stats", "invite:users", "view:profile ] ``` - **Billing trial** - When a user has an active billing trial on their plan, the token may include `has_trial_period` (boolean) and `trial_expires_on` (ISO 8601 datetime string for when the trial ends). `trial_expires_on` is typically present when `has_trial_period` is `true`. For definitions, see [Billing concepts & terms](/billing/about-billing/billing-concepts-terms/). - **External provider ID** - The ID you use to identify the organization the user is authorized against - (MS Entra ID authentication only) Claims starting with `ext_` indicate that user details have come from a third party enterprise auth provider like Microsoft. For example: ```jsx "ext_groups": [ "group1", "group2 ], "ext_attributes": { "jobTitle": "engineer", "mail": "engineer@kinde.com", "preferredLanguage": "en", } ``` ## Behaviour of Access Tokens on refresh When you use the `refresh_token` grant to refresh an access token, Kinde will return an existing access token if that existing access token is not expired. You will get a completely new access token if one (or more) of the following conditions are met: - You revoke your existing access token - Your user has signed out of their session, and your application has called the logout function in Kinde - Your existing access token has expired. ## FAQ ### Can I remove claims to reduce token size? Yes. Kinde automatically populates the access token with claims like `permissions`, `feature_flags`, and `org_code`. If your app handles this data another way — or you want to keep JWTs small and free of client-readable claims — you can strip any of these from the token at generation time using the **user token generation workflow** - see [Remove claims](/workflows/workflow-tutorials/customize-token-with-workflow/#remove-claims). The workflow fires whenever a token is issued and gives you full control over what goes into the final token. You can also use it to retrieve data from the [Kinde Management API](/kinde-apis/management/) server-side instead of embedding it in the JWT. ### How long does an access token last? Access tokens have a default lifetime of **24 hours (86,400 seconds)**. You can change this in **Settings > Environment > Applications > [your app] > Tokens**. Kinde does not recommend extending the access token lifetime beyond 1 day, as access tokens are the most exposed token type and a longer lifetime increases the window of risk if one is compromised. For a comparison of all token default lifetimes, see [Configure token and session expiry](/build/tokens/configure-tokens/). Note that revoking a token, ending a session, or deleting a user does not shorten the lifetime of an access token that has already been issued — see [What revocation does and doesn't do](/build/tokens/configure-tokens/#what-revocation-does-and-doesnt-do).
# Build - Tokens - ID tokens
> Complete guide to Kinde ID tokens including standard OpenID Connect claims, Kinde-specific claims, and troubleshooting missing claims with scope configuration.
Last updated: 2026-03-26
ID tokens, OpenID Connect, user identity, token claims, authentication, user profile
tokens, authentication, oidc
During authentication, ID tokens carry information about authenticated users securely to your application. ## ID token standard claims - **At hash** - `at_hash` ensures the integrity of the claim made in the access token. - **Audience** - intended recipient of the token. Represented as the token's `aud` claim. This could be your kinde domain or app URI, e.g. `https://.kinde.com` - **Authentication time** - `auth_time` indicates the time when the user was authenticated. It's useful for scenarios where certain actions are allowed only if the user has recently authenticated. - **Authorized party** - an `azp` claim specifies the client ID of the party to which the ID Token was originally issued. - **Email** - the `email` associated with the user’s profile - **Expiration Time** - The `exp` claim specifies the timestamp when the ID token expires and should no longer be considered valid. It helps prevent the token from being used indefinitely. More about [setting token expiry in Kinde](/build/tokens/configure-tokens/). - **Issued At** - The `iat` claim indicates the timestamp when the ID token was issued. It can be used to determine the token's age and to mitigate replay attacks. - **Issuer** - The `iss` claim specifies the issuer of the ID token, usually the URL of the authorization server or identity provider. It's used to verify the token's authenticity. - **Picture URL** - the `picture` claim contains the location reference of the avatar picture of the user, if there is one. - **Subject -** The `sub` claim is a unique identifier for the authenticated user within the context of the issuing authentication server. In Kinde, this is the user’s ID. - **Token ID** - the `jti` claim is the unique identifier of the ID token - **Updated at** - the `updated_at` claim specifies the issuer of the ID token, usually the URL of the authorization server or identity provider. It's used to verify the token's authenticity. - **User last name** - the `family_name` claim contains the user’s last name - **User first name** - the `given_name` claim contains the user’s first name - **User full name** - `name` contains the first name and last name of the user ## Kinde additional claims - **Social identity** - Details from the user’s third-party profile, such as handle, username, and ID. - **Organizations** - The `org_codes` claim contains an array of IDs for the Kinde organizations that the user belongs to. ## Example ID token ```json { "at_hash": "VZ6cU0Ay0RKB5EosbWuTCQ", "aud": [ "https://.kinde.com ], "auth_time": 1692361334, "azp": "dee7f3c57b3c47e8b96edde2c7ecab7d", "email": "jane.smith@gmail.com", "exp": 1693288799, "family_name": "Smith", "given_name": "Jane", "iat": 1693285199, "iss": "https://.kinde.com", "jti": "fcxf6xd3-8c75-402x-a4cb-1659fb8c555d", "name": "Jane Smith", "org_codes": [ "org_xxxxxxxxxxx ], "picture": "https://lh3.googleusercontent.com/a/google-url", "provided_id": "", "sub": "kp_xxxxxxxxxxxxxxxxxxxx", "updated_at": 1692009540 } ``` ## How long does an ID token last? ID tokens have a default lifetime of **1 hour (3,600 seconds)**. You can change this in **Settings > Environment > Applications > [your app] > Tokens**. ID tokens carry identity information that is only needed at the moment of authentication, so they do not need a long lifetime — keeping this short is recommended. For a comparison of all token default lifetimes, see [Configure token and session expiry](/build/tokens/configure-tokens/). ## Can't find a claim in the token? Missing token claims are usually caused by missing scope requests in your app. If you are not using an SDK, you need to manually add scopes (such as `profile`, `email`, `openid`) so that the token you receive from Kinde includes the right claims. Review this document if you are [not using an SDK](/developer-tools/about/using-kinde-without-an-sdk/).
# Build - Tokens - Configure token and session expiry
> Configure Kinde token lifetimes, revoke sessions, and close the JWT access window after logout or user deletion
Last updated: 2026-08-31
token expiry, session timeout, token lifetime, refresh tokens, access tokens, token revocation, JWT validation, token introspection
build, tokens, security
Tokens are an essential part of keeping your application secure. They enable the continued verification of users and applications (including APIs), and are a mechanism for detecting unauthorized intruders. Tokens need to be updated and refreshed to remain secure, which is why you need to set how long a token lasts, for each token type. ## What are the default token lifetimes in Kinde? Kinde issues three types of tokens, each with a default lifetime that applies out of the box. All values are configurable per application in **Settings > Environment > Applications > [your app] > Tokens**. | Token | Default lifetime | | --- | --- | | Refresh token | 15 days (1,296,000 seconds) | | Access token | 24 hours (86,400 seconds) | | ID token | 1 hour (3,600 seconds) | The refresh token lifetime must always be set longer than the access token lifetime. For guidance on each token type, see the dedicated pages: [access tokens](/build/tokens/about-access-tokens/), [ID tokens](/build/tokens/about-id-tokens/), and [refresh tokens](/build/tokens/refresh-tokens/). ## Defining token lifetimes You can define the lifetime (expiry time) of ID tokens, access tokens, refresh tokens, and SSO session expiry tokens. Expiry and timeouts are usually defined in seconds - where 3,600 seconds is one hour and 86,400 seconds is one day. Tokens and sessions need to be configured per application. - **ID Tokens**: Contain identity information about a user. These do not need to last long as identity info is only needed at the moment of authentication, and is unrelated to session lifetimes. - **Access tokens**: Contain access permissions for a user during authentication. These are the most vulnerable token for attacks, and we do not recommend extending the access token lifetime beyond 1 day. - **Refresh tokens**: Are issued at the same time as an access token, and extend a user's session without them having to reauthenticate. If you want a user to stay authenticated without having to sign in daily or more frequently - set a high lifetime for refresh tokens. - **Session inactivity timeout**: After a period with no **server-visible** activity on the user’s Kinde SSO session, the user may need to sign in again. Local navigation in your app does not reset the timer on its own; activity usually means **authenticated requests from your app to Kinde** for that user (for example, during token refresh). See [Session management](/authenticate/manage-authentication/session-management/) for a full explanation. We recommend a fairly short limit (for example, up to one day). Token and session expiry should be approached with priority for system and user security. The aim is to reduce risks such as: - Token theft through man-in-the-middle attacks - Unauthorized access through compromised refresh tokens - Session hijacking on shared or public devices - Data exposure through prolonged inactive sessions ## Set token lifetimes 1. Go to **Settings** **> Environment > Applications.** 2. Select **View details** on the application tile. 3. Select **Tokens** in the side menu. 4. For each token type, set the expiry time in seconds. 3,600 seconds is one hour; 86,400 seconds is one day. 5. Select **Save**. ## Refresh token cookies For applications that support refresh tokens, the Tokens page includes a **Refresh token cookies** fieldset with the following option. ### Use client-specific refresh token cookies When this toggle is **enabled**, refresh tokens are stored in cookies named with the client ID prefix (for example, `refresh_token_abc123`) instead of the generic `refresh_token` cookie. That allows multiple applications on the same custom domain to keep separate refresh tokens and avoids one app overwriting another's token. - **Default**: The toggle is disabled by default. - **Custom domain required**: The option is only available when a custom domain is configured. If no custom domain exists, a warning banner is shown: **"Client-specific refresh token cookies require a custom domain. Configure a custom domain in Settings > Custom domains."** ## Revoke a token to end a user session You can use the Kinde Account API to revoke access and refresh tokens after a user signs out of your app. This forces a new session for each login. To revoke a previously issued token, you need to make a POST request to the `/oauth2/revoke` endpoint with the operation ID `tokenRevocation`. When making the request, you should include the following parameters in the request body: - `token` (string): The token that you want to revoke. - `client_id` (string): Your client's identifier. - `client_secret` (string): The secret associated with your client. Ensure to set the Content-Type header to `application/x-www-form-urlencoded`. Upon successful revocation, you will receive a 200 status code indicating that the token was successfully revoked. For more information and example code snippets, see [revoke tokens](https://docs.kinde.com/kinde-apis/frontend/#tag/oauth/post/oauth2/revoke). To end all of a specific user's sessions from your backend rather than revoking one token at a time, see [End a user's sessions from your backend](/authenticate/manage-authentication/session-management/#end-a-users-sessions-from-your-backend). ## What revocation does and doesn't do Revoking a token or ending a user's sessions takes effect immediately for everything Kinde holds server-side. It does not reach access tokens that have already been issued. | What you revoke | Effect | | --- | --- | | SSO (authenticated) session | Ends immediately. The user must sign in again to start a new session. | | Refresh token | Invalidated immediately. The next refresh attempt fails with `invalid_grant`. | | Access token already held by an app | **Remains valid until it expires.** | This is a property of JWTs, not a Kinde limitation. Access tokens are self-contained and signed, so your API validates them locally against Kinde's public keys, checking the signature, issuer, audience, and expiry. That check never calls Kinde, which is what makes it fast and keeps Kinde out of your request path. The trade-off is that no identity provider can reach into a token that has already been handed out. In practice, an access token already held by an app keeps working until `exp`, even after you revoke sessions or refresh tokens, or suspend or delete the user. That remaining window is at most the access token lifetime you configured — up to 24 hours with the default. Suspension or deletion also stops the user from signing in and from obtaining new tokens. Revoking a session or refresh token does not: the user must reauthenticate, but they can sign in again immediately. ### Close the window **Shorten the access token lifetime.** This is the control to reach for. The remaining validity window for the revoked session is at most the configured access token lifetime, so lowering it is the most direct fix. A 5 to 15 minute access token paired with refresh tokens means remaining access for that session ends within minutes after revocation, because subsequent refreshes for the revoked session fail. Shortening the lifetime does not prevent the user from signing in again. See [Set token lifetimes](/build/tokens/configure-tokens/#set-token-lifetimes) above. **Check live state, very sparingly.** The `/oauth2/introspect` endpoint validates a token against current session state, so it reflects revocation immediately. It also puts Kinde back in your request path, which is the thing local JWT validation exists to avoid. Reserve it for a small number of genuinely high-value actions where a short token lifetime is not enough on its own. Do not use it for routine request authorization. ## Token security Tokens can be vulnerable to security breaches. Access tokens in particular contain sensitive information, and these tokens can be used to access systems. Refresh tokens can be used to reduce some of this risk as they can be used to get new access tokens. However, refresh tokens are also a security risk for the same reason they are useful. To mitigate risk, we recommend using Automatic Reuse Detection and Refresh Token Rotation. Setting up an automation to revoke tokens after logout can enhance security as it forces re-authentication each sign in.
# Build - Tokens - Decoding JSON Web Tokens
> Learn how to decode JSON Web Tokens (JWTs) using Kinde's JWT libraries, including validation methods, security considerations, and practical implementation examples.
Last updated: 2026-04-14
JWT decoding, token decoding, JWT validation, token security, JWT libraries, token parsing
tokens, security, jwt, decoding
JWT decoding involves parsing and validating JSON Web Tokens to extract their payload information securely. While JWTs are typically signed (not encrypted), decoding refers to the process of parsing the token structure and validating its claims. Before decoding a JWT, it's important to understand its structure. A JWT consists of three parts separated by dots (`.`): 1. **Header** - Contains metadata about the token (algorithm, type) 2. **Payload** - Contains the claims (user data, permissions, etc.) 3. **Signature** - Used to verify the token's authenticity ## Using Kinde JWT Decoder The [@kinde/jwt-decoder](https://www.npmjs.com/package/@kinde/jwt-decoder) library provides a simple, type-safe way to decode JWT tokens. The decoder extracts and returns the decoded payload containing the token's claims. See an [example access token payload](/build/tokens/about-access-tokens/#example-access-token). ### Installation ### Basic Usage ```javascript import { jwtDecoder } from "@kinde/jwt-decoder" const token = "eyJhbGciOiJIUzI1NiIsInR5cCI6IkpXVCJ9.eyJzdWIiOiIxMjM0NTY3ODkwIiwibmFtZSI6IkpvaG4gRG9lIiwiYWRtaW4iOnRydWUsImlhdCI6MTUxNjIzOTAyMn0.KMUFsIDTnFmyG3nMiGM6H9FNFUROf3wh7SmqJp-QV30" // Simple decode const decodedToken = jwtDecoder(token) console.log(decodedToken) // Output: { sub: '1234567890', name: 'John Doe', admin: true, iat: 1516239022 } ``` ### Type-Safe Decoding ```typescript import { jwtDecoder, type JWTDecoded } from "@kinde/jwt-decoder" // Decode with extended type type CustomJWT = JWTDecoded & { custom_claim?: string feature_flags?: Record } const decodedToken = jwtDecoder("ey...") ``` ## Using Kinde JWT Validator The [@kinde/jwt-validator](https://www.npmjs.com/package/@kinde/jwt-validator) library provides cryptographic JWT validation with support for mobile and edge environments. The `validateToken` method verifies the token's signature and returns an object with a `valid` property indicating whether the token is valid. ### Installation ### Validation and Decoding ```javascript import { validateToken } from "@kinde/jwt-validator" import { jwtDecoder } from "@kinde/jwt-decoder" const token = "ey..." // your JWT here const validateAndDecode = async () => { try { // Validate the token const result = await validateToken({ token, domain: "https://your-subdomain.kinde.com", }) if (result.valid) { console.log("Token is valid") // Decode after validation const decoded = jwtDecoder(token) console.log("Decoded payload:", decoded) } else { console.log("Token validation failed:", result.message) } } catch (error) { // The validator throws for JWKS or validation errors console.error("Token is invalid:", error) } } validateAndDecode() ``` ## Manual JWT Decoding If you need to decode JWTs without using Kinde's libraries, you can implement manual decoding: ### Browser/Web Platform This implementation uses `atob()`, which is available in browsers, web workers, and service workers: ```javascript function base64UrlDecode(str) { // Replace Base64URL characters with Base64 characters let base64 = str.replace(/-/g, '+').replace(/_/g, '/') // Add padding if needed (Base64 strings must be multiples of 4) while (base64.length % 4) { base64 += '=' } return atob(base64) } function decodeJWT(token) { try { // Split the token into its three parts const parts = token.split('.') if (parts.length !== 3) { throw new Error('Invalid JWT format') } // Decode header and payload (base64url) const header = JSON.parse(base64UrlDecode(parts[0])) const payload = JSON.parse(base64UrlDecode(parts[1])) return { header, payload, signature: parts[2] } } catch (error) { throw new Error('Failed to decode JWT: ' + error.message) } } // Usage const token = "eyJhbGc..." const decoded = decodeJWT(token) console.log(decoded.payload) ``` ### Node.js Platform For Node.js environments, use `Buffer` instead of `atob()`: ```javascript function base64UrlDecode(str) { // Replace Base64URL characters with Base64 characters let base64 = str.replace(/-/g, '+').replace(/_/g, '/') // Add padding if needed (Base64 strings must be multiples of 4) while (base64.length % 4) { base64 += '=' } return Buffer.from(base64, 'base64').toString('utf-8') } function decodeJWT(token) { try { // Split the token into its three parts const parts = token.split('.') if (parts.length !== 3) { throw new Error('Invalid JWT format') } // Decode header and payload (base64url) const header = JSON.parse(base64UrlDecode(parts[0])) const payload = JSON.parse(base64UrlDecode(parts[1])) return { header, payload, signature: parts[2] } } catch (error) { throw new Error('Failed to decode JWT: ' + error.message) } } ``` ### Universal/Cross-Platform For code that works in both browser and Node.js environments: ```javascript function base64UrlDecode(str) { // Replace Base64URL characters with Base64 characters let base64 = str.replace(/-/g, '+').replace(/_/g, '/') // Add padding if needed (Base64 strings must be multiples of 4) while (base64.length % 4) { base64 += '=' } // Use Buffer in Node.js, atob in browser if (typeof Buffer !== 'undefined') { return Buffer.from(base64, 'base64').toString('utf-8') } else { return atob(base64) } } ``` ### TypeScript Implementation ```typescript interface JWTHeader { alg: string; typ: string; kid?: string; } interface JWTPayload { iss: string; sub: string; aud: string | string[]; exp: number; iat: number; jti?: string; [key: string]: any; } interface DecodedJWT { header: JWTHeader; payload: JWTPayload; signature: string; } function base64UrlDecode(str: string): string { // Replace Base64URL characters with Base64 characters let base64 = str.replace(/-/g, '+').replace(/_/g, '/') // Add padding if needed (Base64 strings must be multiples of 4) while (base64.length % 4) { base64 += '=' } // Use Buffer in Node.js, atob in browser if (typeof globalThis.Buffer !== 'undefined') { return globalThis.Buffer.from(base64, 'base64').toString('utf-8') } else if (typeof globalThis.atob !== 'undefined') { return globalThis.atob(base64) } else { throw new Error('Neither Buffer nor atob is available in this environment') } } function decodeJWT(token: string): DecodedJWT { try { // Split the token into its three parts const parts = token.split('.') if (parts.length !== 3) { throw new Error('Invalid JWT format') } // Decode header and payload (base64url) const header = JSON.parse(base64UrlDecode(parts[0])) as JWTHeader const payload = JSON.parse(base64UrlDecode(parts[1])) as JWTPayload return { header, payload, signature: parts[2] } } catch (error) { throw new Error('Failed to decode JWT: ' + (error instanceof Error ? error.message : String(error))) } } ``` ## Common Use Cases ### Displaying User Information You can extract user information from decoded tokens, including email, organization code, feature flags, and permissions. By default, the email claim is not included in the `access_token`. To enable it: 1. Go to **Application** > **View Details** > **Tokens** > **Access Token** and select **Customize**. 2. Enable the **Email (string)** claim. 3. Select **Save**. If you need to access the user's full name and profile picture, use the `id_token` instead of the access token. The `id_token` includes these claims by default. You can decode the `id_token` using the same method as the access token. Learn more about [ID tokens](/build/tokens/about-id-tokens/). ```javascript import { jwtDecoder } from "@kinde/jwt-decoder" function displayUserInfo(token) { try { const payload = jwtDecoder(token) // Note: Email must be enabled in token customization for access tokens console.log(`User: ${payload.email}`) console.log(`Organization code: ${payload.org_code}`) console.log(`Permissions: ${payload.permissions?.join(", ")}`) return { email: payload?.email || "", org_code: payload.org_code, permissions: payload.permissions || [], } } catch (error) { console.error("Failed to decode token:", error) return null } } ``` **About `org_code` and `permissions` claims** The `org_code` and `permissions` claims are **not included by default** in access tokens: - **`org_code`**: Only included when the user belongs to and signs in to an organization. If a user belongs to no organizations, this claim will be omitted. - **`permissions`**: Only included when the user signs in to an organization AND has permissions assigned to them or their role. If no permissions are configured or assigned, this claim will be omitted. Always check if these claims exist before accessing them (as shown in the example above using optional chaining or default values). ### Checking Feature Flags ```javascript import { jwtDecoder } from "@kinde/jwt-decoder" function checkFeatureFlag(token, flagName) { try { const payload = jwtDecoder(token); const featureFlags = payload.feature_flags; if (featureFlags && featureFlags[flagName]) { return featureFlags[flagName].v; } return false; } catch (error) { console.error('Failed to check feature flag:', error); return false; } } ``` **About `feature_flags` claim** The `feature_flags` claim is **not included by default** in access tokens. It's only included when: - Feature flags are configured in your Kinde environment and assigned to the user or organization - For Machine-to-Machine (M2M) applications, only flags explicitly enabled in the app's token configuration are included If no feature flags are configured or assigned, this claim will be omitted. Always check if the claim exists before accessing it (as shown in the example above). Feature flags use a compact format with short keys: `t` for type and `v` for value. ### Extracting Permissions ```javascript import { jwtDecoder } from "@kinde/jwt-decoder" export function getUserPermissions(token) { try { const payload = jwtDecoder(token) return payload.permissions || [] } catch (error) { console.error('Failed to extract permissions:', error) return [] } } ``` **About `permissions` claim** The `permissions` claim is **not included by default** in access tokens. It's only included when: - The user signs in to an organization AND has permissions assigned to them or their role If no permissions are configured or assigned, this claim will be omitted. Always check if the claim exists before accessing it (as shown in the example above using `|| []` as a fallback). ## Security Considerations ### Important Security Notes - **Decoding vs. Validation**: Decoding a JWT only extracts the payload - it doesn't verify the token's authenticity or integrity. - **Always Validate**: After decoding, always validate the token using proper cryptographic verification. - **Never Trust Client-Side Decoding**: Client-side decoding should only be used for display purposes, not for security decisions. - **Check Expiration**: Always verify the `exp` claim to ensure the token hasn't expired. ### Validation Checklist When decoding JWTs, ensure you: - Verify the token signature using the public key - Check the `iss` (issuer) claim matches your Kinde domain - Validate the `aud` (audience) claim - Verify the `exp` (expiration) claim - Check the `iat` (issued at) claim is reasonable - Validate any custom claims specific to your application ## Error Handling ### Common Decoding Errors ```javascript function safeDecodeJWT(token) { try { if (!token) { throw new Error('Token is required') } if (typeof token !== 'string') { throw new Error('Token must be a string') } const parts = token.split('.') if (parts.length !== 3) { throw new Error('Invalid JWT format - must have 3 parts') } return jwtDecoder(token) } catch (error) { console.error('JWT decoding error:', error.message) return null } } ``` ## Best Practices - **Use Kinde Libraries**: Prefer Kinde's JWT libraries for production applications as they handle edge cases and provide type safety. - **Validate Before Decoding**: Always validate the token's signature and claims before trusting the decoded payload. - **Handle Errors Gracefully**: Implement proper error handling for malformed or invalid tokens. - **Log Security Events**: Log failed decoding attempts for security monitoring. - **Keep Libraries Updated**: Regularly update JWT libraries to get security patches and improvements. ## Resources - [Kinde Online JWT Decoder](https://kinde.com/tools/online-jwt-decoder/) - [Kinde JWT Decoder Library](https://www.npmjs.com/package/@kinde/jwt-decoder) - [Kinde JWT Validator Library](https://www.npmjs.com/package/@kinde/jwt-validator)
# Build - Tokens - Using OAuth scopes
> Guide to using OAuth 2.0 scopes in Kinde including supported scopes, authorization flows, and implementation guidance for different application types.
Last updated: 2026-03-19
OAuth scopes, authorization, openid, email, profile, offline, PKCE
tokens, oauth, scopes
In Kinde, OAuth 2.0 scopes are used to request access to the protected information we store on behalf of your users. The OAuth protocol helps ensure only authorized access to this information. ## Kinde-supported OAuth scopes The following scopes can be requested from Kinde. - `openid` - requests an ID token which contains information about the user - `email` - requests a user's email - `profile` - requests profile details as part of ID token, e.g. name, family name, given name, picture (avatar) - `offline` - request to act on behalf of the user if they're offline ## OAuth flows How you request scopes depends on your tech framework and the OAuth 2.0 flow you’re using for your application type. You can use the following flows to request scopes in Kinde. ### Authorization Code flow `authorization_code` Recommended for regular web applications rendered on the server. ### Authorization Code flow with Proof Key for Code Exchange (PKCE) `authorization_code_flow_pkce` Kinde supports the PKCE extension, in which case the `code_challenge` and `code_challenge_method` parameters are also required. This is recommended for mobile apps and single page applications (SPAs). ### Implicit flow (not supported) Before PKCE (see above) this was the method used by applications that were unable to store secrets securely. This flow has security implications and Kinde does not support it for this reason. ## Guidance on requesting scopes Our SDK documents contain guidance on how to connect and make requests in your chosen framework or language. See [all our SDKs](/developer-tools/about/our-sdks/). You can also access our [starter kits on GitHub](https://github.com/kinde-starter-kits) and our [Kinde Management API library](/kinde-apis/management/).
# Build - Tokens - Refresh tokens
> Understand how refresh tokens work, including token rotation, offline scope implementation, security best practices, and SDK integration for maintaining user sessions.
Last updated: 2026-04-13
refresh tokens, token rotation, offline scope, session management, token security, auto-update
tokens, authentication, oauth
Refresh tokens are used to request new access tokens. Access tokens are issued when a user makes an authentication request or a call is made to an API. An access token gives permission to enter and interact with a system. ## How refresh tokens work Access tokens usually have an intentionally short lifetime. However, rather than having a user need to re-authenticate frequently, a refresh token can be used to request a new access token. Refresh tokens operate without user intervention, extending session access without the same security risk as requesting a new access token. There is no cap on the number of times a refresh token can be used — it remains valid until it expires or is rotated out. ## How to get a refresh token To get a refresh token, you need to include the `offline` scope when you initiate an authentication request through the `https://.kinde.com/oauth2/auth` endpoint. You also need to initiate Offline Access in your API. Details on how to do this is provided in [our SDKs](/developer-tools/about/our-sdks/), but here’s how to do it yourself. Below is an example using the Authorization Code grant, with the `offline` scope being one of the scopes passed to the authentication request. ```bash curl -G "https://.kinde.com/oauth2/auth" \ -d "response_type=code" \ -d "client_id=" \ -d "redirect_uri=" \ -d "scope=offline%20email%20openid%20profile" ``` In a real app you typically redirect the user to this URL in a browser rather than calling it with curl. The response will redirect the user to your `redirect_uri` with an authorization `code` in the query string; you then exchange that code for tokens (including a refresh token) via POST to `https://.kinde.com/oauth2/token` with `grant_type=authorization_code`. Refresh tokens are stored in sessions. When a session needs to be refreshed (for example, a pre-defined time has passed), the app uses the refresh token on the backend to obtain a new access token, using the `https://.kinde.com/oauth2/token` endpoint with `grant_type=refresh_token`. **Example: request a new access token using a refresh token** ```bash curl -X POST "https://.kinde.com/oauth2/token" \ -H "Content-Type: application/x-www-form-urlencoded" \ -d "grant_type=refresh_token" \ -d "client_id=" \ -d "client_secret=" \ -d "refresh_token=" ``` Use this only from a secure backend. Do not send `client_secret` from frontend or public clients; use PKCE for SPAs and similar apps. **Example of a refresh token response** ```json { "access_token": "", "refresh_token": "", "token_type": "Bearer" } ``` ## Refresh token rotation Kinde always rotates refresh tokens. When you use an existing refresh token to request a new access token, a new refresh token is also generated and provided with your new access token. The old refresh token becomes immediately invalid. ## Auto-update of refresh tokens Kinde allows a small overlap period after rotation where both the previous and new refresh token are valid. This is to account for retries and bad network connections (for example, parallel requests that both send the old token before the rotation response arrives). You can [set the lifetime of a refresh token](/build/tokens/configure-tokens/) in Kinde. It needs to be longer than the life of an access token. ## Client-specific refresh token cookies When multiple applications share the same custom domain, they normally share a single `refresh_token` cookie. That can cause one app's refresh token to overwrite another's—for example, signing in to App B may replace the refresh token that App A had set, breaking App A's session. To avoid this, Kinde supports **client-specific refresh token cookies**. When enabled for an application, the refresh token is stored in a cookie named with the application's client ID prefix (for example, `refresh_token_abc123`), so each app keeps its own refresh token independently. - **Where to enable**: **Settings > Applications > [your app] > Tokens > Refresh token cookies** - **Requirement**: A custom domain must be configured; this feature is not available without one. - **Default**: The feature is disabled by default. - **Cookie naming**: Kinde uses the first 6 characters of the application's client ID to build the cookie name (e.g. `refresh_token_abc123`). - **Fallback**: If a client-specific cookie is not found, Kinde falls back to the standard `refresh_token` cookie. ## Refresh tokens when you are not using an SDK You should store the refresh token you get with your initial `/token` request. Otherwise, your user will need to go through the sign in process again, to get a new access token. ## Use the SDK to silently refresh tokens Front-end packages do **not** all behave the same way: - **[JavaScript (PKCE) SDK](/developer-tools/sdks/frontend/javascript-sdk/):** Use **`getAccessToken()`**. It **only reads** the cached JWT from memory (or configured storage) and **does not** refresh it. Silent refresh runs on client init, on a **pre-expiry timer** (about **10 seconds** before access token expiry by default), and when the tab or window regains focus; when those succeed, the next `getAccessToken()` reads the updated value. See [Does getAccessToken read storage only, or does it refresh the token?](/developer-tools/sdks/frontend/javascript-sdk/#does-getaccesstoken-read-storage-only-or-does-it-refresh-the-token) and [When does the JavaScript SDK refresh access tokens in the background?](/developer-tools/sdks/frontend/javascript-sdk/#when-does-the-javascript-sdk-refresh-access-tokens-in-the-background). - **[React SDK](/developer-tools/sdks/frontend/react-sdk/):** Use **`getAccessToken()`** on the hook. It **only reads** the cached JWT from session storage and **does not** refresh it. Silent refresh runs on provider init, on a **pre-expiry timer** (about **10 seconds** before access token expiry by default), and optionally when **`refreshOnFocus`** is enabled; when those succeed, the next `getAccessToken()` reads the updated value. See [Does getAccessToken throw or return an error object when something goes wrong?](/developer-tools/sdks/frontend/react-sdk/#does-getaccesstoken-throw-or-return-an-error-object-when-something-goes-wrong) and [When does the React SDK refresh tokens silently?](/developer-tools/sdks/frontend/react-sdk/#when-does-the-react-sdk-refresh-tokens-silently). ## How long does a refresh token last? Refresh tokens have a default lifetime of **15 days (1,296,000 seconds)**. You can change this in **Settings > Environment > Applications > [your app] > Tokens**. The refresh token lifetime must always be set longer than the access token lifetime. There is no cap on the number of times a refresh token can be used within its lifetime — it remains valid until it expires or is rotated out. For a comparison of all token default lifetimes, see [Configure token and session expiry](/build/tokens/configure-tokens/). ## Token security recommendations Token security can be approached in a number of ways. We recommend at least covering the basics of: - keeping the number of refresh tokens within a manageable limit to keep credentials safe and secure. - storing refresh tokens securely in the back-end of your application because they essentially allow a user to remain authenticated forever. - employing refresh token rotation and automatic reuse detection for added security.
# Build - Tokens - Token customization
> Learn how to customize Kinde tokens by adding custom claims, properties, and third-party integrations like Hasura for enhanced token functionality.
Last updated: 2024-01-15
token customization, custom claims, properties, additional claims, third-party integration, Hasura
tokens, customization, properties
If you want to include additional information in tokens, you can customize access tokens, M2M tokens, and ID tokens using preset custom claims and [properties](/properties/about-properties/). If you need Kinde token formats to be third-party friendly, you can also enable mapping for those services, e.g. Hasura. Token customization is a step toward enabling custom claims, but it is not the same thing. Standard JWT claims such as `sub` (subject) cannot be overridden. Kinde sets these and they are read-only. ## Add claims to a token 1. In Kinde, go to **Settings > Applications** and select **Details** on your application. 2. Select **Tokens**, then scroll to the **Token customization** section. 3. On the relevant token type card, select **Customize**. A window appears where you can select scopes and properties.  4. Select the available **Additional claims** and **Properties** you want to include in the token. 5. Select **Save**. ## Additional claims for tokens Apart from your own [custom properties](/properties/work-with-properties/properties-in-tokens/), you can add some out of the box additional claims to tokens. ### Add claims to access tokens You can: - add an organization name to an access token (`org_name`) - add roles to an access token (`roles`) - add an email to an access token (`email`) - add an external organization ID to an access token (`external_organization_id`) ### Add claims to ID tokens You can: - Add a user's social identity to an ID token - Add a user's organizations to an ID token ### Add claims to M2M tokens You can [add feature flags to an M2M token](/machine-to-machine-applications/m2m-application-setup/add-feature-flags-to-m2m-applications/). ## Add properties to tokens To further customize tokens you can add information using [properties](/properties/about-properties/). Properties are custom fields and information that you can attach to your users, organizations, and applications in order to collect the data you want. For example, if you ask your customers to complete a form, you can map the answers to their user record. Another example could be you want to collect a delivery address for an organization, or include unique identifiers for M2M apps. To make a property available in a token, you need to [make the property public](/properties/work-with-properties/manage-properties/), and then customize the token following the procedure above, to add a property. The value will appear in the token under a `application_properties` claim: ```json { "application_properties": { "region": { "v": "eu" }, "tier": { "v": "pro" } } } ``` The `v` is a shortcode for the value of the property. Only the properties you explicitly toggle on will be included. ## Token integration for third parties Currently, we only support formatting for Hasura. 1. In Kinde, go to **Settings > Applications** and select **Details** on your application. 2. Select **Tokens.** 3. Scroll to the **Token integrations** section and switch the toggle on for the platform you use. 4. Select **Save**.
# Build - Tokens - OAuth 2.0 access token validation and error codes
> Reference guide for OAuth 2.0 access token validation including successful response formats and common error codes with troubleshooting information.
Last updated: 2026-04-13
OAuth 2.0, token validation, error codes, invalid_request, invalid_client, invalid_grant, unauthorized_client
tokens, oauth, error-handling
OAuth 2.0 authentication involves a request for an access token, and a response to the request. Here’s some typical successful and unsuccessful (error) responses. ## Successful responses - `access_token` (required) – The access token string as issued by the authorization server. - `token_type` (required) – The type of token this is, typically just the string “Bearer”. - `expires_in` (recommended) – If the access token expires, the server should reply with the duration of time the access token is granted for. - `refresh_token` (optional) – If the access token will expire, then it is useful to return a refresh token which applications can use to obtain another access token. - `scope` (optional) – If the scope the user granted is identical to the scope the app requested, this parameter is optional. If the granted scope is different from the requested scope, such as if the user modified the scope, then this parameter is required. ## Unsuccessful responses - `invalid_request` – The request is missing a parameter so the server can’t proceed with the request. This may also be returned if the request includes an unsupported parameter or repeats a parameter. - `invalid_client` – Client authentication failed, such as if the request contains an invalid client ID or secret. Send an HTTP 401 response in this case. - `invalid_grant` – The authorization code (or user’s password for the password grant type) is invalid or expired. This is also the error you would return if the redirect URL given in the authorization grant does not match the URL provided in this access token request. Also returned when a rotated refresh token stored in memory no longer matches the `refresh_token` cookie — for example, after a silent refresh that did not update the `httpOnly` cookie. See [React SDK refresh token troubleshooting](/developer-tools/sdks/frontend/react-sdk/#why-am-i-getting-invalid_grant-errors-after-the-sdk-silently-refreshes-my-token). - `invalid_scope` – For access token requests that include a scope (password or client_credentials grants), this error indicates an invalid scope value in the request. - `unauthorized_client` – The client is not authorized to use the requested grant type. For example, if you restrict which applications can use the Implicit grant, you would return this error for the other apps. - `unsupported_grant_type` – If a grant type is requested that the authorization server doesn’t recognize, use this code. Note that unknown grant types also use this specific error code rather than using the `invalid_request` above.
# Build - Tokens - Verifying JSON Web Tokens
> Learn how to verify JSON Web Tokens (JWTs) for secure authentication, including signing algorithms, validation methods, and security best practices for protecting your backend APIs.
Last updated: 2024-01-15
JWT verification, token validation, RSA signing, JSON Web Key, issuer claims, audience claims, state verification
tokens, security, jwt
Kinde uses JSON Web Tokens (JWT) for secure data transmission, authentication, and authorization. JWT verification ensures that only authorized users and apps can access your regular web, native, or single-page applications, by checking that tokens are valid, and have not been tampered with, misused, or are expired. The validation process checks the structure, claims, and signature of the JWT. If you are [setting up with Kinde without an SDK](/developer-tools/about/using-kinde-without-an-sdk/), or if you are using a mobile or front-end SDK and want to protect your back-end APIs, this topic is relevant for you. ## **How the JWTs work** ### **Signing algorithm** The JWT signature is generated using a ’signing algorithm’. Kinde supports: - RSA with 2048-bit key - SHA-256 hashing algorithm - RSA signature with SHA-256 ### **Hash values** When validating a JWT, generally, the current hash value and the original hash value are parsed, or decoded, then compared to verify the token signature is authentic. This is part of token encryption. ## **Methods to verify JWTs** If you are not using one of our SDKs, you can parse and validate a JWT by: - Using any existing middleware for your web framework. - Choosing a third-party library, for example the OpenID Foundation has [a list of libraries for working with JWT tokens](https://openid.net/developers/jwt/) See also [Kinde’s supported languages and frameworks](/developer-tools/about/our-sdks/). ## **Asymmetric signing algorithm (RSA)** Verify that the token is signed with `RS256` algorithm (see the `alg` header in the token response). Kinde only supports signing tokens with the asymmetric signing algorithm (RSA). We don’t support `HMAC` signing by design. ## **JSON Web Key** It’s likely you will be using a library to validate your JWTs and they will require the url for your public JSON Web Key (also known as a `jwks` file). The file can be found here: `https://.kinde.com/.well-known/jwks` ## **Included in the Kinde access token** ### **Issuer (iss) claim** Verify the `iss` claim, that the token was issued by your Kinde environment. Each environment has a unique `iss` claim. ### **Audience (aud) claims** If you are authenticating an API, verify `aud` claims in the token. We support multiple `aud` claims which are passed in the token as a JSON array. ### **State versus stateless** For increased security in a back-end application, verify the `state` that you provided in the callback. Deny all requests with a `state` that your application does not recognize. You can use `state` for front-end applications, but it does not increase security. ## The getToken function The `getToken` function stores an in-memory cache of the access token, which it returns by default. If the token is about to expire it will use a refresh token to get a new access token from Kinde silently in the background so additional network requests to Kinde are only made when absolutely necessary. To keep tokens secure, they should only be stored in the back end of your application. Tokens become unsecured if stored in a browser’s local storage, indexed database, or session storage.
# Contribute - Index.mdx - Contribution guide
> Comprehensive contribution guide for Kinde documentation including writing guidelines, MDX syntax, component usage, GitHub workflow, and community contribution standards.
Last updated: 2026-04-21
contribution guide, documentation, GitHub, pull request, frontmatter, MDX syntax, code samples, components
contribute, documentation, community
We love that you want to help us with our docs in GitHub, so here’s our guidelines to help make this easier for you. The first thing to know is that Kinde has editorial discretion over all docs and we will review and edit community contributions to keep content in line with our styles and standards. Don’t let this stop you from raising issues or making suggestions - we need your expertise. We just don’t expect writing perfection, so we’ve got you covered. ## What to contribute Our docs describe what Kinde does, how our platform works, the core functions, configurations, features, settings, etc. We’re not trying to cover every use case, just the most common. Please raise an issue or suggestion if: - Something is incorrect and needs to be fixed - Something is under-explained and needs improvement - You find a gap in the docs or missing information What we are not looking for: - Product suggestions or feature requests - please log these [here](https://kinde-21631392.hs-sites.com/en-au/feature-request/) - Workarounds or solutions from third-parties - Non-specific feedback such as ‘bad doc, please improve’. ## Ways to contribute ### Raise an issue Let us know if a document is wrong or needs fixing. Be as specific as you can so we can address it quickly. An example is where a code snippet is incorrect, or a procedure is no longer working. For issues, provide: - Clear descriptive titles - Links to relevant pages/files - Explanations as to why (or *for whom*) this is a problem - Optional: proposed solutions ### Suggest a single page edit Suggest an improvement or change to a document by selecting **Edit this page** in your browser on the document. This will take you to GitHub where you can edit the content of the file and then create a pull request. As part of creating the pull request, make sure you explain why the changes are needed, who they help, and how. ### Raise a PR for bigger contributions We prefer to write the big stuff ourselves, so we encourage people to raise issues about gaps in our content and provide suggestions that way. However, if you want to create a new topic or edit multiple files, go to GitHub to create a branch or fork and raise a PR. There’s no guarantee your pages will be approved and merged, but we will review and get in touch to discuss and definitely consider new content for inclusion. ## Contributing to SDK documentation Our SDK docs are always evolving and we welcome suggestions and contributions to make them better. SDK docs are stored with our other docs (see the file structure below). The SDKs themselves are stored in separate [Kinde repos](https://github.com/kinde-oss/). ## General document structure Most Kinde docs follow a similar structure: - What is the topic about and who is it for (1-2 sentences) - Conceptual explanations with appropriate headings - Before you begin section for prerequisites - Procedure with steps - How to do x. - Supplementary or adjacent information - Related topics ## How we write Our documents are used by developers of varying experience, people from different language backgrounds, and users who are in a hurry to get the answer they need. Our guiding principle is to always use clear, simple language. Our docs are not translated currently, but they will be soon. Plain English makes translation easier. ### Writing principles - Use direct, clear sentences and short paragraphs - Use simple, plain vocabulary and phrases - Minimize jargon, idioms, and internet shorthand - Don’t make assumptions about what readers already know - Explain abbreviations and acronyms in full ### Content principles - Use short, descriptive headings that include keywords, so people can scan to find what they need. E.g. ‘Update redirect URLs’, instead of ‘Edit the .env file’. - Provide clear, step-by-step instructions that any level of user could follow easily. - Include conceptual explanations and use cases for complex topics. - Create tidy code snippets or examples that will help users get it right. ### Tone and voice - Take a friendly but casual tone, like you are explaining things to a peer or colleague. - Don’t waffle on too much with preamble, get to the point. - Speak with clarity and confidence. You know what you’re talking about. ## How to contribute to the Kinde docs ### Edit an existing article 1. Navigate to the doc in your browser and select **Edit page** at the bottom. GitHub opens. 2. Make the required changes and then **Commit**. 3. Provide clear and direct notes about your changes. 4. Submit a PR. [See below](/contribute/#raise-a-pr). ### Create a new document 1. Navigate to the folder of the section and subsection the topic will go. 2. Select **New file**. 3. Type the name of the file in the blank field and add .mdx. 4. Add the required frontmatter of the topic (`title` and `page_id`). See the [Docs syntax](/contribute/#docs-syntax) topic below. 5. Add content and commit. Explain the reason for the topic as part of the PR. ### File structure in GitHub Our documentation articles are written in `mdx` and are structured as follows: - src - content - docs - topic group - subtopic group - article-1.mdx - article-2.mdx ### Raise a PR When you're ready to raise a PR, use the following naming conventions: `feat:[description]` for new topics or substantial changes `fix:[description]` for corrections and minor changes This helps us recognize and prioritize requests. ## Docs syntax This section describes some of our styles, elements, and conventions for docs content. ### Frontmatter The header/metadata part of the content helps the article appearing correctly in docs. It is also important for external AI tools and search optimization. Copy the whole example below into the top of any new topic. And complete the required sections. Complete optional sections if you want. ```mdx title="frontmatter example" --- page_id: title: description: "description" sidebar: order: tableOfContents: maxHeadingLevel: 3 relatedArticles: - - app_context: - m: s: topics: - - - sdk: [] languages: [] audience: complexity: keywords: - - - - - updated: yyyy-mm-dd ai_summary: --- ``` #### Required Fields **`page_id`** (uuid) - This is the internal unique `id` for the article. This will be used when referencing other articles within the `relatedArticles` frontmatter. You can use our [online UUID generator tool](https://kinde.com/tools/online-uuid-generator/) to use as the `page_id`. **`title`** (string) - You must provide a title for every page. This will be displayed at the top of the page, in browser tabs, and in page metadata. **`description`** (string) - A brief description of the article content, used for SEO and metadata. **`keywords`** (array) - Array of keywords for search optimization. #### Optional Fields **`sidebar`** - **`order`** (number) - Control the order of this article when sorting an autogenerated group of links under a specific topic or subtopic. Lower numbers are displayed higher up in the link group. Providing the `order` frontmatter is completely optional and will be treated as a hint for us to where to place the file. We may update the article's `order` upon further review. - **`label`** (string) - The label of the article when displayed in the sidebar. Falls back to `title` if not provided. **`topics`** (array) - Array of topic tags that help categorize the content. **`sdk`** (array) - Array of SDKs that are relevant to this article. Use `[]` for no SDKs or `null` for not applicable. **`languages`** (array) - Array of programming languages covered in the article. **`ai_summary`** (string) - A full paragraph summary of the article content for AI processing and search (around 200 words). Falls back to `description` if not provided. **`relatedArticles`** (array) - Array of page IDs for related articles that should be displayed at the bottom of the page. **`app_context`** - Map doc item to the Kinde dashboard menu item and submenu items. - **`m`** (string) - The top level menu item - **`s`** (string) - The submenu item **How it looks in the dashboard:** In Kinde dashboard, they will appear in the "Help" menu popup under the **Suggested for you** section.  **How to add them:** Log in to your Kinde dashboard and navigate to the appropriate setting page. You will find them within the navigation URL of each page.  Example: ```mdx app_context: - m: releases s: feature_flags ``` ### Code samples The code snippets in our docs are powered by [astro-expressive-code](https://github.com/expressive-code/). Here are some examples in how you can use them: #### Regular syntax highlighting For code highlighting, you will need a language identifier. (See full list of [supported languages](https://github.com/shikijs/textmate-grammars-themes/blob/main/packages/tm-grammars/README.md) on GitHub) e.g. `js` for JavaScript: ````md title="example.mdx" ins=/^([^a-z]{3}.*)/ ```js console.log("This code is syntax highlighted!"); ``` ```` Will render: ```js console.log("This code is syntax highlighted!"); ``` #### Frames If you use a language identifier that is typically used for terminal sessions or shell scripts, a terminal frame will be added to the rendered output. ```` ```bash nano script.sh ``` ```` Will render: ```bash nano script.sh ``` If you add a value for `title`, then you get a title bar: ```` ```powershell title="PowerShell terminal example Write-Output "This one has a title! ``` ```` Result: ```powershell title="PowerShell terminal example Write-Output "This one has a title! ``` If the language identifier is not a terminal session or shell script one, providing the `title` attribute will render the frame with the file name, for example. ```` ```tsx title="src/app/page.tsx import { RegisterLink, LoginLink } from "@kinde-oss/kinde-auth-nextjs/components"; ``` ```` Output: ```tsx title="src/app/page.tsx import {RegisterLink, LoginLink} from "@kinde-oss/kinde-auth-nextjs/components"; ``` This can also been achieved by adding a comment with the file name at the top of your file. ````text frame="none" ```tsx // src/app/page.tsx import { RegisterLink, LoginLink } from "@kinde-oss/kinde-auth-nextjs/components ``` ```` Output: ```tsx // src/app/page.tsx import {RegisterLink, LoginLink} from "@kinde-oss/kinde-auth-nextjs/components"; ``` ### Images Use images sparingly, to support complex or detailed procedures. For accessibility, do not use images instead of text. Always include alt-text. If you need an image or screen shot in your article, you’ll have to: - Create a folder within `src/assets/images` with the same slug as your article (the article’s `.mdx` file name) - The image must be at least `1440px` wide - Include `alt text` in the markdown. Images are optimized before publishing, and have styles and zoom functionality added. For example, this article lives under `src/docs/contribute/index.mdx` - In this case, we would create a `contribute` folder under `src/assets/images` and save the image there. - src - assets - images - contribute - penguin.jpg To add an image to an article, just simply use the `markdown` syntax like so: ```md title="src/docs/contribute/index.mdx  ``` The image will be rendered with some padding and will have the **click to zoom** functionality added to it.  ## Component reference See below a list of the components ready to use. This list is constantly being updated. ## `` This component combines multiple useful commands from different package managers in the `node` ecosystem. It generates commands for `npm`, `yarn`, `pnpm` and `bun`. ### Properties - **`type`** (string) - The type of command to be executed. (e.g., `add`, `create`, `dlx`, `exec`, `run`, `remove`). Defaults to `add` if not specified. - **`pkg`** (string) - The package to be installed. (e.g., `firebase`) - **`args`** (string) - The arguments to be passed to the command. (e.g., `-e with-supabase`) - **`dev`** (boolean) - Whether to install the package as a dev dependency. Defaults to `false` if not specified. (e.g., ``). You can also use `dev` as a shorthand: ``. ### Install a dependency **Syntax** ```mdx ``` **Output** To add multiple packages, separate them with spaces: ```mdx ``` ### Install a dev dependency **Syntax** ```mdx ``` **Output** ### Run a command We can output the `npm run dev` command equivalent with this hack: ```mdx ``` **Output** ### Execute a command (npx) ```mdx ``` **Output** ### Complex command with args ```mdx ``` **Output** ## `